Love this? Save it for later!
Share the inspiration with your friends
“I wasn’t expecting to become a cereal treat mastermind during a power outage,” I confessed to my friend last Saturday. It was one of those rare summer evenings when the electricity decided to take a spontaneous break. No blender, no oven, just me rummaging through the pantry with a flashlight in hand. That’s when I stumbled on a half-open bag of cereal and a lonely jar of peanut butter. Honestly, the kitchen looked like a small tornado had passed through by the time I was done, but those first bites of my quick no-bake cereal treats? Life-changing.
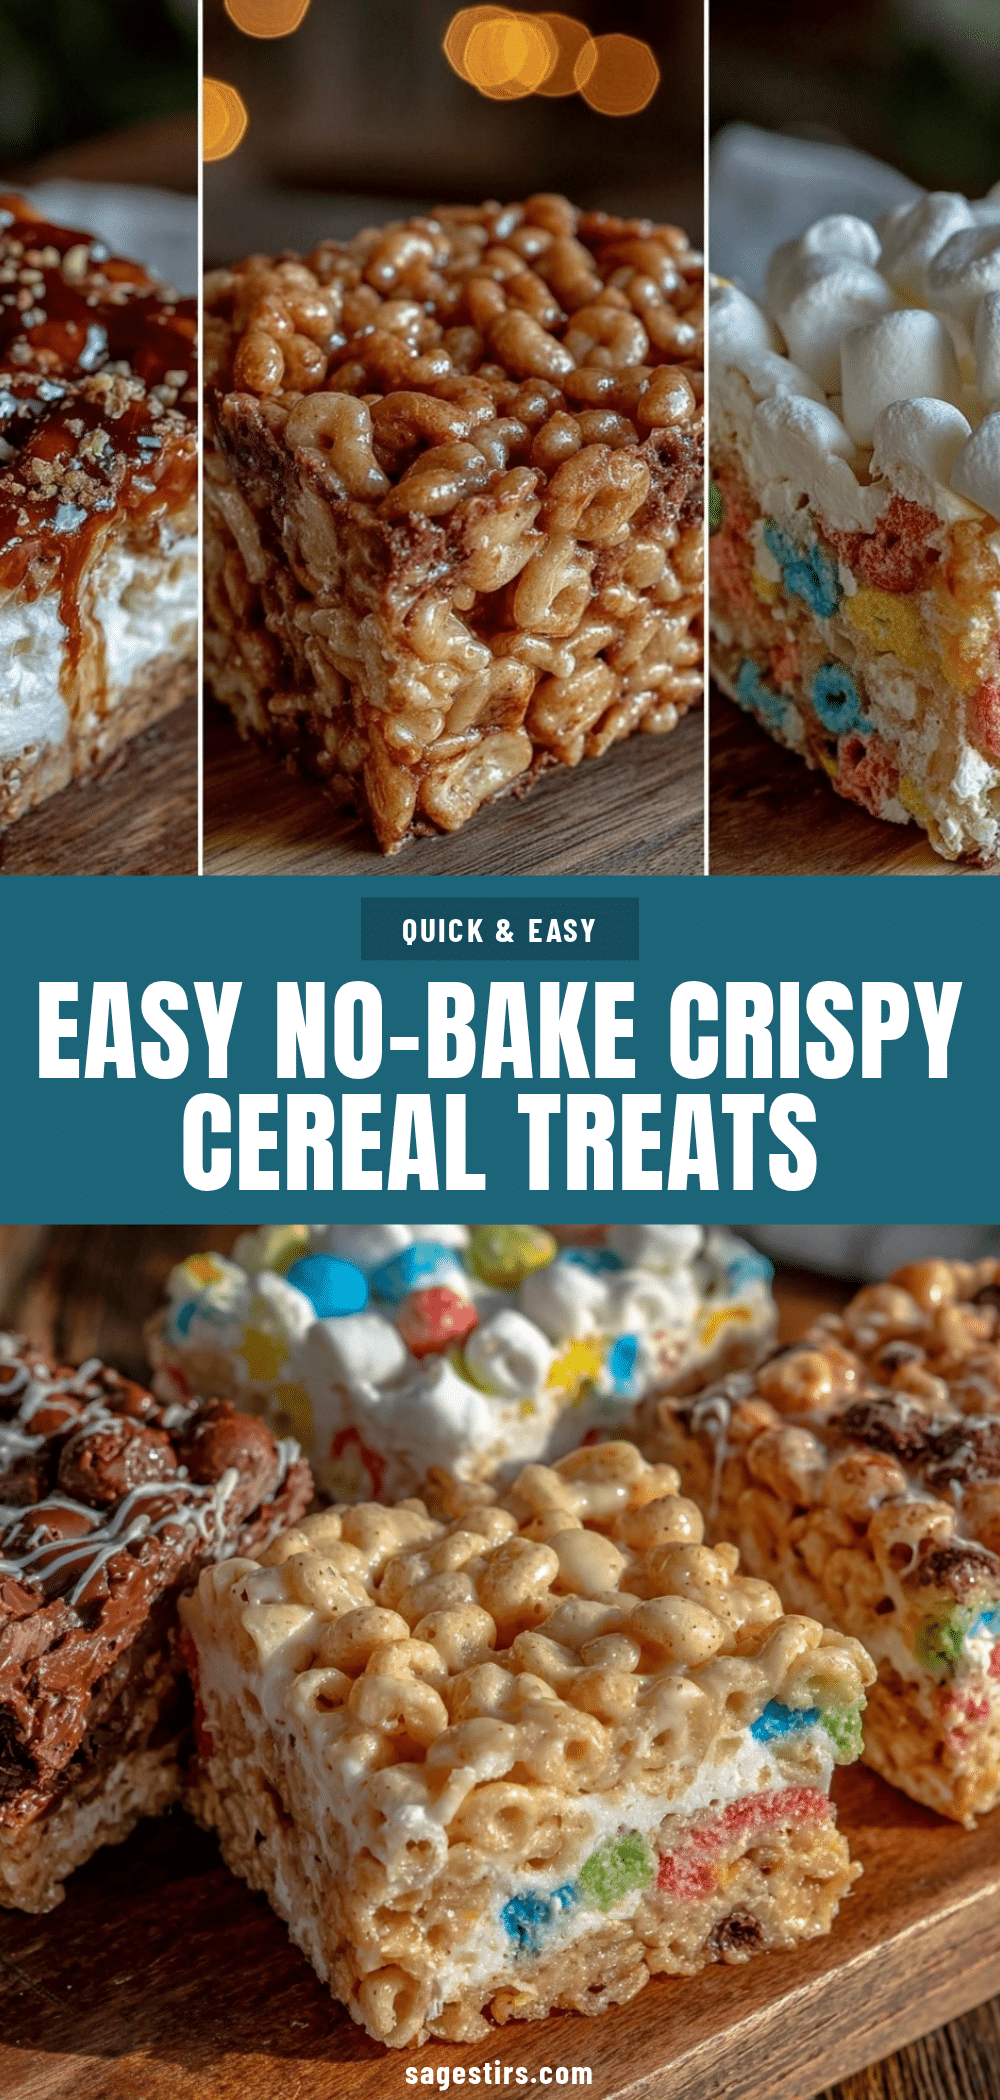
Maybe you’ve been there—the clock’s ticking, the snack monster’s growling, and the last thing you want is a complicated recipe that demands an oven preheat or a long wait. Well, let me tell you, these Easy No-Bake Cereal Treats 3 Ways are the answer to those frantic snack-time moments. What makes them so special? They’re fast, fun, and flexible enough to fit whatever you’ve got lying around. I remember almost dropping the bowl (classic me) while mixing the first batch, but the results? Worth every sticky finger.
These treats have since become a staple in my snack arsenal, perfect for everything from last-minute after-school bites to sweet additions at casual get-togethers. Whether you’re a cereal fan, a peanut butter lover, or just someone who needs a quick, delicious fix, these three different spins on the classic no-bake cereal treat are here to save the day — and your snack time.
Why You’ll Love This Recipe
This recipe isn’t just your everyday cereal snack. I’ve tested these three variations countless times, tweaking and tasting until each version hit that perfect balance of crunchy, sweet, and satisfying. Here’s why you’ll keep coming back to these no-bake cereal treats:
- Quick & Easy: Comes together in under 15 minutes — perfect for busy afternoons or last-minute cravings.
- Simple Ingredients: No fancy shopping trips needed; you probably already have these staples in your pantry.
- Perfect for Any Occasion: Whether it’s a casual snack, a kid’s lunchbox addition, or a fun party treat, these fit right in.
- Crowd-Pleaser: The crunchy texture paired with sweet, melty binders makes it a hit with both kids and adults.
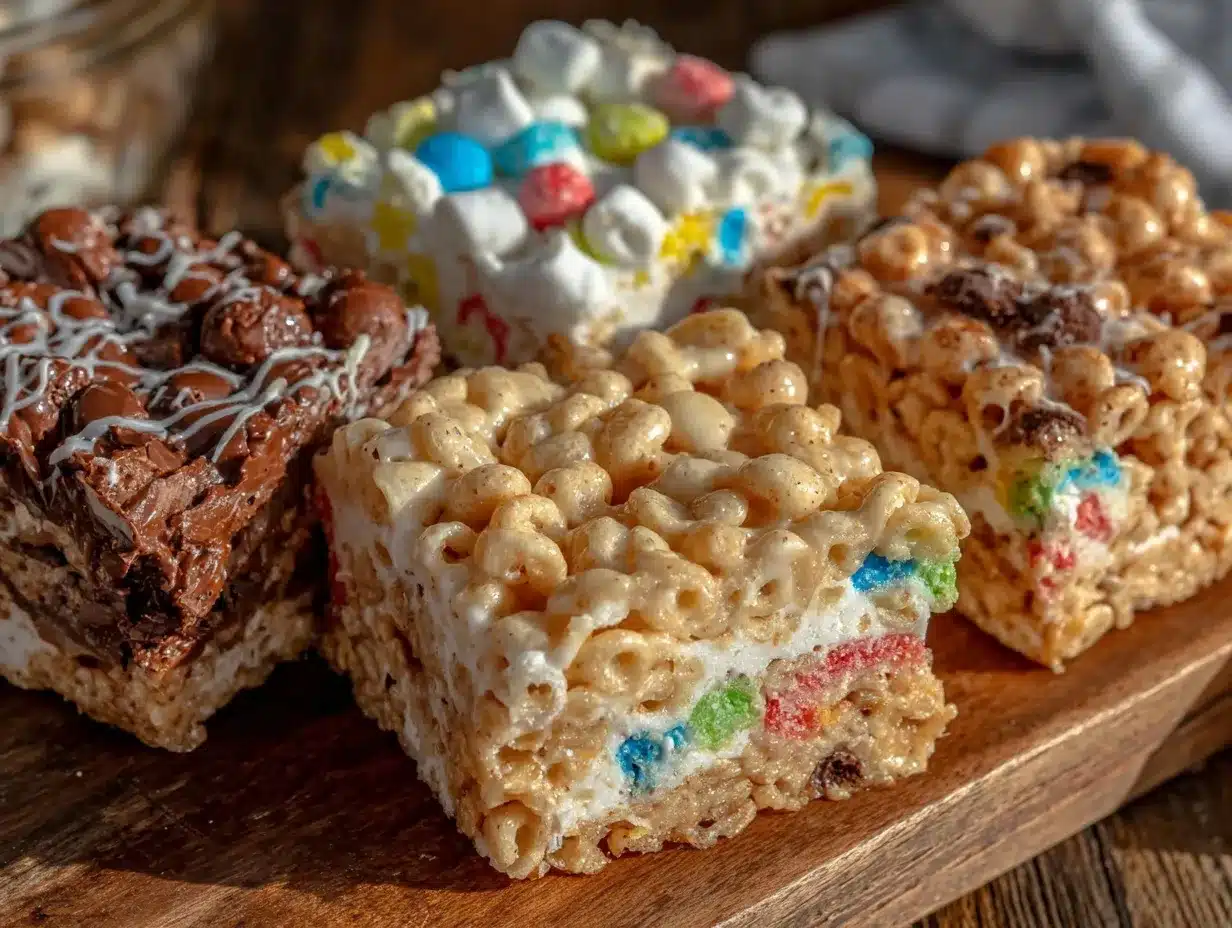
- Unbelievably Delicious: Each variation has a unique twist, from classic marshmallow goo to peanut butter richness and a chocolatey boost.
What really sets these no-bake cereal treats apart is the versatility in flavors and textures. I love blending creamy peanut butter into the mix for that extra depth, but sometimes the classic marshmallow version just hits the nostalgic spot. And the chocolate twist? Let’s just say it’s become my go-to when I want a little indulgence without the fuss. Honestly, these treats are comfort food without the complicated steps — you’ll find yourself closing your eyes after the first bite, savoring that perfect chewy-crunchy combo.
What Ingredients You Will Need
This recipe uses simple, wholesome ingredients to deliver bold flavor and a satisfying texture without any fuss. You can mix and match based on what you have, and most of these are pantry staples. Here’s the breakdown for the three versions:
For the Classic Marshmallow Treats
- 3 cups of crispy rice cereal (I recommend Nature’s Path for the best crunch)
- 4 cups mini marshmallows
- 3 tablespoons unsalted butter, softened (adds richness)
- 1 teaspoon pure vanilla extract (optional but adds a lovely depth)
For the Peanut Butter Treats
- 3 cups of cornflakes or your favorite flake cereal
- 1/2 cup creamy peanut butter (try Smucker’s Natural for smoothness)
- 1/4 cup honey or maple syrup (natural sweetener)
- 1 teaspoon vanilla extract
For the Chocolate Lover’s Treats
- 3 cups of multigrain puffed cereal
- 1 cup semi-sweet chocolate chips
- 1/4 cup almond butter (can swap with peanut butter if preferred)
- 2 tablespoons coconut oil (helps with melting)
- 1 tablespoon powdered sugar (optional for a touch of sweetness)
Substitutions? Absolutely. Gluten-free cereal options work well, and you can swap dairy butter with coconut oil or plant-based butter for a vegan twist. If marshmallows aren’t your thing, the peanut butter or chocolate versions offer equally delicious alternatives. For seasonal tweaks, fresh or dried berries tossed in can add a fun pop of color and flavor.
Equipment Needed
- Large mixing bowls — I usually use two: one for melting and one for mixing cereal
- Microwave-safe bowl or saucepan for melting marshmallows, butter, or chocolate
- Wooden spoon or silicone spatula for stirring — silicone is great for scraping every last bit
- 8×8-inch square baking pan or a rimmed dish for pressing the mixture (lined with parchment paper for easy removal)
- Measuring cups and spoons — precise measurements really help with texture
- Optional: a knife or bench scraper for cutting the treats once set
If you don’t have a microwave, a double boiler works perfectly for melting chocolate or marshmallows gently. I learned that the hard way after my microwave conked out and ended up with scorched marshmallows (lesson learned!). For budget-friendly options, silicone spatulas and glass bowls from local stores do the trick without breaking the bank. Keeping your utensils clean and dry is key — sticky mixtures are easier to handle with a lightly greased spatula or bowl.
Preparation Method
- Prepare your pan: Line an 8×8-inch baking pan with parchment paper and lightly grease it with butter or non-stick spray. This helps when it’s time to remove the treats.
- Classic Marshmallow Treats: In a microwave-safe bowl, melt 3 tablespoons of butter for about 30 seconds. Add 4 cups mini marshmallows and microwave in 30-second bursts, stirring in between, until smooth. Stir in 1 teaspoon vanilla extract. Quickly fold in 3 cups crispy rice cereal until evenly coated. Press mixture firmly into the prepared pan with a buttered spatula. Let cool for 30 minutes before cutting.
- Peanut Butter Treats: In a small saucepan over low heat, combine 1/2 cup peanut butter and 1/4 cup honey. Stir constantly until smooth and warm (about 3-4 minutes). Remove from heat and add 1 teaspoon vanilla. In a large bowl, toss 3 cups cornflakes with the warm peanut butter mixture until fully coated. Transfer to the lined pan and press down firmly. Chill in the fridge for 20 minutes before slicing.
- Chocolate Lover’s Treats: In a microwave-safe bowl, melt 1 cup semi-sweet chocolate chips and 2 tablespoons coconut oil in 30-second intervals, stirring between each, until silky. Stir in 1/4 cup almond butter and 1 tablespoon powdered sugar until smooth. Immediately fold in 3 cups multigrain puffed cereal. Press into the prepared pan and refrigerate for 30 minutes until firm.
- Cutting and Serving: Once set, remove treats from the pan using the parchment paper edges. Use a sharp knife or bench scraper to cut into squares or bars. For cleaner cuts, dip the knife in hot water and wipe dry between slices.
- Troubleshooting: If your treats are too crumbly, you might have pressed them too lightly or not mixed thoroughly. For overly sticky treats, chilling them a bit longer helps firm them up. Remember, timing is your friend here — rushing the cooling can lead to a messy snack time.
Tip from experience: I once tried to skip the cooling step, and it was a gooey mess. Patience here pays off, trust me.
Cooking Tips & Techniques
These no-bake cereal treats are forgiving, but a few tips can make your snack game stronger. First, when melting marshmallows or chocolate, low and slow is the way to go. High heat scorches quickly, turning your smooth mixture grainy or bitter.
Another thing I learned the hard way: butter your spatula or hands before pressing the mixture into the pan. It prevents sticking and gives a nice smooth surface. Plus, pressing firmly (but not too hard) ensures the bars hold together without crumbling.
Timing matters. Let the treats cool fully before cutting, especially with the chocolate and marshmallow versions. It’s tempting to slice immediately, but you’ll just end up with sticky edges.
Don’t skip the vanilla extract in the marshmallow and peanut butter versions — it adds subtle warmth and rounds out the flavors. And if you’re multitasking, prep your pan and measure ingredients first. It makes the quick mixing stage much less stressful.
Finally, experiment with your cereals! I’ve tried these treats with everything from puffed millet to cocoa-flavored flakes, and each brings its own fun texture. Just be mindful of the cereal’s sturdiness to keep your treats from turning to crumbs.
Variations & Adaptations
These Easy No-Bake Cereal Treats are like a blank canvas for your snack creativity. Here are a few variations I’ve enjoyed (and some you might want to try):
- Nut-Free Version: Swap peanut or almond butter for sunflower seed butter to keep it allergy-friendly without losing richness.
- Seasonal Berry Boost: Add 1/2 cup dried cranberries, cherries, or chopped freeze-dried berries into any mixture for a tart pop.
- Spiced Twist: Mix 1/2 teaspoon cinnamon or pumpkin pie spice into the marshmallow or peanut butter base for a cozy flavor.
- Vegan-Friendly: Use vegan marshmallows and coconut oil instead of butter for a plant-based treat.
- Chocolate Swirl: Drizzle melted dark chocolate over the classic marshmallow version before it sets for an extra indulgent look and taste.
One experiment I loved was swapping out the cornflakes in the peanut butter version for gluten-free oat clusters — gave the bars an unexpected chewiness that was pretty addictive. Honestly, mixing and matching your favorite cereals and add-ins can turn this simple snack into a personalized treat you’ll crave.
Serving & Storage Suggestions
These treats are best served at room temperature, just after they’ve set properly. They cut cleanly and hold their shape nicely, perfect for stacking on a plate or packing in lunchboxes.
Pair them with a cold glass of milk or a cup of tea for a comforting snack break. They also make great finger food at casual parties, especially when you mix a few varieties for a colorful platter.
To store, keep them in an airtight container at room temperature for up to 3 days. If your kitchen is warm, the fridge works too, though the texture firms up and you might want to let them sit out a few minutes before eating. For longer storage, freeze the bars wrapped tightly in plastic wrap and placed in a freezer bag — they thaw quickly at room temperature.
Pro tip: flavors deepen a bit after resting overnight, especially the peanut butter and chocolate versions. So if you can wait, make them the day before!
Nutritional Information & Benefits
While these easy no-bake cereal treats are definitely a sweet snack, they can be surprisingly wholesome depending on your ingredient choices. Here’s an estimated breakdown per serving (one bar, about 2×2 inches):
| Calories | Fat | Carbohydrates | Protein | Fiber |
|---|---|---|---|---|
| 150-200 kcal | 6-10 g | 22-28 g | 3-5 g | 1-3 g |
Key ingredients like peanut butter and almond butter provide healthy fats and protein, while cereals offer fiber (especially if you choose whole grain or multigrain options). Using natural sweeteners such as honey or maple syrup helps keep added sugars moderate compared to traditional candy bars.
For those avoiding gluten, just pick gluten-free cereals, and for dairy-free, coconut oil and vegan marshmallows do the trick. Just be mindful of potential allergens like nuts or soy depending on your ingredient brands. From my experience, these treats strike a nice balance between indulgence and a bit of nutritional goodness, perfect for a quick pick-me-up without the guilt.
Conclusion
So, there you have it — three delicious ways to whip up easy no-bake cereal treats that are fast, fun, and totally customizable. Whether you’re rescuing a late-night snack craving or assembling a quick dessert for unexpected guests, these recipes are there for you without the fuss.
Personally, I keep coming back to the peanut butter version because it reminds me of those cozy afternoons when I just want something a little nutty and sweet without the oven drama. But honestly, you can’t go wrong with any of these. Feel free to tweak, add your favorite mix-ins, or make them your own.
If you try these treats, I’d love to hear which version you liked best or what creative spins you came up with. Drop a comment below or share your thoughts — it’s always fun to swap snack stories. Now, go on, treat yourself; you deserve a little no-bake magic today!
FAQs
Can I use different cereals for these no-bake treats?
Absolutely! Most crispy or puffed cereals work well. Just avoid overly dense or soggy cereals to keep that perfect crunch.
How long do these treats stay fresh?
Stored in an airtight container at room temperature, they last about 3 days. Refrigeration can extend freshness up to a week.
Can I make these treats gluten-free?
Yes, just choose gluten-free cereals and check that any add-ins like marshmallows are gluten-free as well.
Is it possible to freeze no-bake cereal treats?
Yes! Wrap them tightly in plastic wrap and place in a freezer-safe bag. Thaw at room temperature before serving.
What’s the best way to cut these treats without making a mess?
Use a sharp knife dipped in hot water and wiped dry between cuts for clean slices. Letting the treats cool fully also helps.
Pin This Recipe!
Easy No-Bake Cereal Treats 3 Ways for Quick and Delicious Snacks
These easy no-bake cereal treats come in three delicious variations—classic marshmallow, peanut butter, and chocolate lover’s—perfect for quick, customizable snacks that require no oven.
- Prep Time: 10 minutes
- Cook Time: 5 minutes
- Total Time: 35-40 minutes
- Yield: 12 servings
- Category: Snack
- Cuisine: American
Ingredients
- Classic Marshmallow Treats: 3 cups crispy rice cereal, 4 cups mini marshmallows, 3 tablespoons unsalted butter (softened), 1 teaspoon pure vanilla extract (optional)
- Peanut Butter Treats: 3 cups cornflakes or favorite flake cereal, 1/2 cup creamy peanut butter, 1/4 cup honey or maple syrup, 1 teaspoon vanilla extract
- Chocolate Lover’s Treats: 3 cups multigrain puffed cereal, 1 cup semi-sweet chocolate chips, 1/4 cup almond butter (or peanut butter), 2 tablespoons coconut oil, 1 tablespoon powdered sugar (optional)
Instructions
- Prepare your pan by lining an 8×8-inch baking pan with parchment paper and lightly greasing it with butter or non-stick spray.
- Classic Marshmallow Treats: Melt 3 tablespoons butter in a microwave-safe bowl for about 30 seconds. Add 4 cups mini marshmallows and microwave in 30-second bursts, stirring until smooth. Stir in 1 teaspoon vanilla extract. Quickly fold in 3 cups crispy rice cereal until evenly coated. Press mixture firmly into the prepared pan. Let cool for 30 minutes before cutting.
- Peanut Butter Treats: In a small saucepan over low heat, combine 1/2 cup peanut butter and 1/4 cup honey. Stir constantly until smooth and warm (3-4 minutes). Remove from heat and add 1 teaspoon vanilla. Toss 3 cups cornflakes with the warm peanut butter mixture until fully coated. Transfer to the lined pan and press down firmly. Chill in the fridge for 20 minutes before slicing.
- Chocolate Lover’s Treats: Melt 1 cup semi-sweet chocolate chips and 2 tablespoons coconut oil in a microwave-safe bowl in 30-second intervals, stirring until silky. Stir in 1/4 cup almond butter and 1 tablespoon powdered sugar until smooth. Fold in 3 cups multigrain puffed cereal. Press into the prepared pan and refrigerate for 30 minutes until firm.
- Once set, remove treats from the pan using parchment paper edges. Use a sharp knife or bench scraper dipped in hot water and wiped dry to cut into squares or bars.
- If treats are too crumbly, press more firmly or mix thoroughly. For sticky treats, chill longer before cutting.
Notes
Use low heat when melting marshmallows or chocolate to avoid scorching. Butter your spatula or hands before pressing mixture into the pan to prevent sticking. Let treats cool fully before cutting for clean slices. Experiment with different cereals and add-ins like dried berries or spices for variety. For vegan versions, use vegan marshmallows and coconut oil instead of butter.
Nutrition
- Serving Size: One bar (about 2x2 i
- Calories: 150200
- Sugar: 1015
- Sodium: 100150
- Fat: 610
- Saturated Fat: 24
- Carbohydrates: 2228
- Fiber: 13
- Protein: 35
Keywords: no-bake, cereal treats, peanut butter snacks, marshmallow treats, chocolate cereal bars, quick snacks, easy desserts, kid-friendly snacks