Love this? Save it for later!
Share the inspiration with your friends
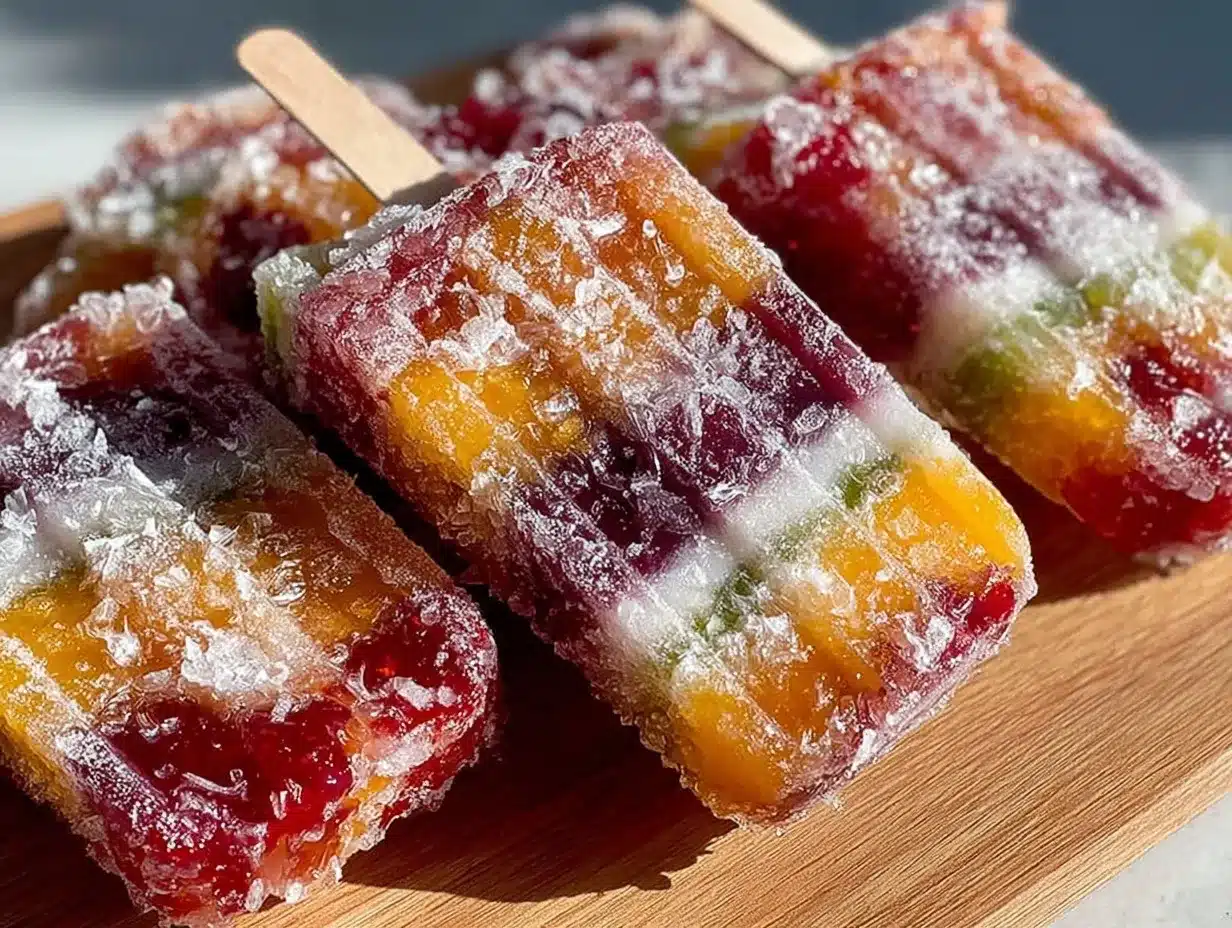
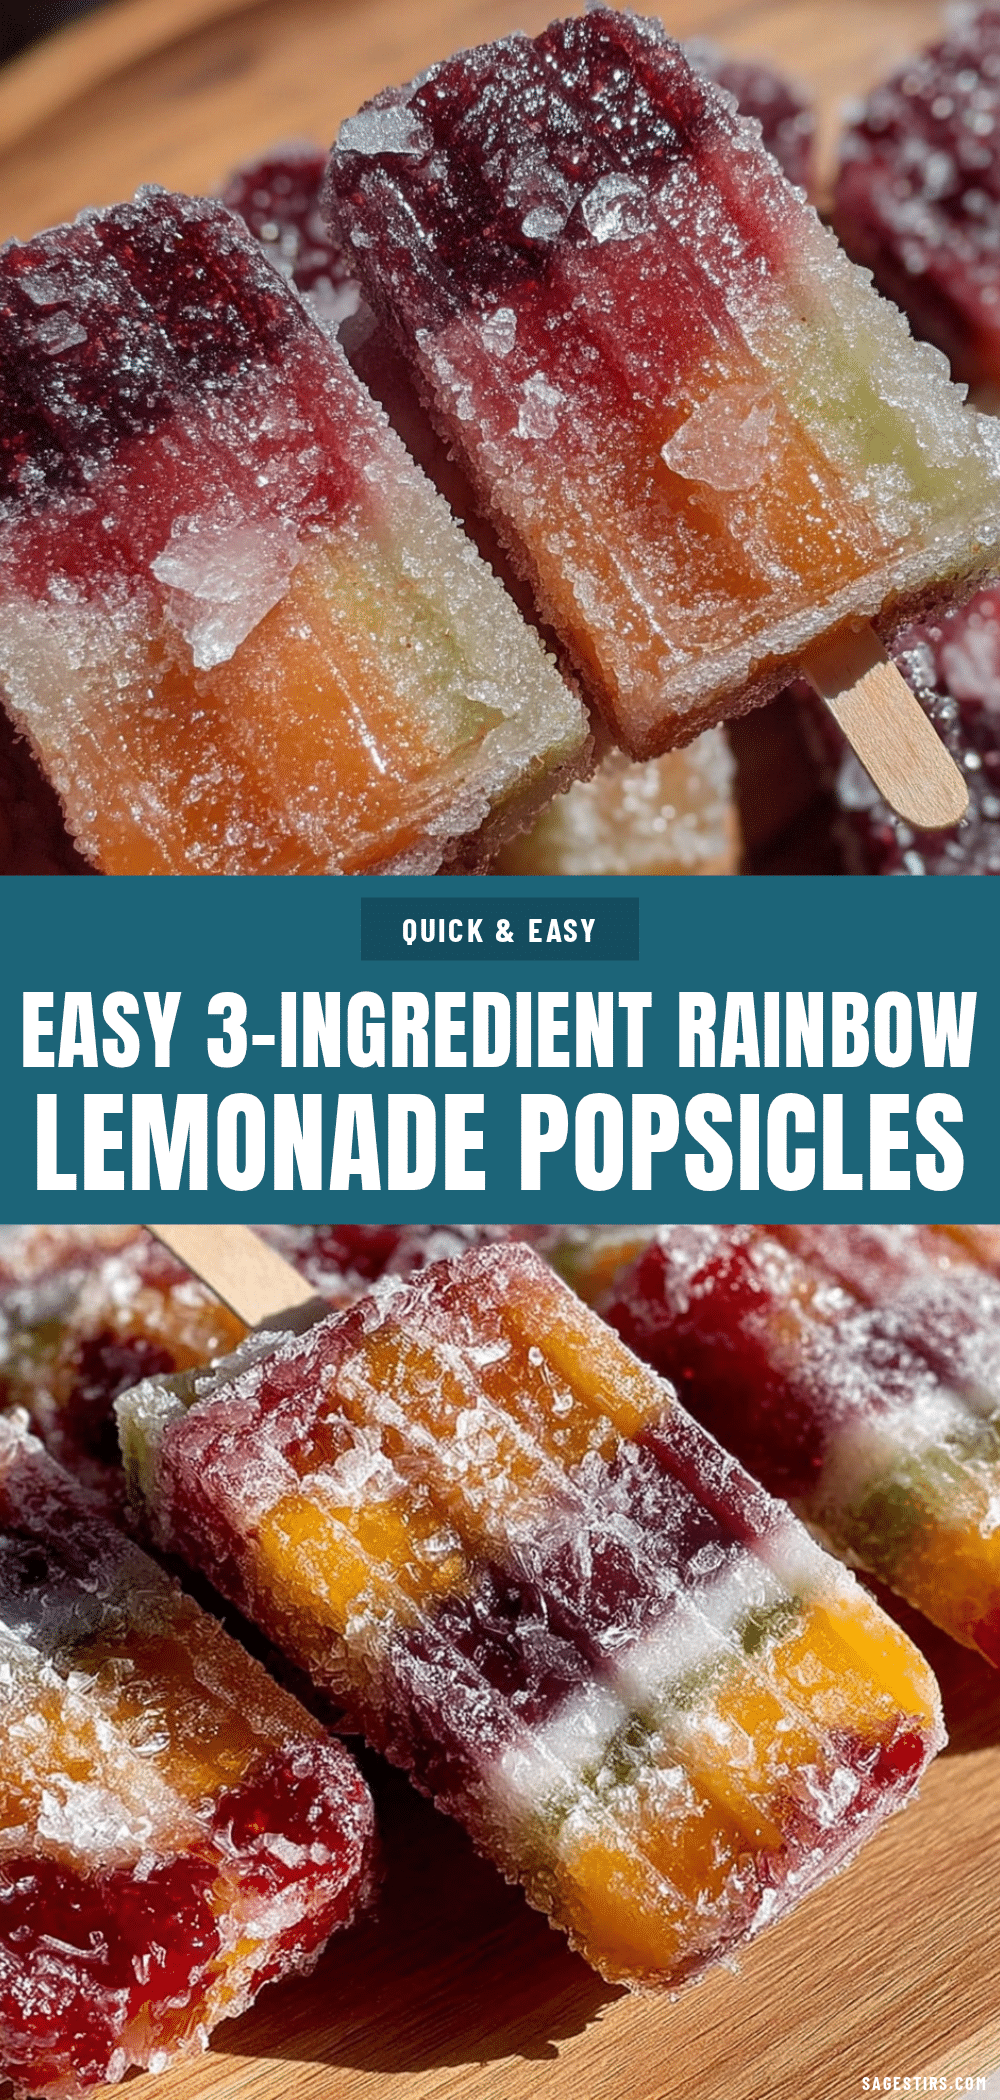
“Why does lemonade always have to be just yellow?” my niece asked one blazing July afternoon as we stood in the kitchen, sweating through the endless summer heat. I wasn’t supposed to be playing favorites with recipes, but honestly, her curious question stuck with me. That day, armed with a box of Kool-Aid packets and a handful of lemons, I set out to make something that would catch the eye and cool the soul. The result? Easy Rainbow Frozen Lemonade Popsicles with Kool-Aid Layers—a colorful treat that’s as fun to make as it is to eat.
Now, here’s the thing: this recipe wasn’t born out of some fancy experiment or a planned food shoot. In fact, I forgot to buy the usual popsicle molds and had to improvise with tiny paper cups and wooden sticks I found at the back of the drawer. The layers weren’t perfectly straight, the colors bled a little, and honestly, the kitchen looked like a mess afterward. But those rainbow popsicles? They were a hit. The tangy lemonade base paired with the bold, nostalgic Kool-Aid flavors made every bite a mini celebration of summer.
Maybe you’ve been there—looking for a simple, kid-approved way to brighten a hot day without fuss or fancy ingredients. This recipe is exactly that. It’s a little messy, totally joyful, and ridiculously easy. Plus, it’s perfect for backyard parties, quick afternoon snacks, or just a colorful way to beat the heat. Let me tell you, once you try these rainbow frozen lemonade popsicles, you’ll keep coming back for more. And who knows? Maybe your next summer craving will be a whole rainbow in every bite.
Why You’ll Love This Recipe
Honestly, these Easy Rainbow Frozen Lemonade Popsicles with Kool-Aid Layers have become a staple in my summer lineup, and here’s why you’ll love them just as much:
- Quick & Easy: These popsicles come together in under 20 minutes of prep, making them perfect for those last-minute heatwave cravings or spontaneous backyard fun.
- Simple Ingredients: You don’t need anything fancy—just lemonade, a few Kool-Aid packets, and water. Most of these are pantry staples, so no last-minute grocery runs.
- Perfect for Summer Gatherings: Whether it’s a kid’s birthday, a casual BBQ, or a pool party, these popsicles bring color and smiles to any occasion.
- Crowd-Pleaser: Kids adore the bright layers, and adults appreciate the nostalgic twist with lemonade’s tangy freshness.
- Unbelievably Delicious: The combination of tart lemonade with sweet Kool-Aid flavors creates a refreshing treat that’s never boring.
What sets this recipe apart? It’s the layering technique that creates those vibrant stripes of flavor without a ton of fuss. I’ve tried versions where everything was mixed together, but the distinct Kool-Aid layers give each bite a surprise pop of color and taste. Plus, this is a recipe you can easily customize based on your favorite Kool-Aid flavors or lemonade brands. Personally, I recommend using a good quality lemonade concentrate like Country Time for the best balance between sweet and tart. Honestly, it’s the kind of recipe that makes you pause and smile after the first lick—comfort food that’s also a whimsical nod to childhood summers.
What Ingredients You Will Need
This recipe uses simple, wholesome ingredients to deliver bold flavor and satisfying texture without the fuss. Most of these are easy to find year-round, and you probably have some already in your pantry.
- Lemonade: 4 cups (960 ml) prepared lemonade, chilled (I prefer using Country Time lemonade concentrate reconstituted with water for a fresh, tangy flavor)
- Kool-Aid packets: 5 packets, assorted flavors (I used cherry, orange, grape, lemon-lime, and blue raspberry for a vibrant rainbow effect)
- Cold water: 10 cups (2.4 liters) divided (used to mix with Kool-Aid)
- Sugar (optional): 2-4 tablespoons (30-60 g), depending on your preference and lemonade sweetness
- Wooden popsicle sticks or reusable popsicle molds: enough for 10 popsicles
Ingredient tips: For the Kool-Aid packets, you can swap out any flavors you like, or even use natural powdered drink mixes if you want to avoid artificial colors. The lemonade can be homemade or store-bought, but if you go homemade, make sure it’s well chilled before starting the layers to help set them properly. If you prefer a sugar-free version, skip the added sugar and opt for unsweetened lemonade and sugar-free Kool-Aid mixes.
Equipment Needed
- Popsicle molds or small paper cups: I’ve used both for this recipe; paper cups work great in a pinch and are budget-friendly.
- Wooden popsicle sticks: Essential for easy handling once frozen. If you don’t have wooden sticks, you can use sturdy plastic spoons as a last resort.
- Measuring cups and spoons: To get your lemonade and water ratios right.
- Mixing bowls: Multiple bowls help keep the Kool-Aid flavors separate for layering.
- Freezer: Obviously necessary, but a good tip is to clear some space ahead of time so your popsicles freeze evenly.
Personally, I’ve found that silicone popsicle molds are easier to pop out and reuse, but if you’re making these with kids, paper cups add a bit of fun and simplicity. Just remember to poke holes in the cups if your sticks don’t fit snugly, or freeze the lemonade a bit before inserting sticks so they stand upright.
Preparation Method
- Prepare the lemonade base: Chill 4 cups (960 ml) of lemonade in the refrigerator. If using concentrate, mix according to package instructions and refrigerate until cold (about 30 minutes).
- Mix Kool-Aid layers: In 5 separate bowls, combine 2 cups (480 ml) cold water with one Kool-Aid packet each. Stir well until fully dissolved. If desired, add 1 tablespoon (15 g) sugar to each for extra sweetness. Set aside.
- Start the first layer: Pour about 2 tablespoons (30 ml) of chilled lemonade into each popsicle mold or paper cup. Freeze for 20-30 minutes until slightly firm but not completely solid (this helps layers stick).
- Add the first Kool-Aid layer: Pour 2 tablespoons (30 ml) of the first Kool-Aid flavor over the lemonade layer. Freeze again for 30 minutes until firm.
- Repeat layering: Alternate between lemonade and different Kool-Aid flavors in 2-tablespoon increments. Freeze each layer for 20-30 minutes before adding the next. This creates distinct stripes and prevents colors from mixing too much.
- Insert sticks: When you add your third or fourth layer, insert the wooden sticks into the center of each popsicle if not already done.
- Final freeze: After the last layer, freeze the popsicles for at least 4 hours or overnight until fully firm.
- Unmold and enjoy: To release popsicles, run warm water briefly on the outside of molds or cups. Pull out carefully and enjoy your colorful, refreshing treat!
Pro tip: If your layers bleed a little, that’s okay—it adds to the homemade charm and rainbow effect. Just be patient with the freezing times to get the best layered look. I learned this the hard way after rushing and ending up with a pinkish lemonade mess instead of neat stripes!
Cooking Tips & Techniques
Making perfect rainbow frozen lemonade popsicles involves a bit of patience and layering finesse. Here are some tips to keep your popsicles looking and tasting amazing:
- Freeze between layers: Don’t rush adding layers. Waiting 20-30 minutes ensures each layer sets enough to hold the next without mixing.
- Chill your liquids: Starting with cold lemonade and Kool-Aid mixtures helps the layers freeze faster and reduces color bleeding.
- Use small pours: Pouring 2 tablespoons (30 ml) at a time keeps layers thin and visually appealing. Larger pours risk melting the previous layer.
- Stick placement: Insert sticks when the popsicles are partially frozen (about halfway done) so they stay upright and centered.
- Experiment with flavors: Try different Kool-Aid flavors or even make a lemonade-lime combo for extra zing.
One time, I forgot to chill the lemonade and poured the warm mixture directly. The layers took forever to freeze, and the colors blurred badly. Lesson learned: patience is your best friend here. Also, if you’re using paper cups, freezing the first layer before inserting sticks helps keep them steady. Trust me, there’s nothing sadder than popsicle sticks falling over mid-freeze.
Variations & Adaptations
This recipe is super versatile and easy to adapt based on your taste preferences or dietary needs.
- Dietary swaps: Use sugar-free lemonade and Kool-Aid packets to make a low-sugar version that still tastes bright and fun.
- Seasonal twists: Add a splash of fresh fruit juice like watermelon or strawberry instead of some Kool-Aid layers for a natural fruity pop.
- Adult version: Mix a little vodka or rum into the lemonade layers for a boozy summer treat—perfect for grown-up parties!
- Dairy alternative: Try mixing a small amount of coconut water with your lemonade for a lighter, hydrating twist.
- Personal favorite: I once swapped the lemonade layers with sparkling water and added a pinch of citric acid to keep that tart kick—it was surprisingly refreshing and bubbly!
Serving & Storage Suggestions
These Easy Rainbow Frozen Lemonade Popsicles are best served straight from the freezer while still firm but not rock-hard. If you’re making them for a party, consider placing them on a tray lined with ice to keep them cold and ready.
They pair wonderfully with light snacks like crispy garlic chicken or a fresh fruit salad. For beverages, a tall glass of iced tea or lemonade complements the popsicles nicely, keeping the flavor theme consistent.
To store, keep popsicles in an airtight container or tightly wrapped in plastic wrap to avoid freezer burn and odor absorption. They freeze well for up to two weeks. When reheating (if you want a softer texture), let them sit at room temperature for 5 minutes or briefly run under cold water—warm water risks melting too fast.
Flavors tend to mellow slightly after a day or two in the freezer, so if you prefer bold, fresh tastes, enjoy them within the first 48 hours.
Nutritional Information & Benefits
Each popsicle (assuming 10 total) roughly contains:
| Nutrient | Amount per popsicle |
|---|---|
| Calories | 60-80 kcal |
| Carbohydrates | 15-20 g |
| Sugars | 14-18 g |
| Fat | 0 g |
| Protein | 0 g |
Key ingredients like lemons offer a good dose of vitamin C and antioxidants. Kool-Aid packets, while mostly sugar and flavoring, add a nostalgic punch that reminds many of childhood summers. For those watching sugar intake, using sugar-free versions or reducing added sugar helps keep these popsicles lighter. They’re naturally gluten-free and vegan, making them suitable for most dietary preferences.
From my wellness perspective, these popsicles are a fun way to enjoy a sweet treat without heavy fats or complex ingredients—perfect for staying refreshed and happy during those scorching summer days.
Conclusion
So there you have it—Easy Rainbow Frozen Lemonade Popsicles with Kool-Aid Layers that bring color, fun, and flavor to your summer table. This recipe is worth trying because it’s simple, playful, and endlessly customizable. Whether you’re feeding a crowd or just treating yourself, these popsicles offer that perfect balance of tart lemonade with sweet, fruity layers you’ll want again and again.
I love this recipe because it reminds me of those carefree summer afternoons and the joy of creating something bright and cheerful with just a few pantry staples. I hope you’ll enjoy making and sharing these popsicles as much as I do. Feel free to tweak the flavors, mix up the colors, or add your personal twist—and please leave a comment to share your experience or any fun adaptations you come up with. Here’s to cooling off with a rainbow in hand and a smile on your face!
FAQs
Can I make these popsicles without Kool-Aid?
Absolutely! You can replace Kool-Aid layers with other fruit juices or purees like strawberry, raspberry, or mango for natural flavor and color.
How long do the popsicles take to freeze completely?
Generally, about 4-6 hours or overnight for best results. Partial freezing between layers usually takes 20-30 minutes each.
Can I use fresh lemonade instead of store-bought?
Yes, fresh lemonade works great. Just make sure it’s well chilled before layering to prevent melting the previous layers.
What if I don’t have popsicle molds?
Small paper cups or even silicone muffin liners can work. Just make sure to insert sticks carefully and freeze long enough to keep them upright.
Can I prepare these popsicles ahead of time for a party?
Yes! Make them a day in advance and keep them tightly covered in the freezer. Just allow a few minutes at room temperature before serving to make unmolding easier.
Pin This Recipe!
Easy Rainbow Frozen Lemonade Popsicles Recipe with Kool-Aid Layers for Summer Fun
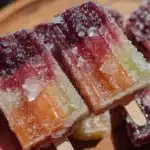
A colorful and refreshing frozen treat combining tangy lemonade with vibrant Kool-Aid layers, perfect for summer gatherings and quick snacks.
- Prep Time: 15 minutes
- Cook Time: 4 hours 30 minutes
- Total Time: 4 hours 45 minutes
- Yield: 10 popsicles 1x
- Category: Dessert
- Cuisine: American
Ingredients
- 4 cups (960 ml) prepared lemonade, chilled (preferably Country Time lemonade concentrate reconstituted with water)
- 5 packets Kool-Aid, assorted flavors (e.g., cherry, orange, grape, lemon-lime, blue raspberry)
- 10 cups (2.4 liters) cold water, divided (used to mix with Kool-Aid)
- 2–4 tablespoons (30–60 g) sugar (optional, depending on preference and lemonade sweetness)
- Wooden popsicle sticks or reusable popsicle molds, enough for 10 popsicles
Instructions
- Chill 4 cups (960 ml) of lemonade in the refrigerator. If using concentrate, mix according to package instructions and refrigerate until cold (about 30 minutes).
- In 5 separate bowls, combine 2 cups (480 ml) cold water with one Kool-Aid packet each. Stir well until fully dissolved. If desired, add 1 tablespoon (15 g) sugar to each for extra sweetness. Set aside.
- Pour about 2 tablespoons (30 ml) of chilled lemonade into each popsicle mold or paper cup. Freeze for 20-30 minutes until slightly firm but not completely solid.
- Pour 2 tablespoons (30 ml) of the first Kool-Aid flavor over the lemonade layer. Freeze again for 30 minutes until firm.
- Alternate between lemonade and different Kool-Aid flavors in 2-tablespoon increments, freezing each layer for 20-30 minutes before adding the next to create distinct stripes.
- When adding the third or fourth layer, insert wooden sticks into the center of each popsicle if not already done.
- After the last layer, freeze the popsicles for at least 4 hours or overnight until fully firm.
- To unmold, run warm water briefly on the outside of molds or cups. Pull out carefully and enjoy.
Notes
Freeze each layer for 20-30 minutes to prevent colors from mixing. Chill liquids before layering to reduce bleeding. Insert sticks when popsicles are partially frozen to keep them upright. Paper cups can be used in a pinch but poke holes if sticks don’t fit snugly.
Nutrition
- Serving Size: 1 popsicle
- Calories: 6080
- Sugar: 1418
- Carbohydrates: 1520
Keywords: rainbow popsicles, lemonade popsicles, Kool-Aid popsicles, summer treats, frozen lemonade, kid-friendly dessert, easy popsicles