Love this? Save it for later!
Share the inspiration with your friends
Introduction
I did not trust refrigerator pickles when I first heard about them. The idea of skipping the whole canning process, the bubbling jars, and that classic pickling ritual honestly sounded like a shortcut destined to disappoint. You know, like those “quick” fixes that never quite hit the mark. But one afternoon, while rummaging through the fridge and craving something sharp and crunchy to pair with my lunch, I figured, why not give this quick tangy dill refrigerator pickles recipe a shot? The smell of fresh dill and garlic mingling with vinegar was surprisingly inviting.
I tossed together the ingredients, skeptical but curious, and after a few hours, I tried a slice. And honestly, it was a quiet revelation. The tang was bright but not overpowering, the crunch was just right, and the dill flavor felt fresh—like summer stored in a jar. It stuck with me because it was so simple yet satisfying, a no-fuss recipe that didn’t require hours of waiting or fancy equipment.
What sold me wasn’t just the taste but the ease—no canner, no boiling water baths, just a straightforward brine and a fridge. It’s perfect for those moments when you want that homemade pickle fix without the usual pickle drama. Over time, this quick tangy dill refrigerator pickles recipe has become my go-to snack, a reliable companion to everything from sandwiches to salads, and a surprisingly delightful way to brighten up meals. It’s one of those recipes that proves sometimes less really is more.
Why You’ll Love This Recipe
- Quick & Easy: Ready to enjoy in as little as 24 hours, this recipe is perfect for busy days when you crave something tangy but don’t want to wait weeks.
- Simple Ingredients: Uses pantry staples and fresh herbs you probably already have—no obscure spices or fancy jars needed.
- Perfect for Snacks & Meals: Great for jazzing up lunch sandwiches, adding crunch to salads, or serving as a tangy side for dinners like the cozy baked whole chicken.
- Crowd-Pleaser: Kids and adults alike love the bright flavor and satisfying crunch—always disappears fast at gatherings.
- Unbelievably Delicious: The brine balances tartness and a touch of sweetness with fresh dill and garlic, making every bite zingy and fresh.
- Not Your Average Pickle: Unlike canned pickles that can sometimes be mushy or overly salty, these keep their crunch and have a fresher, lighter taste thanks to the no-canning method.
- This recipe makes you realize homemade pickles don’t have to be complicated or time-consuming, just thoughtfully simple with big flavor.
What Ingredients You Will Need
This recipe uses simple, wholesome ingredients to deliver bold flavor and satisfying crunch without the fuss. Each component plays a key role in creating that perfect quick tangy dill refrigerator pickle experience.
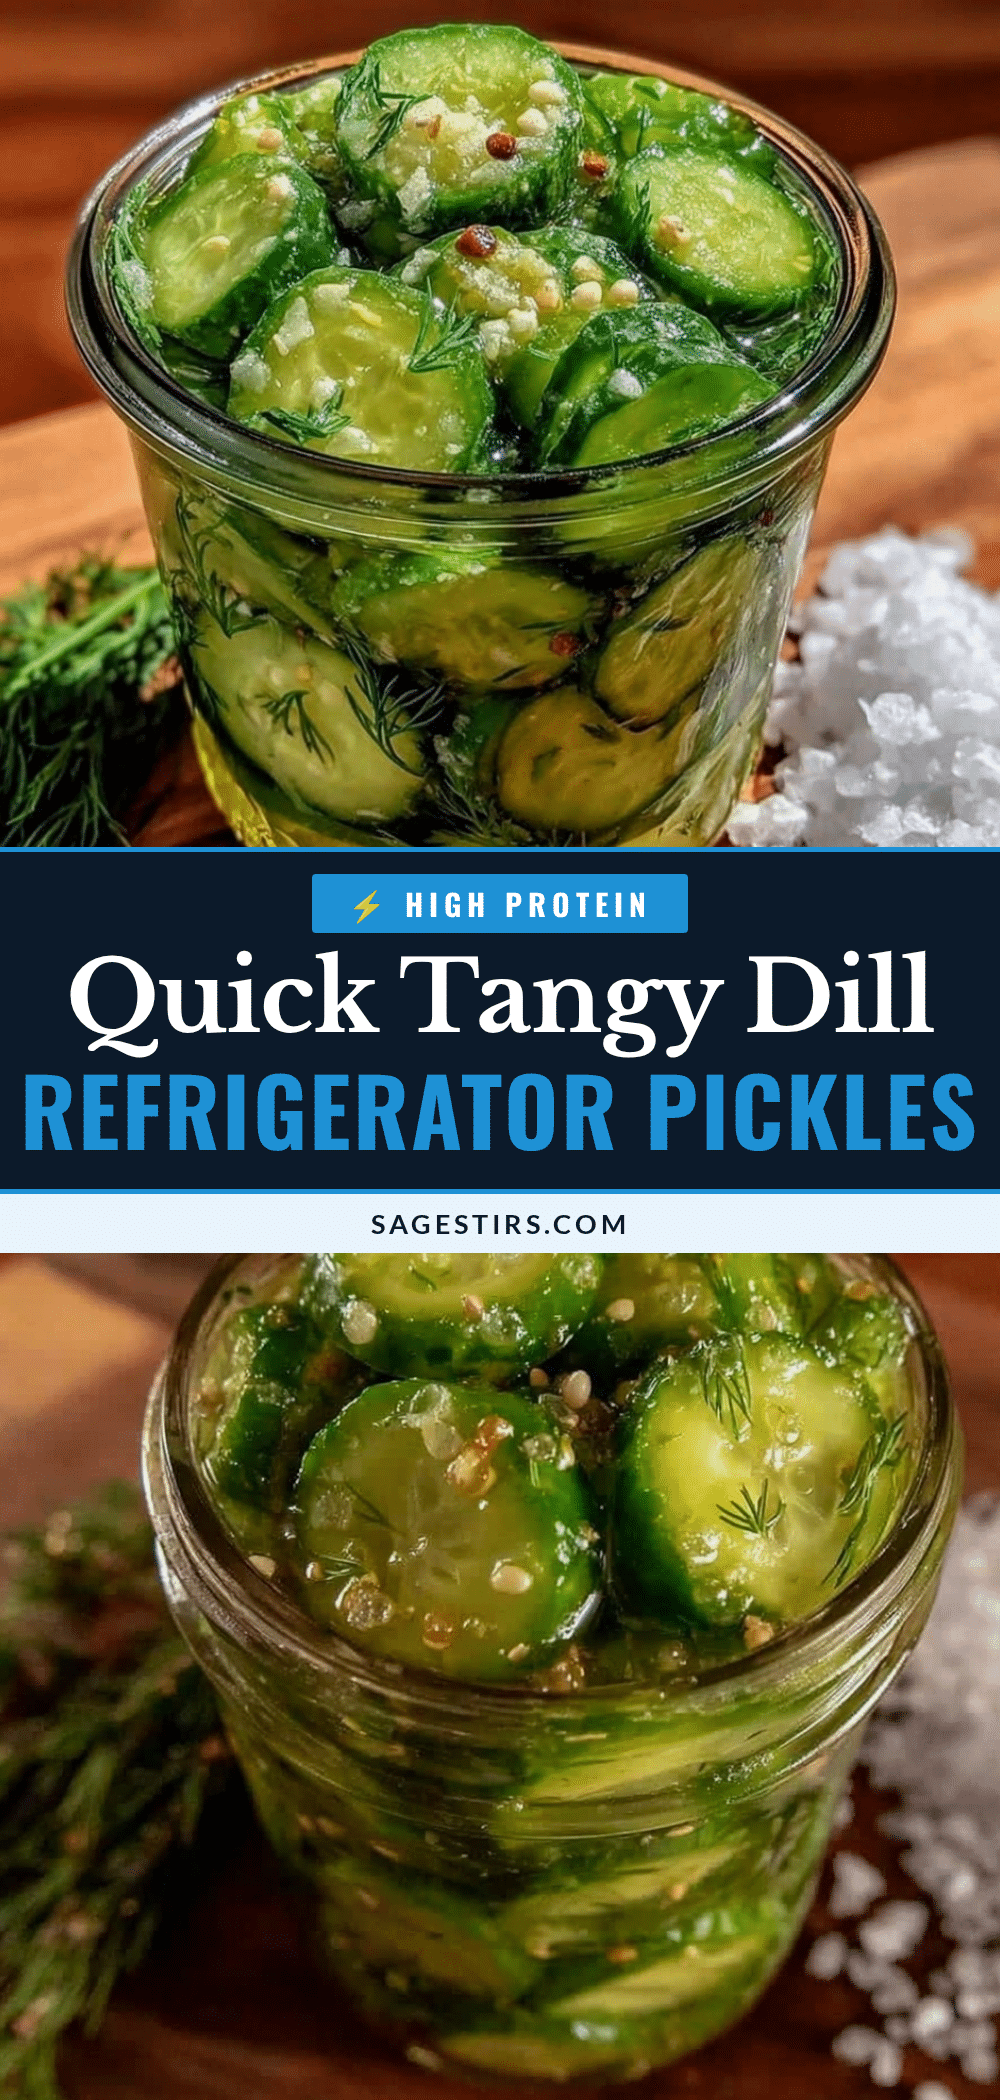
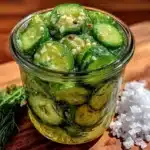
- Cucumbers: 4 medium Kirby cucumbers, sliced into spears or rounds (Kirby cucumbers hold up best for pickling—they stay firm and crisp)
- Fresh Dill: 4-5 sprigs, roughly chopped (the herb that gives this pickle its signature tangy, aromatic flavor)
- Garlic Cloves: 3 cloves, smashed or thinly sliced (adds a subtle, savory depth)
- White Vinegar: 1 cup (240 ml) – the backbone of the brine, provides that unmistakable tang
- Water: 1 cup (240 ml) – balances out the vinegar and softens the acidity
- Granulated Sugar: 1 tablespoon (optional, but helps mellow the vinegar’s sharpness)
- Salt: 1 tablespoon kosher salt or pickling salt (essential for flavor and crunch)
- Black Peppercorns: 1 teaspoon whole (adds subtle spice)
- Red Pepper Flakes: ½ teaspoon (optional for a gentle kick)
For best results, I like to use pickling salt because it dissolves cleanly and won’t cloud the brine. If you don’t have it, kosher salt works fine—just avoid iodized table salt since it can make the pickles cloudy or bitter.
In summer, you can swap out some of the fresh dill with tarragon or fresh basil for a different herbal note. And if you want a slightly sweeter pickle, increasing the sugar to 2 tablespoons works well without overpowering the tang.
Equipment Needed

- Glass Jar or Airtight Container: A quart-sized mason jar or any glass container with a tight lid works perfectly. I prefer glass since plastic can sometimes absorb flavors over time.
- Measuring Cups and Spoons: For precise brine measurements—accuracy matters to get that perfect balance of tang and saltiness.
- Mixing Bowl: To dissolve the salt and sugar in vinegar and water before adding cucumbers.
- Sharp Knife and Cutting Board: For slicing cucumbers and crushing garlic cloves.
- Optional: Tongs or Fork: To press down the cucumbers and keep them submerged in the brine while refrigerating.
You don’t need a fancy canning set or large pots, which is why this recipe is great for beginners or those who want pickles without the usual fuss. If you don’t have a mason jar, a clean plastic container with a lid will do in a pinch, but glass is best for flavor and longevity.
Keeping your jar clean and dry before use helps prevent any unwanted bacteria or cloudiness in the pickles. I learned this the hard way after my first batch turned a little murky—clean jars make a world of difference!
Preparation Method
- Prepare the cucumbers: Wash and dry the cucumbers thoroughly. Slice them into spears or rounds depending on your preference—spears for crunchy snacks, rounds for sandwiches. This should take about 10 minutes.
- Make the brine: In a mixing bowl, combine 1 cup (240 ml) white vinegar, 1 cup (240 ml) water, 1 tablespoon granulated sugar, and 1 tablespoon kosher salt. Stir until sugar and salt are completely dissolved—this usually takes about 2 minutes. The brine should taste tangy and slightly salty but not overwhelming.
- Add spices and herbs: Place the smashed garlic cloves, fresh dill sprigs, 1 teaspoon black peppercorns, and optional ½ teaspoon red pepper flakes into the bottom of your clean glass jar.
- Pack the cucumbers: Tightly pack the cucumber slices into the jar on top of the dill and garlic. Press them down gently to fit as many as possible without crushing.
- Pour the brine: Carefully pour the brine over the cucumbers until they’re fully submerged. Use a clean utensil (like a wooden spoon) to press down the cucumbers if needed, ensuring none float above the liquid.
- Seal and refrigerate: Close the jar tightly with the lid and refrigerate. The pickles will start tasting good after about 24 hours but are best after 2-3 days for full flavor development.
- Enjoy: Use a clean fork or tongs to remove pickles. These quick tangy dill refrigerator pickles will keep well for up to 2 weeks in the fridge.
Watch for cloudy brine or off smells as signs of spoilage—though if you keep everything clean and cold, this rarely happens. If you want extra crispness, try adding a few grape leaves or a pinch of crushed mustard seeds, a little trick I picked up over time.
Cooking Tips & Techniques
Honestly, the biggest tip is not to rush the pickles. It’s tempting to dig in after a few hours, but letting them sit at least a full day lets the flavors meld beautifully. Also, don’t skip dissolving the salt and sugar first; undissolved salt can lead to uneven seasoning.
Using fresh, firm cucumbers is key. I’ve learned that day-old cucumbers or those starting to soften won’t crisp up well in the fridge. If you live in a hot climate, keep your pickles in the coldest part of the fridge to maintain crunch.
Another thing I figured out is that smashing the garlic cloves lightly before adding them releases more flavor without making it too garlicky. And if you like a little heat, red pepper flakes are great, but add them sparingly so they don’t overpower the dill’s brightness.
When packing the jar, press cucumbers down gently to prevent air pockets, which can cause uneven pickling. I like to check every couple of days and give the jar a gentle shake to redistribute flavors.
Variations & Adaptations
- Spicy Dill Pickles: Increase red pepper flakes to 1 teaspoon and add a few slices of jalapeño for a fiery twist.
- Garlic & Mustard Seed: Add 1 teaspoon yellow mustard seeds and double the garlic for a more pungent, savory profile.
- Low-Sodium Version: Reduce salt to 1 teaspoon and add a splash of lemon juice for extra tang without sacrificing flavor.
- Vinegar Swap: Use apple cider vinegar instead of white vinegar for a fruitier, milder tang.
- Herb Variations: Try swapping dill for fresh tarragon or basil to experiment with different herbaceous notes.
I once made a batch with fresh basil and lemon zest that paired beautifully with summer salads. It was a fun change from the classic dill flavor and reminded me how versatile this no-canning method really is.
Serving & Storage Suggestions
Serve these quick tangy dill refrigerator pickles chilled straight from the fridge. They’re perfect alongside sandwiches, burgers, or even tossed into a tangy pasta salad like the easy no-fail pasta salad for fresh crunch.
Store pickles in the refrigerator in a tightly sealed jar or container. They stay fresh and crisp for up to two weeks. For best flavor, consume within the first ten days.
When reheating meals that include these pickles, like a cozy chicken dish from the easy no-fail roasted chicken recipes, add the pickles fresh at the end to keep their crunch intact.
Over time, the flavors deepen, and the tang gets a bit more mellow, but the texture remains satisfyingly crunchy if kept cold and sealed well.
Nutritional Information & Benefits
One serving (about 3 spears) of these quick tangy dill refrigerator pickles contains roughly:
| Calories | Carbohydrates | Fiber | Sodium |
|---|---|---|---|
| 10 kcal | 2 g | 1 g | 400 mg |
Pickles are low in calories and provide a small amount of fiber. The vinegar promotes digestion and may help regulate blood sugar levels. Using fresh dill adds antioxidants and vitamins A and C, supporting immune health.
Keep in mind the sodium content is moderate, so those watching salt intake should enjoy in moderation or opt for the low-sodium variation.
From a wellness perspective, these refrigerator pickles offer a flavorful way to incorporate fermented-like foods without the fuss of traditional fermentation, making them a smart, tasty addition to a balanced diet.
Conclusion
This quick tangy dill refrigerator pickles recipe has quietly become one of my kitchen staples because it’s just that easy and satisfying. It’s proof that homemade pickles don’t need to be complicated or time-consuming to taste fantastic. The fresh dill, bright vinegar, and crunchy cucumbers hit that perfect balance of tang and texture every time.
Feel free to tweak the spice levels, herbs, or sweetness to suit your own taste—it’s forgiving and adaptable. Honestly, once you try these, you might find yourself reaching for the jar as often as I do, whether for a snack, a sandwich topper, or a vibrant side dish.
If you’ve got a favorite way to enjoy quick pickles or a twist on this recipe, I’d love to hear about it in the comments below. Sharing kitchen experiments is what makes cooking so much fun!
Here’s to simple, tangy, crunchy delights right from your fridge—no canner required.
FAQs
How long do quick refrigerator pickles last?
They typically last up to two weeks when stored in a sealed jar in the refrigerator. For best crunch and flavor, enjoy within 10 days.
Can I use regular cucumbers instead of Kirby cucumbers?
Yes, but Kirby cucumbers are preferred because they stay firmer and crisper during pickling. Regular slicing cucumbers might become softer more quickly.
Do I need to peel the cucumbers before pickling?
No need to peel them unless you prefer a milder texture or want to reduce bitterness. The peel adds color and crunch.
Can I make this recipe vegan and gluten-free?
Absolutely! The recipe is naturally vegan and gluten-free, using just cucumbers, vinegar, herbs, and spices.
What can I use if I don’t have white vinegar?
Apple cider vinegar is a great substitute and adds a slightly fruity note. Just keep the same quantity for balanced acidity.
Pin This Recipe!
Quick Tangy Dill Refrigerator Pickles Recipe Easy No-Canning Method
A simple and quick refrigerator pickle recipe that skips the canning process, delivering tangy, crunchy dill pickles ready in as little as 24 hours.
- Prep Time: 10 minutes
- Cook Time: 0 minutes
- Total Time: 24 hours (including refrigeration time)
- Yield: 4 servings 1x
- Category: Snack / Side Dish
- Cuisine: American
Ingredients
- 4 medium Kirby cucumbers, sliced into spears or rounds
- 4–5 sprigs fresh dill, roughly chopped
- 3 garlic cloves, smashed or thinly sliced
- 1 cup (240 ml) white vinegar
- 1 cup (240 ml) water
- 1 tablespoon granulated sugar (optional)
- 1 tablespoon kosher salt or pickling salt
- 1 teaspoon whole black peppercorns
- ½ teaspoon red pepper flakes (optional)
Instructions
- Wash and dry the cucumbers thoroughly. Slice into spears or rounds depending on preference.
- In a mixing bowl, combine 1 cup white vinegar, 1 cup water, 1 tablespoon granulated sugar, and 1 tablespoon kosher salt. Stir until sugar and salt are completely dissolved.
- Place smashed garlic cloves, fresh dill sprigs, black peppercorns, and optional red pepper flakes into the bottom of a clean glass jar.
- Tightly pack the cucumber slices into the jar on top of the dill and garlic, pressing down gently to fit as many as possible without crushing.
- Pour the brine over the cucumbers until fully submerged. Press down cucumbers if needed to keep them under the liquid.
- Seal the jar tightly and refrigerate. Pickles will start tasting good after about 24 hours but are best after 2-3 days for full flavor.
- Use a clean fork or tongs to remove pickles. Store in the refrigerator and consume within two weeks.
Notes
Use pickling salt for best results to avoid cloudy brine. Let pickles sit at least 24 hours for best flavor. Fresh, firm cucumbers are key for crunch. Avoid iodized table salt. Optional additions include grape leaves or crushed mustard seeds for extra crispness. Variations include spicy, garlic & mustard seed, low-sodium, vinegar swaps, and herb swaps.
Nutrition
- Serving Size: About 3 spears
- Calories: 10
- Sugar: 1
- Sodium: 400
- Carbohydrates: 2
- Fiber: 1
Keywords: quick pickles, refrigerator pickles, dill pickles, no canning, easy pickles, tangy pickles, crunchy pickles