Love this? Save it for later!
Share the inspiration with your friends
I was standing in my neighbor Carol’s garage last August, helping her sort through boxes for a yard sale, when a whiff of vinegar and dill hit me from somewhere deep in the clutter. It was sharp and tangy and so specific that I stopped mid-motion, a chipped ceramic rooster in my hands. And suddenly I was seven years old at my aunt Margie’s kitchen table in central Illinois, watching her pack quart jars with cucumber spears and garlic cloves, the counter around her a battlefield of brine and spice. She’d been gone for six years by then, and I hadn’t thought about her pickles in maybe a decade. But that smell — it didn’t just remind me of her. It brought her back. The way she’d smack her lips after pulling a jar from the fridge, the way she called me “kiddo” and let me eat pickles straight from the jar with my fingers.
Honestly, I sat down on a dusty lawn chair right there in Carol’s garage and texted my mom: “Did Aunt Margie have a pickle recipe?” Two days later, I had a handwritten note in the mail — Margie’s recipe, in her loopy cursive, stained on the corner where she’d dripped brine. And let me tell you, it wasn’t complicated. That was the thing. She wasn’t doing some fancy fermentation or water-bath canning. She was just… refrigerating them. For 24 hours. And they came out so crisp you could hear the snap from across the room.
So I made them. And I’ve been making them ever since — tweaking, testing, ruining a few batches (lesson learned: don’t skip the ice bath). These crispy refrigerator dill pickles are the kind of thing you make once and then can’t stop making. They’re salty, garlicky, vinegary in the best way, and somehow stay crunchy for weeks. You know that feeling when you bite into a pickle and it’s already soft, and you just sigh? These are the opposite of that. They fight back. And the best part? You don’t need a water bath, you don’t need special equipment, and you don’t need to wait months. Twenty-four hours. That’s it. Maybe you’ve been hunting for that perfect pickle recipe that actually delivers on the crunch. I promise you, this is the one.
Why You’ll Love This Recipe
I’ve tested this recipe about fourteen times now — not because I had to, but because I kept thinking “surely it can’t stay this crunchy after two weeks.” Spoiler alert: it does. Here’s why these crispy refrigerator dill pickles are going to become your new go-to:
- Ready in 24 Hours: Most pickle recipes make you wait weeks. These are ready tomorrow. Perfect for when you need pickles for a barbecue or just really want that crunch right now.
- Simple Ingredients: Cucumbers, vinegar, dill, garlic, salt, and a few spices. That’s it. No weird additives or hard-to-find items.
- Perfect for Summer: When garden cucumbers are taking over your counter, this is the best way to use them up. Also amazing for potlucks, picnics, and burger nights.
- Crowd-Pleaser: I brought a jar to a family gathering and watched three different people ask for the recipe before the burgers were even off the grill.
- Unbelievably Crunchy: The secret is in the preparation — and I’ll share every trick I learned from my ruined batches so yours turn out perfect the first time.
What makes this recipe different from the dozen other pickle recipes online? It’s the ice bath. I know, it sounds silly. But soaking the cucumber slices in ice water before packing them draws out excess moisture and firms up the cell structure. That’s the difference between a sad, limp pickle and one that snaps when you bite it. Plus, I use a precise vinegar-to-water ratio that balances tang without being harsh. This isn’t just another version of refrigerator pickles — it’s the version I’ve perfected through trial, error, and a few very salty mistakes.
These pickles are the kind that make you close your eyes after the first bite. They’re comfort food in pickle form — crunchy, tangy, and deeply satisfying. Perfect for impressing guests without stress, or turning a simple sandwich into something memorable.
What Ingredients You Will Need
This recipe uses simple, wholesome ingredients to deliver that perfect crunch and tangy flavor without any fuss. Most of these are probably already in your pantry or fridge.
For the Pickles
- 1 ½ pounds Kirby cucumbers (or Persian cucumbers) — these are naturally crunchier than English or garden slicers. Look for firm, unwaxed cucumbers with no soft spots. I’ve found Kirby cucumbers at most grocery stores, but if you can’t find them, Persian cucumbers work great too.
- 4 cloves garlic, peeled and smashed slightly — this infuses the brine with that essential garlicky punch. I use fresh garlic, not the pre-minced stuff from a jar. Trust me on this.
- 2 tablespoons fresh dill (or 1 tablespoon dried dill weed) — fresh dill gives a brighter flavor, but dried works in a pinch. I prefer fresh when I can get it, especially in summer when it’s growing like crazy in the garden.
- 1 teaspoon black peppercorns — whole peppercorns add a subtle warmth without making the pickles spicy. Don’t use ground pepper here; it’ll make the brine cloudy.
- ½ teaspoon red pepper flakes (optional) — for a little heat. I add these to about half my batches depending on my mood.
- 1 teaspoon mustard seeds — these add a lovely pop of texture and a mild, earthy flavor that complements the dill beautifully.
For the Brine
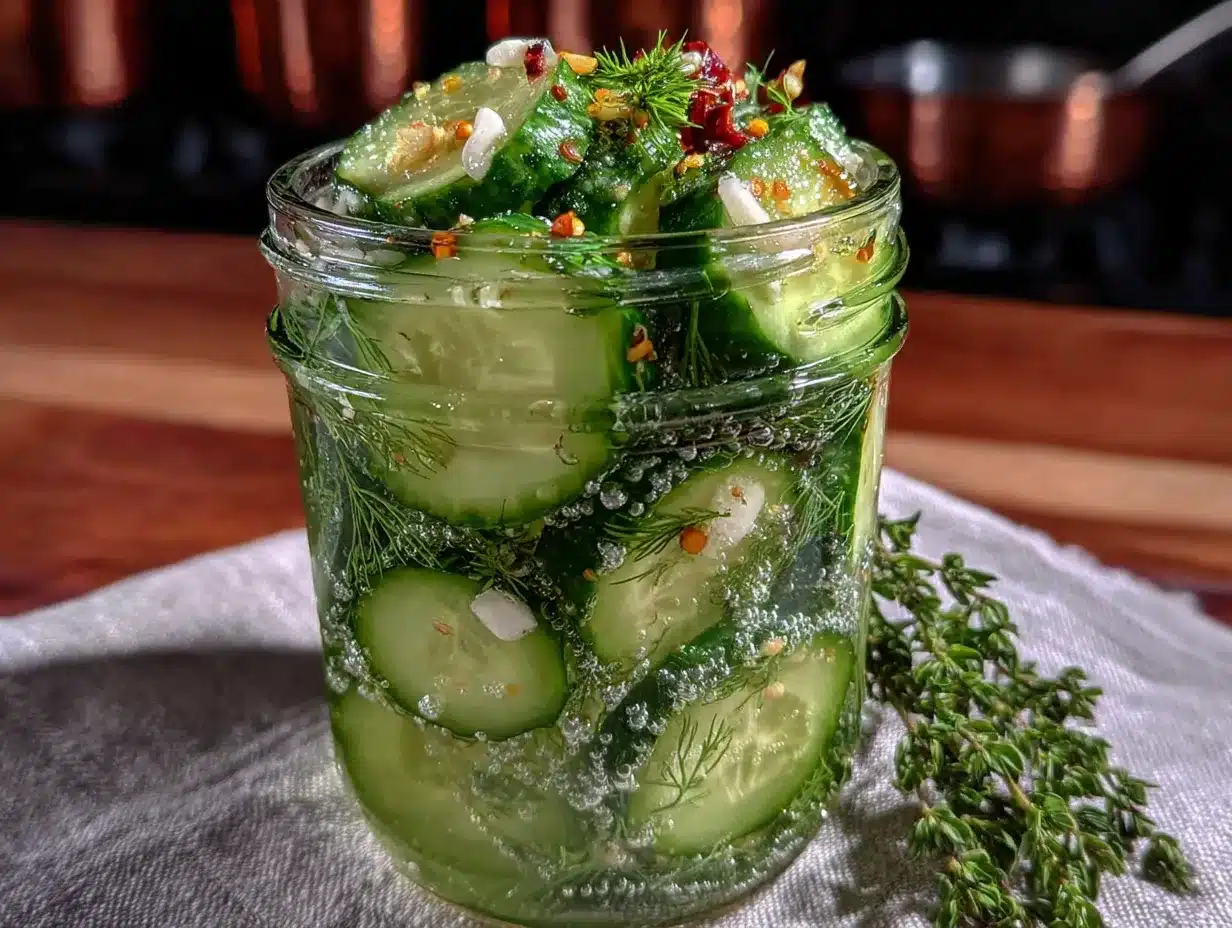
- 1 cup water — filtered or tap is fine. If your tap water is heavily chlorinated, let it sit out for 10 minutes before using.
- 1 cup white vinegar (5% acidity) — this is the standard for pickling. I’ve tried apple cider vinegar and it works, but white vinegar gives the cleanest, most classic dill pickle flavor. I recommend Heinz or store brand — just check the acidity percentage.
- 1 tablespoon kosher salt — not table salt! Table salt has anti-caking agents that can make the brine cloudy and affect the flavor. I use Diamond Crystal kosher salt. If you’re using Morton’s, use slightly less since it’s denser.
- 1 tablespoon sugar (optional) — this balances the vinegar’s sharpness. I add it to most batches, but if you like your pickles extra tangy, you can skip it.
Substitution Guidance: For a low-sodium version, use half the salt and add a bit more dill and garlic for flavor. For a sweeter bread-and-butter style, increase sugar to ¼ cup. If you’re avoiding vinegar, you can use a 50/50 mix of apple cider vinegar and water, but the flavor will be different — more fruity, less sharp. I’ve tried it and it’s good, just not the classic dill pickle experience.
Equipment Needed
The beauty of this recipe is that you don’t need any fancy canning equipment. Here’s what you’ll need:
- 1 quart-sized Mason jar (or two pint jars) — wide-mouth jars are easier to pack. I use Ball or Kerr jars, but any glass jar with a tight-fitting lid works. I’ve even used an old pasta sauce jar in a pinch.
- Sharp knife and cutting board — for slicing cucumbers. A mandoline slicer makes uniform slices, but a steady hand and a sharp knife work just fine.
- Small saucepan — for heating the brine. Any small pot works.
- Measuring cups and spoons — accuracy matters with the brine ratio.
- Large bowl — for the ice bath. You need something big enough to hold the cucumber slices and ice water.
- Strainer or colander — for draining the cucumbers after their ice bath.
Budget-Friendly Options: Don’t have a Mason jar? Use any glass jar with a plastic or vinegar-safe lid. Metal lids can react with the vinegar over time, so if you’re using a metal lid, line it with a piece of plastic wrap before screwing it on. I learned that one the hard way when my pickles tasted faintly metallic. Not pleasant.
Preparation Method
- Prepare the cucumbers: Wash your cucumbers thoroughly. Cut off about ¼ inch from the blossom end (the end opposite the stem) — this contains enzymes that can soften pickles. I know it sounds fussy, but it makes a real difference. Slice the cucumbers into ¼-inch rounds or spears, depending on your preference. I like spears for snacking and rounds for sandwiches.
- Ice bath treatment: Fill a large bowl with ice and cold water. Add the cucumber slices and let them soak for 30 minutes. This is the secret to maximum crunch. The cold water firms up the cucumber’s cell structure and removes some excess moisture. I set a timer because I’ve definitely forgotten and left them in for an hour — they were fine, just extra cold.
- Make the brine: While the cucumbers soak, combine the water, vinegar, salt, and sugar (if using) in a small saucepan. Bring to a boil over medium-high heat, stirring occasionally to dissolve the salt and sugar. Once it’s boiling, remove from heat and let it cool for about 10 minutes. You don’t want to pour boiling brine over the cucumbers — it can cook them slightly and affect the crunch.
- Pack the jar: Drain the cucumber slices and pat them dry with a clean kitchen towel or paper towels. This step matters — excess water will dilute the brine. Layer the cucumbers in your jar with the garlic cloves, fresh dill, peppercorns, mustard seeds, and red pepper flakes if using. Pack them in fairly tightly, but don’t crush them. I like to alternate layers: cucumbers, then a sprinkle of spices, then more cucumbers.
- Pour the brine: Once the brine has cooled slightly, pour it over the cucumbers in the jar, making sure everything is completely submerged. Leave about ½ inch of headspace at the top. If you need more brine, mix a quick batch of ½ cup water and ½ cup vinegar with ½ teaspoon salt.
- Seal and refrigerate: Screw the lid on tightly and give the jar a gentle shake to distribute the spices. Refrigerate immediately. Here’s the hard part: wait 24 hours before opening. I know. It’s torture. But the flavors need time to meld and the brine needs time to work its magic. I usually make these in the evening and by the next evening, they’re ready.
- Taste and adjust: After 24 hours, open the jar and taste a pickle. Need more salt? Add a pinch to the brine and shake. Want more garlic? Smash another clove and drop it in. The beauty of refrigerator pickles is that you can keep adjusting as they sit.
Sensory Cues: When you open the jar after 24 hours, you should smell vinegar, dill, and garlic immediately — a bright, sharp, welcoming aroma. The pickles should look slightly translucent at the edges but still have that vibrant green color. When you bite into one, you should hear and feel a clean snap. If they’re soft, they might have sat too long in the ice bath or the cucumbers were too old to begin with.
Cooking Tips & Techniques
I’ve made enough mistakes with pickles to fill a small book. Here’s what I’ve learned so you don’t have to repeat my errors:
Choose the right cucumber. This is non-negotiable. Kirby cucumbers are the gold standard for pickling because they’re naturally thicker-skinned and less watery. English cucumbers can work if that’s all you have, but they tend to get softer faster. Garden-variety slicers? They’ll work in a pinch, but don’t expect them to stay crunchy for more than a week. I once used the big waxy cucumbers from the supermarket and regretted it — they were limp by day three.
Don’t skip the salt. Salt isn’t just for flavor — it helps draw moisture out of the cucumbers and keeps them firm. If you’re watching your sodium, reduce the salt but don’t eliminate it entirely. Even a teaspoon makes a difference.
Temperature matters. These pickles need to stay cold. If your fridge is on the warmer side, they’ll soften faster. I keep mine toward the back of the fridge where it’s coldest, not in the door where temperatures fluctuate.
Patience is a virtue. I know I said they’re ready in 24 hours, and they are. But honestly? They’re even better at 48 hours. The flavors deepen, the garlic mellows, and the crunch stays. I make a batch, try one at 24 hours, and then try to leave the rest alone until day two. It’s hard. Do it anyway.
Multitasking strategy: While the cucumbers are in their ice bath, make the brine and wash your jar. That way everything comes together in about 10 minutes of active work. The rest is just waiting.
Variations & Adaptations
Once you’ve mastered the basic recipe, here are some ways to switch it up:
Spicy Garlic Pickles: Double the red pepper flakes and add a sliced jalapeño to the jar. These are incredible on tacos or spicy sandwiches. I made a batch for a taco night and they were gone before the meat was off the grill.
Bread and Butter Style: Increase the sugar to ¼ cup and add ½ teaspoon turmeric for that classic yellow color. Add sliced onion rings to the jar for extra flavor. These are sweeter and milder — great for kids or people who find dill pickles too sharp.
Herb Garden Medley: Swap the dill for a mix of fresh herbs — try tarragon, thyme, and a sprig of rosemary. The flavor is more complex and earthy. I did this with a batch last fall and it was fantastic with roasted meats.
Low-Sodium Version: Use 1 teaspoon of salt instead of 1 tablespoon. Add extra garlic, dill, and a squeeze of lemon juice to boost flavor without the salt. They won’t stay as crunchy for as long, but they’re still good for about a week.
Add Some Heat: For a smoky kick, add ½ teaspoon of smoked paprika and a dried chipotle pepper to the jar. The smokiness pairs surprisingly well with the dill and garlic. I tried this on a whim and now it’s my second-favorite variation.
Serving & Storage Suggestions
These pickles are best served cold, straight from the fridge. I love them on a classic deli sandwich — turkey, Swiss, mustard, and a few pickle slices on rye bread. They’re also incredible chopped up into tuna salad or potato salad for extra crunch and tang.
For a party, arrange them on a platter with cheese cubes, salami, and crackers. They’re a hit at summer barbecues alongside burgers and hot dogs. I’ve also been known to eat them straight from the jar while standing in front of the open fridge at 11 p.m. No judgment here.
Storage: Keep the jar tightly sealed in the refrigerator at all times. These are not shelf-stable — they need to stay cold. Properly stored, they’ll stay crunchy for 2 to 3 weeks. The flavor will peak around day 3 or 4 and then slowly mellow. After about 3 weeks, they’ll start to soften, but they’re still perfectly edible for another week or so.
Reheating? Don’t. These are cold pickles. If you want warm pickles, you’re making a different recipe.
Flavor Development: The brine gets more complex as it sits. The garlic mellows, the dill infuses deeper, and the spices settle into a beautiful harmony. I’ve found that day 3 is the sweet spot — the crunch is still perfect and the flavors have fully developed.
Nutritional Information & Benefits
Per serving (about 4 pickle spears):
- Calories: 15
- Carbohydrates: 3g
- Fiber: 1g
- Sugar: 1g
- Sodium: 350mg (varies based on salt used)
- Fat: 0g
- Protein: 0g
These pickles are naturally low in calories and fat-free. The main nutritional consideration is the sodium content, which comes from the salt in the brine. If you’re watching your salt intake, use the low-sodium variation mentioned above.
On the plus side, cucumbers are hydrating and contain vitamin K and antioxidants. The vinegar in the brine may help with blood sugar regulation, and garlic is known for its immune-supporting properties. Plus, fermented foods (well, these are technically brined, not fermented) are great for gut health. While these refrigerator pickles don’t contain live probiotics like fermented pickles do, they still offer that satisfying crunch without any added preservatives or artificial ingredients.
These pickles are naturally gluten-free, dairy-free, and vegan. They’re also low-carb and keto-friendly, making them a great snack for anyone watching their carbohydrate intake.
Conclusion
These crispy refrigerator dill pickles are proof that you don’t need a grandmother’s secret recipe or a basement full of canning equipment to make something truly special. With just a few simple ingredients and 24 hours of patience, you can have pickles that rival anything you’d buy at the store — and honestly, they’re better. They’re crunchier, fresher, and completely customizable to your taste.
I’ve made these for parties, for lazy Sunday afternoons, and for those moments when I just need something tangy and satisfying. Every time I open that jar and hear that snap, I think of Aunt Margie’s kitchen and the way she’d wink at me as I fished a pickle out of the jar with my bare fingers. These pickles carry a little bit of her spirit — and now they can carry a little bit of yours too.
Try this recipe and let me know how it goes! Did you add extra garlic? Skip the sugar? Try a wild herb combination? Drop a comment below and tell me about your version. And if you loved these, share the recipe with a friend who needs a little more crunch in their life. Happy pickling!
Frequently Asked Questions
Can I use regular cucumbers instead of Kirby cucumbers?
You can, but they won’t stay as crunchy. Kirby cucumbers have thicker skins and less water content, which makes them ideal for pickling. If you use English or garden cucumbers, expect them to soften after about a week. Slice them thicker — ½ inch instead of ¼ inch — to help them hold up better.
Do I need to sterilize the jar?
Since these are refrigerator pickles and not shelf-stable canned goods, you don’t need to sterilize the jar. Just wash it thoroughly with hot soapy water and rinse well. If you’re nervous about it, run it through the dishwasher on the sanitize cycle.
Can I reuse the brine for another batch?
Technically yes, but the flavor will be much weaker the second time around. The first batch absorbs a lot of the vinegar, salt, and spice. If you want to reuse it, add a little fresh vinegar and salt to boost the flavor. I usually just make fresh brine — it’s quick and the results are better.
Why are my pickles soft?
Several possible reasons: you used older cucumbers, skipped the ice bath, didn’t cut off the blossom end, or used too much salt (which can draw out too much moisture). Also, check your fridge temperature — if it’s above 40°F, the pickles will soften faster. Next time, make sure your cucumbers are as fresh as possible and follow the ice bath step. That usually solves the problem.
How long do these pickles last?
In the refrigerator, they’ll stay crunchy for 2 to 3 weeks. After that, they’ll start to soften but are still safe to eat for another week or so. The flavor will peak around day 3 or 4. Just make sure the jar stays sealed when not in use and the pickles remain submerged in the brine. If any pickles are floating above the brine line, push them down or remove them — they can spoil faster.
Pin This Recipe!
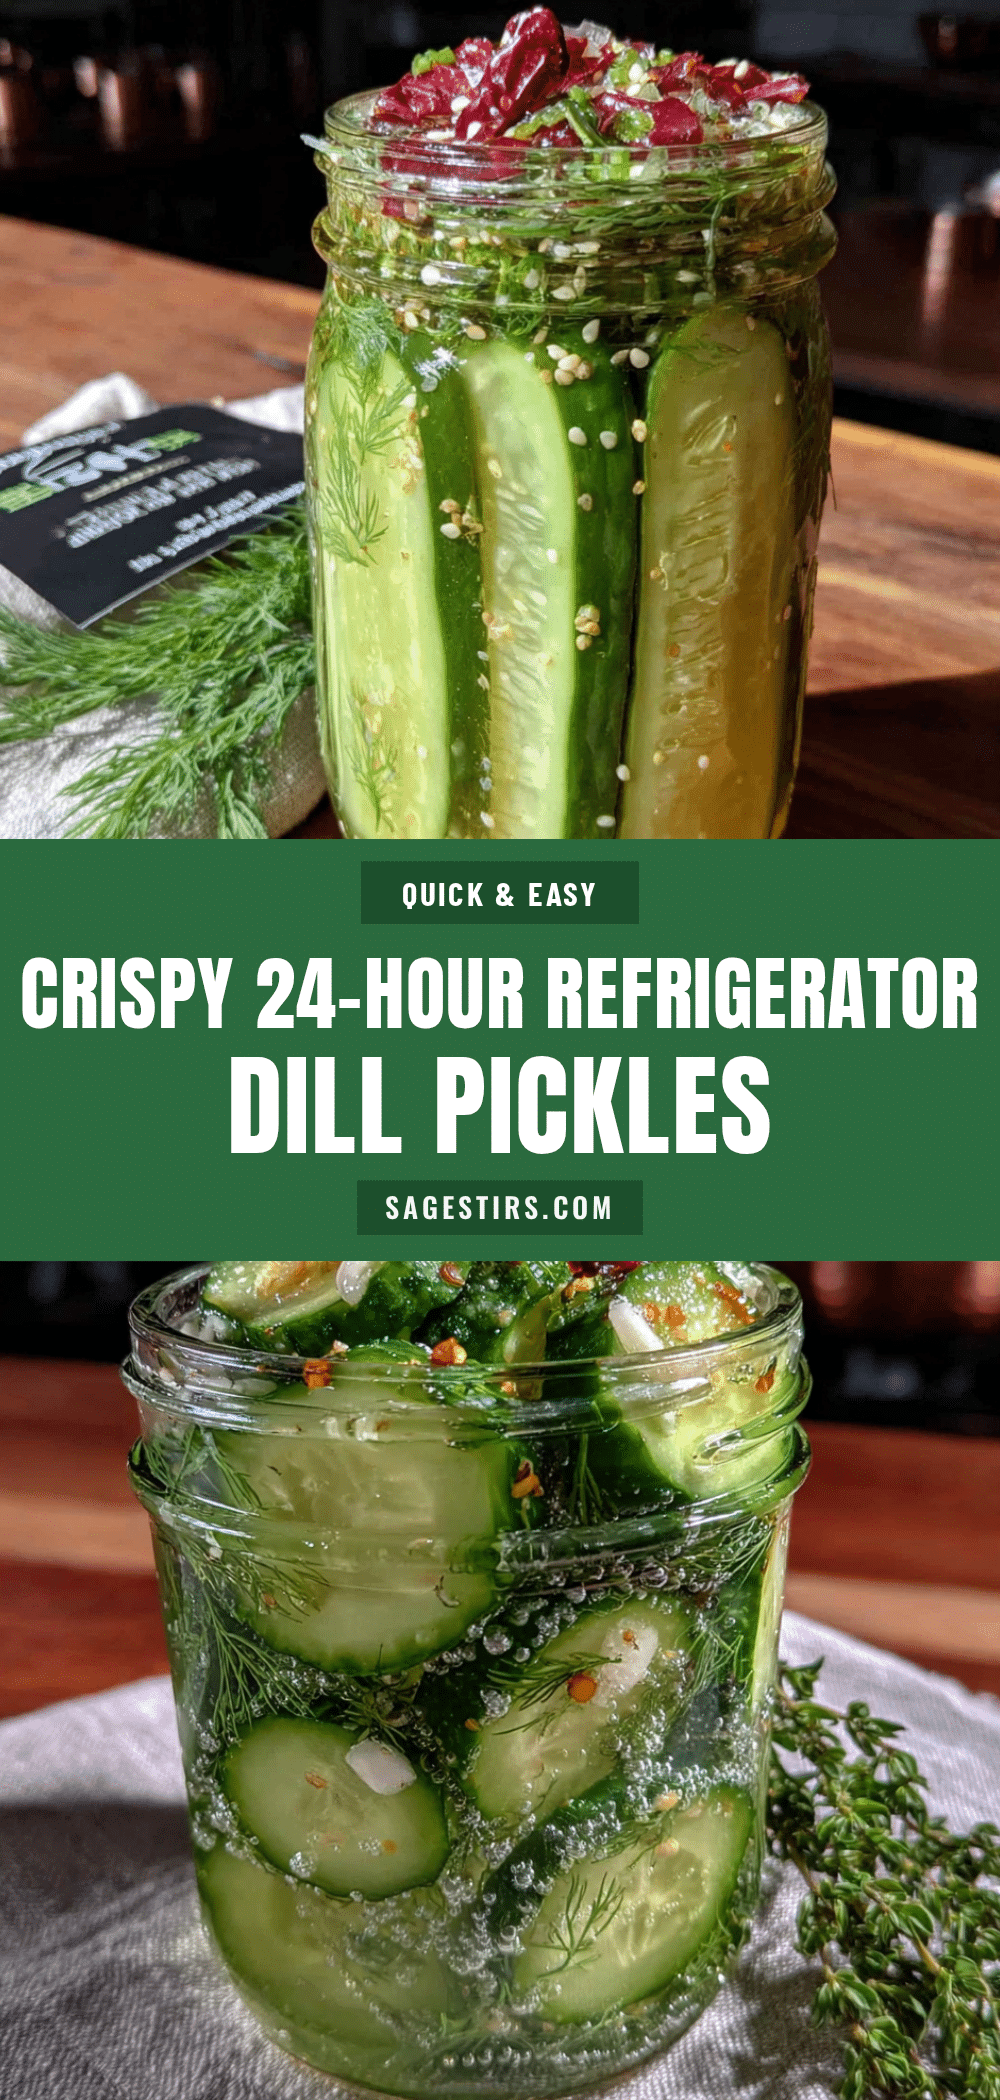
Crispy Refrigerator Dill Pickles: Ready in 24 Hours
These crispy refrigerator dill pickles are salty, garlicky, vinegary, and stay crunchy for weeks. Ready in just 24 hours with simple ingredients and no special equipment.
- Prep Time: 15 minutes
- Cook Time: 5 minutes
- Total Time: 24 hours 20 minutes
- Yield: 4 servings 1x
- Category: Appetizer
- Cuisine: American
Ingredients
- 1 ½ pounds Kirby cucumbers (or Persian cucumbers)
- 4 cloves garlic, peeled and smashed
- 2 tablespoons fresh dill (or 1 tablespoon dried dill weed)
- 1 teaspoon black peppercorns
- ½ teaspoon red pepper flakes (optional)
- 1 teaspoon mustard seeds
- 1 cup water
- 1 cup white vinegar (5% acidity)
- 1 tablespoon kosher salt
- 1 tablespoon sugar (optional)
Instructions
- Prepare the cucumbers: Wash thoroughly. Cut off about ¼ inch from the blossom end. Slice into ¼-inch rounds or spears.
- Ice bath treatment: Fill a large bowl with ice and cold water. Add cucumber slices and soak for 30 minutes.
- Make the brine: While cucumbers soak, combine water, vinegar, salt, and sugar (if using) in a small saucepan. Bring to a boil, stirring to dissolve. Remove from heat and let cool for about 10 minutes.
- Pack the jar: Drain cucumbers and pat dry. Layer in a quart-sized Mason jar with garlic, dill, peppercorns, mustard seeds, and red pepper flakes (if using). Pack tightly but don’t crush.
- Pour the brine: Once cooled slightly, pour brine over cucumbers, ensuring they are completely submerged. Leave ½ inch headspace.
- Seal and refrigerate: Screw lid on tightly, shake gently, and refrigerate immediately. Wait 24 hours before opening.
- Taste and adjust: After 24 hours, taste a pickle. Adjust salt, garlic, or spices as desired.
Notes
For maximum crunch, use Kirby cucumbers, don’t skip the ice bath, and cut off the blossom end. Pickles are best after 24 hours but even better at 48 hours. Store in refrigerator for up to 3 weeks.
Nutrition
- Serving Size: 4 pickle spears
- Calories: 15
- Sugar: 1
- Sodium: 350
- Carbohydrates: 3
- Fiber: 1
Keywords: refrigerator pickles, dill pickles, crispy pickles, homemade pickles, easy pickles, 24-hour pickles