Love this? Save it for later!
Share the inspiration with your friends
By the fourth time I made these Crispy Honey Garlic Baked Chicken Thighs this month, I stopped counting the batches and started counting the empty plates. It’s a weird kind of problem to have, honestly. I wasn’t trying to reinvent the wheel or find the perfect weeknight meal. I just wanted something fast, cheap, and flavorful enough to make my husband stop scrolling through his phone while he ate.
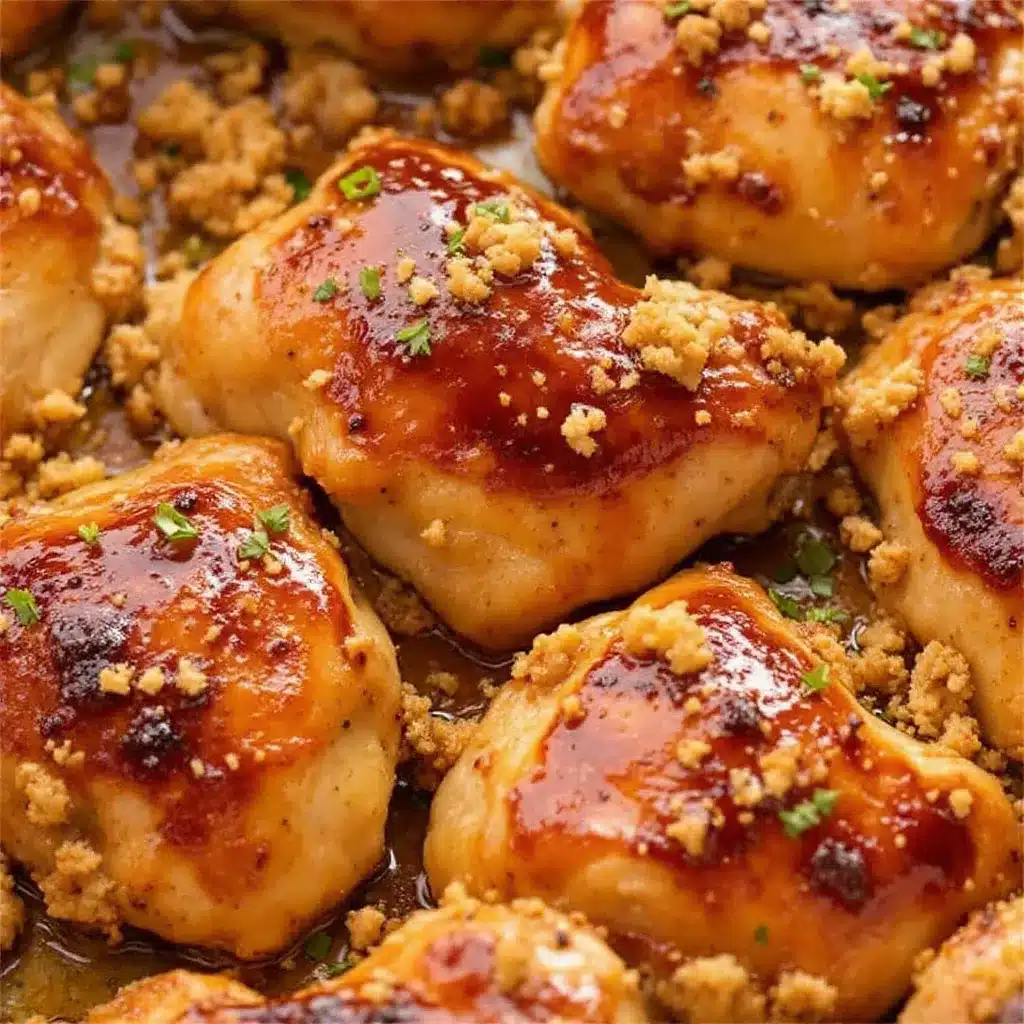
The first time, I used too much honey. The second time, I forgot the garlic powder and it tasted like bland roast chicken. The third time, I panicked and burned the sugar because I was distracted by a text message. But this fourth iteration? This one clicked. The skin got shatteringly crisp without me having to deep fry it in a vat of oil. The sauce stayed glossy and clung to every nook and cranny of the meat.
I didn’t plan this recipe. I stumbled into it while trying to use up chicken thighs that were about to go bad. I threw them in the oven with whatever was in my pantry—honey, soy sauce, garlic, and a pinch of red pepper flakes because I like a little heat. I expected a mess. I got dinner.
Now, it’s on the rotation. Tuesday, Thursday, and sometimes Saturday if I’m feeling lazy. There is something satisfying about pulling a tray out of the oven and smelling that sweet, savory, garlicky aroma hit you in the face. It’s not fancy. It’s not a five-star restaurant dish. But it is the kind of meal that makes you feel like you’ve got your life together, even if you’re wearing sweatpants.
I’m sharing this because you need it in your life. Not because it’s complicated, but because it’s reliable. And in a world where dinner is often an afterthought, reliability is everything.
Why You’ll Love This Recipe
Let’s be real for a second. Cooking chicken thighs can be a gamble. Sometimes they’re dry, sometimes they’re tough, and often they just taste like… chicken. But when you get this right, it’s different. It’s juicy, it’s flavorful, and it’s got that texture you crave. Here is why this recipe actually works and why you’ll keep coming back to it.
- Quick & Easy: You know how some recipes say “30 minutes” but take an hour to prep? This one doesn’t lie. It comes together in under 20 minutes of active time. You chop, you toss, you bake. Perfect for those busy weeknights when you’re starving and don’t have energy to cook.
- Simple Ingredients: No fancy grocery trips needed. You likely already have honey, soy sauce, garlic, and cornstarch in your kitchen. It’s pantry-friendly comfort food at its finest. No obscure spices or hard-to-find items.
- Perfect for Meal Prep: These thighs hold up really well in the fridge. I’ve made this for lunch on Wednesday using Sunday’s dinner, and it’s still good. The flavors actually get better the next day as the sauce soaks in a bit more.
- Crowd-Pleaser: Always gets rave reviews from kids and adults alike. Even my picky eater, who usually only eats bread and cheese, asks for seconds. It’s sweet enough to please the sweet tooth but savory enough to satisfy the adult palate.
- Unbelievably Delicious: The texture and flavor combo is next-level comfort food. The cornstarch makes the skin crisp, the honey adds that sticky sweetness, and the garlic provides the punch. It’s a balance that just works.
What makes this recipe different from the rest is the technique. Most people just dump everything in a bowl and bake it. That leads to soggy skin. I use a little cornstarch to dry-brine the chicken slightly, which helps the skin crisp up in the oven. It’s a small step that makes a huge difference. Whether you are a novice cook or a seasoned pro, this method ensures you get consistent results every single time.
This recipe isn’t just good—it is the kind that makes you close your eyes after the first bite. It’s comfort food reimagined—healthier than takeout, faster than delivery, but with the same soul-soothing satisfaction. Perfect for impressing guests without stress, or turning a simple meal into something memorable. If you love this, you might also enjoy checking out my crispy baked chicken wings for another easy, crunchy chicken option.
What Ingredients You Will Need
This recipe uses simple, wholesome ingredients to deliver bold flavor and satisfying texture without the fuss. The magic here is in the balance of sweet, salty, and savory. You don’t need anything exotic, just good quality basics. Here is what you need to grab.
For the Chicken
- Chicken Thighs: Boneless, skin-on thighs are the way to go. Skin-on is crucial for that crispy texture. If you can find organic or pasture-raised, that’s even better for flavor. (Adds richness)
- Cornstarch: This is the secret weapon. It helps draw out moisture and creates a crust that stays crisp. Don’t skip it.
- Sea Salt: Just a good pinch to season the meat itself.
- Black Pepper: Freshly cracked pepper adds a nice bite.
For the Honey Garlic Sauce
- Honey: I recommend using a local wildflower honey if you can find it. It has a better flavor than the cheap stuff in the bear bottle. (Adds sweetness)
- Soy Sauce: Use low-sodium soy sauce so you can control the saltiness. Regular works too, just reduce the added salt.
- Garlic: Fresh garlic is non-negotiable here. Minced fine. If you use jarred garlic, it’ll taste metallic and off. (Adds punch)
- Rice Vinegar: Adds a little tang to cut through the sweetness. Apple cider vinegar works in a pinch.
- Sesame Oil: Just a teaspoon. It adds that nutty aroma that makes Asian-inspired dishes taste authentic.
- Red Pepper Flakes: Optional, but I highly recommend it. It adds a subtle heat that balances the honey.
- Water: To thin out the sauce so it coats the chicken evenly without being too thick.
For the best texture, look for firm, small-curd chicken thighs. In summer, you might want to add some fresh ginger to the sauce for a brighter flavor. If you need to substitute, you can use maple syrup instead of honey for a different flavor profile, though it won’t be as sticky. Use almond flour for a gluten-free option if you are avoiding cornstarch, but the texture will be slightly different. Keep this section scannable because we all want to get to the cooking part, right?
Equipment Needed
You don’t need a lot of fancy gadgets for this. Keep it simple.
- Large Baking Sheet: A standard half-sheet pan is perfect. Make sure it has a rim so the sauce doesn’t spill over and burn in your oven.
- Parchment Paper: This is my best friend. It makes cleanup a breeze. The sauce sticks to parchment, not the pan. If you don’t have it, foil works, but parchment is better for preventing sticking.
- Mixing Bowls: One medium bowl for tossing the chicken with cornstarch, and one small bowl for whisking the sauce.
- Pastry Brush: Or a spoon. You’ll use this to brush the sauce onto the chicken halfway through baking.
- Sharp Knife and Cutting Board: For mincing the garlic. If your garlic is hard to mince, smash it with the side of your knife first.
I’ve tried using non-stick pans and regular metal pans. Non-stick is easier for cleanup, but metal pans get crispier. If you want maximum crispiness, use a metal pan and grease it lightly. If you want ease, use parchment paper on a metal pan. Budget-friendly option: Any old baking sheet from a thrift store will do. Just make sure it’s clean and flat.
Preparation Method
Here is how you make these Crispy Honey Garlic Baked Chicken Thighs. It’s straightforward, but pay attention to the details.
- Preheat and Prep: Preheat your oven to 400°F (200°C). Line a large baking sheet with parchment paper. This takes about 2 minutes. Make sure the oven is fully hot before you put the chicken in.
- Season the Chicken: Pat the chicken thighs dry with paper towels. This is important. Moisture is the enemy of crispiness. In a medium bowl, toss the chicken thighs with cornstarch, salt, and pepper. Make sure each piece is lightly coated. This should take about 3 minutes. The cornstarch will look white and powdery at first, but that’s normal.
- Arrange on Pan: Place the chicken thighs on the prepared baking sheet in a single layer. Do not overcrowd the pan. If the pieces are touching, they will steam instead of roast. You might need two pans. This takes about 2 minutes.
- First Bake: Bake the chicken for 15 minutes. This cooks the chicken through and starts to crisp the skin. While this is baking, make the sauce.
- Make the Sauce: In a small bowl, whisk together the honey, soy sauce, minced garlic, rice vinegar, sesame oil, red pepper flakes, and water. The water should be about 2-3 tablespoons. Whisk until the honey is dissolved. This takes about 2 minutes.
- Brush and Finish: Remove the pan from the oven. Brush the tops of the chicken thighs generously with the honey garlic sauce. Return to the oven and bake for another 10-15 minutes. The sauce will bubble and caramelize. Keep an eye on it so the honey doesn’t burn. This takes about 10 minutes.
- Rest and Serve: Remove from the oven and let the chicken rest for 5 minutes. This allows the juices to redistribute. Sprinkle with sesame seeds or green onions if you want to garnish. Slice and serve.
Troubleshooting tip: If the sauce is too thick, add a splash more water. If it’s too thin, let it cook a bit longer. The sauce should coat the back of a spoon. If the chicken isn’t crispy enough, broil for the last 1-2 minutes, but watch it like a hawk.
Cooking Tips & Techniques
I’ve made this recipe enough times to learn a few things the hard way. Here are some professional techniques that will save you from soggy chicken.
- Dry the Chicken: I can’t stress this enough. Wet chicken = steamed chicken. Use paper towels and really press down to get the moisture off. It seems like a small step, but it makes a huge difference in the final texture.
- Don’t Skip the Cornstarch: Some people worry about cornstarch, but it’s the key to that bakery-style crust. It creates a barrier that keeps the skin crisp even after the sauce is added. It’s not deep frying, but it mimics the result.
- Watch the Honey: Honey burns easily. That’s why I bake the chicken first, then add the sauce. If you put the sauce on at the beginning, the sugar will caramelize too much and turn bitter. Always add the sauce halfway through.
- Single Layer is Key: If you pile the chicken on top of each other, the bottom pieces will get soggy. Give them space. Air circulation is your friend.
- Use Fresh Garlic: Jarred garlic has preservatives that can taste metallic and don’t cook the same way. Fresh garlic has a brighter, sharper flavor that stands up to the honey better.
My biggest failure was once trying to double the recipe on one pan. The result was a sad, sticky mess. Lesson learned: cook in batches if you need to. It’s worth the extra effort. Consistency comes from not rushing the prep.
Variations & Adaptations
This recipe is a canvas. You can tweak it to fit your taste or dietary needs.
- Spicy Version: Add more red pepper flakes or a dash of sriracha to the sauce. If you like heat, this is the way to go.
- Gluten-Free: Swap the soy sauce for tamari or coconut aminos. Use cornstarch as usual. It’s naturally gluten-free if you use tamari.
- Low-Sugar: Swap the honey for a sugar-free sweetener like monk fruit or erythritol. It won’t caramelize the same way, but the flavor will be similar. You might need to add a little xanthan gum to help it stick.
- Ginger Boost: Add a teaspoon of fresh grated ginger to the sauce. It adds a warm, zesty flavor that pairs beautifully with the garlic.
- Vegetable Add-In: Toss broccoli or bell peppers on the pan with the chicken. They’ll roast in the sauce and make a complete meal. Just add them during the last 10 minutes so they don’t get mushy.
I’ve tried adding a splash of lime juice at the end for a citrusy twist. It’s good, but not my favorite. The classic combo is hard to beat. But feel free to experiment. That’s what cooking is all about.
Serving & Storage Suggestions
These chicken thighs are best served hot, right out of the oven. The skin is crisp, the sauce is warm and sticky. Serve them over steamed rice, quinoa, or with some roasted vegetables. I like to add some steamed broccoli or green beans on the side. A sprinkle of sesame seeds and chopped green onions adds color and freshness.
For storage, let the chicken cool completely before putting it in an airtight container. It will last in the fridge for up to 3 days. Reheat in the oven at 350°F for 10 minutes to keep the skin crisp. The microwave will make the skin soggy, so avoid that if you can.
The flavors develop over time, so the leftovers actually taste better on day two. The sauce soaks into the meat a bit more. If you want to freeze it, freeze the cooked chicken without the sauce. Add fresh sauce when you reheat. It freezes well for up to 3 months.
Nutritional Information & Benefits
Chicken thighs are a great source of protein and healthy fats. They are more flavorful than chicken breasts and stay juicier. The honey provides quick energy, while the garlic has anti-inflammatory properties. This recipe is naturally gluten-free if you use tamari. It’s not a diet food, but it’s not a cheat meal either. It’s balanced and satisfying.
One serving (2 thighs with sauce) has approximately 350 calories, 25g protein, 15g fat, and 20g carbs. The macros can vary depending on the size of the thighs and the amount of sauce used. It’s a hearty meal that will keep you full for hours. No mid-afternoon snack needed.
Conclusion
These Crispy Honey Garlic Baked Chicken Thighs are a game-changer for weeknight dinners. They are easy, delicious, and reliable. I hope you try them and love them as much as I do. Feel free to adjust the spice level or add vegetables to make it your own.
If you make this recipe, please come back and leave a comment. I love hearing how it turned out for you. Share your variations or tips with the community. And if you have friends who need dinner inspiration, share this post with them.
Thanks for reading. Now go make some dinner.
Frequently Asked Questions
Can I use chicken breasts instead of thighs?
Yes, but they will cook faster and can dry out. If you use breasts, reduce the bake time to 15-20 minutes total. Thighs are juicier and better for this recipe, but breasts work in a pinch.
Why is my chicken skin not crispy?
The most common reason is moisture. Make sure you pat the chicken dry and use cornstarch. Also, don’t overcrowd the pan. If the skin is wet, it steams instead of roasts.
Can I make this in the air fryer?
Yes! Cook at 380°F for 10-12 minutes. Brush with sauce halfway through. It works great in the air fryer and saves time.
How do I store leftovers?
Store in an airtight container in the fridge for up to 3 days. Reheat in the oven or air fryer to keep the skin crisp.
Is this recipe spicy?
It has a mild kick from the red pepper flakes, but it’s mostly sweet and savory. You can add more flakes for more heat or leave them out for a milder flavor.
Pin This Recipe!

Crispy Honey Garlic Baked Chicken Thighs

A reliable, weeknight-friendly dinner featuring juicy chicken thighs with shatteringly crisp skin, coated in a glossy, sweet, and savory honey garlic sauce. Ready in under 20 minutes of active time.
- Prep Time: 15 minutes
- Cook Time: 25-30 minutes
- Total Time: 40-45 minutes
- Yield: 4 servings
- Category: Main Course
- Cuisine: Asian-Inspired
Ingredients
- Boneless, skin-on chicken thighs
- Cornstarch
- Sea salt
- Black pepper
- Honey
- Low-sodium soy sauce
- Fresh garlic, minced
- Rice vinegar
- Sesame oil
- Red pepper flakes
- Water
Instructions
- Preheat oven to 400°F (200°C). Line a large baking sheet with parchment paper.
- Pat chicken thighs dry with paper towels to remove moisture.
- In a medium bowl, toss chicken thighs with cornstarch, salt, and pepper until lightly coated.
- Arrange chicken in a single layer on the prepared baking sheet, ensuring pieces are not touching.
- Bake for 15 minutes.
- While chicken bakes, whisk together honey, soy sauce, minced garlic, rice vinegar, sesame oil, red pepper flakes, and 2-3 tablespoons of water in a small bowl.
- Remove pan from oven and brush chicken generously with the honey garlic sauce.
- Return to oven and bake for another 10-15 minutes until sauce bubbles and caramelizes.
- Remove from oven and let rest for 5 minutes before serving.
Notes
Patting the chicken dry is crucial for crispiness. Do not overcrowd the pan to prevent steaming. Honey burns easily, so add the sauce halfway through baking. For a gluten-free version, use tamari instead of soy sauce. Leftovers keep well in the fridge for 3 days; reheat in the oven to maintain crispiness.
Nutrition
- Serving Size: 2 thighs with sauce
- Calories: 350
- Sugar: 18
- Sodium: 450
- Fat: 15
- Saturated Fat: 4
- Carbohydrates: 20
- Protein: 25
Keywords: chicken thighs, honey garlic chicken, baked chicken, weeknight dinner, crispy chicken, easy recipe, gluten-free option