Love this? Save it for later!
Share the inspiration with your friends
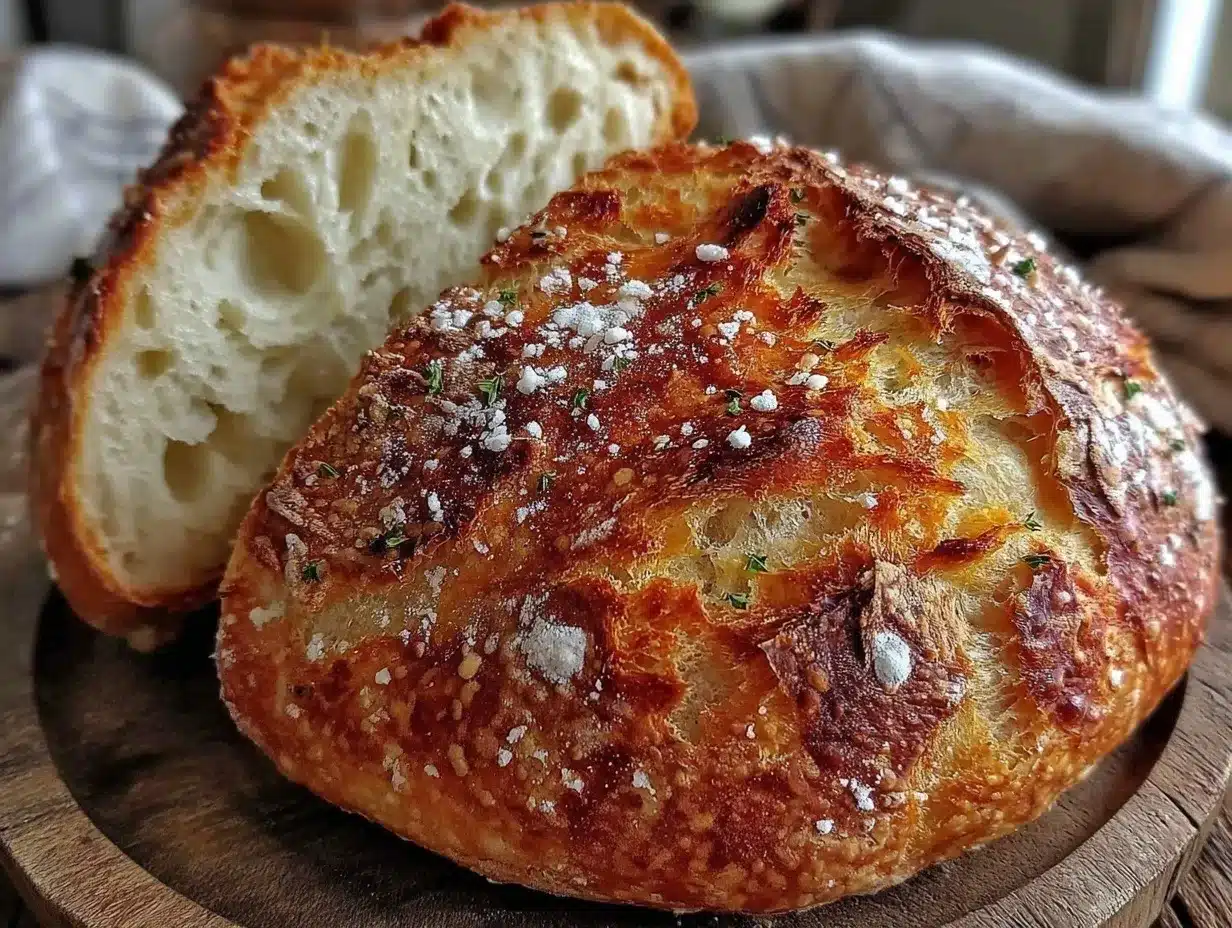
I remember the first time I tried this recipe—it was early spring, the season when the light starts to stretch longer and the chill in the air isn’t quite as sharp. I’d been intimidated by bread-making for years, convinced it needed hour-long hands-on sessions and fancy mixers. But this easy crispy no-knead Dutch oven bread changed everything. It’s funny how simplicity can open up a whole new world. The crust that shatters with a satisfying snap, the airy crumb inside that feels like a little cloud you can tear apart, and that unmistakable warmth of homemade bread filling the whole space. It’s not just bread; it’s a quiet ritual that marks a slow morning well spent.
There’s no rush here, no need to make it perfect, just a gentle trust in time and heat. This bread recipe stuck with me because it’s approachable—it doesn’t demand expertise, only a few ingredients and some patience. Honestly, it’s the kind of loaf that invites you to sit down with a pat of butter or a drizzle of honey and just breathe. That’s why I’m sharing it with you. It’s simple, reliable, and comforting in a way only bread can be.
Why You’ll Love This Recipe
This easy crispy no-knead Dutch oven bread recipe has become a staple for home bakers who want a fuss-free, satisfying loaf. I’ve tested it countless times, and here’s why it’s such a favorite:
- Quick & Easy: Once you mix the ingredients, the dough needs minimal attention—just a few minutes to stir and then a few hours to rise. Perfect for busy mornings or lazy weekends.
- Simple Ingredients: Flour, water, salt, and yeast—that’s it. No mysterious additives or special flours required. You probably have these pantry staples on hand right now.
- Perfect for Beginners: No kneading means less intimidation. You can get a bakery-worthy loaf without the elbow grease or complicated techniques.
- Crispy Crust & Soft Interior: The Dutch oven traps steam, creating that signature crunchy crust and a tender, airy crumb inside every single time.
- Versatile: Great for sandwiches, dipping in soups, or just slathered with butter. Plus, it pairs wonderfully with dishes like roasted chicken or a fresh salad.
- Stress-Free Baking: No need to watch the dough constantly. You can mix it before bed and bake fresh bread in the morning, making it ideal for meal prep.
What sets this recipe apart is how it honors the traditional bread-making process but without the usual fuss. The secret is the slow fermentation and that trusty Dutch oven which mimics a professional steam oven you find in artisan bakeries. I’ve tried countless no-knead recipes, but this one consistently yields the best crust-to-crumb ratio and flavor balance. It’s the kind of bread that makes you close your eyes and savor the moment—simple, soulful, and satisfying.
What Ingredients You Will Need
This recipe uses simple, wholesome ingredients to deliver bold flavor and satisfying texture without the fuss. Each component plays a quiet but essential role in building the perfect loaf.
- All-purpose flour (3 cups / 360g): The base of your bread. Look for unbleached flour for a better texture. I prefer King Arthur Flour for consistent results.
- Instant yeast (1/4 tsp): Helps the dough rise gently. You can substitute active dry yeast but add an extra 5 minutes to the initial proofing time.
- Salt (1 1/2 tsp): Enhances flavor and strengthens the dough. Use fine sea salt or kosher salt for best results.
- Warm water (1 1/2 cups / 360ml): The warmth activates the yeast and binds the flour. Aim for about 105°F to 110°F (40°C to 43°C) to avoid killing the yeast.
Optional additions:
- Olive oil (1 tbsp): Adds a subtle richness and softens the crumb if you prefer a less chewy bread.
- Whole wheat flour (replace up to 1 cup / 120g of all-purpose flour): For a nuttier flavor and heartier texture.
Seasonal tip: In cooler months, I sometimes add a teaspoon of honey to give the crust a slight caramel edge and feed the yeast a bit more. It’s a small twist but worth trying if you enjoy a touch of sweetness.
Equipment Needed
- Dutch oven (5 to 7-quart size preferred): This is the star of the show. It traps steam, creating that crispy crust. A heavy cast-iron Dutch oven with a tight-fitting lid works best, but enameled versions are fine too.
- Mixing bowl: A large, heatproof bowl to combine ingredients and allow the dough to rise.
- Spoon or spatula: For stirring the dough—no mixer required.
- Kitchen towel or plastic wrap: To cover the dough during proofing and keep it from drying out.
- Oven mitts: Essential for safely handling the hot Dutch oven.
If you don’t have a Dutch oven, a heavy oven-safe pot with a lid can substitute, but the results may vary slightly. In a pinch, a deep baking dish covered tightly with foil can work, but it won’t capture steam as well. I once tried baking this bread on a pizza stone without a covered pot, and it lacked that signature crispiness—so the Dutch oven really is worth it if you can manage one.
Preparation Method
- Mix the dry ingredients: In your mixing bowl, combine 3 cups (360g) of all-purpose flour, 1/4 teaspoon instant yeast, and 1 1/2 teaspoons salt. Stir thoroughly with a spoon or spatula so everything is evenly distributed. This usually takes about 2 minutes.
- Add warm water: Pour in 1 1/2 cups (360ml) of warm water (around 105°F to 110°F or 40°C to 43°C). Stir until the dough is shaggy and sticky—don’t worry about it looking smooth. This step should only take about 3 minutes.
- Cover and let it rise: Cover the bowl tightly with plastic wrap or a kitchen towel, then leave it at room temperature for 12 to 18 hours. The dough will bubble and double in size. I usually prep mine in the evening so it’s ready the next morning. If your kitchen is cold, aim for the upper end of the rising time.
- Preheat the oven: About 30 minutes before baking, place your Dutch oven with its lid inside the oven and preheat to 450°F (230°C). This ensures the pot is scorching hot and ready to create steam.
- Shape the dough: Lightly flour a work surface. Turn the dough out gently—no need to knead—shape it into a rough ball by folding the edges toward the center with floured hands. Don’t overwork it; the dough will still be sticky but manageable. This takes around 3 minutes.
- Transfer to parchment paper: Place the dough ball on a sheet of parchment paper. This will help you lift it into the Dutch oven without burns or sticking.
- Bake the bread: Carefully remove the hot Dutch oven from the oven using oven mitts. Lift the parchment paper with the dough and place it inside the pot. Cover with the lid and bake for 30 minutes.
- Finish baking uncovered: After 30 minutes, remove the lid and bake for another 15 to 20 minutes until the crust is deep golden brown and crisp. The loaf should sound hollow when tapped.
- Cool completely: Transfer the bread to a wire rack and let cool for at least one hour before slicing. This step is crucial to let the crumb set properly.
Tip: If your dough seems too sticky to handle, dust your hands and surface with flour, but don’t overdo it. Excess flour can dry the crust. Also, watch the oven carefully the first time you bake to prevent over-browning.
Cooking Tips & Techniques
Here’s what I’ve learned from many batches of this easy crispy no-knead Dutch oven bread:
- Patience is key: The slow fermentation is what develops flavor and texture. Resist the urge to rush the rising time—your bread will thank you.
- Use the right water temperature: Too hot and you’ll kill the yeast; too cold and the dough won’t rise properly. I use a kitchen thermometer to check—it’s worth the tiny investment.
- Preheat your Dutch oven properly: A scorching hot pot creates steam that crisps the crust. Don’t skip this step or your bread might bake unevenly.
- Don’t skip the cooling time: It’s tempting to slice right away, but the crumb needs time to set; otherwise, you’ll get gummy bread.
- Flour types matter: All-purpose is fine but try swapping in bread flour for more chew, or whole wheat for an earthier taste. Just remember whole wheat absorbs more water, so adjust accordingly.
- Experiment with add-ins carefully: Herbs, olives, or cheese can be mixed in, but keep in mind they can affect hydration and baking time.
My first attempt had a crust that was too hard and burnt edges—turns out my oven rack was too low. Placing the Dutch oven in the center rack made all the difference. Also, I learned that letting the dough rest in the fridge overnight adds even more depth of flavor. It’s those little lessons that make this recipe feel like a trusted friend rather than a strict instruction.
Variations & Adaptations
It’s easy to adjust this recipe to suit different tastes or dietary needs.
- Gluten-Free Version: Substitute with a gluten-free all-purpose flour blend and add 1 teaspoon xanthan gum to mimic gluten’s structure. The texture will be different but still enjoyable.
- Herb-Infused Bread: Stir in 1 to 2 tablespoons of fresh chopped rosemary, thyme, or basil to the dry ingredients for a fragrant loaf. I once paired this with a fresh basil pesto, and it was a match made in heaven.
- Whole Wheat Blend: Replace half of the all-purpose flour with whole wheat flour for a nuttier flavor and denser crumb. Add a bit more water to keep the dough soft.
- Cheesy Crust: Sprinkle grated parmesan or cheddar on top before baking uncovered for a savory crust twist.
- Quick Rise Version: Use a tablespoon of instant yeast and reduce the rising time to about 4-6 hours for a faster loaf, though the flavor won’t be quite as developed.
I personally love the herb variation, especially when paired with a simple olive oil dip or alongside a juicy chicken dish. It adds a fresh note that balances the hearty bread beautifully.
Serving & Storage Suggestions
This bread is best enjoyed fresh, but it keeps well too.
- Serving: Let the bread cool completely before slicing. Serve warm with butter, olive oil, or your favorite jam. It pairs wonderfully with soups, stews, or a cozy homemade soup.
- Storage: Wrap the cooled loaf in a clean kitchen towel or place it in a bread bag to keep the crust crisp while preventing staleness. Store at room temperature for up to 2 days.
- Freezing: Slice and freeze the bread in an airtight bag for up to 3 months. Toast slices directly from frozen for a quick snack.
- Reheating: Warm the loaf in a 350°F (175°C) oven for 10-15 minutes to refresh the crust and crumb.
- Flavor development: The bread’s flavor deepens slightly after a day, making leftovers delicious toasted or transformed into sandwiches.
Nutritional Information & Benefits
This easy crispy no-knead Dutch oven bread is a simple, wholesome choice. One slice (about 60g) contains approximately:
| Calories | 160 |
|---|---|
| Carbohydrates | 32g |
| Protein | 5g |
| Fat | 1g |
| Fiber | 1g |
The recipe is naturally low in fat and free from added sugars. Using whole wheat flour increases fiber content and adds minerals. For those watching gluten intake, swapping to gluten-free flour blends helps accommodate dietary needs. This bread also contains yeast and wheat, common allergens to keep in mind.
From a wellness perspective, homemade bread like this lets you control the ingredients and avoid preservatives found in store-bought loaves. Plus, the slow fermentation can make it easier to digest for some people. Pairing it with nutrient-dense sides like roasted veggies or protein-rich dishes makes for a balanced meal you can feel good about.
Conclusion
This easy crispy no-knead Dutch oven bread recipe is proof that great bread doesn’t have to be complicated. It’s approachable for beginners and rewarding for seasoned bakers alike. The simple ingredients and hands-off method mean you can enjoy fresh, crusty bread without the usual stress.
I love this recipe because it brings a little ceremony to my kitchen—a daily reminder that some of the best things come from patience and simplicity. Whether you want bread to impress guests or just to treat yourself on a quiet morning, this loaf fits the bill.
Give it a try, make it your own, and share how it turns out! I’m always curious to hear your twists or how you serve it alongside your favorite dishes. Happy baking!
Frequently Asked Questions
Can I use active dry yeast instead of instant yeast?
Yes, you can substitute active dry yeast but increase the rising time by 5 to 10 minutes as it takes longer to activate.
Do I have to use a Dutch oven?
While a Dutch oven is ideal for trapping steam and creating a crispy crust, you can use a heavy oven-safe pot with a lid or cover a baking dish tightly with foil as alternatives.
How long does the dough need to rise?
The dough should rise for 12 to 18 hours at room temperature until it’s bubbly and doubled in size. Longer rising develops flavor but don’t let it overproof.
Can I add herbs or cheese to the dough?
Absolutely! Fresh herbs, olives, or cheese can be mixed in before the first rise. Just keep in mind these add-ins may alter baking time slightly.
How do I store leftover bread?
Wrap the cooled bread in a kitchen towel or bread bag and store at room temperature for up to 2 days. For longer storage, slice and freeze for up to 3 months.
Pin This Recipe!

Easy Crispy No-Knead Dutch Oven Bread Recipe Perfect for Beginners

A simple, fuss-free no-knead bread recipe that yields a crispy crust and soft, airy crumb using a Dutch oven. Perfect for beginners and busy bakers.
- Prep Time: 10 minutes
- Cook Time: 45 to 50 minutes
- Total Time: 12 hours 55 minutes to 18 hours 10 minutes
- Yield: 1 loaf (about 8 servings) 1x
- Category: Bread, Baking
- Cuisine: American
Ingredients
- 3 cups (360g) all-purpose flour (unbleached preferred)
- 1/4 teaspoon instant yeast (substitute active dry yeast with extra rising time)
- 1 1/2 teaspoons salt (fine sea salt or kosher salt recommended)
- 1 1/2 cups (360ml) warm water (105°F to 110°F / 40°C to 43°C)
- Optional: 1 tablespoon olive oil (for softer crumb)
- Optional: Up to 1 cup (120g) whole wheat flour (replace part of all-purpose flour)
- Optional: 1 teaspoon honey (for slight caramel crust and yeast feed in cooler months)
Instructions
- In a mixing bowl, combine 3 cups (360g) all-purpose flour, 1/4 teaspoon instant yeast, and 1 1/2 teaspoons salt. Stir thoroughly with a spoon or spatula for about 2 minutes.
- Pour in 1 1/2 cups (360ml) warm water (105°F to 110°F). Stir until the dough is shaggy and sticky, about 3 minutes.
- Cover the bowl tightly with plastic wrap or a kitchen towel and let the dough rise at room temperature for 12 to 18 hours until bubbly and doubled in size.
- About 30 minutes before baking, place your Dutch oven with its lid inside the oven and preheat to 450°F (230°C).
- Lightly flour a work surface and gently turn the dough out. Shape it into a rough ball by folding edges toward the center, about 3 minutes.
- Place the dough ball on a sheet of parchment paper to help transfer it into the Dutch oven.
- Carefully remove the hot Dutch oven from the oven using oven mitts. Lift the parchment paper with the dough and place it inside the pot. Cover with the lid and bake for 30 minutes.
- Remove the lid and bake uncovered for another 15 to 20 minutes until the crust is deep golden brown and crisp. The loaf should sound hollow when tapped.
- Transfer the bread to a wire rack and let cool completely for at least one hour before slicing.
Notes
Use warm water between 105°F and 110°F to activate yeast without killing it. Preheat the Dutch oven for 30 minutes to trap steam and create a crispy crust. Let bread cool completely before slicing to set the crumb. If dough is sticky, dust hands and surface lightly with flour but avoid excess flour to prevent dry crust. For faster rise, increase yeast to 1 tablespoon and reduce rising time to 4-6 hours. Experiment with herbs or cheese carefully as they may affect hydration and baking time.
Nutrition
- Serving Size: 1 slice (about 60g)
- Calories: 160
- Fat: 1
- Carbohydrates: 32
- Fiber: 1
- Protein: 5
Keywords: no-knead bread, Dutch oven bread, easy bread recipe, beginner bread, crispy crust bread, homemade bread, no mixer bread