Love this? Save it for later!
Share the inspiration with your friends
“Hand me that bowl,” my next-door neighbor called from her kitchen one Saturday morning. I had just popped over to borrow some sugar, but before I even stepped fully inside, the warm, nutty aroma of peanut butter mixed with the sweet hint of strawberry jam pulled me into the heart of her home. She wasn’t making a fuss about it—no fancy plating or complicated steps—just this simple, effortless act of spreading comfort between soft pockets of dough. Honestly, it looked like she threw it together in a snap, but when I took a bite of those easy homemade PB&J pockets, I was hooked.
What really got me was how she mentioned freezing extras for busy days, which felt like a tiny secret weapon for any chaotic morning. Maybe you’ve been there—rushing through breakfast with everyone running late, scrambling to find something that’s quick but still tastes like it was made with care. That’s why these PB&J pockets stayed with me. They’re not just sandwiches; they’re little pockets of nostalgia and practicality wrapped up in one.
Let me tell you, this recipe isn’t complicated or trying too hard, which is exactly why it works so well. It’s the kind of thing you can whip up without thinking twice, yet somehow it turns out extraordinary every time. If you’re looking for freezer-friendly snacks that feel homemade and have that perfect balance of peanut butter and strawberry jam, this recipe is going to become your go-to.
Why You’ll Love This Recipe
After testing this recipe multiple times (and honestly, eating way more than I should admit), I’m confident this is one of the best homemade PB&J pockets you’ll try.
- Quick & Easy: Comes together in under 30 minutes, perfect for busy mornings or last-minute snack cravings.
- Simple Ingredients: No fancy grocery trips needed—just pantry staples like bread, peanut butter, and strawberry jam.
- Freezer Friendly: Make a big batch ahead of time, freeze, and reheat whenever hunger strikes.
- Crowd-Pleaser: Always a hit with kids and adults alike, whether for lunchboxes or an afternoon pick-me-up.
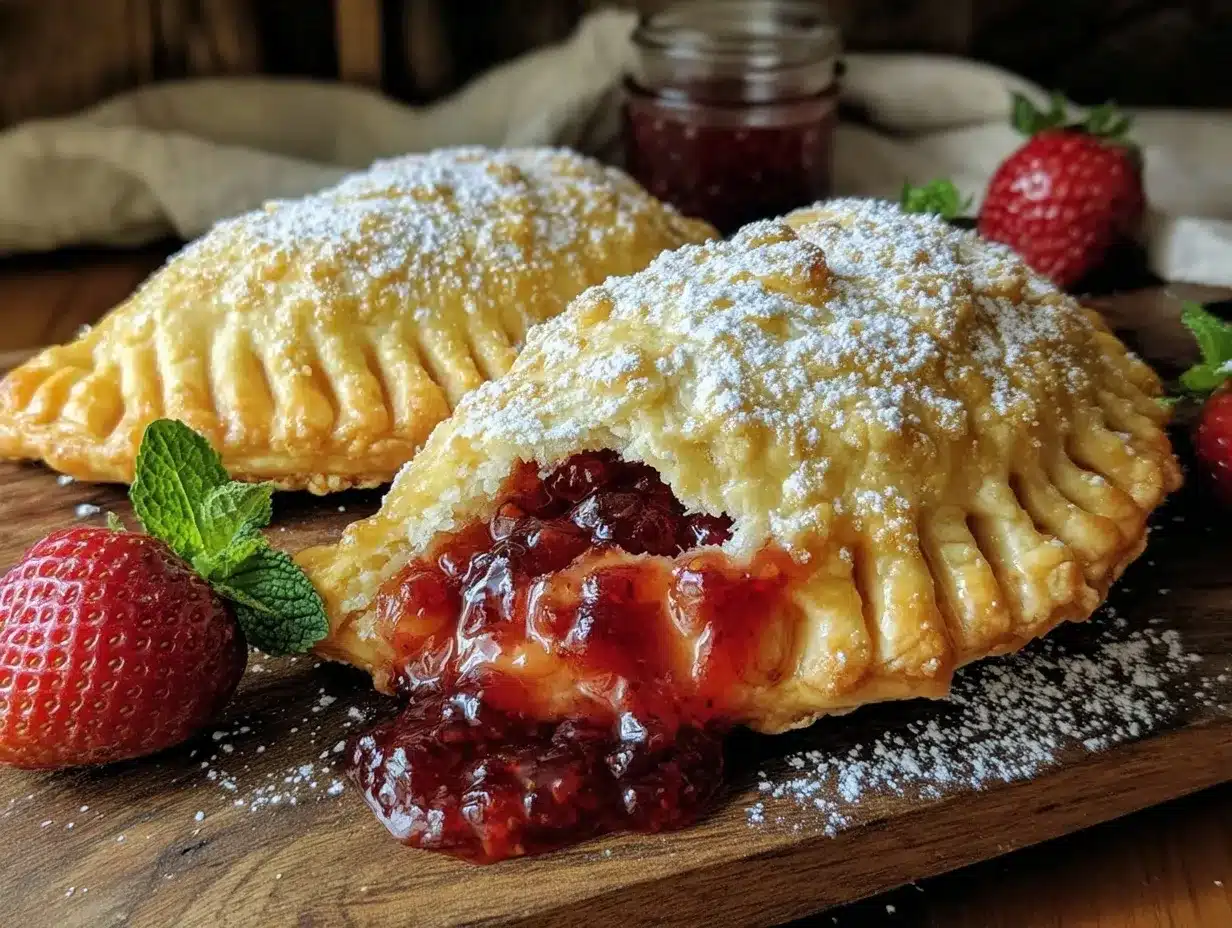
- Unbelievably Delicious: The pockets have a tender, flaky crust that holds the gooey peanut butter and sweet jam perfectly without any mess.
What sets this recipe apart is the simple trick of sealing the edges just right to keep the filling from leaking during freezing and reheating. Plus, I use a lightly brushed butter or oil on the outside before baking to get that golden, slightly crisp finish that feels so satisfying. This isn’t just another PB&J—you’re getting a handheld, freezer-friendly snack that’s just as good straight from the oven as it is after a quick reheat.
Honestly, it’s the kind of recipe that makes you smile after the first bite because it’s comfort food, convenience, and a tiny bit of magic all rolled into one. Whether you’re packing lunches or need something easy for unexpected guests, these pockets have got you covered.
What Ingredients You Will Need
This recipe uses simple, wholesome ingredients to deliver bold flavor and satisfying texture without the fuss. Most of these are pantry staples, and you can easily swap a few to suit your preferences or dietary needs.
- Bread Dough: 2 ½ cups all-purpose flour (about 310g) – I prefer King Arthur for consistent texture
- Yeast: 2 ¼ teaspoons active dry yeast (one packet)
- Warm Water: ¾ cup (180ml), around 110°F (43°C) to activate the yeast gently
- Sugar: 2 tablespoons granulated sugar (balances the yeast and dough flavor)
- Salt: 1 teaspoon fine salt
- Peanut Butter: ½ cup creamy peanut butter – Skippy or natural peanut butter works great here
- Strawberry Jam: ½ cup – homemade or store-bought, avoid overly runny jam to prevent leaks
- Unsalted Butter: 2 tablespoons, melted (for brushing the dough edges and the pocket tops)
- Egg Wash: 1 large egg beaten with 1 tablespoon water (optional, for a shiny golden crust)
Substitutions: For gluten-free, swap regular flour with a 1:1 gluten-free baking blend. Use almond or sunflower butter if you want to skip peanuts. If you prefer, swap strawberry jam with raspberry or grape jam for a flavor twist.
Equipment Needed
- Mixing bowls – one large for the dough and one small for wet ingredients
- Measuring cups and spoons – precise measurements help with dough consistency
- Stand mixer with dough hook (optional) – makes kneading easier, but hand kneading works fine
- Rolling pin – to roll out the dough evenly
- Baking sheet lined with parchment paper or a silicone baking mat
- Pastry brush – for applying melted butter and egg wash
- Sharp knife or pizza cutter – to cut the dough into pockets
If you don’t have a stand mixer, a large wooden spoon and some elbow grease will do the job just fine. I’ve used everything from a trusty hand mixer to just my hands in a pinch. For budget-friendly options, parchment paper and plastic wrap for covering dough are must-haves to keep things smooth.
Preparation Method
- Activate the Yeast: In a small bowl, combine warm water (¾ cup / 180ml) and sugar (2 tablespoons). Stir to dissolve, then sprinkle in the yeast (2 ¼ teaspoons). Let it sit for 5–7 minutes until frothy and bubbly, which means the yeast is alive and ready.
- Make the Dough: In a large bowl, mix the flour (2 ½ cups / 310g) and salt (1 teaspoon). Pour in the yeast mixture and stir until the dough starts to come together.
- Knead the Dough: Lightly flour your work surface and knead the dough for about 8–10 minutes until it’s smooth and elastic. If using a stand mixer, knead with a dough hook on medium speed for about 6 minutes. The dough should bounce back when poked.
- First Rise: Place the dough in a lightly oiled bowl, cover with a damp cloth or plastic wrap, and let it rise in a warm spot for 1 hour or until it doubles in size.
- Prepare Filling: While the dough rises, mix the peanut butter (½ cup) and strawberry jam (½ cup) in a bowl if you want to combine or keep separate for spreading during assembly. Keep handy.
- Shape the Pockets: Once risen, punch down the dough and roll it out on a floured surface into a 12×12 inch (30×30 cm) square. Cut the dough into 9 equal squares.
- Fill and Seal: Spread about 1 tablespoon peanut butter and 1 tablespoon jam in the center of each square, leaving a ½-inch border. Brush edges with melted butter (1 tablespoon) and fold the dough over to form a triangle or rectangle. Press edges firmly with a fork to seal—this prevents leaks during baking and freezing.
- Second Rise: Place pockets on the prepared baking sheet. Cover loosely and let rise for 20 minutes.
- Apply Egg Wash & Bake: Brush the tops with egg wash (optional) for a golden finish. Bake in a preheated 375°F (190°C) oven for 15–18 minutes or until golden brown.
- Cool & Freeze: Let pockets cool completely on a wire rack. For freezing, place them on a tray in a single layer until firm, then transfer to freezer bags. Reheat in a toaster oven or microwave when ready to eat.
Tip: If the filling starts to ooze during baking, your sealing wasn’t tight enough—next time, try pressing the edges a bit more firmly or adding a light egg wash on the folds before sealing.
Cooking Tips & Techniques
One thing I learned the hard way was how crucial it is to get the dough texture just right—too sticky, and it’s a mess; too dry, and the pockets turn tough. Kneading until the dough springs back is your best indicator. Another key tip is the sealing technique: I like to use my fingers first to pinch the edges, then go over with a fork for that extra tight seal.
Timing-wise, don’t rush the rising stages. The dough needs that time to develop flavor and texture, so a warm spot without drafts is perfect. I sometimes pop mine near a sunny window or on top of the fridge if the kitchen’s chilly.
For freezing, I always freeze the pockets individually on a baking sheet first—this stops them from sticking together in the bag. When reheating, the toaster oven brings back the crispness better than the microwave, but the microwave is a quick fix if you’re in a hurry.
Don’t be shy about brushing the outside with melted butter before baking—that little extra makes a huge difference in color and flavor. Just watch the oven closely towards the end to prevent burning.
Variations & Adaptations
Here are a few ways to mix things up with this recipe:
- Flavors: Swap strawberry jam with raspberry, blueberry, or even apricot for seasonal variety.
- Dietary: Use almond or sunflower seed butter for nut-free options, and gluten-free flour blends for those avoiding gluten.
- Sweetness: Add a sprinkle of cinnamon or a drizzle of honey inside before sealing for an extra flavor punch.
- Cooking Method: Instead of baking, try pan-frying the pockets in a little butter for a crispy, golden exterior.
- A personal twist I tried was adding a few mini chocolate chips with the jam for a surprise melty treat—totally worth it!
Serving & Storage Suggestions
These PB&J pockets are best served warm, fresh from the oven or freshly reheated. They make a wonderful handheld treat for lunchboxes, picnics, or quick breakfasts. Pair them with a glass of cold milk or a cup of tea for a comforting combo.
Store leftovers in an airtight container at room temperature for up to 2 days, or freeze as described earlier for up to 3 months. When reheating from frozen, allow a few extra minutes in the oven to ensure they’re heated through without drying out.
The flavors actually deepen a bit after resting, so if you can plan ahead, letting them thaw slightly before reheating can bring out more of that rich peanut butter and jam goodness.
Nutritional Information & Benefits
Each PB&J pocket (based on 9 servings) roughly contains:
- Calories: 200–220
- Protein: 6g
- Carbohydrates: 25g
- Fat: 9g (mostly from peanut butter)
- Fiber: 2g
Peanut butter provides heart-healthy fats and protein, while strawberry jam adds natural fruit sugars and antioxidants. This recipe offers a balanced snack that fuels kids and adults alike, especially when paired with a side of fresh fruit or veggies. Just be mindful of peanut allergies and opt for seed butters if needed.
Conclusion
If you want a snack that’s easy to make, freezer-friendly, and deliciously nostalgic, these easy homemade PB&J pockets with strawberry jam are exactly what your kitchen needs. They come together fast, use simple ingredients, and save you from those rushed mornings or unexpected hunger pangs.
I love how adaptable this recipe is—you can tweak the fillings or dough to suit your taste or dietary needs. Honestly, once you make a batch, you’ll wonder how you ever got by without these in your freezer.
Give this recipe a try, and feel free to share how you make it your own. I’m always curious to hear new twists or stories from the kitchen. Here’s to many cozy bites and happy snack times!
FAQs
Can I use store-bought dough instead of making my own?
Absolutely! Premade pizza or bread dough works fine and saves time. Just be sure to still seal the edges well to avoid leaks.
How long can I freeze the PB&J pockets?
You can freeze them for up to 3 months. For best quality, thaw and reheat within that time.
Can I make these pockets vegan?
Yes! Use dairy-free butter or oil for brushing, and swap the egg wash for a plant-based alternative like almond milk or aquafaba.
What’s the best way to reheat frozen pockets?
The toaster oven is ideal to keep them crispy. Alternatively, microwave for 30-60 seconds, but they might be softer.
Can I add other fillings besides peanut butter and jam?
Definitely! Nut butters, cream cheese with fruit, or even savory fillings like ham and cheese work well if you want a change.
Pin This Recipe!
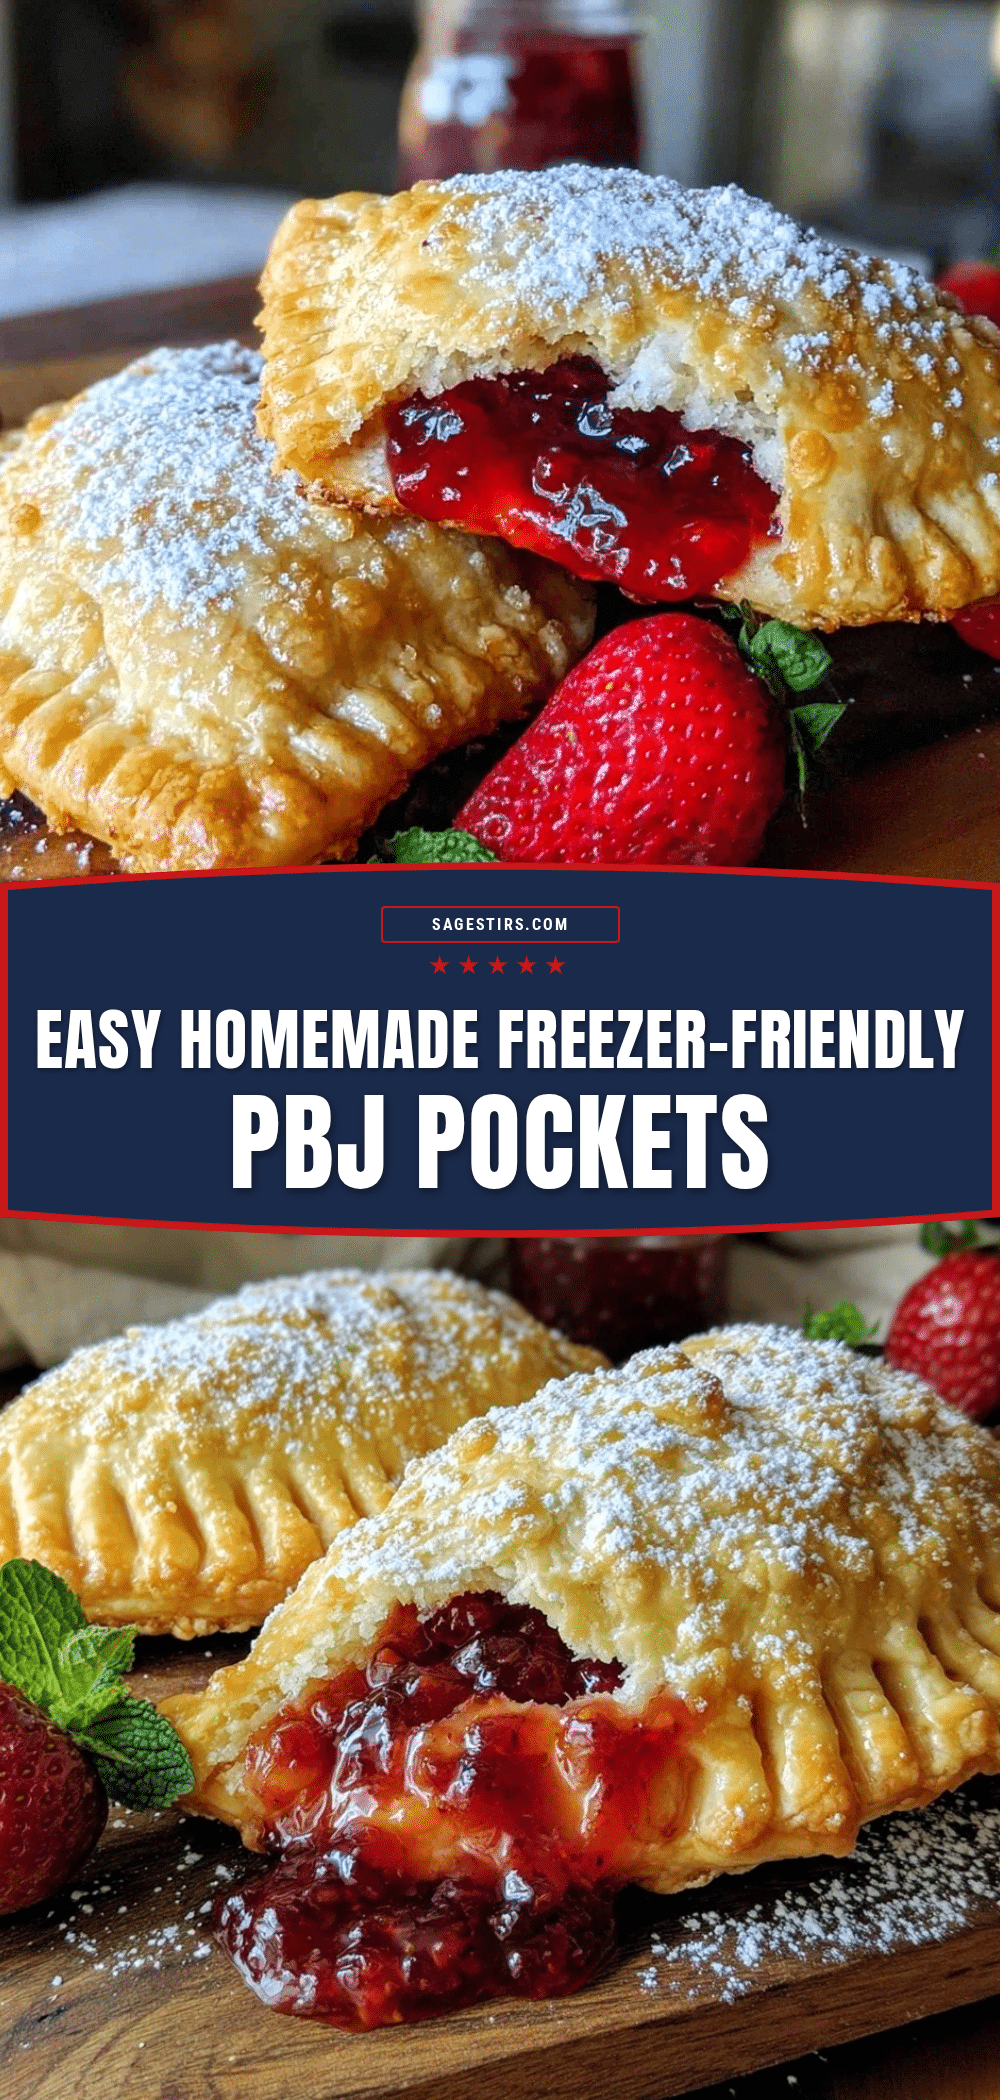
Easy Homemade PB&J Pockets with Strawberry Jam
These easy homemade PB&J pockets are freezer-friendly snacks with a tender, flaky crust filled with peanut butter and strawberry jam, perfect for busy mornings or quick snacks.
- Prep Time: 15 minutes
- Cook Time: 18 minutes
- Total Time: 1 hour 35 minutes
- Yield: 9 servings 1x
- Category: Snack
- Cuisine: American
Ingredients
- 2 ½ cups all-purpose flour (about 310g / 11 oz)
- 2 ¼ teaspoons active dry yeast (one packet)
- ¾ cup warm water (180ml / ¾ cup), around 110°F (43°C)
- 2 tablespoons granulated sugar
- 1 teaspoon fine salt
- ½ cup creamy peanut butter
- ½ cup strawberry jam
- 2 tablespoons unsalted butter, melted
- 1 large egg beaten with 1 tablespoon water (optional, for egg wash)
Instructions
- Activate the yeast by combining warm water and sugar in a small bowl. Stir to dissolve, sprinkle in yeast, and let sit for 5–7 minutes until frothy.
- In a large bowl, mix flour and salt. Pour in yeast mixture and stir until dough starts to come together.
- Knead the dough on a floured surface for 8–10 minutes until smooth and elastic, or knead with a stand mixer dough hook on medium speed for 6 minutes.
- Place dough in a lightly oiled bowl, cover, and let rise in a warm spot for 1 hour or until doubled in size.
- Mix peanut butter and strawberry jam in a bowl or keep separate for spreading.
- Punch down the dough and roll out into a 12×12 inch square. Cut into 9 equal squares.
- Spread about 1 tablespoon peanut butter and 1 tablespoon jam in the center of each square, leaving a ½-inch border.
- Brush edges with melted butter, fold dough over to form a triangle or rectangle, and press edges firmly with a fork to seal.
- Place pockets on a baking sheet, cover loosely, and let rise for 20 minutes.
- Brush tops with egg wash if using, and bake at 375°F (190°C) for 15–18 minutes until golden brown.
- Cool completely on a wire rack. For freezing, place pockets on a tray in a single layer until firm, then transfer to freezer bags.
- Reheat frozen pockets in a toaster oven or microwave before serving.
Notes
Ensure edges are sealed tightly to prevent filling leaks during baking and freezing. Brush outside with melted butter before baking for a golden, crisp finish. Freeze pockets individually on a tray before bagging to prevent sticking. Reheat in toaster oven for best crispness.
Nutrition
- Serving Size: 1 PB&J pocket
- Calories: 210
- Sugar: 8
- Sodium: 150
- Fat: 9
- Saturated Fat: 2
- Carbohydrates: 25
- Fiber: 2
- Protein: 6
Keywords: PB&J pockets, peanut butter and jelly, freezer-friendly snacks, homemade snacks, strawberry jam, easy snack recipe