Love this? Save it for later!
Share the inspiration with your friends
There used to be this little café downtown, tucked between a dry cleaner and a vintage shop, that made the most incredible zucchini bars. They called them “Zucchini Frites” on the menu, but honestly, they were these golden, cheesy, crispy squares of pure magic. When they closed—just a note on the door one Tuesday, “Thanks for ten years, folks”—I was genuinely heartbroken. I mean, I actually stood there reading that note three times, hoping it was a joke. After twelve tries—some burnt, some soggy, one that my neighbor politely called “interesting”—I finally got it.
These Crispy Parmesan Zucchini Bars are my love letter to that café. They’ve got that same addictively crunchy outside and tender, savory inside that made me order them every single time. The secret, I discovered, is a simple trick with salt and a really good quality Parmesan. You know that feeling when you bite into something and it’s exactly what you’ve been craving? That’s this recipe.
I make these all summer long, especially when the zucchini from my garden starts taking over the counter. They’re the side dish that disappears before the main course even hits the table. Let me tell you, there’s something deeply satisfying about turning a vegetable that’s literally everywhere in August into something people fight over. And honestly, after that first batch I got right, I knew I had to share it with you.
Why You’ll Love This Recipe
These aren’t your average zucchini side dish. I’ve tested this recipe more times than I care to admit, and every single batch confirmed what I suspected from the start—this is the version worth keeping. Here’s why you’ll find yourself making these on repeat:
- Quick & Easy: From counter to table in under 30 minutes. Perfect for those “what am I making for dinner?” panic moments.
- Simple Ingredients: You probably have everything in your kitchen right now. No fancy trips to specialty stores required.
- Perfect for Summer: Great for barbecues, potlucks, or just a Tuesday night when you need something crispy and satisfying.
- Crowd-Pleaser: I’ve served these to kids, picky eaters, and serious foodies. They all reach for seconds.
- Unbelievably Delicious: The texture is what gets everyone. Crispy on the outside, tender on the inside, with that salty, nutty Parmesan flavor throughout.
What makes this recipe different from all the others? It’s the technique. Most zucchini bar recipes end up soggy because they skip the crucial salting step. I learned that the hard way—batch three was a sad, watery mess. By drawing out the excess moisture before baking, you get that perfect crispy exterior that stays crunchy even after cooling. Plus, I use a blend of breadcrumbs and Parmesan that creates a crust so good, you’ll want to put it on everything.
This recipe isn’t just good—it’s the kind that makes you close your eyes after the first bite. It’s comfort food reimagined: healthier than fried zucchini, faster than most side dishes, but with the same soul-soothing satisfaction. Perfect for impressing guests without stress, or turning a simple summer meal into something memorable.
What Ingredients You Will Need
This recipe uses simple, wholesome ingredients that work together to create something truly special. Most of these are pantry staples, which makes these bars perfect for spontaneous cooking.
- Zucchini: 3 medium zucchini (about 1.5 pounds total). Look for firm, dark green zucchini without soft spots. Medium ones work best—they have fewer seeds and less water content than the giant ones.
- Salt: 1 teaspoon kosher salt (for drawing out moisture). I use Diamond Crystal kosher salt—it’s less salty by volume, so you have more control. If using table salt, use only ½ teaspoon.
- Parmesan Cheese: 1 cup (100g) freshly grated Parmesan cheese. Please, please buy a block and grate it yourself. The pre-shredded stuff has anti-caking agents that prevent melting and that beautiful crispy texture. I recommend a good Parmigiano-Reggiano if your budget allows—it makes a real difference.
- Panko Breadcrumbs: ½ cup (60g) panko breadcrumbs. These are flakier than regular breadcrumbs and create a lighter, crunchier crust. Regular breadcrumbs will work in a pinch, but the texture won’t be quite as amazing.
- Eggs: 2 large eggs, lightly beaten. They help bind everything together and add richness. For a vegan version, you can use flax eggs (2 tablespoons ground flaxseed mixed with 6 tablespoons water, let sit for 5 minutes).
- Garlic: 2 cloves garlic, minced. Fresh garlic is non-negotiable here—the jarred stuff tastes flat. I use a microplane for the finest mince, which distributes the flavor evenly.
- Dried Oregano: 1 teaspoon dried oregano. It adds that subtle Italian-inspired flavor that complements the Parmesan beautifully. You can substitute with dried basil or Italian seasoning.
- Black Pepper: ½ teaspoon freshly ground black pepper. Freshly ground makes a noticeable difference in flavor.
- Olive Oil: 2 tablespoons extra-virgin olive oil, for brushing the baking sheet. It helps the bottoms get golden and crispy without sticking.
- Fresh Parsley: 2 tablespoons chopped fresh parsley, for garnish (optional but recommended). It adds a pop of color and freshness.
For the best texture, I recommend using a box grater for the zucchini rather than a food processor. The food processor can turn the zucchini into mush, while hand-grating gives you nice, even shreds that hold their shape during baking.
Equipment Needed
You don’t need a professional kitchen to make these bars, but having the right tools makes the process smoother and more enjoyable.
- Box Grater or Food Processor: For shredding the zucchini. I prefer a box grater—it gives you more control and creates better texture. If using a food processor, use the shredding disc, not the regular blade.
- Clean Kitchen Towel or Cheesecloth: For squeezing out the zucchini moisture. A thin dish towel works perfectly. I’ve also used paper towels in a pinch, but they tend to tear and leave lint.
- Large Mixing Bowl: For combining the ingredients. Any large bowl will work.
- Rimmed Baking Sheet: A standard 13×18-inch baking sheet. The rim is important—it catches any oil and prevents spills.
- Parchment Paper: For lining the baking sheet. It prevents sticking and makes cleanup a breeze. Silicone baking mats work too, but parchment gives a crisper bottom.
- Pastry Brush: For brushing the olive oil onto the parchment. A silicone brush is easiest to clean.
- Spatula: For spreading and flipping the bars. A thin metal spatula works best for getting under the crispy edges.
- Cooling Rack: Optional but helpful—it prevents the bottoms from getting soggy as they cool.
If you don’t have a pastry brush, just drizzle the oil onto the parchment and spread it around with a paper towel. It’s not fancy, but it works. And if you’re in a budget-friendly mood, skip the cooling rack and just transfer the bars to a plate lined with paper towels.
Preparation Method
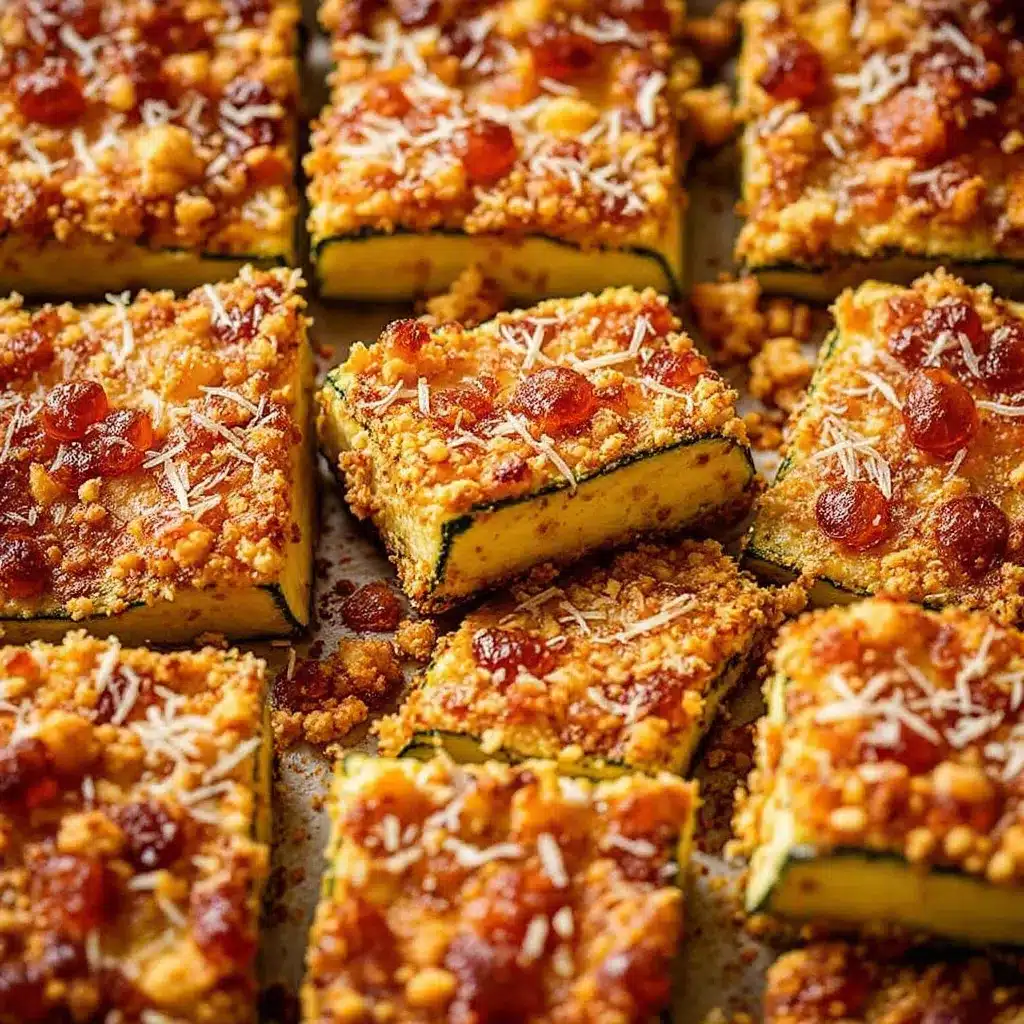
Let me walk you through this step by step. I’ve made these bars more times than I can count, and these are the exact steps that give you the best results every single time.
- Preheat your oven to 425°F (220°C). Getting the oven hot is crucial for that crispy exterior. While it’s heating, line a rimmed baking sheet with parchment paper and brush it lightly with olive oil. Set it aside.
- Shred the zucchini. Using the large holes of a box grater, shred your 3 medium zucchini. You should end up with about 4 cups of shredded zucchini. Don’t worry if it looks like a lot—it will shrink significantly after salting and squeezing.
- Salt the zucchini. Place the shredded zucchini in a large mixing bowl and sprinkle with 1 teaspoon kosher salt. Toss everything together with your hands to distribute the salt evenly. Let it sit for 10 minutes. You’ll see liquid pooling at the bottom of the bowl—that’s the excess moisture leaving the zucchini. This step is non-negotiable if you want crispy bars instead of sad, soggy ones.
- Squeeze out the moisture. After 10 minutes, transfer the salted zucchini to a clean kitchen towel or a double layer of cheesecloth. Gather the corners and twist tightly, squeezing over the sink. You’ll be amazed at how much liquid comes out—I usually get about ½ cup of green-tinted water. Keep squeezing until no more liquid drips out. This is the most important step. I learned this lesson after my third attempt came out like zucchini pudding.
- Mix the dry ingredients. In the same bowl (wipe it dry first), combine 1 cup freshly grated Parmesan cheese, ½ cup panko breadcrumbs, 2 minced garlic cloves, 1 teaspoon dried oregano, and ½ teaspoon black pepper. Stir with a fork until everything is evenly distributed.
- Add the zucchini and eggs. Add the squeezed zucchini to the bowl with the dry ingredients. Add 2 lightly beaten eggs. Mix everything together with a fork or your hands until it’s well combined. The mixture should be moist but not wet—it should hold together when pressed between your fingers.
- Shape the bars. Transfer the mixture to the prepared baking sheet. Using your hands or a spatula, press it into an even rectangle about ½ inch thick. Don’t make it too thin or the bars will fall apart. Don’t make it too thick or they won’t get crispy. Aim for a uniform thickness so everything cooks evenly.
- Bake for 20-25 minutes. Place the baking sheet in the preheated oven and bake for 20 minutes. The edges should be golden brown and the top should be set. If you want extra crispy bars, switch the oven to broil for the last 1-2 minutes—watch carefully so they don’t burn. I learned that one the hard way when I got distracted and ended up with charcoal bars.
- Cool and cut. Remove from the oven and let the bars cool on the baking sheet for 5 minutes. This resting time helps them set and makes them easier to cut. Using a sharp knife or pizza cutter, slice into 12-16 bars. Transfer to a serving platter and garnish with fresh parsley if desired.
A quick note: the bars will be most crispy right out of the oven. They’ll soften slightly as they cool, but they’ll still be delicious. If you’re serving them later, reheat in a 350°F oven for 5 minutes to revive the crunch.
Cooking Tips & Techniques
After making these bars more times than I care to admit, I’ve picked up a few tricks that make a real difference. Let me share what I’ve learned—including the mistakes that taught me the most.
Don’t skip the salting step. I know it adds 10 minutes to the process, but it’s the difference between crispy perfection and soggy disappointment. Zucchini is basically a water balloon disguised as a vegetable. If you don’t draw out that moisture, it will steam in the oven instead of crisping up. I once thought I could skip this step because I was in a hurry—never again. The bars were edible, but they lacked that addictive crunch.
Use freshly grated Parmesan. I cannot stress this enough. The pre-shredded stuff in the green can contains cellulose and anti-caking agents that prevent proper melting. When you grate your own Parmesan, it melts into the mixture and creates those beautiful crispy edges. Plus, the flavor is infinitely better. Buy a block of Parmigiano-Reggiano and grate it yourself—your taste buds will thank you.
Press the mixture firmly. When you’re shaping the bars on the baking sheet, really press down with your hands or a spatula. The tighter the mixture is packed, the better the bars will hold together. Loose packing leads to bars that crumble when you try to pick them up. I learned this when my fourth batch turned into zucchini crumbles—delicious crumbles, but not bars.
Watch the broiler carefully. If you decide to broil for extra crispiness, stay right there. The difference between golden perfection and burnt disaster is about 30 seconds. I may have set off the smoke detector once. Or twice. Let’s just say I’ve learned to set a timer.
Cut with a sharp knife or pizza cutter. A dull knife will drag through the bars and mess up the crispy edges. A sharp knife or pizza cutter gives you clean cuts and keeps the bars intact. I use a pizza cutter for speed, but a chef’s knife works great too.
Serve immediately for maximum crunch. These bars are best within 15 minutes of coming out of the oven. If you’re making them for a party, time your baking so they’re ready just before serving. Your guests will appreciate the effort.
Variations & Adaptations
One of the best things about this recipe is how adaptable it is. I’ve experimented with different flavors and dietary needs, and here are my favorite variations.
Gluten-Free Version: Swap the panko breadcrumbs for gluten-free panko or crushed pork rinds for a keto-friendly option. I’ve tried both, and the pork rind version is surprisingly delicious—it adds an extra layer of crunch and a subtle savory flavor. Just crush them in a bag with a rolling pin before mixing.
Cheese Variations: While Parmesan is classic, you can experiment with other hard cheeses. Pecorino Romano adds a saltier, sharper flavor. Aged Gouda gives a smoky, nutty taste. I once made a batch with half Parmesan and half sharp cheddar, and it was incredible—the cheddar added a gooey richness that the Parmesan alone doesn’t provide.
Herb Swaps: The dried oregano is great, but feel free to experiment. Fresh basil (finely chopped) adds a sweet, peppery note. Dried thyme gives an earthy, almost floral flavor. My personal favorite is a combination of oregano and a pinch of red pepper flakes for a little heat. It wakes up the whole dish.
Add Vegetables: You can add finely grated carrot or yellow squash to the mixture for extra color and nutrients. Just make sure to squeeze out the moisture from any added vegetables just like you do with the zucchini. I’ve also added finely chopped sun-dried tomatoes (the oil-packed kind, patted dry) for a burst of tangy flavor.
Air Fryer Adaptation: If you have an air fryer, you can make these bars even crispier. Shape the mixture into small patties and place them in the air fryer basket in a single layer. Cook at 375°F (190°C) for 10-12 minutes, flipping halfway through. They come out perfectly golden and extra crunchy. Just work in batches so you don’t overcrowd the basket.
Spicy Version: Add ½ teaspoon of cayenne pepper or 1 finely chopped jalapeño to the mixture. The heat pairs beautifully with the salty Parmesan and the mild zucchini. I made this version for a game day party, and it was the first thing to disappear from the snack table.
Serving & Storage Suggestions
These bars are incredibly versatile when it comes to serving. Here’s how I like to enjoy them, along with tips for keeping them fresh.
Serving Temperature: These bars are best served warm, straight from the oven. The exterior is at its crispiest, and the interior is tender and flavorful. That said, they’re also delicious at room temperature—perfect for picnics or potlucks where you can’t control the timing.
Presentation Ideas: Arrange the bars on a wooden cutting board or a white platter for a beautiful presentation. Garnish with fresh parsley or basil for a pop of color. For dipping, serve with marinara sauce, ranch dressing, or a simple garlic aioli. I love making a quick dipping sauce by mixing ½ cup Greek yogurt with 1 minced garlic clove, a squeeze of lemon juice, and a pinch of salt.
Complementary Dishes: These bars pair beautifully with grilled chicken, fish, or steak. They’re also great alongside a simple green salad or as part of a summer vegetable spread. For a vegetarian meal, serve them with a big bowl of tomato soup or a hearty grain salad. I often make them as an appetizer for pasta dinners—they’re the perfect pre-dinner snack.
Storage Instructions: If you have leftovers (unlikely, but possible), store them in an airtight container in the refrigerator for up to 3 days. The texture will soften, but the flavor will still be great. To reheat, place them on a baking sheet in a 350°F (175°C) oven for 5-7 minutes. This revives some of the crispiness. Avoid microwaving—it makes them soggy and sad.
Freezing Tips: You can freeze these bars for up to 2 months. Let them cool completely, then arrange them in a single layer on a baking sheet and freeze until solid. Transfer to a freezer-safe bag or container. To reheat, bake directly from frozen at 375°F (190°C) for 12-15 minutes, or until heated through and crispy. I like to double the batch and freeze half for busy weeknights.
Flavor Development: Interestingly, the flavors actually deepen and meld together after a day in the refrigerator. The garlic and oregano become more pronounced, and the Parmesan flavor intensifies. So if you’re planning ahead, these bars are actually better the next day—just reheat them properly to bring back the crunch.
Nutritional Information & Benefits
These Crispy Parmesan Zucchini Bars are not only delicious but also packed with nutritional benefits. Here’s a quick breakdown.
Estimated Nutritional Values (per serving, based on 12 bars):
- Calories: 110
- Total Fat: 7g
- Saturated Fat: 3g
- Cholesterol: 45mg
- Sodium: 280mg
- Total Carbohydrates: 6g
- Dietary Fiber: 1g
- Sugars: 2g
- Protein: 8g
Health Benefits: Zucchini is low in calories but high in nutrients. It’s an excellent source of vitamin C, vitamin A, and potassium. The fiber content supports digestive health, and the antioxidants help fight inflammation. Parmesan cheese adds protein and calcium, while the eggs provide high-quality protein and essential vitamins like B12 and D.
Dietary Considerations: This recipe is naturally vegetarian and can be made gluten-free with a simple substitution. It’s low-carb friendly (about 6g net carbs per serving) and can be adapted for keto by using almond flour instead of panko. For a dairy-free version, use nutritional yeast instead of Parmesan and a dairy-free cheese alternative.
Potential Allergens: This recipe contains dairy (Parmesan cheese) and eggs. It also contains gluten if using traditional panko breadcrumbs. Always check your ingredient labels if cooking for someone with allergies.
I love that this recipe lets me enjoy a crispy, satisfying side dish without the guilt of deep frying. It’s comfort food that actually nourishes your body—something I feel good about serving to my family and friends.
Conclusion
These Crispy Parmesan Zucchini Bars have become a staple in my kitchen for good reason. They’re quick enough for a busy weeknight, impressive enough for company, and delicious enough that everyone—even the picky eaters—asks for the recipe. That café downtown may be gone, but their spirit lives on in every batch I make.
I hope you give these bars a try and make them your own. Maybe you’ll add extra garlic, or swap in a different cheese, or serve them with your favorite dipping sauce. That’s the beauty of a simple recipe—it leaves room for your creativity. Don’t be afraid to experiment and find your perfect version.
When you make these, I’d love to hear how they turn out. Drop a comment below and let me know if you tried any variations, or share a photo of your creation. And if you’re looking for more summer side dishes, check out our grilled vegetable skewers or this simple tomato basil salad—they pair perfectly with these bars for a complete summer meal.
Happy cooking, friends! May your zucchini be crispy and your Parmesan be freshly grated.
Frequently Asked Questions
Can I make these zucchini bars ahead of time?
Yes! You can prepare the mixture up to 24 hours in advance and store it in the refrigerator. When you’re ready to bake, simply spread it on the prepared baking sheet and bake as directed. You may need to add 2-3 minutes to the baking time since the mixture will be cold.
Why are my zucchini bars falling apart?
This usually happens for one of three reasons: not enough moisture was squeezed out of the zucchini, the mixture wasn’t pressed firmly enough on the baking sheet, or they were cut before they had time to set. Make sure to squeeze the zucchini thoroughly, press the mixture firmly, and let the bars cool for at least 5 minutes before cutting.
Can I use yellow squash instead of zucchini?
Absolutely! Yellow squash works perfectly in this recipe. It has a similar moisture content and texture, so just follow the same steps for salting and squeezing. You can even use a mix of zucchini and yellow squash for a colorful presentation.
How do I make these bars dairy-free?
To make dairy-free zucchini bars, substitute the Parmesan cheese with nutritional yeast (use about ⅓ cup for a similar cheesy flavor) or a dairy-free Parmesan alternative. Make sure your breadcrumbs are also dairy-free. The texture will be slightly different, but they’ll still be delicious and crispy.
Can I bake these in a different pan shape?
Yes! You can press the mixture into a greased 8×8-inch baking pan for thicker bars, or shape them into individual patties on the baking sheet for more of a fritter-style snack. Just adjust the baking time accordingly—thicker bars may need 5-10 minutes more, while individual patties may cook faster.
Pin This Recipe!
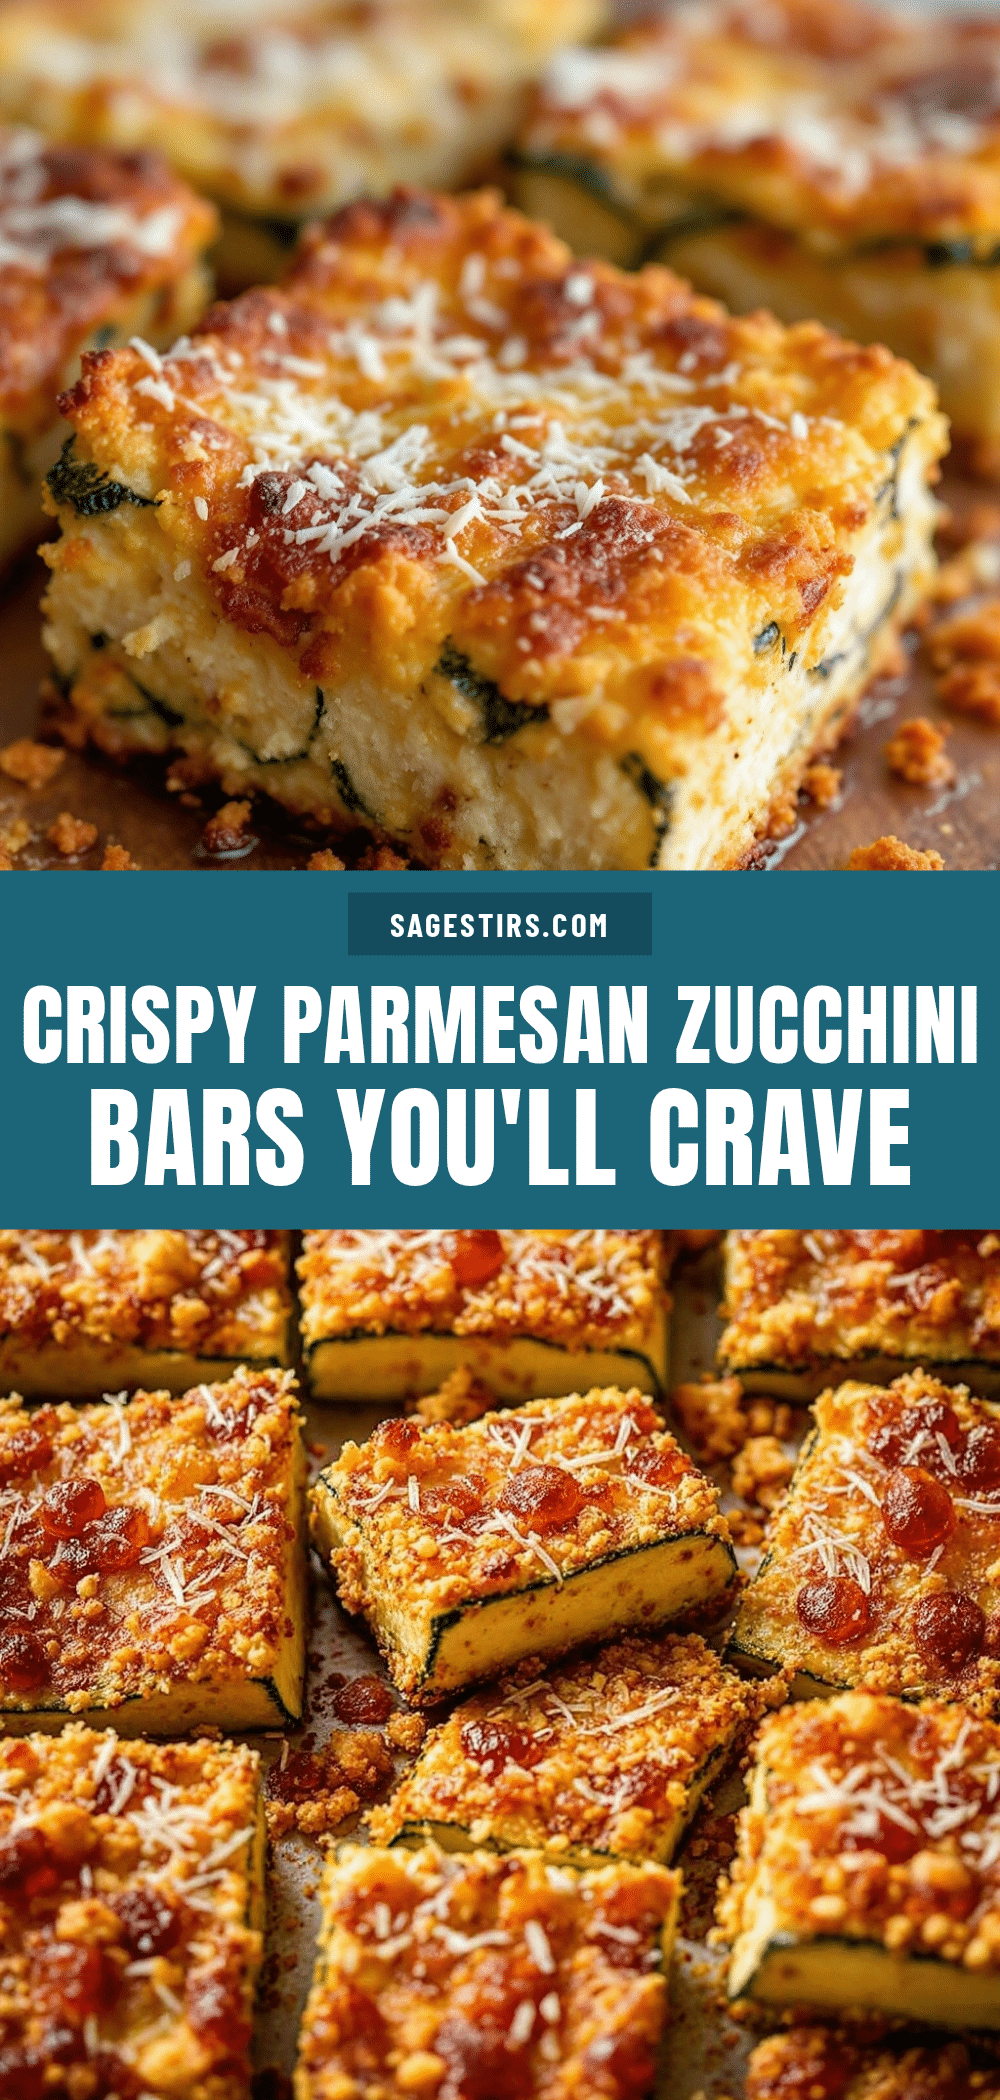
Crispy Parmesan Zucchini Bars: The Best Easy Summer Side
These Crispy Parmesan Zucchini Bars are golden, cheesy, and perfectly crunchy on the outside with a tender, savory inside. Made with simple ingredients and a clever salting trick, they’re the ultimate summer side dish that disappears before the main course hits the table.
- Prep Time: 15 minutes
- Cook Time: 25 minutes
- Total Time: 40 minutes
- Yield: 12-16 bars (about 4 servings) 1x
- Category: Side Dish
- Cuisine: Italian-American
Ingredients
- 3 medium zucchini (about 1.5 pounds total)
- 1 teaspoon kosher salt (for drawing out moisture)
- 1 cup (100g) freshly grated Parmesan cheese
- ½ cup (60g) panko breadcrumbs
- 2 large eggs, lightly beaten
- 2 cloves garlic, minced
- 1 teaspoon dried oregano
- ½ teaspoon freshly ground black pepper
- 2 tablespoons extra-virgin olive oil (for brushing the baking sheet)
- 2 tablespoons chopped fresh parsley (for garnish, optional)
Instructions
- Preheat your oven to 425°F (220°C). Line a rimmed baking sheet with parchment paper and brush it lightly with olive oil. Set aside.
- Using the large holes of a box grater, shred the 3 medium zucchini. You should have about 4 cups of shredded zucchini.
- Place the shredded zucchini in a large mixing bowl and sprinkle with 1 teaspoon kosher salt. Toss to distribute evenly. Let sit for 10 minutes until liquid pools at the bottom.
- Transfer the salted zucchini to a clean kitchen towel or double layer of cheesecloth. Gather the corners and twist tightly, squeezing over the sink until no more liquid drips out (about ½ cup of liquid).
- In the same bowl (wiped dry), combine 1 cup freshly grated Parmesan cheese, ½ cup panko breadcrumbs, 2 minced garlic cloves, 1 teaspoon dried oregano, and ½ teaspoon black pepper. Stir with a fork until evenly distributed.
- Add the squeezed zucchini and 2 lightly beaten eggs to the bowl. Mix with a fork or hands until well combined. The mixture should be moist but not wet, holding together when pressed.
- Transfer the mixture to the prepared baking sheet. Using your hands or a spatula, press it into an even rectangle about ½ inch thick.
- Bake for 20-25 minutes, until the edges are golden brown and the top is set. For extra crispiness, switch to broil for the last 1-2 minutes, watching carefully to avoid burning.
- Remove from the oven and let cool on the baking sheet for 5 minutes. Using a sharp knife or pizza cutter, slice into 12-16 bars. Transfer to a serving platter and garnish with fresh parsley if desired.
Notes
Don’t skip the salting step—it’s crucial for crispy bars. Use freshly grated Parmesan for best melting and flavor. Press the mixture firmly on the baking sheet to prevent crumbling. Serve immediately for maximum crunch. Reheat leftovers in a 350°F oven for 5-7 minutes to revive crispiness.
Nutrition
- Serving Size: 3-4 bars
- Calories: 110
- Sugar: 2
- Sodium: 280
- Fat: 7
- Saturated Fat: 3
- Carbohydrates: 6
- Fiber: 1
- Protein: 8
Keywords: zucchini bars, crispy zucchini, Parmesan zucchini, summer side dish, easy zucchini recipe, baked zucchini, vegetarian side dish