Love this? Save it for later!
Share the inspiration with your friends
It was 10:47 PM on a random Wednesday, and a cookie craving hit me like a freight train. I mean, the kind of craving where you can already taste the warm, melty chocolate and the soft, doughy center. I didn’t have the energy for a full batch, and honestly, the idea of chilling dough for an hour felt like a cruel joke at that hour. I had a single stick of butter, a sad-looking egg, and a desperate need for something sweet. That’s when I decided to break all the cookie rules and just… go for it. No chilling, no fuss, just straight from mixing bowl to oven.
Let me tell you, I was half-expecting a flat, greasy mess. I mean, isn’t that what every baking blog warns you about? But something about the late-night quiet made me bold. I threw the ingredients together, scooped them onto a pan, and watched them transform in the oven. The smell alone was worth it—buttery, vanilla-y, and pure comfort. When I pulled them out, they were perfect: golden edges, soft centers, and that signature crinkle top. I may have eaten three before they even cooled. Maybe you’ve been there, standing in your kitchen at a ridiculous hour, just needing one good thing to go right. This recipe is that thing.
These easy small-batch chocolate chip cookies have become my go-to for those moments. They are quick, they are reliable, and they taste like you spent hours on them. No fancy techniques, no waiting around, just pure cookie satisfaction. Honestly, this no-chill recipe changed my baking life. It’s the kind of recipe you’ll keep coming back to, late at night or any time of day.
Why You’ll Love This Recipe
I have tested this recipe more times than I care to admit, tweaking the butter temperature and the flour ratio until it was just right. What I ended up with is a cookie that is genuinely foolproof. You don’t need to be a pastry chef or even a confident baker to nail these. Here is why this recipe stands out from the crowd:
- Quick & Easy: From start to finish, these cookies are ready in under 20 minutes. No chilling, no complicated steps, just mix and bake.
- Simple Ingredients: You likely have everything in your pantry right now. No need for a special trip to the store for obscure flours or hard-to-find extracts.
- Perfect for a Small Craving: This recipe makes exactly six generous cookies. It is ideal for when you want a treat without a mountain of leftovers tempting you all week.
- Crowd-Pleaser: I have brought these to last-minute gatherings and they disappear in minutes. The texture is spot-on—crispy edges with a soft, almost gooey center.
- Unbelievably Delicious: The secret is in the technique. By using melted butter and a slightly higher brown sugar ratio, you get that chewy, rich flavor without the wait. It is next-level comfort food.
This isn’t just another chocolate chip cookie recipe. It is the one I turn to when I need a guaranteed win. The texture is that perfect balance of crunchy and soft, and the flavor is deeply caramelized from the brown sugar. It is comfort food at its finest—fast, satisfying, and made with love (and a little bit of impatience).
What Ingredients You Will Need
This recipe uses simple, everyday ingredients to create a cookie that tastes anything but ordinary. The magic is in the proportions and the technique, not in a long list of fancy items.
- Unsalted Butter: 4 tablespoons (56g), melted and slightly cooled. Using melted butter is the key to the no-chill method. It creates a chewier texture and helps the cookies spread just the right amount. I prefer using unsalted so I can control the salt level. If you only have salted butter, just reduce the added salt by a pinch.
- Light Brown Sugar: ¼ cup (50g), packed. Brown sugar is non-negotiable here for that deep, caramel-like flavor and soft texture. It has more moisture than white sugar, which helps keep the centers tender. I like Domino brand for its consistent quality.
- Granulated Sugar: 2 tablespoons (25g). This adds a touch of sweetness and helps create those crispy, golden edges. The combination of both sugars is what gives the cookie its perfect texture contrast.
- Large Egg Yolk: 1. Using just the yolk instead of the whole egg is a game-changer. It adds richness and fat without the extra moisture from the egg white, which can make the dough too sticky. Save the egg white for your morning scramble!
- Vanilla Extract: ½ teaspoon. Pure vanilla extract makes a difference here. Imitation vanilla can give a slightly artificial taste. I always reach for Nielsen-Massey or simply a store-brand pure extract.
- All-Purpose Flour: ½ cup (60g). Spoon and level your flour for the best results. Scooping directly from the bag can pack in too much flour, leading to dry cookies.
- Baking Soda: ¼ teaspoon. This is our leavening agent. It helps the cookies spread and become slightly chewy. Make sure it is fresh—if it doesn’t fizz when mixed with a little vinegar, it is time for a new box.
- Salt: ¼ teaspoon. Salt is not just for flavor; it balances the sweetness and enhances the chocolate. I use fine sea salt for even distribution.
- Chocolate Chips: ⅓ cup (60g). Use good-quality chocolate chips or a chopped chocolate bar for those melty puddles. I am partial to Ghirardelli 60% cacao chips for a rich, not-too-sweet flavor. You can also use semi-sweet or dark chocolate, whichever you prefer.
Ingredient Substitution Guidance:
- For a dairy-free version, substitute the butter with a high-quality vegan butter stick, like Earth Balance. The texture may be slightly different, but it still works beautifully.
- If you only have a whole egg, you can use that instead of just the yolk, but the cookies will be a tiny bit cakier and less chewy. Still delicious, just different.
- Gluten-free all-purpose flour blends, like Bob’s Red Mill 1-to-1, can be used in place of regular flour. No other adjustments needed.
Equipment Needed
You don’t need a professional bakery setup for these cookies. A few basic tools will do the trick. Here is what you will need:
- Mixing Bowls: One medium bowl for the wet ingredients and one small bowl for the dry ingredients. I love my set of Pyrex glass bowls—they are sturdy and easy to clean.
- Whisk: For combining the wet ingredients smoothly. A fork works in a pinch if you don’t have one.
- Rubber Spatula: Essential for folding in the flour and chocolate chips without overmixing. A wooden spoon also works.
- Baking Sheet: A standard half-sheet pan is perfect. I recommend a light-colored, non-stick pan for even browning. Dark pans can cause the bottoms to burn.
- Parchment Paper or Silicone Baking Mat: This prevents sticking and ensures easy cleanup. Parchment paper is my go-to for the crispiest bottoms.
- Cookie Scoop or Tablespoon: For uniform cookies. A #40 cookie scoop (about 1.5 tablespoons) is ideal for this recipe. If you don’t have one, just use a regular spoon and shape the dough balls with your hands.
- Cooling Rack: While not strictly necessary, a wire rack lets the cookies cool evenly and prevents soggy bottoms. If you don’t have one, let them cool on the baking sheet for a few minutes before transferring to a plate.
Preparation Method

Alright, let’s make some cookies. This method is designed to be as straightforward as possible, but I’ve included all the little tricks I’ve learned along the way to ensure success every single time.
- Preheat and Prep: First things first, preheat your oven to 350°F (175°C). Line your baking sheet with parchment paper. This step is crucial for easy removal and clean-up. While the oven is heating, melt your butter in a microwave-safe bowl or in a small saucepan over low heat. You want it melted but not hot—just warm to the touch.
- Mix the Wet Ingredients: In your medium mixing bowl, combine the melted butter, packed brown sugar, and granulated sugar. Whisk them together vigorously for about 30 seconds until the mixture looks like wet sand and has slightly lightened in color. This step helps dissolve the sugar for a smoother cookie. Then, add the egg yolk and vanilla extract. Whisk again until everything is fully combined and looks a bit glossy.
- Combine the Dry Ingredients: In your small bowl, whisk together the all-purpose flour, baking soda, and salt. This ensures the leavening agent and salt are evenly distributed throughout the dough so every cookie is perfectly balanced.
- Bring It All Together: Pour the dry ingredients into the wet ingredients. Using your rubber spatula, fold gently until just a few streaks of flour remain. Do not overmix! Overworking the dough will develop the gluten and result in tough cookies. We want them tender.
- Add the Chocolate: Gently fold in the chocolate chips until they are evenly distributed. The dough will be thick and slightly sticky. That is exactly what we want.
- Scoop and Shape: Using your cookie scoop or a spoon, portion the dough into 6 equal balls, each about 1.5 tablespoons in size. For that classic bakery look, gently pull each dough ball apart into two halves and press them back together with the rough, torn side facing up. This creates those beautiful, craggly tops as they bake. Place the dough balls on the prepared baking sheet, spacing them about 2 inches apart.
- Bake: Pop the baking sheet into the preheated oven. Bake for 8-10 minutes, or until the edges are golden brown and the centers look slightly puffed and set. The tops might look a tiny bit underdone in the middle—that is perfect. They will continue to bake from the residual heat of the pan.
- Cool and Enjoy: Let the cookies cool on the baking sheet for 5 minutes. This is a critical step. They are very fragile right out of the oven. After 5 minutes, transfer them to a wire rack to cool completely, or just grab one while it is still warm. I won’t judge.
Sensory Cues: When you whisk the butter and sugars, it should smell like buttery caramel. When you fold in the flour, the dough should be cohesive but not dry. When the cookies are done, the kitchen will smell like a bakery, and the edges will be a deep, golden brown.
Cooking Tips & Techniques
I have made more batches of these cookies than I can count, and I have learned a few things the hard way. Here are my best tips to make sure your batch is perfect.
- Don’t Skip the Butter Cooling: I once used butter that was too hot, and my cookies spread into thin, greasy pancakes. Let the melted butter cool for a minute or two before mixing it with the sugar. You want it warm, not piping hot.
- Weigh Your Flour: This is the biggest game-changer for consistent baking. If you don’t have a scale, spoon the flour into your measuring cup and level it off with a knife. Scooping directly from the bag can add an extra 20-30% more flour, leading to dry, cakey cookies.
- Chill the Dough (If You Must): I know this is a no-chill recipe, but if your kitchen is very hot or your butter was too soft, you can pop the scooped dough in the fridge for 15 minutes. It will help prevent excessive spreading. For standard room temperature, you don’t need it.
- Use a Cookie Scoop: Uniform size means uniform baking. Some cookies will be done before others if they are different sizes. A scoop ensures they all finish at the same time.
- My Biggest Failure: I once tried to double this recipe and used a whole egg instead of just the yolk. The cookies came out puffy and more like little cakes. It was a valuable lesson in sticking to the recipe for the perfect texture. The egg yolk is the secret to that chewy, rich center.
Variations & Adaptations
This recipe is a fantastic base for experimentation. Here are some of my favorite ways to change it up.
- Double Chocolate Chip: Replace 1 tablespoon of the all-purpose flour with 1 tablespoon of unsweetened cocoa powder. The result is a rich, fudgy chocolate cookie. I add white chocolate chips to this version for a beautiful contrast.
- Nutty & Salty: Add ¼ cup of toasted, chopped pecans or walnuts along with the chocolate chips. Sprinkle a tiny bit of flaky sea salt (like Maldon) on top of each dough ball just before baking. The salt enhances the sweetness and adds a wonderful crunch.
- Gluten-Free Adaptation: As mentioned, substitute the all-purpose flour with a 1-to-1 gluten-free baking flour blend. I have done this many times for friends, and the texture is remarkably similar. Just be sure the blend contains xanthan gum for structure.
- M & M Cookies: For a fun, colorful twist, swap the chocolate chips for ⅓ cup of regular M & M’s. This is a huge hit with kids and for holiday baking.
- Peanut Butter Swirl: After scooping the dough onto the pan, drop a small dollop of peanut butter (about ½ teaspoon) on top of each cookie and gently swirl it in with a toothpick. Bake as directed. The peanut butter gets all warm and melty—absolutely divine.
I personally love the double chocolate version for a richer dessert. It feels more indulgent, like a fancy bakery cookie, but it is just as easy to make.
Serving & Storage Suggestions
These cookies are best enjoyed warm, right from the oven. That moment when the chocolate is still melty and the edges are perfectly crisp is pure magic. But they are also fantastic at room temperature.
- Serving Temperature: Serve them warm or at room temperature. For an extra treat, pop a cookie in the microwave for 10 seconds to re-melt the chocolate.
- Presentation: Stack them on a small plate or in a cute jar. A glass of cold milk is the classic pairing, but they are also wonderful with a cup of strong coffee or a scoop of vanilla ice cream for an impromptu ice cream sandwich.
- Storage: Store leftover cookies in an airtight container at room temperature for up to 3 days. They will stay soft and chewy. I like to add a slice of bread to the container—it absorbs excess moisture and keeps the cookies from drying out.
- Freezing: You can freeze the baked cookies for up to 3 months. Wrap them individually in plastic wrap and place them in a freezer bag. Thaw at room temperature for about 30 minutes. You can also freeze the unbaked dough balls. Scoop them onto a baking sheet, freeze until solid, then transfer to a freezer bag. Bake from frozen, adding 2-3 minutes to the baking time.
- Flavor Development: Honestly, these cookies are amazing on day one, but on day two, the flavors meld together even more. The brown sugar flavor deepens, and the texture becomes even more tender. They rarely last that long in my house, though.
Nutritional Information & Benefits
Let’s be real—these are a treat. But knowing what’s in them helps you enjoy them mindfully. Here is the estimated nutritional breakdown for one cookie (based on 6 cookies per batch).
| Nutrient | Amount per Cookie |
|---|---|
| Calories | ~195 kcal |
| Fat | 10g |
| Carbohydrates | 25g |
| Protein | 2g |
| Sugar | 16g |
Pin This Recipe!
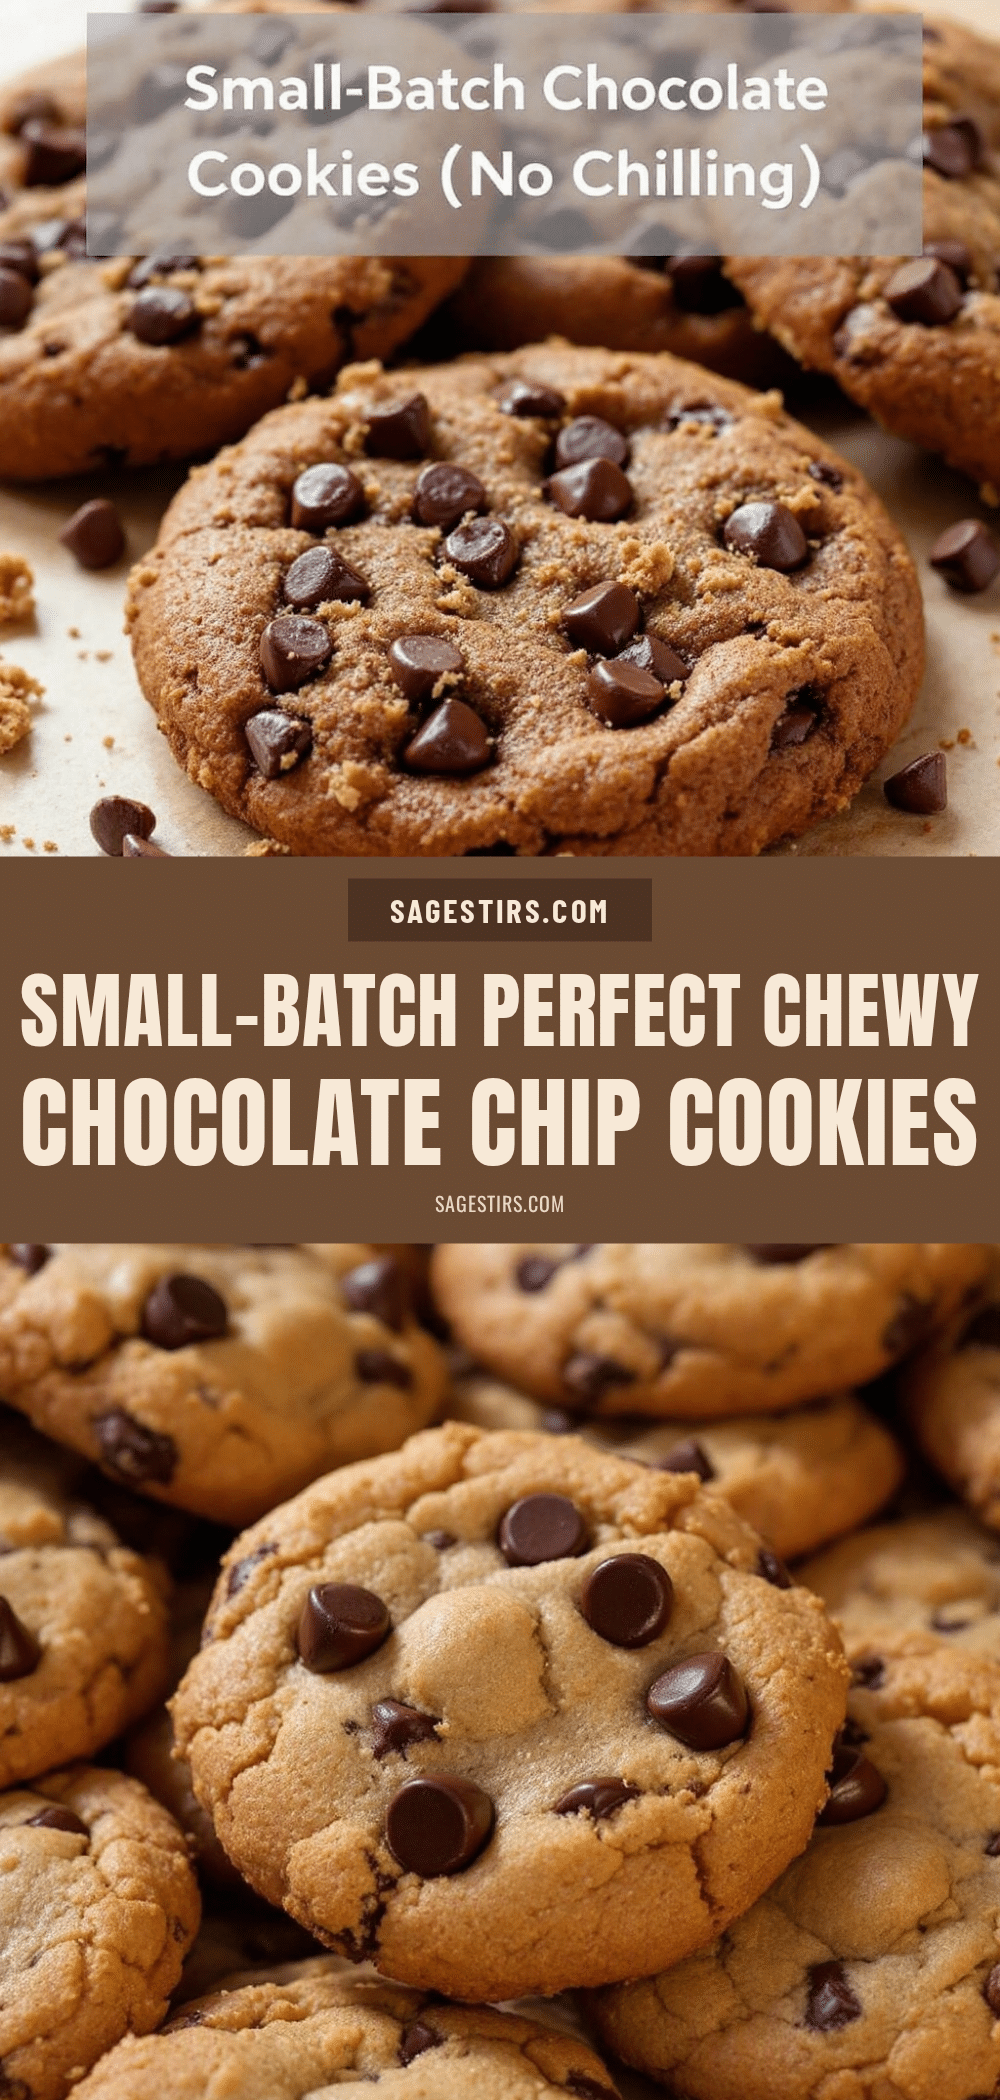
Easy Small-Batch Chocolate Chip Cookies: Best No-Chill Recipe

These easy small-batch chocolate chip cookies are quick, reliable, and taste like you spent hours on them. No chilling, no fuss, just pure cookie satisfaction in under 20 minutes.
- Prep Time: 10 minutes
- Cook Time: 10 minutes
- Total Time: 20 minutes
- Yield: 6 cookies 1x
- Category: Dessert
- Cuisine: American
Ingredients
- 4 tablespoons (56g) unsalted butter, melted and slightly cooled
- ¼ cup (50g) light brown sugar, packed
- 2 tablespoons (25g) granulated sugar
- 1 large egg yolk
- ½ teaspoon vanilla extract
- ½ cup (60g) all-purpose flour, spooned and leveled
- ¼ teaspoon baking soda
- ¼ teaspoon salt
- ⅓ cup (60g) chocolate chips
Instructions
- Preheat oven to 350°F (175°C). Line a baking sheet with parchment paper.
- In a medium bowl, whisk together melted butter, brown sugar, and granulated sugar for about 30 seconds until well combined and slightly lightened.
- Add egg yolk and vanilla extract; whisk until glossy and fully combined.
- In a small bowl, whisk together flour, baking soda, and salt.
- Pour dry ingredients into wet ingredients; fold with a rubber spatula until just a few streaks of flour remain. Do not overmix.
- Gently fold in chocolate chips until evenly distributed. Dough will be thick and slightly sticky.
- Scoop dough into 6 equal balls (about 1.5 tablespoons each). For craggly tops, pull each ball apart into two halves and press back together with torn side up. Place on prepared baking sheet, 2 inches apart.
- Bake for 8-10 minutes, until edges are golden brown and centers look slightly puffed and set.
- Let cookies cool on baking sheet for 5 minutes, then transfer to a wire rack to cool completely or enjoy warm.
Notes
For best results, use melted butter that is warm but not hot. Spoon and level flour to avoid dry cookies. If kitchen is very warm, chill scooped dough for 15 minutes to prevent spreading. For a dairy-free version, substitute with vegan butter. For gluten-free, use a 1-to-1 gluten-free flour blend.
Nutrition
- Serving Size: 1 cookie
- Calories: 195
- Sugar: 16
- Sodium: 150
- Fat: 10
- Saturated Fat: 6
- Carbohydrates: 25
- Fiber: 1
- Protein: 2
Keywords: small-batch chocolate chip cookies, no-chill cookies, easy cookie recipe, quick cookies, late-night cookies