Love this? Save it for later!
Share the inspiration with your friends
I was standing there in my pajamas, holding a spoonful of melted chocolate that was rapidly cooling into a stubborn, grainy mess. The kids were screaming about costumes upstairs. My partner was frantically looking for the car keys. And I had absolutely nothing to put in the trick-or-treat buckets because I had assumed we’d buy something at the store. Let’s face it, I am not the parent who has a stash of individually wrapped candies ready to go. I am the parent who improvises with whatever is in the pantry while trying not to cry.
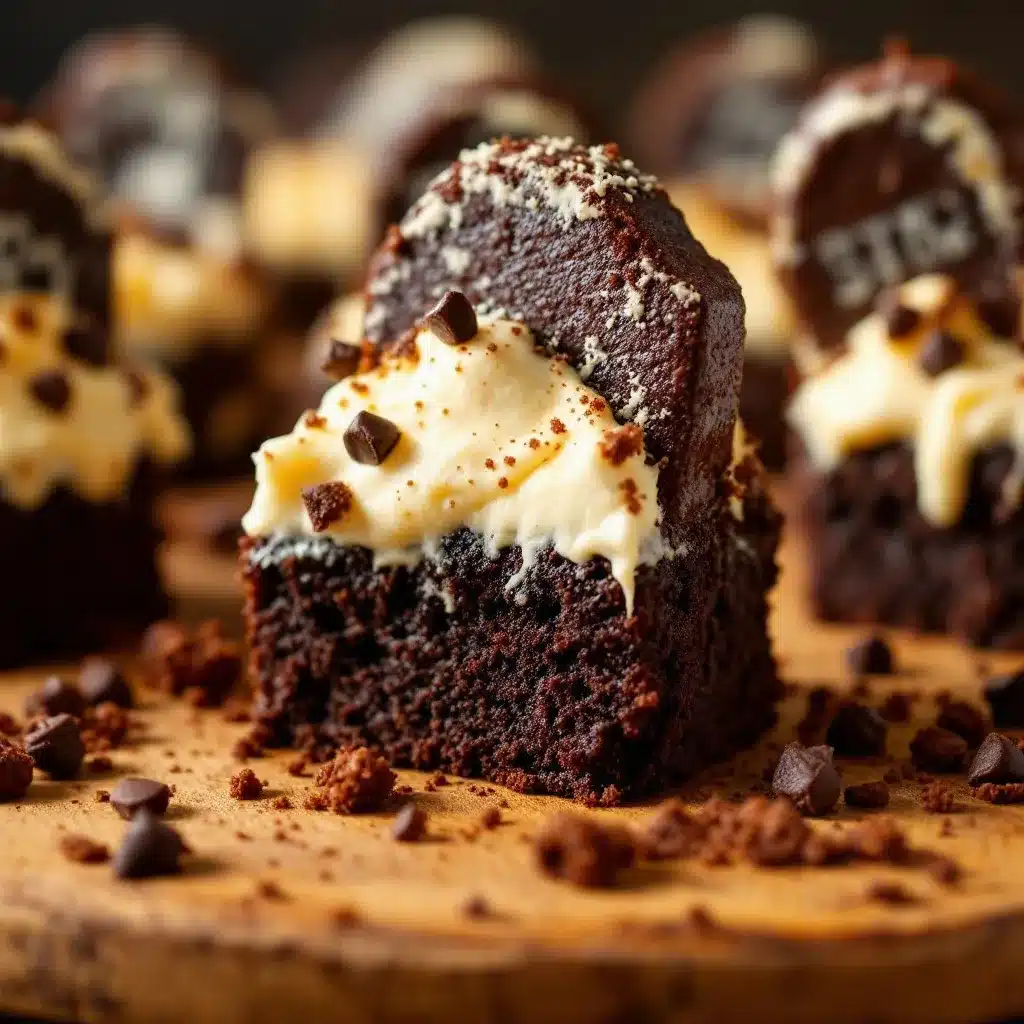
So I looked at the mess. I looked at the chocolate. And I realized we could make Spooky Halloween Brownie Tombstones right then and there. No baking. No oven. Just chocolate, cookies, and a little bit of desperation. It wasn’t planned. It was pure chaos fuel. But when I finally stuck a white chocolate shard into a square of that fudgy base, it actually looked like a gravestone. A cute one, sure, but definitely spooky enough for five-year-olds.
We rushed them onto a plate, threw them in the freezer for ten minutes while I put on real pants, and handed them out. The kids thought they were genius. The neighbors thought we were prepared. Honestly, I just felt lucky the chocolate hadn’t seized up completely. That moment stuck with me. It wasn’t about perfection. It was about making something magical out of nothing. And that is exactly why this recipe works.
Why You’ll Love This Recipe
I’ve tested a lot of no-bake desserts over the years. Some are too sweet, some are too hard to cut, and some just fall apart the moment you touch them. This version is different because it hits that sweet spot between easy and impressive. It’s not just another cookie dough ball rolled in sprinkles. It’s structured, it’s fun, and it actually looks like what it’s supposed to be.
- Quick & Easy: This comes together in under 10 minutes of active time. You don’t need to wait for an oven to preheat or worry about burning the edges. It’s perfect for those last-minute Halloween emergencies or when you just want a sweet treat without the fuss.
- Simple Ingredients: You likely already have everything in your kitchen. Chocolate chips, butter, crushed cookies, and white chocolate. No fancy grocery trips needed for exotic spices or hard-to-find items.
- Perfect for Halloween Parties: These are great for school exchanges, trick-or-treating, or just a cozy movie night. They are easy to grab with one hand while holding a pumpkin bucket with the other.
- Crowd-Pleaser: Kids love the “tombstone” shape, and adults love the rich chocolate flavor. It gets rave reviews from everyone, even the picky eaters who usually refuse to try anything new.
- Unbelievably Delicious: The texture is next-level comfort food. The cookie crumbles provide a slight crunch, while the chocolate binder keeps it fudgy and soft. It’s not dry, and it’s not overly sweet.
What makes this recipe stand out from the rest is the simplicity of the assembly. You aren’t baking a cake and carving it. You are building these little structures from scratch. It feels more like a craft project than cooking, which makes it engaging for kids to help with. I remember making a batch last year, and my son insisted on making the tombstones crooked because “ghosts live in crooked houses.” It was adorable, and it tasted even better because of it.
This isn’t just a dessert; it’s the kind of treat that makes you close your eyes after the first bite and remember being a kid. It’s comfort food reimagined for the spookiest night of the year. Whether you are impressing guests or just treating yourself, these tombstones turn a simple evening into something memorable without any stress.
What Ingredients You Will Need
This recipe uses simple, wholesome ingredients to deliver bold flavor and satisfying texture without the fuss. You don’t need any special equipment or hard-to-find items. The magic happens because of how these basic components interact when melted and chilled together.
For the Brownie Base
- Dark or Semi-Sweet Chocolate Chips: 1 cup (175g). I recommend using a brand like Ghirardelli or Guittard for the best melt and richest flavor. Avoid chips that have too many stabilizers, as they can make the base gritty.
- Unsalted Butter: 2 tablespoons. This adds richness and helps bind the crumbs. Softened butter works, but melting it with the chocolate is faster.
- Cream Cheese (Optional but Recommended): 2 ounces (50g), softened. This is the secret weapon. It adds a slight tang that cuts through the sweetness and gives the brownies a fudgy, cheesecake-like density. It also helps them hold their shape better.
- Crushed Cookies: 1 ½ cups (approx. 150g). You need about 20 regular Oreos. Double Stuf works too, but you may need slightly fewer since they are sweeter. Graham crackers are a good alternative if you want a lighter texture.
For the Tombstone Details
- White Chocolate Chips: ½ cup (85g). For the “stone” part. You can use real white chocolate or white chocolate melting wafers. Wafers are easier to work with because they have a higher melting point and don’t seize as easily.
- Black Food Coloring Gel: A few drops. Gel coloring is essential here. Liquid food coloring will make the white chocolate runny and grainy. Gel keeps the texture smooth.
- Mini Chocolate Chips or Black Sprinkles: For the “R.I.P.” lettering. Mini chips are easier to stick onto the curved surface of the tombstone. Black sprinkles add a fun, spooky texture.
If you are allergic to dairy, you can easily swap the butter and cream cheese for coconut oil and dairy-free cream cheese. The texture might be slightly softer, so you will need to chill them longer. For a gluten-free option, just use certified gluten-free Oreos or crushed gluten-free shortbread cookies. The process remains exactly the same.
Equipment Needed
You don’t need much for this recipe, which is part of the appeal. A medium microwave-safe bowl is the most important tool. I prefer glass or ceramic because they heat evenly and don’t get too hot to touch. If you don’t have one, a heatproof glass measuring cup works perfectly.
A silicone spatula is essential for stirring the chocolate. It helps you scrape every bit of chocolate from the sides of the bowl so nothing goes to waste. I also recommend using a small paring knife or a butter knife. You’ll use this to shape the tombstones and write the letters. A dull knife is actually better here because it doesn’t cut through the chocolate as easily.
For chilling, you’ll need a baking sheet or a large plate. A silicone baking mat is helpful if you don’t want to use parchment paper, as the chocolate sticks less to silicone. If you are in a rush, a standard freezer works fine, but make sure you have space. No fancy equipment is needed, and you can do this with basic kitchen tools you already own.
Preparation Method
- Melt the Chocolate Base: In your microwave-safe bowl, combine the chocolate chips and butter. Microwave on high for 30 seconds. Stir well. If there are still chunks, microwave for another 15 seconds and stir again. You want a smooth, glossy mixture. Do not overheat, or the chocolate will seize. This takes about 1 minute total.
- Add the Cream Cheese: If using cream cheese, add it to the warm chocolate now. Stir vigorously until completely smooth and incorporated. The mixture should look like a thick, fudgy batter. If it looks too thick, add a teaspoon of milk or cream.
- Crumble the Cookies: Place your cookies in a large zip-top bag. Use a rolling pin or a heavy pan to crush them into fine crumbs. You want them small, like sand, but a few larger pieces are okay for texture. Pour the crumbs into the chocolate mixture.
- Combine and Chill: Stir the crumbs into the chocolate until fully coated. The mixture will look dry at first, but keep stirring. It should come together into a thick dough. Cover the bowl with plastic wrap and refrigerate for 20 minutes. This step is crucial. It firms up the fats so the dough is easy to handle.
- Shape the Tombstones: Remove the dough from the fridge. Scoop out about 1 tablespoon of mixture per tombstone. Roll it into a ball, then flatten it slightly with your fingers. Shape one end into a rounded arch, like a classic gravestone. Place them on a parchment-lined baking sheet.
- Melt the White Chocolate: In a clean bowl, melt the white chocolate chips. Microwave in 15-second intervals, stirring between each. Add the black gel food coloring a drop at a time until you reach a dark gray or black color. Stir well.
- Dip and Decorate: Using a fork, dip each brownie tombstone halfway into the colored white chocolate. Lift it out and let the excess drip off. Tap the fork gently on the side of the bowl to remove drips. Place back on the baking sheet.
- Write the Letters: While the white chocolate is still wet, use a toothpick or a small spoon to write “R.I.P.” or draw a cross. If using mini chocolate chips, press them gently into the white chocolate to form letters. This adds a nice 3D effect.
- Final Set: Place the baking sheet in the freezer for at least 15 minutes. The chocolate needs to be completely hard before you touch them. Once set, transfer them to an airtight container.
Cooking Tips & Techniques
One common mistake people make is using too much heat when melting chocolate. Chocolate is sensitive. If it gets too hot, it becomes grainy and stiff. Always use low power or short bursts. If your chocolate looks separated or dry, it’s burned. Start over.
Another tip is to keep your hands dry. Moisture is the enemy of chocolate. If your hands are sweaty or wet, the chocolate will seize up on your fingers. Wash and dry your hands thoroughly before shaping the brownies. If the dough is too sticky, dip your fingers in cold water briefly, then dry them again.
When dipping the tombstones, don’t submerge them completely. Half-dipping creates a nice contrast between the dark brownie and the white “stone.” It also makes them easier to eat. If you dip them all the way, the bottom might be too hard to bite through.
For the letters, precision isn’t necessary. In fact, crooked letters look more authentic and spooky. Don’t stress about making them perfect. The charm of these tombstones is their rustic, homemade look. If you make a mistake, just press another chip over it. No one will notice.
Finally, work in small batches. If you dip all the tombstones at once, the first ones will start to harden before you can decorate them. Dip five or six at a time, decorate them, then go back for the next batch. This ensures everything stays workable and fresh.
Variations & Adaptations
While the classic dark chocolate version is my favorite, there are plenty of ways to change this up. For a lighter option, use vanilla wafers instead of Oreos. The flavor will be milder, but the texture will be similar. You can also use ginger snap cookies for a spicy kick that pairs well with the chocolate.
If you want to make these nut-free for school parties, just ensure your cookies and chocolate chips are certified nut-free. Many brands offer this now. For a dairy-free version, use coconut oil instead of butter and dairy-free chocolate chips. The result is slightly softer, so chill them longer.
For a different color scheme, use green food coloring for “slime” tombstones or orange for pumpkin-themed ones. You can also skip the black coloring entirely and just use plain white chocolate for a “ghostly” look. Press candy eyes into the white chocolate for a cute ghost effect.
I once tried making these with peanut butter cups crushed into the base. It was delicious but very sweet. If you go this route, reduce the amount of chocolate chips slightly to balance the sugar. The possibilities are endless, so don’t be afraid to experiment.
Serving & Storage Suggestions
These tombstones are best served chilled. The cold temperature keeps the chocolate firm and the brownie base fudgy. Arrange them on a platter with some fake spiderwebs or plastic bats for a spooky presentation. They pair well with hot cocoa or milk. Avoid serving them at room temperature, as the chocolate may become soft and messy.
For storage, keep them in an airtight container in the refrigerator. They will stay fresh for up to one week. If you need to make them ahead, you can freeze them for up to three months. Thaw them in the refrigerator overnight before serving. Do not leave them out for more than two hours, especially in warm weather.
When reheating, do not use the microwave. Let them come to room temperature naturally. If you need to soften them slightly, place them in the fridge for 10 minutes. The flavors develop over time, becoming richer and more cohesive after a day or two in the fridge.
Nutritional Information & Benefits
These brownies are rich in calories and sugar, so enjoy them in moderation. Each tombstone contains approximately 150-180 calories, depending on the size and specific ingredients used. The chocolate provides a small amount of antioxidants, and the cookies offer carbohydrates for energy.
They are not a health food, but they are a fun treat for special occasions. For those with gluten sensitivities, the gluten-free variation is a safe option. Always check labels for allergens. The cream cheese adds a bit of protein, which helps balance the sugar slightly.
I view these as a occasional indulgence rather than a daily snack. They are perfect for Halloween or birthday parties where the focus is on fun rather than nutrition. Balance them with healthy meals during the day.
Conclusion
Spooky Halloween Brownie Tombstones are a fun, easy, and delicious way to celebrate the season. They require no baking, minimal ingredients, and offer a creative twist on classic brownies. I love this recipe because it brings joy to both kids and adults, and it’s easy enough to make on a busy weeknight.
Feel free to customize the colors, shapes, and decorations to match your theme. Share your creations with me in the comments below! I’d love to see your spooky designs. Don’t forget to share this recipe with friends who need a last-minute Halloween treat.
Happy Halloween, and enjoy your spooky sweets!
FAQs
Can I use milk chocolate instead of dark chocolate?
Yes, you can. Milk chocolate will make the brownies sweeter and softer. You may need to chill them longer to ensure they hold their shape.
Why is my white chocolate grainy?
This usually happens if it was overheated or if water got into the bowl. Make sure your bowl is completely dry and melt it slowly in short intervals.
How long do these last in the fridge?
They stay fresh for up to one week in an airtight container. After that, they may start to dry out.
Can I make these nut-free?
Yes, just use nut-free cookies and chocolate chips. Many brands offer certified nut-free options.
Do I have to use Oreos?
No, you can use any cookie you like. Graham crackers, vanilla wafers, or ginger snaps work well too.
Pin This Recipe!
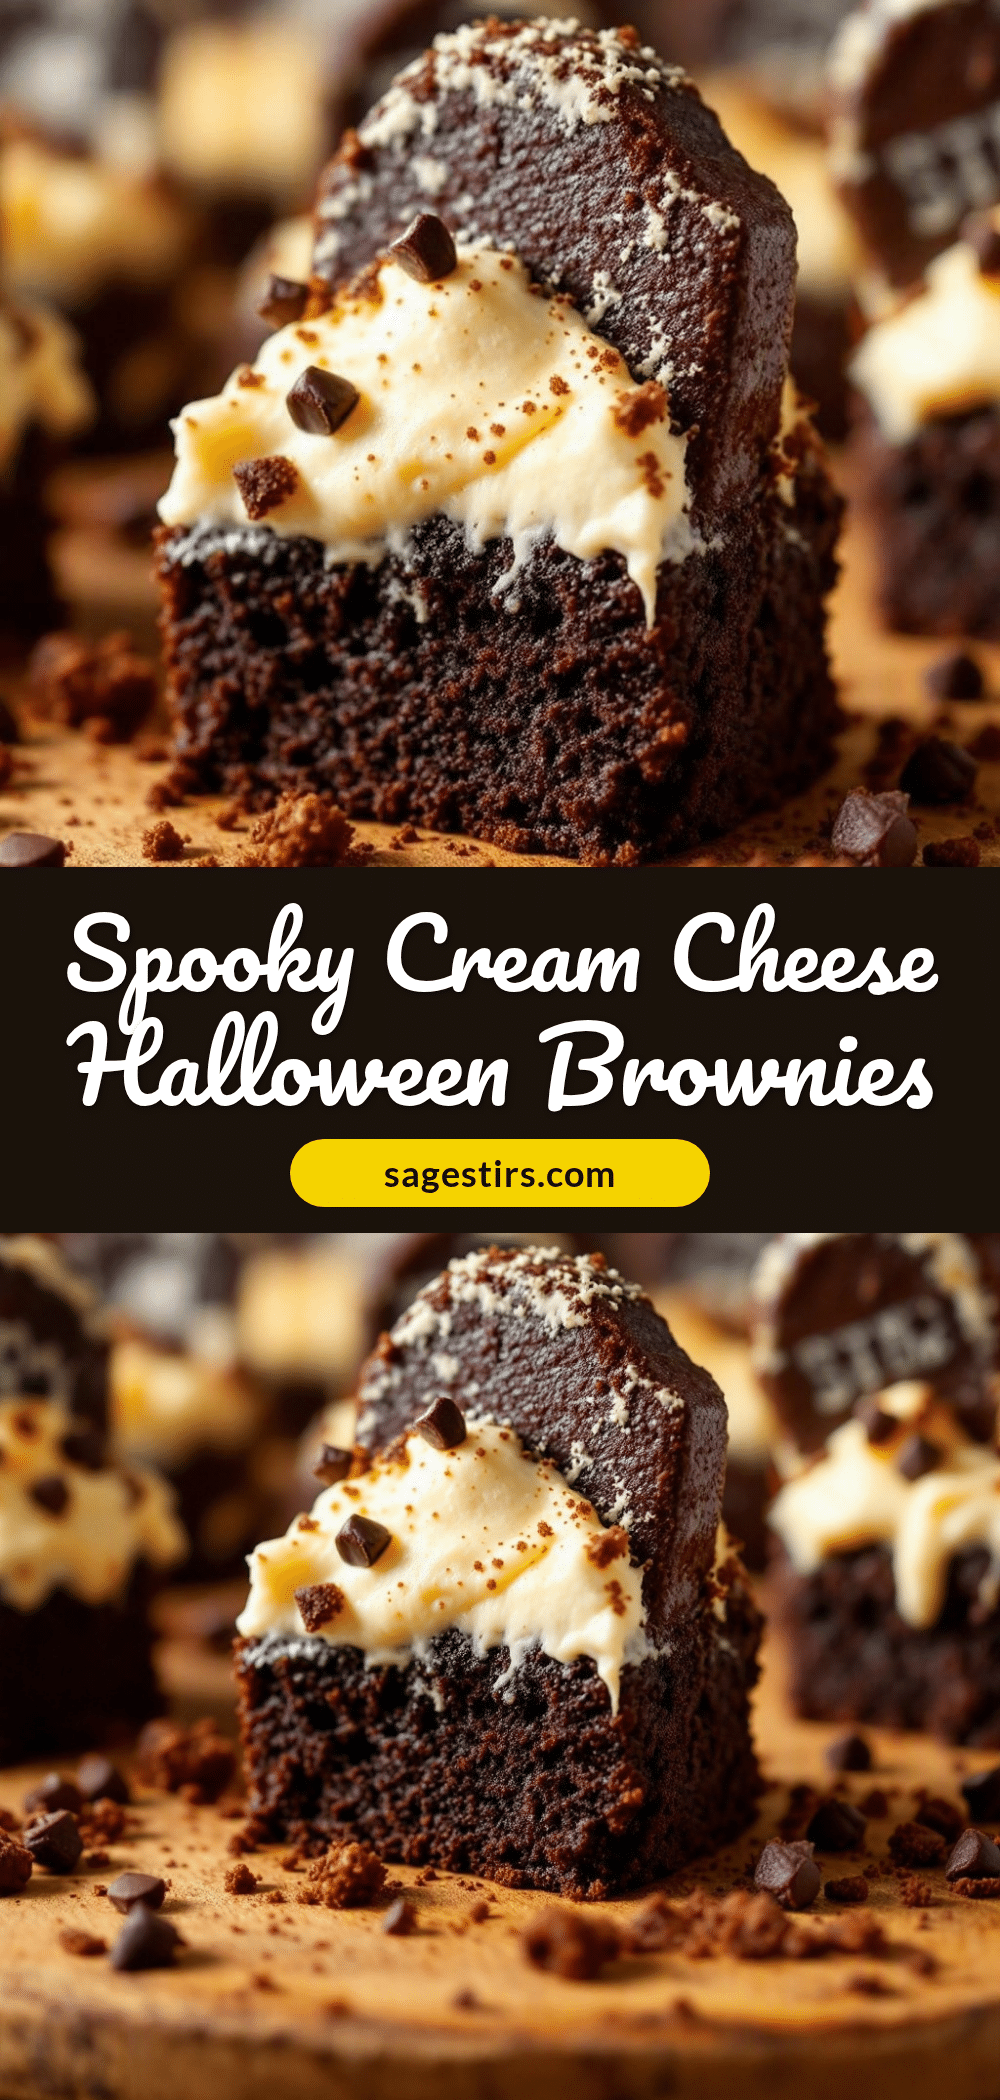
Spooky Halloween Brownie Tombstones: 10-Min No-Bake Recipe
A quick, no-bake Halloween treat made from chocolate, cookies, and cream cheese, shaped like tombstones and decorated with white chocolate. Perfect for last-minute parties or trick-or-treating.
- Prep Time: 10 minutes
- Cook Time: 0 minutes
- Total Time: 35 minutes
- Yield: Approximately 20 tombstones 1x
- Category: Dessert
- Cuisine: American
Ingredients
- 1 cup (175g) Dark or Semi-Sweet Chocolate Chips
- 2 tablespoons Unsalted Butter
- 2 ounces (50g) Cream Cheese, softened (optional but recommended)
- 1 ½ cups (approx. 150g) Crushed Cookies (e.g., Oreos)
- ½ cup (85g) White Chocolate Chips
- Black Food Coloring Gel
- Mini Chocolate Chips or Black Sprinkles (for decoration)
Instructions
- In a microwave-safe bowl, combine chocolate chips and butter. Microwave on high for 30 seconds, stir, then microwave for another 15 seconds if needed until smooth. Do not overheat.
- If using cream cheese, add it to the warm chocolate mixture and stir vigorously until smooth and incorporated.
- Crush cookies into fine crumbs using a rolling pin or heavy pan. Pour crumbs into the chocolate mixture and stir until fully coated and a thick dough forms.
- Cover the bowl and refrigerate for 20 minutes to firm up the fats.
- Remove dough from fridge. Scoop about 1 tablespoon per tombstone, roll into a ball, flatten slightly, and shape one end into a rounded arch. Place on a parchment-lined baking sheet.
- In a clean bowl, melt white chocolate chips in 15-second intervals, stirring between each. Add black gel food coloring drop by drop until dark gray or black.
- Dip each brownie tombstone halfway into the colored white chocolate using a fork. Let excess drip off and place back on the baking sheet.
- While the white chocolate is wet, write ‘R.I.P.’ or draw a cross using a toothpick or mini chocolate chips.
- Place the baking sheet in the freezer for at least 15 minutes until the chocolate is completely hard. Transfer to an airtight container.
Notes
Ensure hands are dry to prevent chocolate from seizing. Use gel food coloring, not liquid, to maintain texture. For gluten-free options, use certified gluten-free cookies. For dairy-free, substitute butter and cream cheese with coconut oil and dairy-free alternatives. Store in the refrigerator for up to one week.
Nutrition
- Serving Size: 1 tombstone
- Calories: 165
- Sugar: 14
- Sodium: 45
- Fat: 10
- Saturated Fat: 6
- Carbohydrates: 18
- Fiber: 1
- Protein: 2
Keywords: Halloween, no-bake, brownies, tombstones, easy dessert, kids recipe, party treat, chocolate, cookies