Love this? Save it for later!
Share the inspiration with your friends
The slightly gritty, sandy texture of almond flour against the smooth, cool almond sliver—that is the whole sensory promise of these crispy witch finger cookies. It’s what my niece, who is seven and has very strong opinions about candy corn, calls “the good creepy kind of crunchy.” Everything else—the buttery shortbread base, the faint vanilla warmth, the theatrical dip in red jam at the cuticle—is just the setup for that one, specific mouthfeel. I wasn’t trying to reinvent the Halloween cookie tray last October. I was just tired of the same old sugar cookies that taste like nothing but frosting. I wanted something that actually felt like a witch’s hand had been busy in the kitchen. Something with a little texture, a little drama, and a lot of butter. These witch finger cookies deliver on all three counts. The almond sliver becomes this perfect little talon, and honestly, the way the dough bakes up with those knuckle indentations? It’s unsettling in the best way. I have made three batches in the last week alone, and every single time, someone walks into the kitchen, stops, and just stares at the cooling rack. That is the reaction you want. It’s not about being perfect. It’s about being memorable.
These crispy witch finger cookies are the kind of recipe that makes you the cool person at the Halloween party. They are surprisingly simple to pull together, and the visual payoff is huge. I remember the first time I made them, I was so paranoid the “fingers” would look like weird, lumpy sausages. But the dough is forgiving, and once you get the hang of shaping them, it moves fast. You can even get the kids involved, though fair warning—they will probably make a few fingers that look more like alien thumbs. That is part of the charm. The almond nails are the real star here. You press them in gently, and they bake right along with the cookie, staying perfectly intact. The slight bitterness of the almond skin plays beautifully against the sweet, buttery cookie. It’s a little bit of savory crunch that keeps you coming back for just one more finger.
Why You’ll Love This Recipe
Let me be honest with you. I have tested a lot of Halloween cookie recipes over the years, and most of them are either too fussy or they taste like cardboard. These crispy witch finger cookies are the exception. They hit that sweet spot between impressive-looking and genuinely delicious. You don’t have to be a pastry chef to pull these off. The dough is a straightforward shortbread, which means it’s hard to overmix and easy to handle. I am a firm believer that a Halloween treat should be just as good to eat as it is to look at, and these cookies deliver on both fronts.
- Quick & Easy: The dough comes together in about 10 minutes. The chilling time is the only real wait, and you can even speed that up in the freezer if you are in a rush. From start to finish, you are looking at under an hour of active time.
- Simple Ingredients: You probably have most of these in your pantry right now. Butter, sugar, flour, an egg, vanilla, and a jar of jam. The almond slivers are the only “special” ingredient, and they are easy to find in any grocery store baking aisle.
- Perfect for Halloween Parties: These are the undisputed showstoppers on any dessert table. They are spooky without being gory, which makes them perfect for kids and adults alike. They also travel well, so you can bring them to school parties or potlucks without stress.
- Crowd-Pleaser: I have yet to meet a person who can resist picking one up and taking a bite. The texture is crisp and sandy, not cakey, and the almond adds a lovely, unexpected crunch. Even people who swear they don’t like “weird” Halloween food go back for seconds.
- Unbelievably Delicious: This isn’t just a gimmick cookie. The shortbread base is genuinely one of the best I have ever made. It’s rich, buttery, and has just the right amount of sweetness. The almond extract in the dough gives it that subtle marzipan flavor that makes it feel a little bit fancy.
What makes these different from other witch finger recipes is the texture. A lot of versions use a soft, puffy sugar cookie dough that bakes up thick and cakey. That is fine, but it doesn’t feel like a real finger. A real finger is lean and bony. My version uses a higher ratio of butter to flour, which gives you that signature shortbread crumble. It’s crisp, it’s sandy, and it holds its shape perfectly. The almond nail doesn’t sink into the dough or burn. It stays put, looking exactly like a tiny, polished talon. This is the best version because I have eaten all the other ones, and I know what works.
What Ingredients You Will Need
This recipe uses simple, wholesome ingredients to deliver that signature crisp texture and buttery flavor. Every component has a job to do, and I have tested the ratios to make sure they work together perfectly. No weird science, just good baking fundamentals.
- Unsalted Butter (1 cup, softened): This is the backbone of the cookie. I always use unsalted so I can control the salt level. Let it sit out for at least 30 minutes to get truly soft. If you try to cream cold butter, you will end up with lumps, and nobody wants a lumpy witch finger. I prefer Kerrygold or Plugrà for the best flavor, but any good-quality butter works.
- Granulated Sugar (1/2 cup): Just enough to sweeten the cookie without making it cloying. The sugar also helps with the crisp texture. Don’t be tempted to use brown sugar here—it will make the cookies softer and less defined.
- Large Egg (1): The egg acts as a binder. It gives the dough structure so the fingers don’t fall apart when you shape them. Make sure it is at room temperature so it emulsifies into the butter smoothly.
- Vanilla Extract (1 teaspoon): Pure vanilla, not imitation. It adds warmth and depth to the flavor. You can also use vanilla bean paste if you want those little specks in the dough.
- Almond Extract (1/2 teaspoon): This is the secret weapon. It gives the cookies that subtle marzipan or amaretto flavor that makes them taste so sophisticated. A little goes a long way, so don’t overpour.
- All-Purpose Flour (2 1/4 cups): Standard AP flour is perfect here. It provides the structure for the shortbread. I have tested this with gluten-free 1-to-1 flour blends, and they work, but the texture is slightly more delicate.
- Salt (1/4 teaspoon): A pinch of salt balances the sweetness and enhances the buttery flavor. I use fine sea salt for baking. If you only have kosher, you might need a tiny bit more.
- Whole Almond Slivers (about 48, for the nails): You want the flat, slivered almonds, not the whole ones. The shape is perfect for mimicking a fingernail. I recommend buying a bag of slivered almonds and picking out the nicest-looking ones. You will need one per cookie.
- Strawberry or Raspberry Jam (for the “blood”): A good-quality seedless jam works best. The red color is perfect for that creepy cuticle effect. I use Bonne Maman because the color is vibrant and the flavor is clean. You can also use red gel food coloring mixed with a little corn syrup if you want a more theatrical look.
Equipment Needed
You don’t need a lot of fancy gear to make these cookies. That is part of the appeal. Here is what you will need to get the job done.
- Electric Hand Mixer or Stand Mixer: You can cream the butter and sugar by hand with a wooden spoon, but it takes a lot of elbow grease. A mixer makes it quick and easy. I prefer my stand mixer with the paddle attachment for the creaming step.
- Mixing Bowls: One large bowl for the dough and one small bowl for the egg wash. Nothing fancy needed.
- Baking Sheets: Two standard half-sheet pans work well. I line mine with parchment paper for easy cleanup. Silicone baking mats also work, but the cookies might spread a tiny bit more.
- Parchment Paper or Silicone Baking Mats: Essential for preventing sticking and ensuring even browning. Parchment is my go-to because it is disposable.
- Small Offset Spatula or Butter Knife: This is for making the knuckle indentations on the shaped dough. A butter knife works just fine, but an offset spatula gives you a little more control.
- Pastry Brush: For brushing the egg wash onto the shaped cookies. A silicone brush is best because it doesn’t shed bristles.
- Small Spoon or Toothpick: For applying the jam at the base of the almond nail. A toothpick gives you the most precision.
- Plastic Wrap: To wrap the dough log while it chills. You can also use a reusable beeswax wrap if you are trying to cut down on waste.
If you don’t have an electric mixer, you can absolutely do this by hand. Just make sure your butter is very soft, and be prepared to work it for a few minutes. The dough will come together. I have done it both ways, and the results are the same.
Preparation Method
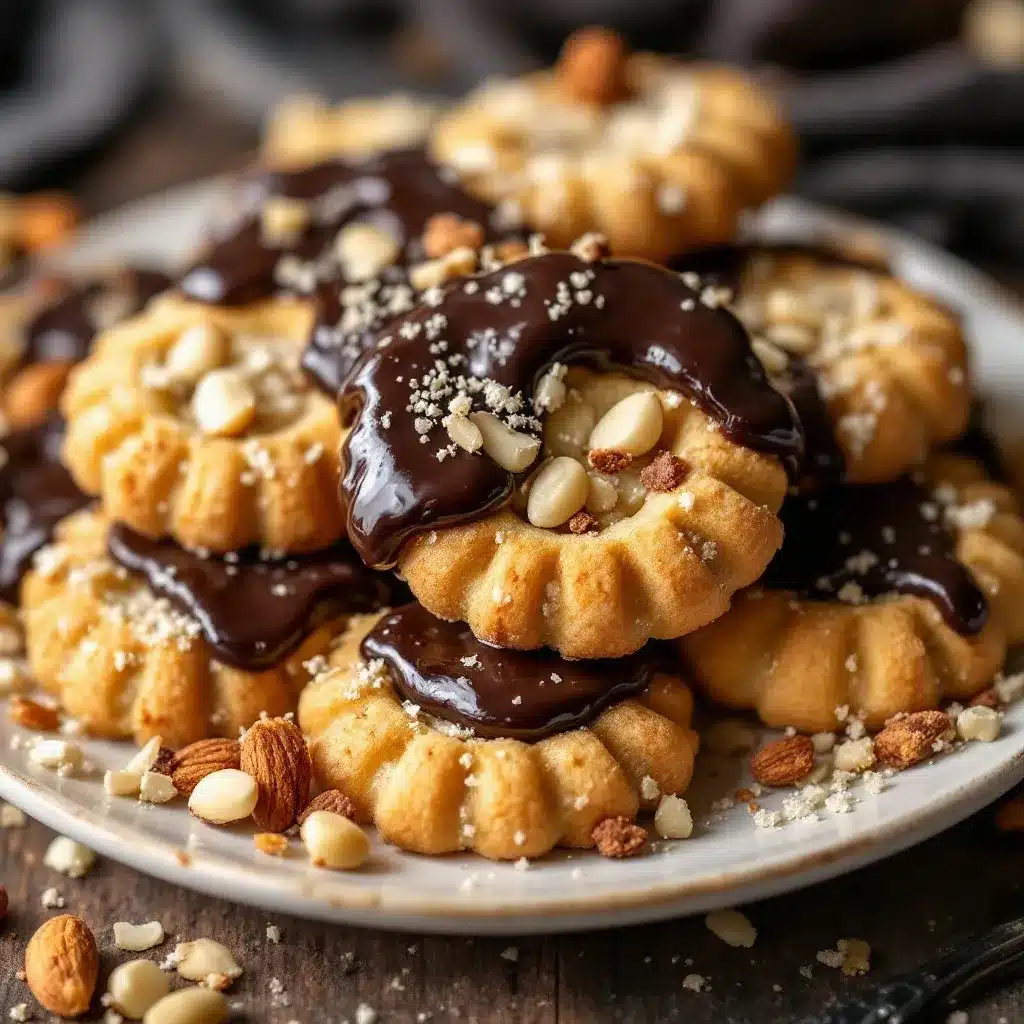
Alright, let’s get our hands a little dirty. This is the fun part. Follow these steps closely, and you will have a baking sheet full of creepy, crispy fingers in no time.
- Cream the butter and sugar. In your large mixing bowl, beat the softened butter and granulated sugar together on medium speed until the mixture is light, pale, and fluffy. This takes about 2-3 minutes with a mixer. You want to see the color change from yellow to a very pale cream. This step is crucial for a tender cookie. Scrape down the sides of the bowl once during the process.
- Add the wet ingredients. Crack the egg into a small bowl first (just in case you get any shell), then add it to the butter mixture along with the vanilla extract and almond extract. Beat on low speed until everything is just combined. Don’t overmix here, or you will incorporate too much air. The mixture might look a little curdled at this point, and that is totally fine. It will come together once you add the flour.
- Add the dry ingredients. In a separate bowl, whisk together the all-purpose flour and the salt. With the mixer on low speed, gradually add the flour mixture to the wet ingredients. Mix just until the dough comes together and no streaks of flour remain. The dough will be soft and slightly crumbly, but it should hold together when you squeeze it in your hand. If it feels too dry, you can add a teaspoon of cold water. If it feels too sticky, add a tablespoon of flour.
- Chill the dough. Turn the dough out onto a piece of plastic wrap. Shape it into a rough disc, wrap it tightly, and flatten it into a 1-inch thick disc. Refrigerate for at least 30 minutes. This step is non-negotiable. Chilled dough is much easier to shape into fingers without it getting sticky and falling apart. You can chill it for up to 24 hours if you want to get ahead.
- Preheat and prepare. When you are ready to bake, preheat your oven to 350°F (175°C). Line two baking sheets with parchment paper. Take the chilled dough out of the fridge and let it sit on the counter for 5 minutes to soften just enough to be workable.
- Shape the fingers. Pinch off a piece of dough about the size of a walnut (roughly 1 tablespoon). Roll it between your palms to form a log about 3 inches long and 1/2 inch thick. It doesn’t have to be perfectly uniform—in fact, a little irregularity makes them look more realistic. Place the log on the prepared baking sheet. Repeat with the remaining dough, leaving about 2 inches of space between each “finger” on the baking sheet.
- Create the details. This is where the magic happens. Using the back of a butter knife or the tip of an offset spatula, gently press 2-3 horizontal lines into each dough log to create the knuckles. Don’t press too hard, or you will cut the dough in half. You just want a deep indent. Then, gently press one almond sliver onto the tip of each finger to create the nail. Press it in just enough so it stays put during baking. The pointed end of the almond should face outward.
- Brush with egg wash. In a small bowl, whisk together one egg yolk with 1 teaspoon of water. Using your pastry brush, lightly brush this egg wash over the surface of each shaped finger. This will give them that beautiful, glossy, slightly golden finish. Be careful not to brush the almond nail itself, or it can burn.
- Bake. Bake the cookies for 12-15 minutes, or until the edges are just barely starting to turn a light golden brown. The centers will still look a little pale, and that is perfect. They will continue to set as they cool on the baking sheet. Don’t overbake them, or they will lose their crisp, sandy texture.
- Cool and decorate. Let the cookies cool on the baking sheet for 5 minutes. Then, carefully transfer them to a wire rack to cool completely. Once they are cool, it is time for the final touch. Using a toothpick or a small spoon, dab a tiny amount of strawberry or raspberry jam at the base of each almond nail, right where the “cuticle” would be. This is the “blood” effect. Don’t go overboard—a little dab goes a long way. Let the jam set for a few minutes before serving.
One thing I learned the hard way: don’t skip the chilling step. I tried to rush it once, and the fingers spread out into flat, sad little blobs on the baking sheet. They tasted fine, but they looked like melted aliens. Chilling the dough solidifies the butter, which prevents the cookies from spreading too much in the oven. It also makes the dough much easier to handle. Trust me on this one.
Cooking Tips & Techniques
I have made these crispy witch finger cookies about a dozen times now, and I have collected a few tricks that make the process smoother and the results better. Here are my best tips.
Don’t overwork the dough. This is the number one mistake I see people make with shortbread. Once you add the flour, mix just until it comes together. If you keep mixing, you will develop the gluten in the flour, which will make the cookies tough instead of tender and crisp. Think of it like this: you want a sandy crumble, not a chewy breadstick.
Use your freezer for a quick chill. If you are short on time, you can shape the dough into a log, wrap it in plastic, and pop it in the freezer for 15 minutes instead of the refrigerator for 30 minutes. It works just as well. Just keep an eye on it so it doesn’t freeze solid. You want it firm but still malleable.
Keep your hands cool. The warmth of your hands can soften the butter in the dough, making it sticky and hard to shape. If you find the dough getting too soft while you are rolling the fingers, just wash your hands in cold water and dry them off. You can also pop the baking sheet with the shaped fingers into the fridge for 10 minutes before baking to re-chill them.
Make the knuckles deep enough. I made the mistake of being too gentle with my first batch. The knuckle lines were so shallow that they completely disappeared during baking. The cookies looked like smooth little sausages. Press firmly with the back of the knife. You want a visible indent. The dough will puff up slightly in the oven, so a deep line will bake into a perfect crease.
Watch the almond nails. Almonds can burn quickly in the oven. If you notice the almond slivers starting to get too dark before the cookies are done, you can tent the baking sheet loosely with a piece of aluminum foil. This will shield the nuts from direct heat while the cookies finish baking.
Use a toothpick for the jam. A toothpick gives you way more control than a spoon. You want just a tiny, precise dot of jam at the base of the nail. If you use too much, it will run down the side of the cookie and look messy. A little dab is all you need to create that creepy cuticle effect.
Variations & Adaptations
The beauty of this recipe is how easy it is to tweak. You can change the flavor, the look, or even the dietary profile without losing the core appeal. Here are some variations I have tried and loved.
- Chocolate Witch Fingers: Replace 1/4 cup of the all-purpose flour with 1/4 cup of unsweetened cocoa powder. This gives you a dark, chocolatey cookie that looks even more sinister. The chocolate flavor pairs beautifully with the almond nails. You might need to add an extra tablespoon of butter if the dough feels too dry.
- Gluten-Free Version: Use a high-quality 1-to-1 gluten-free flour blend that contains xanthan gum. I have tested this with Bob’s Red Mill and King Arthur brands, and both work well. The texture will be slightly more delicate and crumbly, so handle the shaped fingers gently. The taste is still fantastic.
- Spooky Green Fingers: Add a few drops of green gel food coloring to the dough along with the vanilla extract. You can also add a teaspoon of matcha powder for a natural green hue and a subtle earthy flavor. These look like zombie or monster fingers, which is a fun twist on the witch theme.
- Different Jam Colors: Strawberry and raspberry are classic for the “blood” effect, but you can use any red jam. For a more gruesome look, try using blackberry jam for a dark, almost black “blood.” Or, use apricot jam for a more subtle, almost “healing wound” look. It sounds gross, but it looks incredibly realistic.
- Spiced Version: Add 1 teaspoon of pumpkin pie spice or cinnamon to the flour mixture. This gives the cookies a warm, fall flavor that is perfect for a Halloween party in October. It pairs especially well with the chocolate variation. If you love fall flavors, you should also try my perfect brown butter pumpkin snickerdoodle cookies for another seasonal treat.
Serving & Storage Suggestions
These cookies are best served at room temperature, right after the jam has set. The contrast between the crisp, sandy cookie and the slightly sticky jam is perfect. I like to arrange them on a black platter or a dark-colored cake stand to make the “blood” really pop. They look incredible next to a bowl of cozy homemade pumpkin spice latte for a Halloween brunch or party.
For a truly spooky presentation, you can arrange the fingers in a small, clean flowerpot filled with crushed chocolate cookies (to look like dirt). Just stick the fingers upright in the “dirt” so they look like they are clawing their way out. This is a guaranteed crowd-pleaser at any Halloween gathering.
Storage: Store the cooled, undecorated cookies in an airtight container at room temperature for up to 5 days. Do not add the jam until you are ready to serve them, as the moisture from the jam can soften the cookies over time. If you have already added the jam, they are best eaten within 24 hours.
Freezing: You can freeze the shaped, unbaked fingers on a baking sheet until they are solid, then transfer them to a freezer-safe bag. Bake them directly from frozen, adding 2-3 minutes to the baking time. You can also freeze the baked, undecorated cookies for up to 3 months. Thaw them at room temperature, then add the jam just before serving. The flavor and texture hold up remarkably well.
Reheating: These cookies are meant to be eaten at room temperature. If you want to refresh them, pop them in a 300°F oven for 3-4 minutes, then let them cool. This will crisp them back up if they have softened slightly from storage.
Nutritional Information & Benefits
Let’s be real. These are cookies. They are a treat, and they are meant to be enjoyed as part of a balanced life. But I always appreciate knowing what is in my food, so here is a rough breakdown per cookie (based on a yield of 48 cookies).
- Calories: ~85 kcal per cookie
- Fat: 5g
- Carbohydrates: 9g
- Protein: 1g
- Sugar: 4g
These numbers are estimates and will vary slightly based on the exact brands you use and the size of your cookies. The main source of fat is the butter, which provides a good dose of vitamin A. The almond slivers add a small amount of healthy monounsaturated fats, vitamin E, and magnesium. The jam provides a tiny bit of fruit, but let’s not kid ourselves—it’s mostly sugar.
From a dietary perspective, this recipe is naturally vegetarian. It can be made gluten-free with a simple flour swap, as noted in the variations section. It contains dairy (butter) and nuts (almonds), so it is not suitable for those with allergies to those ingredients. If you need a nut-free version, you can skip the almond extract and use a small piece of sliced, dried apple or a blanched peanut for the nail, though the flavor will change significantly.
I believe in enjoying food without guilt. These cookies are a once-a-year kind of thing for many people, and that is exactly how it should be. A little bit of butter and sugar never hurt anyone, especially when it comes with a side of spooky fun.
Conclusion
These crispy witch finger cookies are more than just a Halloween novelty. They are genuinely delicious shortbread cookies that happen to look like they belong in a haunted house. The texture is perfect—crisp, sandy, and buttery—and the almond nails add that unexpected crunch that makes every bite interesting. I love making them because they are so simple to put together, yet they always get the biggest reaction. People cannot resist picking one up, examining it, and then taking a bite. It is the perfect Halloween treat.
I encourage you to make these your own. Play with the colors, try different jams, or add some spice. The base recipe is solid, but the fun is in the details. If you make them a little lumpy or the knuckles are not perfectly straight, that is totally fine. It makes them look more realistic. Real fingers are not perfect either.
I would love to hear how your witch finger cookies turn out. Did you try a fun variation? Did your kids help shape them? Drop a comment below and let me know. And if you are looking for more spooky or fall-inspired treats, be sure to check out my perfect pumpkin cream cheese muffins for another easy, crowd-pleasing recipe. Happy Halloween, and happy baking!
Frequently Asked Questions
Can I make the dough ahead of time?
Absolutely. You can prepare the dough, wrap it tightly in plastic wrap, and refrigerate it for up to 3 days. You can also freeze the dough disc for up to 3 months. Just thaw it overnight in the refrigerator before shaping and baking.
My dough is too sticky to shape. What should I do?
If the dough is too sticky, it is likely too warm. Pop it back in the refrigerator for 15-20 minutes to firm up the butter. If it is still sticky after chilling, you can dust your hands very lightly with flour or powdered sugar before rolling the fingers.
Can I use a different nut for the nails?
Yes. While almond slivers are the most realistic shape, you can use a small slice of pecan, a pine nut, or even a sunflower seed kernel for a different look. Keep in mind that the baking time and flavor will vary. Pecans, for example, are more oily and can burn faster.
Why did my cookies spread out and lose their shape?
This usually happens for one of two reasons: the dough was not chilled long enough, or the butter was too soft when you started. Make sure your dough is properly chilled (at least 30 minutes) and that your butter is softened but not melted. If your kitchen is very warm, you can chill the shaped fingers on the baking sheet for 10 minutes before baking.
How do I make the “blood” look more realistic?
For a more dramatic effect, mix a drop of red gel food coloring with a teaspoon of corn syrup. This creates a glossy, slightly thicker “blood” that looks more like the real thing. Apply it with a toothpick right at the base of the almond nail. A little goes a long way.
Pin This Recipe!

Crispy Witch Finger Cookies: Easy Halloween Treat Recipe

These crispy witch finger cookies are a spooky, buttery shortbread treat with almond sliver nails and a jam ‘blood’ cuticle. They are surprisingly simple to make and deliver a perfect sandy texture with a dramatic, memorable look.
- Prep Time: 15 minutes
- Cook Time: 15 minutes
- Total Time: 1 hour (including 30 minutes chilling)
- Yield: 48 cookies 1x
- Category: Dessert
- Cuisine: American
Ingredients
- 1 cup unsalted butter, softened
- 1/2 cup granulated sugar
- 1 large egg
- 1 teaspoon vanilla extract
- 1/2 teaspoon almond extract
- 2 1/4 cups all-purpose flour
- 1/4 teaspoon salt
- About 48 whole almond slivers (for the nails)
- Strawberry or raspberry jam (for the ‘blood’)
Instructions
- Cream the butter and sugar: In a large mixing bowl, beat the softened butter and granulated sugar together on medium speed until light, pale, and fluffy, about 2-3 minutes. Scrape down the sides once.
- Add the wet ingredients: Crack the egg into a small bowl, then add it to the butter mixture along with the vanilla extract and almond extract. Beat on low speed until just combined.
- Add the dry ingredients: In a separate bowl, whisk together the all-purpose flour and salt. With the mixer on low speed, gradually add the flour mixture to the wet ingredients. Mix just until the dough comes together and no streaks of flour remain.
- Chill the dough: Turn the dough out onto a piece of plastic wrap. Shape it into a rough disc, wrap it tightly, and flatten it into a 1-inch thick disc. Refrigerate for at least 30 minutes.
- Preheat and prepare: Preheat your oven to 350°F (175°C). Line two baking sheets with parchment paper. Let the chilled dough sit on the counter for 5 minutes to soften slightly.
- Shape the fingers: Pinch off a piece of dough about the size of a walnut (roughly 1 tablespoon). Roll it between your palms to form a log about 3 inches long and 1/2 inch thick. Place on the prepared baking sheet, leaving about 2 inches of space between each finger.
- Create the details: Using the back of a butter knife or the tip of an offset spatula, gently press 2-3 horizontal lines into each dough log to create the knuckles. Then, gently press one almond sliver onto the tip of each finger to create the nail, pointed end outward.
- Brush with egg wash: In a small bowl, whisk together one egg yolk with 1 teaspoon of water. Lightly brush this egg wash over the surface of each shaped finger, avoiding the almond nail.
- Bake: Bake the cookies for 12-15 minutes, or until the edges are just barely starting to turn a light golden brown. Let cool on the baking sheet for 5 minutes, then transfer to a wire rack to cool completely.
- Cool and decorate: Once cool, use a toothpick or small spoon to dab a tiny amount of strawberry or raspberry jam at the base of each almond nail (the cuticle area). Let the jam set for a few minutes before serving.
Notes
Don’t skip the chilling step—it prevents spreading. For a quick chill, freeze the shaped dough for 15 minutes. Keep your hands cool to prevent the dough from getting sticky. Press knuckle lines deep enough so they don’t disappear during baking. Watch the almond nails to prevent burning; tent with foil if needed. Use a toothpick for precise jam application.
Nutrition
- Serving Size: 1 cookie
- Calories: 85
- Sugar: 4
- Sodium: 30
- Fat: 5
- Saturated Fat: 3
- Carbohydrates: 9
- Protein: 1
Keywords: witch finger cookies, Halloween cookies, shortbread cookies, almond cookies, spooky treats, easy Halloween recipe



