Love this? Save it for later!
Share the inspiration with your friends
I did not trust fruit on pancakes. Honestly, I thought it sounded like a mistake until the first bite. You know, we’ve all been there. You see a Pinterest pin for “Fun Halloween Monster Pancakes with Fruit Eyes” and your brain goes, “Nope. That’s just syrup and sadness waiting to happen.” I was the mom who brought store-bought muffins to the school bake sale because I didn’t want to deal with the mess of “creative” cooking. But then, my niece turned six. She wanted a monster. Not a cute, sparkly unicorn, but a green, gooey, toothy monster. I had to step up.
So, I stood over the stove, feeling ridiculous. I had a bowl of batter and a plate of sliced bananas and strawberries. I felt like I was preparing for a craft project, not breakfast. The kitchen smelled like vanilla and anxiety. I flipped the first pancake. It was a little lopsided. I placed a banana slice for an eye. It looked less like a monster and more like a confused owl. I almost ordered pizza. But then I flipped the second one. And the third. And suddenly, the kitchen was full of little green faces staring back at me. They were goofy. They were silly. And they were actually delicious.
That morning, the skepticism melted away faster than butter on hot griddle. My niece didn’t just eat the pancake; she celebrated it. She gave the monster a name. She laughed when the strawberry eye fell off. It wasn’t about perfect presentation. It was about the joy of making something simple feel magical. That’s when I realized that these Fun Halloween Monster Pancakes with Fruit Eyes weren’t just a gimmick. They were a bridge. A bridge between boring weekday breakfasts and the chaotic, happy energy of Halloween morning. I still don’t put fruit on pancakes every day, but for that one morning? It was perfect.
Why You’ll Love This Recipe
Let’s be honest for a second. Cooking for kids (or even adults who love a good gimmick) can feel like a chore. You want something that looks impressive but doesn’t require a degree in culinary arts or three hours of prep time. This recipe hits that sweet spot. I’ve tested this method with everything from organic oat flour to standard all-purpose flour, and the result is always the same: happy faces and empty plates. It’s not just about the cuteness; it’s about the simplicity.
- Quick & Easy: This comes together in under 20 minutes. You can have the batter mixed and the first batch flipping before the kids are fully out of bed. It’s perfect for busy weeknights or last-minute Halloween morning cravings.
- Simple Ingredients: No fancy grocery trips needed. You likely already have everything in your kitchen. Flour, milk, eggs, baking powder, and whatever fruit is in your fridge. That’s it. No special “monster” mixes or expensive food coloring gels.
- Perfect for Halloween: Great for holiday mornings, spooky slumber parties, or just adding a little whimsy to your October routine. It transforms a standard breakfast into a themed event without the stress.
- Crowd-Pleaser: Always gets rave reviews from kids and adults alike. Even the pickiest eaters will tackle a pancake that looks like it’s staring at them. It turns “I don’t like fruit” into “Look at its teeth!”
- Unbelievably Delicious: The texture and flavor combo is next-level comfort food. The sweetness of the fruit balances the savory batter, and the slight char on the pancake adds a nice crunch.
What makes this different from other “fun” breakfast recipes? Most of them rely on heavy syrups or artificial colors. This recipe uses the natural colors of the fruit to create the design. It’s cleaner. It’s fresher. And it tastes like actual breakfast, not just sugar. It’s comfort food reimagined—healthier, faster, but with the same soul-soothing satisfaction. Perfect for impressing guests without stress, or turning a simple meal into something memorable.
What Ingredients You Will Need
This recipe uses simple, wholesome ingredients to deliver bold flavor and satisfying texture without the fuss. The beauty of these Fun Halloween Monster Pancakes with Fruit Eyes lies in their accessibility. You don’t need a specialty store to pull this off. In fact, the more common your ingredients are, the better. We are relying on the natural contrast between the bright fruit and the golden-brown (or green-tinted) batter to create the visual impact. If you want to get fancy, you can use matcha powder for a natural green hue, but plain batter works just as well if you use chocolate chips for eyes or black beans for mouths.
Here is what you need to gather before you start heating the pan:
- For the batter:
- All-purpose flour (2 cups) – I recommend Gold Medal for a light, fluffy texture.
- Granulated sugar (2 tablespoons) – Adds a subtle sweetness that helps with browning.
- Baking powder (2 teaspoons) – Make sure it’s fresh for maximum rise.
- Baking soda (1/2 teaspoon) – Helps with the spread and color.
- Salt (1/2 teaspoon) – Essential for balancing the sweet flavors.
- Large eggs (2), room temperature – Room temp eggs emulsify better into the batter.
- Whole milk (1 1/2 cups) – Or buttermilk for extra tenderness.
- Unsalted butter, melted (1/4 cup) – Let it cool slightly before adding.
- Vanilla extract (1 teaspoon) – For that classic pancake aroma.
- Matcha powder or spinach powder (1 tablespoon, optional) – For a natural green monster color.
- For the monster faces:
- Bananas, sliced into rounds – Perfect for large, goofy eyes.
- Strawberries, sliced into thin strips – Great for teeth or tongues.
- Blueberries – Excellent for small, detailed eyes or noses.
- Chocolate chips (mini) – Use these for pupils or mouths if you want a darker contrast.
- Kiwi, sliced – A great alternative to banana for a lighter eye color.
If you are making this for a group with allergies, you can easily swap the milk for almond or oat milk. For a gluten-free option, use a 1:1 gluten-free flour blend. The key is to keep the fruit fresh and firm so it holds its shape on the hot griddle.
Equipment Needed
You don’t need a professional kitchen to make these, but having the right tools makes the process much smoother. A non-stick skillet or a well-seasoned cast-iron griddle is your best friend here. I personally prefer a cast-iron griddle because it holds heat evenly, which is crucial when you are trying to place delicate fruit slices without them sliding off. If you don’t have a griddle, a large non-stick frying pan works perfectly.
You will also need a standard liquid measuring cup for the batter and a dry measuring cup for the flour. A whisk is essential for combining the wet and dry ingredients without overmixing. Overmixing leads to tough pancakes, so a simple balloon whisk is better than an electric mixer here. A silicone spatula is important for flipping; it’s gentle on the fruit toppings and won’t scratch your pan. Finally, have a plate ready for the finished pancakes. I like to keep them warm in a 200°F oven while I finish the batch.
If you are doing the green monster variation, a small bowl for mixing the matcha powder into the dry ingredients is helpful. For storing leftover fruit, plastic wrap or airtight containers are best to keep them from drying out. Keep your tools within arm’s reach so you don’t have to hunt for them while the batter is sitting there.
Preparation Method
Getting the batter right is the foundation of good pancakes. Start by whisking together the flour, sugar, baking powder, baking soda, and salt in a large mixing bowl. If you are using matcha or spinach powder for green pancakes, add it to this dry mixture now. Whisking it in with the flour ensures there are no green specks in your final pancake. It distributes the color evenly.
In a separate medium bowl, whisk the eggs, milk, melted butter, and vanilla extract until well combined. The butter should be warm but not hot, or you might cook the eggs prematurely. Pour the wet ingredients into the dry ingredients. Gently fold them together with a spatula or whisk. Stop mixing as soon as you no longer see dry pockets of flour. It’s okay if the batter is a little lumpy. Lumpy batter means tender pancakes. Overmixing is the enemy of fluffiness.
Heat your griddle or skillet over medium heat. To test if it’s ready, flick a few drops of water onto the surface. If they dance and evaporate quickly, it’s ready. Lightly grease the pan with butter or oil. Wipe away any excess with a paper towel so the pancakes don’t fry in a pool of grease.
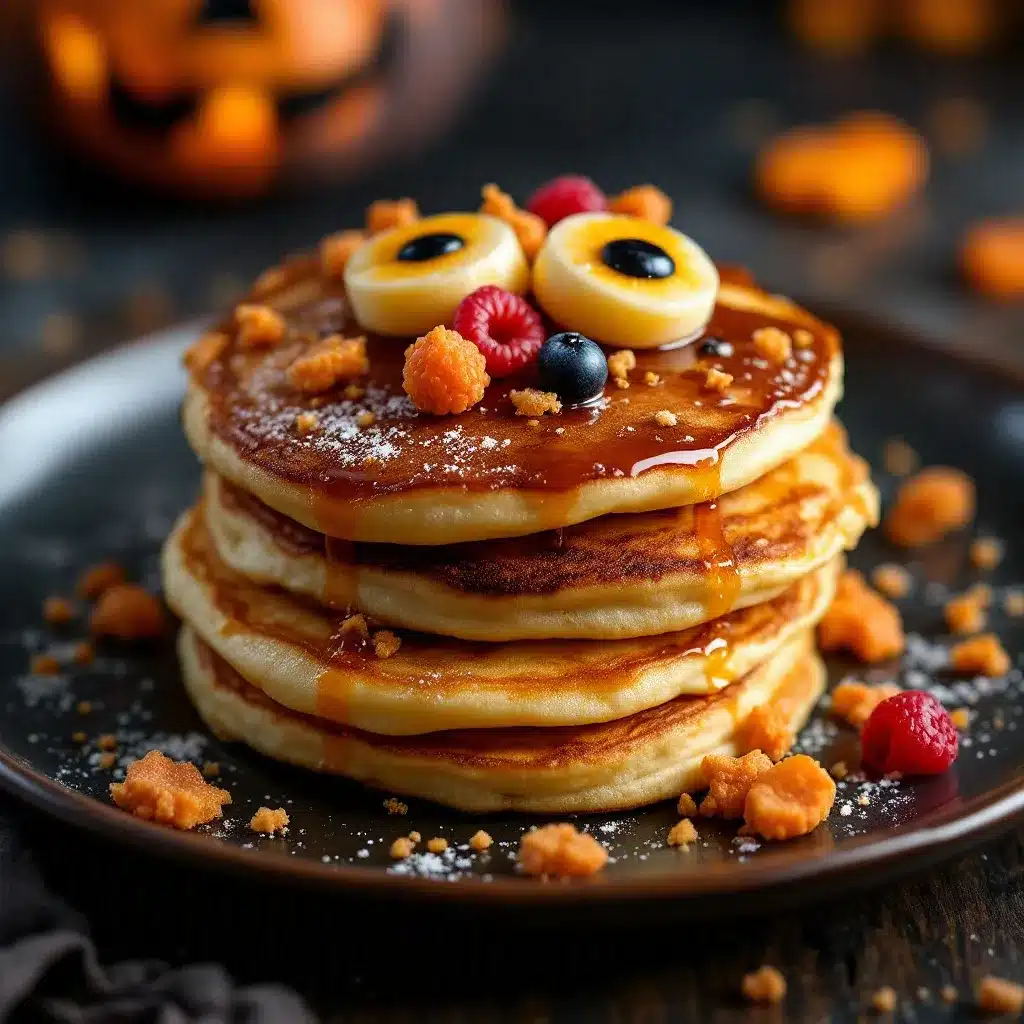
Using a 1/4 cup measuring cup, pour the batter onto the griddle. Immediately, this is where the magic happens. Place your fruit slices on top of the wet batter before you flip it. For a classic monster, place two banana slices for eyes. Add a small blueberry or chocolate chip in the center of each banana slice for pupils. Arrange strawberry slices below the eyes for a mouth. If you want a toothy grin, line up thin strips of strawberry horizontally. The fruit will stick to the batter as it cooks.
Cook the pancakes for about 2-3 minutes. You will see bubbles form on the surface and pop, leaving small holes that stay open. The edges will look set and slightly dry. This is your cue to flip. Slide your spatula carefully under the pancake, supporting the fruit with your hand if needed, and flip it gently. Cook for another 1-2 minutes until the bottom is golden brown and the fruit is warmed through. Transfer to a plate and keep warm. Repeat with the remaining batter, greasing the pan lightly between batches. The whole process should take about 15-20 minutes for a batch of 8-10 pancakes.
How do I keep the fruit from sliding off?
The key is timing and batter consistency. Make sure your batter is thick enough to support the weight of the fruit. If it’s too runny, the fruit will slide. Also, place the fruit immediately after pouring the batter. If you wait too long, the bottom of the pancake will set, and the fruit won’t adhere as well. A slightly sticky batter helps the fruit cling on.
Can I make the batter ahead of time?
It’s best to make the batter fresh. If you let it sit too long, the baking powder loses its potency, and the pancakes won’t rise as much. If you must prep ahead, mix the dry and wet ingredients separately and combine them right before cooking. Store the wet and dry mixtures in the fridge for up to 4 hours.
Cooking Tips & Techniques
One of the biggest mistakes people make with fruit pancakes is burning the sugar in the fruit. Fruit contains natural sugars that caramelize quickly. If your heat is too high, the strawberries will turn into jam before the pancake is cooked. Keep your heat at medium or even medium-low. It’s better to cook them slower for a more even result. Patience is key here.
I learned this the hard way during my first attempt. I cranked up the heat to speed things up, and I ended up with burnt banana slices and raw centers. Lesson learned: low and slow wins the race. Another tip is to use ripe but firm fruit. Overripe bananas are too soft and will mash into the batter. Underripe bananas are too hard and won’t stick well. Look for bananas with a few brown spots but still holding their shape.
For consistent cooking, use the same amount of batter for each pancake. A 1/4 cup scoop is perfect for a standard-sized pancake. If you make them too large, the center might not cook through before the edges burn. Also, don’t overcrowd the pan. Give each pancake enough space to breathe. If you are using a small skillet, you might only be able to cook two at a time. That’s fine. It keeps the process manageable.
Multitasking is your friend here. While the first batch is cooking, you can prepare the next batch of fruit slices. Have a plate ready with pre-sliced fruit so you can grab and go. This keeps the workflow smooth and ensures all pancakes come out hot and fresh. Also, keep a damp cloth nearby to wipe the griddle between batches. This prevents burnt residue from building up and affecting the flavor of the next pancake.
Variations & Adaptations
One of the best things about this recipe is how easily it can be adapted. You aren’t stuck with just green monsters and banana eyes. Here are a few variations I’ve tried that work beautifully.
- Spooky White Ghosts: Use a plain white batter. Instead of banana slices, use sliced pears or apples for eyes. Use blueberries for the mouth. These look like little ghosts floating on the plate. They are less sweet than the banana version and have a nice tartness.
- Chocolate Devil Pancakes: Add cocoa powder to your batter for a chocolate base. Use banana slices for eyes and red strawberry slices for a tongue sticking out. This is a crowd-pleaser for chocolate lovers and looks surprisingly festive.
- Gluten-Free Version: Simply swap the all-purpose flour for a high-quality gluten-free blend. I recommend Bob’s Red Mill 1-to-1 blend. The texture might be slightly denser, but the flavor remains excellent. Add a teaspoon of xanthan gum if your blend doesn’t include it.
- Vegan Option: Use plant-based milk and replace the egg with a flax egg (1 tablespoon ground flaxseed mixed with 3 tablespoons water per egg). Use coconut oil instead of butter. The fruit toppings remain the same.
For a seasonal twist, try using pumpkin puree in the batter for an orange hue, paired with blueberry eyes and a chocolate chip mouth. It’s like a mini pumpkin pie on a plate. You can also experiment with different fruit combinations based on what is in season. In the summer, sliced peaches or nectarines work great for a softer, juicier monster.
Serving & Storage Suggestions
Serve these Fun Halloween Monster Pancakes with Fruit Eyes warm, straight from the griddle. They look best when the fruit is still slightly warm and glistening. A drizzle of pure maple syrup adds a nice gloss and sweetness, but don’t drown them. You want the fruit to remain visible. I like to serve them on a black or dark-colored plate to make the colors pop. It enhances the spooky aesthetic.
For a complete Halloween breakfast, pair these with a side of crispy bacon or sausage links. The savory contrast balances the sweet fruit. A glass of cold milk or a warm cup of coffee is the perfect beverage choice. If you want to make it a full brunch, add a fruit salad on the side with melon and berries.
If you have leftovers, store them in an airtight container in the refrigerator for up to 3 days. The fruit will soften over time, so they are best eaten fresh. To reheat, use a toaster or a warm oven at 350°F for 5-10 minutes. Avoid the microwave if you want to keep the texture crisp. The microwave can make the fruit mushy. For longer storage, freeze the pancakes (without the fruit toppings) for up to 2 months. Add fresh fruit when reheating.
Flavors develop over time, but the fruit’s brightness diminishes. So, try to enjoy them on the day you make them. If you are meal prepping, consider making the batter the night before and cooking them fresh in the morning. This ensures the best texture and presentation.
Nutritional Information & Benefits
While these are definitely a treat, they are also a great way to sneak some fruit into breakfast. Each pancake provides a balance of carbohydrates from the flour and natural sugars from the fruit, along with protein from the eggs and milk. A typical serving of two pancakes with fruit toppings contains approximately 250-300 calories, depending on the size and syrup used.
The fruit toppings add vitamins C and K, as well as fiber, which aids in digestion. Bananas provide potassium, which is good for muscle function. Strawberries are rich in antioxidants. By using whole ingredients, you avoid the artificial dyes and preservatives found in many children’s breakfast foods. This recipe is naturally gluten-free if you use gluten-free flour, and it can easily be made dairy-free or vegan. It’s a wholesome option that doesn’t compromise on fun. Personally, I appreciate that my kids are eating fruit for breakfast without complaining, and I don’t feel guilty about the sugar content because it comes from natural sources.
Conclusion
These Fun Halloween Monster Pancakes with Fruit Eyes are more than just a breakfast; they are a memory maker. They turned my skepticism into joy and my niece’s morning into a celebration. I hope you try this recipe and find your own happy moments in the kitchen. Don’t worry about perfection. The lopsided ones are the most charming. Customize the monsters to fit your family’s style. Add extra teeth, different colors, or silly expressions. The only limit is your imagination.
I’d love to see your creations. If you make these, please share a photo in the comments below. Tell me what kind of monster you made and how your family reacted. Your stories inspire me to keep cooking and experimenting. Thanks for reading, and happy Halloween cooking! Remember, the best recipes are the ones you enjoy making with the people you love.
FAQs
Can I use frozen fruit for the eyes?
Frozen fruit can work, but it releases more water as it thaws. This can make the batter soggy. If you must use frozen fruit, thaw it first and pat it dry with a paper towel. Fresh fruit is always the best choice for clean shapes and less moisture.
Why did my pancakes turn out flat?
This usually happens if the baking powder is old or if the batter was overmixed. Check the expiration date on your baking powder. Also, ensure you are folding the ingredients gently and stopping as soon as the flour is incorporated.
How do I keep the pancakes warm while cooking the rest?
Place the finished pancakes on a wire rack set over a baking sheet. Keep them in a 200°F oven. This allows air to circulate and prevents them from getting soggy from steam. Avoid stacking them on a plate, as the steam will make the bottoms soft.
Can I make the batter ahead of time?
It is best to cook the batter fresh. However, you can mix the dry ingredients and wet ingredients separately and store them in the fridge. Combine them right before cooking to ensure the pancakes rise properly.
What is the best fruit to use for monster eyes?
Bananas and kiwis are the most popular choices because of their size and color contrast. Strawberries work well for mouths and tongues. Blueberries are great for small details like pupils or noses. Experiment with what you have on hand!
Pin This Recipe!
Fun Halloween Monster Pancakes with Fruit Eyes
A quick and easy 3-ingredient style recipe for festive Halloween breakfast pancakes featuring fruit faces. These simple, wholesome pancakes are perfect for kids and adults alike, offering a fun, spooky twist on a classic morning meal.
- Prep Time: 10 minutes
- Cook Time: 15 minutes
- Total Time: 25 minutes
- Yield: 8-10 servings 1x
- Category: Breakfast
- Cuisine: American
Ingredients
- 2 cups all-purpose flour
- 2 tablespoons granulated sugar
- 2 teaspoons baking powder
- 1/2 teaspoon baking soda
- 1/2 teaspoon salt
- 2 large eggs, room temperature
- 1 1/2 cups whole milk
- 1/4 cup unsalted butter, melted
- 1 teaspoon vanilla extract
- 1 tablespoon matcha powder or spinach powder (optional, for green color)
- Bananas, sliced into rounds
- Strawberries, sliced into thin strips
- Blueberries
- Mini chocolate chips
- Kiwi, sliced (optional alternative to banana)
Instructions
- In a large mixing bowl, whisk together the flour, sugar, baking powder, baking soda, salt, and optional matcha/spinach powder.
- In a separate medium bowl, whisk the eggs, milk, melted butter, and vanilla extract until well combined.
- Pour the wet ingredients into the dry ingredients and gently fold together with a spatula or whisk until just combined. Do not overmix; lumps are okay.
- Heat a griddle or skillet over medium heat. Test readiness by flicking water drops onto the surface; they should dance and evaporate.
- Lightly grease the pan with butter or oil, wiping away excess with a paper towel.
- Pour 1/4 cup of batter onto the griddle for each pancake.
- Immediately place fruit slices on top of the wet batter: banana slices for eyes, blueberries or chocolate chips for pupils, and strawberry strips for a mouth.
- Cook for 2-3 minutes until bubbles form on the surface and pop, leaving open holes, and edges look set.
- Carefully flip the pancakes, supporting the fruit with a hand if needed.
- Cook for another 1-2 minutes until the bottom is golden brown and the fruit is warmed through.
- Transfer to a plate and keep warm in a 200°F oven while finishing the batch.
Notes
Ensure batter is thick enough to support the fruit. Place fruit immediately after pouring batter to prevent sliding. Cook on medium-low heat to avoid burning fruit sugars. For gluten-free, use a 1:1 gluten-free flour blend. For vegan, use plant-based milk, flax eggs, and coconut oil.
Nutrition
- Serving Size: 2 pancakes with frui
- Calories: 275
- Sugar: 12
- Sodium: 350
- Fat: 10
- Saturated Fat: 5
- Carbohydrates: 40
- Fiber: 2
- Protein: 8
Keywords: Halloween pancakes, fruit pancakes, monster pancakes, easy breakfast, kid-friendly recipes, healthy breakfast, gluten-free options, vegan pancakes