Love this? Save it for later!
Share the inspiration with your friends
I did not trust stuffed peppers. Honestly, for years I thought they were a sad meal—soggy bell peppers filled with bland meat, all swimming in watery tomato sauce. It felt like something you ate because you had to, not because you wanted to. So when my kid came home from school last October clutching a crumpled drawing of a bell pepper carved like a jack-o-lantern and begged, “Can we make these for Halloween dinner?” I almost laughed. But she looked so hopeful, and I figured, fine—I’d give it one shot, but I was already planning a backup pizza order in my head.
The first batch I made was, well, a learning experience. The peppers turned out mushy, the faces collapsed, and the filling was dry. But something in that ugly, grinning pepper stuck with me. I tweaked the technique—pre-roasting the peppers, making a juicier filling, and adding a smoky kick. The second time, I pulled a pan of these little monsters out of the oven, and the whole kitchen smelled like a cozy haunted house. My daughter actually squealed. We served them with a side of cozy slow cooker fall harvest beef stew for a full Halloween spread, and I watched her eat every single bite. That was the moment I became a believer.
These Spooky Jack-O-Lantern Stuffed Bell Peppers are proof that sometimes the best recipes come from a place of stubborn doubt. They’re fun without being silly, festive without being complicated, and honestly? They taste way better than pizza.
Why You’ll Love This Recipe
Let me tell you what makes these peppers different from every other stuffed pepper recipe you’ve seen. I’ve tested this about six times to get the texture just right—because nobody wants a sad, limp pepper on their Halloween table.
- Perfectly Al Dente Peppers : The secret is a quick pre-roast before stuffing. This keeps the peppers firm enough to hold their carved faces without turning into mush. You get a slight char on the edges that adds so much flavor.
- Juicy, Flavor-Packed Filling : I use a mix of ground beef and Italian sausage with fire-roasted tomatoes, black beans, and a blend of smoked paprika, cumin, and chili powder. It’s not dry—ever. The filling stays moist and holds together beautifully.
- Kid-Friendly & Spooky Fun : My daughter helped carve the faces this year, and she was so proud of her crooked, toothy grin. It’s the kind of dinner that makes kids actually excited to eat their vegetables.
- Simple Ingredients, Big Impact : Nothing fancy here. You probably have most of these ingredients in your pantry right now. No weird specialty items.
- Great for Halloween Parties or Weeknight Dinners : These look impressive on a platter but come together in under an hour. They’re perfect for a Halloween dinner party or just a fun Tuesday night in October.
This recipe is the one that made my husband say, “Okay, I get it now.” It’s comfort food with a spooky twist—and honestly, it’s just really, really good.
What Ingredients You Will Need
This recipe uses simple, wholesome ingredients that come together to create something genuinely delicious. I’ve tested different combinations, and this one gives you the best texture and flavor without any fuss.
- 4 large orange bell peppers (look for squat, wide peppers—they’re easier to carve and hold more filling)
- 1 lb ground beef (85/15 works best—not too lean, not too fatty)
- ½ lb Italian sausage (mild or spicy, your call—I prefer mild for the kids)
- 1 cup cooked white rice (leftover rice works great here)
- 1 can (14.5 oz) fire-roasted diced tomatoes (drained slightly—I like Muir Glen for the smoky flavor)
- 1 can (15 oz) black beans (rinsed and drained)
- 1 small yellow onion (finely diced)
- 3 cloves garlic (minced)
- 1 tbsp smoked paprika (this is non-negotiable for that deep, smoky flavor)
- 1 tsp ground cumin
- ½ tsp chili powder
- ½ tsp salt (plus more to taste)
- ¼ tsp black pepper
- 1 cup shredded Mexican blend cheese (or cheddar, if that’s what you have)
- 2 tbsp olive oil
- Fresh parsley or cilantro (for garnish, optional)
Ingredient Tips: For the best jack-o-lantern faces, choose peppers that are as round as possible. If you can’t find orange bell peppers, you can use yellow or red ones—they just won’t look as spooky. I’ve made this with ground turkey instead of beef, and it works fine, just add a little more olive oil to keep it moist. For a vegetarian version, swap the meat for two cans of black beans and one cup of finely chopped mushrooms.
Equipment Needed
You don’t need anything fancy here. Most of this stuff is probably already in your kitchen.
- Sharp paring knife (for carving the faces—a small, serrated knife works too)
- Large baking dish (9×13 works perfectly)
- Large skillet (for browning the meat)
- Cutting board
- Mixing bowl
- Wooden spoon or spatula
- Small spoon (for scooping out pepper seeds)
- Aluminum foil
- Parchment paper (optional, for easier cleanup)
If you don’t have a paring knife, a sturdy vegetable peeler can work for carving, but a knife is easier. I bought a cheap set of small carving knives at the grocery store last year, and they’ve become my go-to for Halloween cooking.
Preparation Method
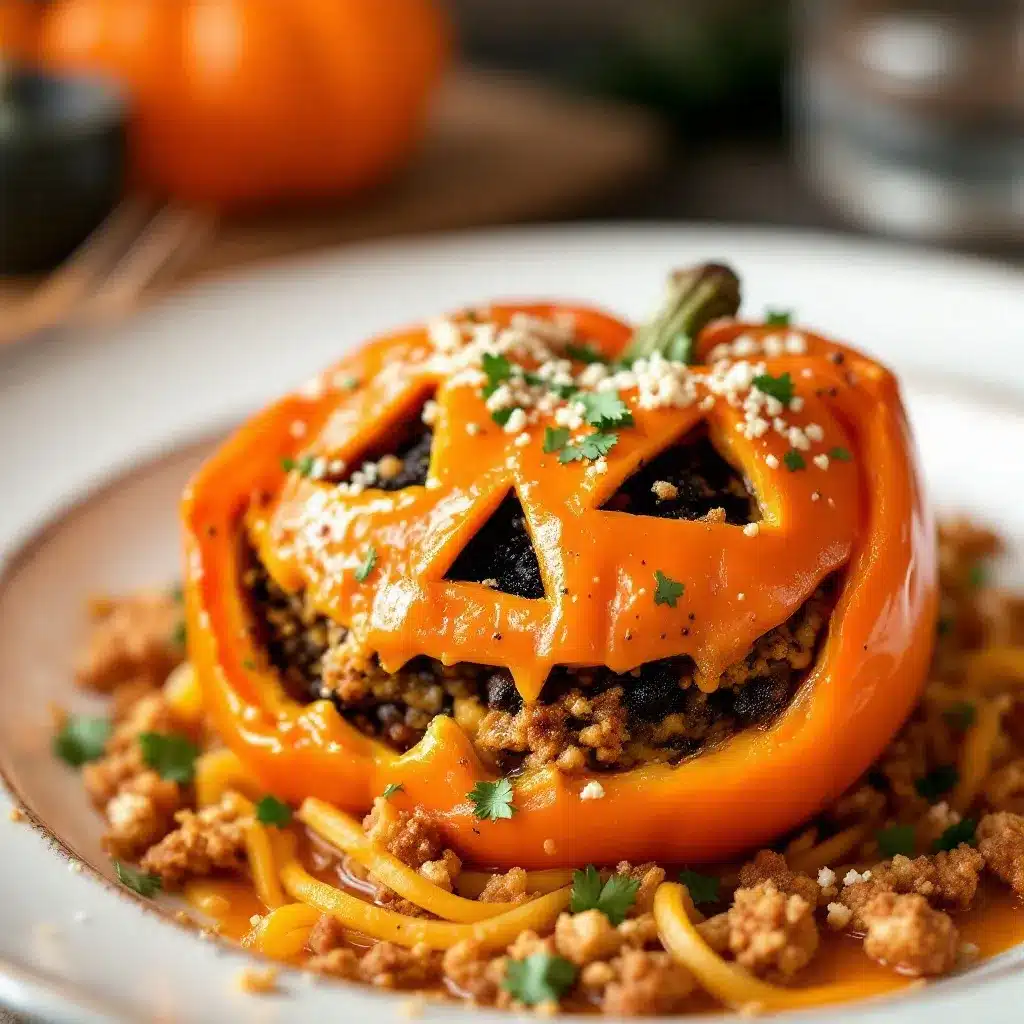
Okay, let’s make these spooky guys. Take your time with the carving—it’s the fun part.
- Preheat your oven to 400°F (200°C). Line your baking dish with parchment paper if you want easier cleanup. I always forget, and then I regret it.
- Prepare the peppers. Wash and dry your bell peppers. Using a sharp knife, cut the top off each pepper about ½ inch from the stem. Set the tops aside. Carefully scoop out all the seeds and white membranes from inside. Don’t rinse them—just use a small spoon to scrape everything out. Pat the insides dry with a paper towel.
- Carve the faces. This is where the magic happens. Using your paring knife, cut triangle eyes and a jagged mouth into the front of each pepper. You can get creative—add a nose, some teeth, or even a little eyebrow. Just make sure the cuts go all the way through the pepper wall. I learned the hard way that shallow cuts don’t show up after baking. Save the cut-out pieces to roast alongside the peppers for a snack.
- Pre-roast the peppers. Place the hollowed peppers and their tops in your baking dish. Drizzle with 1 tablespoon of olive oil and rub it all over the outside and inside. Roast for 10 minutes. This step is crucial—it firms up the peppers so they don’t go mushy later. They should be slightly tender but still hold their shape.
- Make the filling. While the peppers roast, heat the remaining 1 tablespoon of olive oil in a large skillet over medium-high heat. Add the diced onion and cook for 3-4 minutes until it’s soft and translucent. Add the minced garlic and cook for 30 seconds until fragrant.
- Brown the meat. Add the ground beef and Italian sausage to the skillet. Break it up with a wooden spoon and cook for 6-8 minutes until no longer pink. Don’t drain all the fat—leave about a tablespoon in there for flavor. Drain the rest if there’s a lot.
- Add the seasonings. Stir in the smoked paprika, cumin, chili powder, salt, and black pepper. Cook for 1 minute until the spices smell amazing. Then add the fire-roasted tomatoes and black beans. Stir everything together and let it simmer for 3-4 minutes until slightly thickened.
- Add the rice. Stir in the cooked rice. Taste the filling and adjust the salt if needed. Turn off the heat. The filling should be moist but not soupy. If it looks dry, add a splash of chicken broth or water.
- Stuff the peppers. Remove the pre-roasted peppers from the oven. Carefully spoon the filling into each pepper, packing it down gently. Don’t overstuff—you want the filling to be level with the top of the pepper. Top each pepper with a generous sprinkle of shredded cheese.
- Bake the stuffed peppers. Place the stuffed peppers back in the baking dish. If you want, you can put the pepper tops on at an angle to look like little hats. Cover the dish loosely with aluminum foil and bake for 20 minutes. Then remove the foil and bake for another 10 minutes until the cheese is bubbly and golden.
- Rest and serve. Let the peppers rest for 5 minutes before serving. This helps the filling set. Sprinkle with fresh parsley or cilantro if you’re feeling fancy.
Sensory cue: When you pull these out of the oven, the cheese should be melted and slightly browned, the peppers should be tender but still holding their shape, and the filling should be steaming and fragrant with smoked paprika. The carved faces will have darkened slightly, making them look even spookier.
Cooking Tips & Techniques
I’ve made enough mistakes with stuffed peppers to fill a cookbook. Here’s what I’ve learned so you don’t have to repeat my errors.
Don’t skip the pre-roast. I know it’s an extra step, but it makes a huge difference. Peppers that go straight into the oven raw release too much water and turn into sad, soggy messes. The pre-roast firms them up and concentrates their sweetness. Trust me on this one.
Carve the faces before roasting. I tried carving after the pre-roast once, and the peppers were too soft to cut cleanly. Do your carving on raw peppers—the knife glides through much easier.
Use a small spoon for scooping. A teaspoon or a melon baller works perfectly for scraping out seeds and membranes. A big spoon just smashes everything.
Don’t overstuff. I know it’s tempting to cram as much filling as possible in there, but overstuffed peppers tend to split open during baking. Leave about ¼ inch of space at the top.
Let them rest. Those 5 minutes of resting time are not optional. The filling needs time to set, or it’ll fall apart when you try to serve it.
One time I forgot to drain the black beans, and the filling turned into soup. It still tasted good, but the peppers were a mess. Always rinse and drain your beans!
Variations & Adaptations
This recipe is super flexible. Here are some ways to make it your own.
- Vegetarian Version : Swap the meat for two cans of black beans and one cup of finely chopped mushrooms. Sauté the mushrooms with the onions until they release their liquid and start to brown. Add an extra teaspoon of smoked paprika for depth.
- Spicy Version : Use hot Italian sausage instead of mild, add a diced jalapeño to the onion mixture, and use pepper jack cheese on top. My husband loves this version—I think he’s part dragon.
- Mexican-Inspired Version : Add ½ cup of corn kernels (frozen or canned) to the filling, use cotija cheese instead of cheddar, and top with fresh salsa and avocado slices before serving.
- Low-Carb Version : Skip the rice and add an extra cup of riced cauliflower. Sauté it with the onions before adding the meat. You honestly won’t miss the rice.
- Make It a Meal Prep : Assemble the peppers up to the baking step, then cover and refrigerate for up to 24 hours. When you’re ready, just add 10 minutes to the baking time.
I once made a breakfast version with scrambled eggs, chorizo, and cheese inside the peppers. It was weirdly amazing. Don’t be afraid to experiment.
Serving & Storage Suggestions
These peppers are best served hot, right out of the oven. The cheese should be melty, and the filling should be steaming. I like to serve them with a dollop of sour cream and a sprinkle of fresh cilantro on top.
What to serve with them:
- A simple side salad with lime vinaigrette
- Mexican street corn or elote
- Warm tortillas or crusty bread
- A side of easy cowboy caviar with lime cilantro dressing for extra color and crunch
Storage: Leftover stuffed peppers keep well in the fridge for up to 4 days. Store them in an airtight container. The flavors actually get better after a day—the spices meld together and the peppers absorb more of the sauce.
Reheating: The best way to reheat is in the oven at 350°F for 15-20 minutes. The microwave works in a pinch, but the peppers will be softer. If you’re in a hurry, microwave on 50% power for 2-3 minutes.
Freezing: These freeze beautifully. Assemble the peppers completely, but don’t bake them. Wrap each pepper tightly in plastic wrap, then foil. Freeze for up to 3 months. To bake, thaw in the fridge overnight, then bake as directed, adding 10-15 minutes.
One thing I love about this recipe is how the flavors develop. Day-old stuffed peppers are almost better than fresh. The filling gets richer, and the peppers soften just a little more.
Nutritional Information & Benefits
Here’s an approximate nutritional breakdown for one stuffed pepper (based on the recipe as written):
| Nutrient | Amount per Serving |
|---|---|
| Calories | 420 |
| Protein | 32g |
| Carbohydrates | 28g |
| Fiber | 7g |
| Fat | 20g |
| Saturated Fat | 8g |
| Sodium | 680mg |
Health Benefits: Bell peppers are packed with vitamin C—one pepper has more than an orange. They’re also a great source of vitamin A, which is good for your eyes and immune system. The black beans add fiber and plant-based protein, while the lean beef provides iron and B vitamins. This is a well-rounded meal that actually fills you up without weighing you down.
Dietary Considerations: This recipe is naturally gluten-free (just check your sausage and spice blends). For a lower-sodium version, use no-salt-added tomatoes and reduce the added salt. If you’re watching your carbs, skip the rice or use cauliflower rice.
I love that this recipe feels indulgent but is secretly pretty healthy. It’s comfort food you can feel good about serving your family.
Frequently Asked Questions
Can I make these ahead of time for a Halloween party?
Absolutely! You can assemble the peppers completely (including the cheese) up to 24 hours in advance. Just cover and refrigerate. When you’re ready to bake, add about 10 minutes to the baking time since you’re starting from cold.
My peppers always turn out mushy. What am I doing wrong?
The most common mistake is skipping the pre-roast step. Roasting the peppers for 10 minutes before stuffing them firms up the cell structure and prevents them from releasing too much water during baking. Also, make sure you’re not overbaking them—20 minutes covered and 10 uncovered is plenty.
Can I use different colored peppers?
You can, but orange peppers give the best jack-o-lantern effect. Red peppers work but look more like tomatoes. Yellow peppers are okay, but they’re harder to see the carved faces on. Green peppers are too bitter for this recipe in my opinion—save those for salads.
How do I get the faces to show up clearly after baking?
Cut the faces all the way through the pepper wall. If you only score the surface, the cuts will close up during baking. Also, don’t make the cuts too small—big, bold features show up much better. I use a small paring knife and cut in a sawing motion.
Can I freeze the unbaked stuffed peppers?
Yes! Assemble the peppers completely but don’t bake them. Wrap each one tightly in plastic wrap, then in foil. Freeze for up to 3 months. To bake, thaw overnight in the fridge, then bake as directed. You might need to add 10-15 minutes since they’re starting from cold.
Conclusion
These Spooky Jack-O-Lantern Stuffed Bell Peppers are the kind of recipe that makes you look forward to dinner. They’re fun to make, fun to eat, and honestly—they taste incredible. The smoky, savory filling pairs perfectly with the sweet roasted pepper, and the melted cheese on top ties it all together.
I love that this recipe brings people together. My daughter and I spend an evening every October carving faces into peppers and laughing at our crooked creations. It’s become a little tradition, and I hope it becomes one for you too.
Don’t be afraid to make these your own. Swap the fillings, change up the faces, serve them with your favorite sides. The beauty of this recipe is how forgiving it is. And if your first batch isn’t perfect? That’s okay. Mine wasn’t either.
If you make these, I’d love to hear about it. Drop a comment below and tell me what faces you carved—or tag me in your photos. Happy Halloween, and happy cooking!
Pin This Recipe!
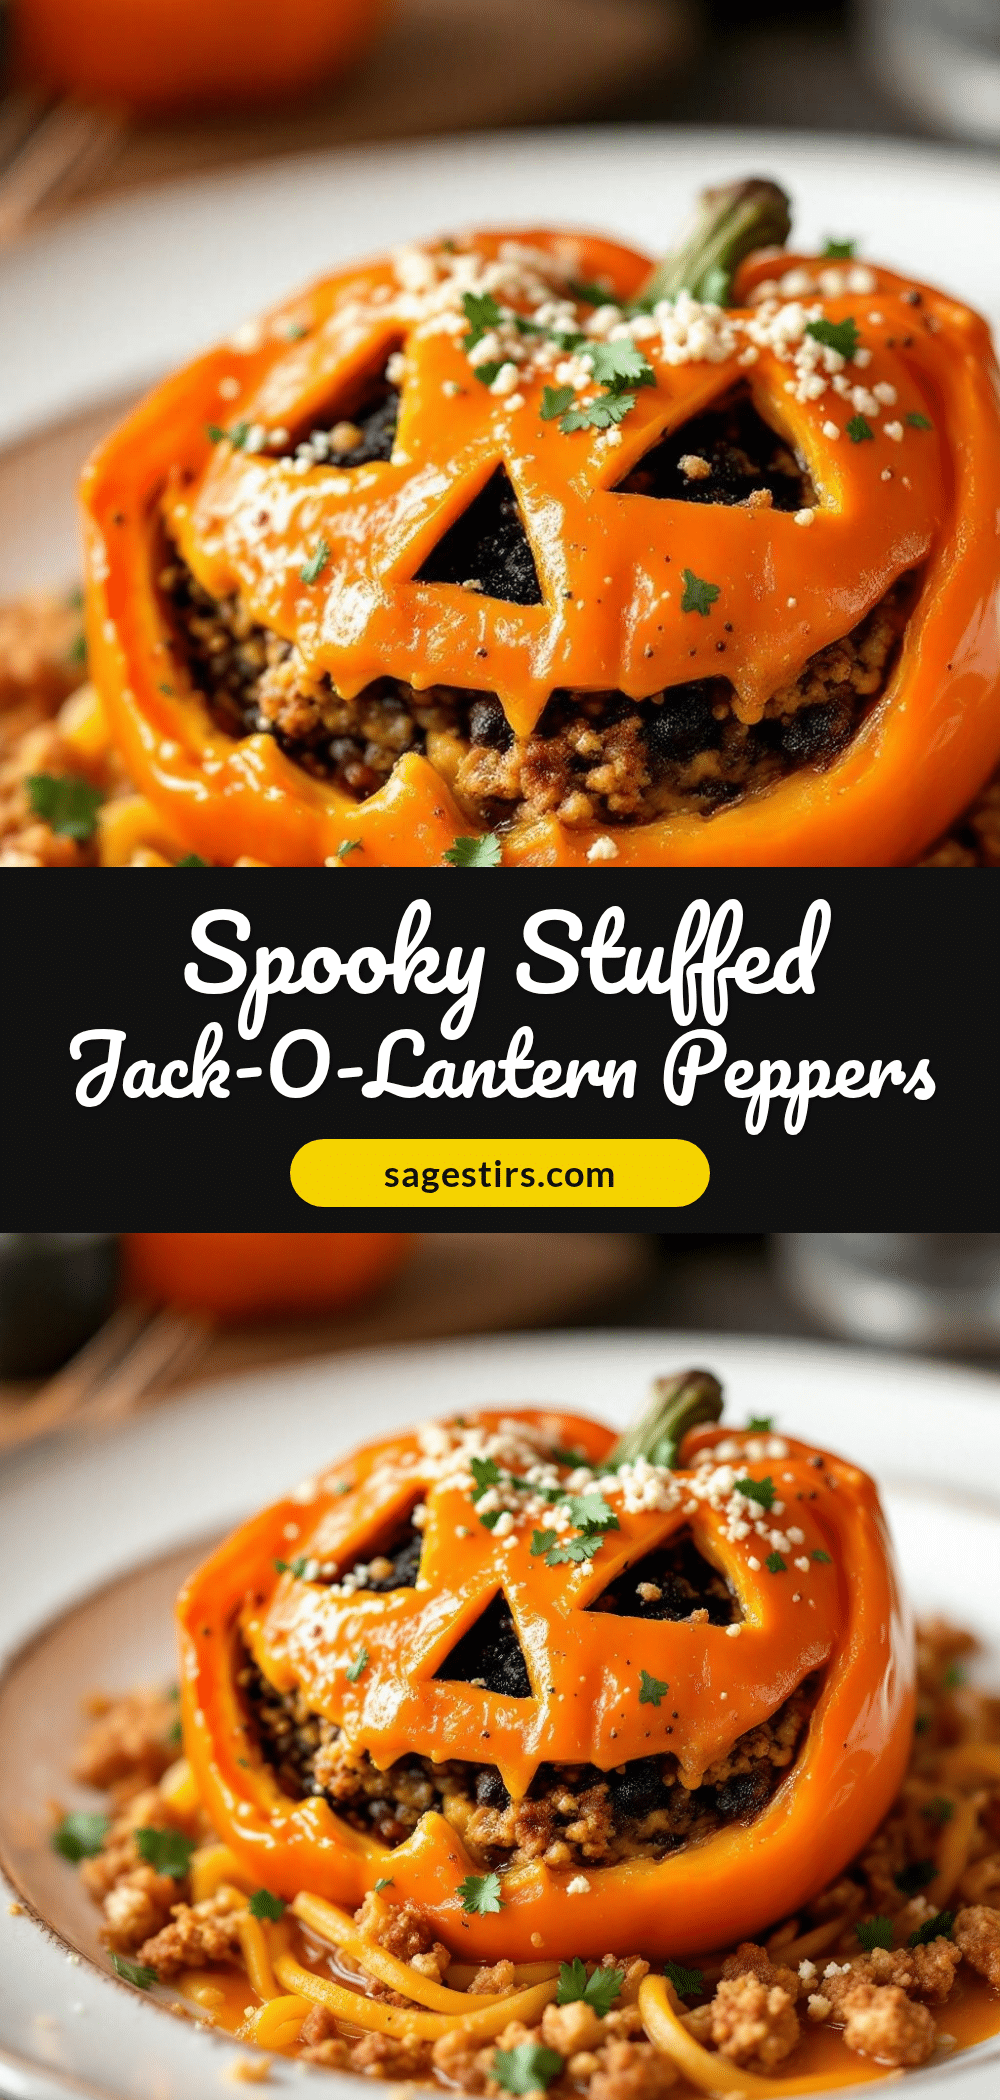
Spooky Jack-O-Lantern Stuffed Bell Peppers

These Spooky Jack-O-Lantern Stuffed Bell Peppers are a fun and festive Halloween dinner. Pre-roasted orange bell peppers are carved with jack-o-lantern faces and filled with a smoky, savory mixture of ground beef, Italian sausage, fire-roasted tomatoes, black beans, and rice, then topped with melted cheese.
- Prep Time: 20 minutes
- Cook Time: 40 minutes
- Total Time: 1 hour
- Yield: 4 servings 1x
- Category: Main Course
- Cuisine: American
Ingredients
- 4 large orange bell peppers
- 1 lb ground beef (85/15)
- ½ lb Italian sausage (mild or spicy)
- 1 cup cooked white rice
- 1 can (14.5 oz) fire-roasted diced tomatoes, drained slightly
- 1 can (15 oz) black beans, rinsed and drained
- 1 small yellow onion, finely diced
- 3 cloves garlic, minced
- 1 tbsp smoked paprika
- 1 tsp ground cumin
- ½ tsp chili powder
- ½ tsp salt, plus more to taste
- ¼ tsp black pepper
- 1 cup shredded Mexican blend cheese (or cheddar)
- 2 tbsp olive oil
- Fresh parsley or cilantro for garnish (optional)
Instructions
- Preheat your oven to 400°F (200°C). Line your baking dish with parchment paper if desired.
- Prepare the peppers: Wash and dry the bell peppers. Cut the top off each pepper about ½ inch from the stem. Set the tops aside. Carefully scoop out all seeds and white membranes using a small spoon. Pat the insides dry with a paper towel.
- Carve the faces: Using a paring knife, cut triangle eyes and a jagged mouth into the front of each pepper, cutting all the way through the pepper wall. Save the cut-out pieces for roasting if desired.
- Pre-roast the peppers: Place the hollowed peppers and their tops in the baking dish. Drizzle with 1 tablespoon olive oil and rub over the outside and inside. Roast for 10 minutes until slightly tender but still holding shape.
- Make the filling: While peppers roast, heat the remaining 1 tablespoon olive oil in a large skillet over medium-high heat. Add the diced onion and cook for 3-4 minutes until soft and translucent. Add the minced garlic and cook for 30 seconds until fragrant.
- Brown the meat: Add the ground beef and Italian sausage to the skillet. Break it up with a wooden spoon and cook for 6-8 minutes until no longer pink. Leave about 1 tablespoon of fat in the pan for flavor; drain the rest if necessary.
- Add the seasonings: Stir in the smoked paprika, cumin, chili powder, salt, and black pepper. Cook for 1 minute. Then add the fire-roasted tomatoes and black beans. Stir and let simmer for 3-4 minutes until slightly thickened.
- Add the rice: Stir in the cooked rice. Taste and adjust salt if needed. Turn off the heat. The filling should be moist but not soupy; add a splash of chicken broth or water if dry.
- Stuff the peppers: Remove the pre-roasted peppers from the oven. Carefully spoon the filling into each pepper, packing it down gently. The filling should be level with the top of the pepper. Top each with a generous sprinkle of shredded cheese.
- Bake the stuffed peppers: Place the stuffed peppers back in the baking dish. Optionally, put the pepper tops on at an angle to look like hats. Cover loosely with aluminum foil and bake for 20 minutes. Remove foil and bake for another 10 minutes until cheese is bubbly and golden.
- Rest and serve: Let the peppers rest for 5 minutes before serving. Sprinkle with fresh parsley or cilantro if desired.
Notes
Don’t skip the pre-roast step—it keeps the peppers firm. Carve faces on raw peppers for clean cuts. Use squat, wide orange bell peppers for easier carving and more filling. For a vegetarian version, swap meat for 2 cans black beans and 1 cup finely chopped mushrooms. Leftovers keep in the fridge for up to 4 days; reheat in the oven at 350°F for 15-20 minutes. Unbaked peppers can be frozen for up to 3 months.
Nutrition
- Serving Size: 1 stuffed pepper
- Calories: 420
- Sodium: 680
- Fat: 20
- Saturated Fat: 8
- Carbohydrates: 28
- Fiber: 7
- Protein: 32
Keywords: stuffed bell peppers, Halloween dinner, jack-o-lantern peppers, spooky recipe, ground beef, Italian sausage, black beans, fire-roasted tomatoes, kid-friendly, festive



