Love this? Save it for later!
Share the inspiration with your friends
I did not trust candy corn in white chocolate bark. Honestly, I thought mixing those waxy, sugar-dusted triangles with premium white chocolate sounded like a mistake waiting to happen. You know how it is with Halloween treats. They often look festive in the store but taste like pure, dense sweetness when you get home. I had a bag of candy corn sitting in my pantry from last October, and I was ready to toss it. My partner, however, insisted we give it one last shot by melting it into something else. I rolled my eyes, grabbed a bag of Ghirardelli white chocolate chips, and figured I had nothing to lose. If it tasted bad, I could just throw the whole thing out.
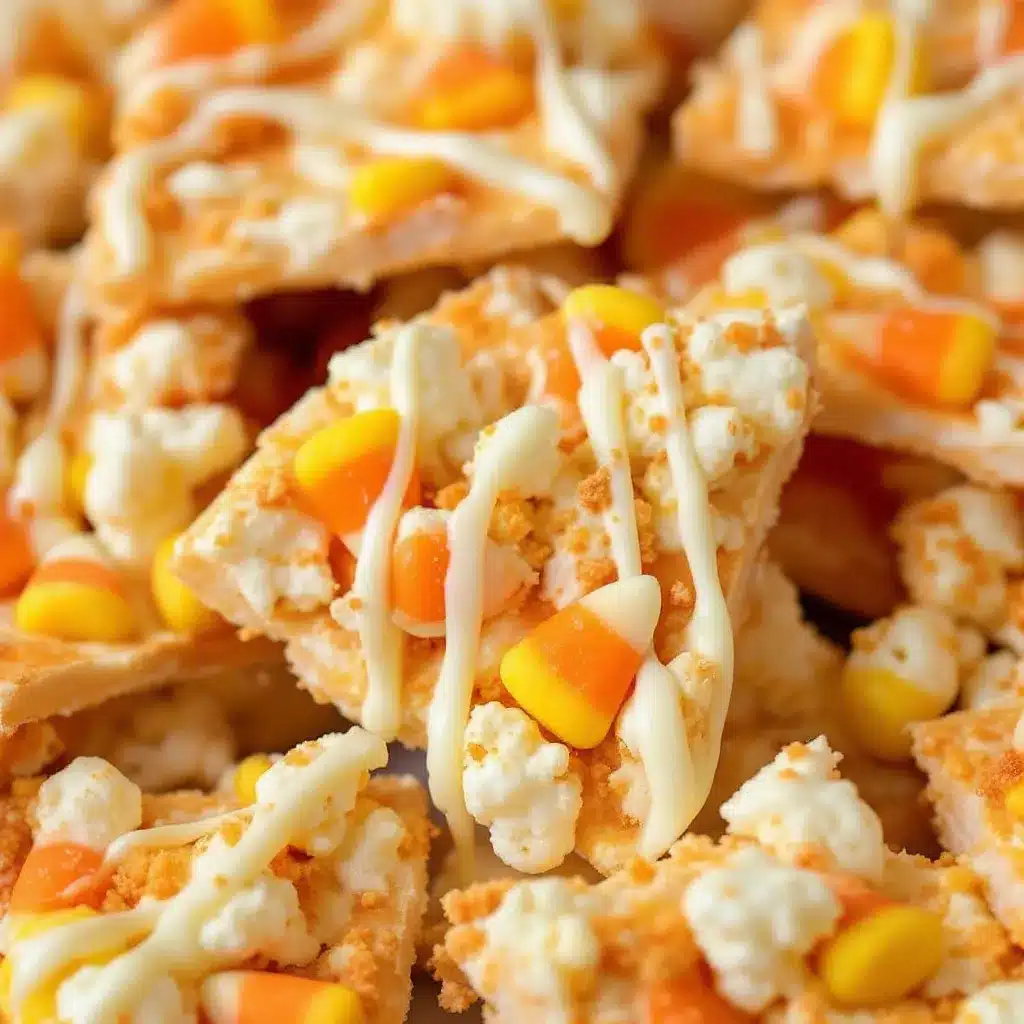
I melted the chocolate slowly, watching it turn glossy and smooth. Then came the risky part: pouring the candy corn in. I was afraid the heat would melt the candy corn into a sticky, unusable mess. I stirred it gently, half-expecting a clumpy disaster. Instead, the pieces held their shape, floating in the creamy white sea like little orange and yellow islands. I spread it onto parchment paper and popped it in the fridge. Twenty minutes later, I cracked a piece. The snap was audible. The white chocolate was rich and smooth, while the candy corn added a surprising, pleasant chew. It wasn’t just good; it was actually delicious.
I stood in my kitchen, staring at the broken pieces, wondering why I had ever doubted this combination. The contrast of textures was perfect. The sweetness was balanced enough to eat by the handful without feeling sick. That was the moment I knew this crispy candy corn white chocolate bark was here to stay. It turned a forgotten ingredient into a show-stopping treat that everyone in the office went crazy for. Now, every time October rolls around, I make a double batch just to be safe.
Why You’ll Love This Recipe
This recipe isn’t just another quick sugar fix; it is a tested and true favorite that balances simplicity with serious flavor. I have made dozens of variations of chocolate bark over the years, from adding pretzels to tossing in dried cranberries. But this specific combination of crispy candy corn and smooth white chocolate hits a different note. It is the kind of treat that makes you close your eyes after the first bite because the texture is just that satisfying. It is comfort food reimagined for the Halloween season, offering that same soul-soothing satisfaction as a slice of pie but without the heaviness.
- Quick & Easy: This comes together in under 10 minutes of active time. You really only need to melt chocolate and mix. It is perfect for busy weeknights or last-minute cravings when you need something sweet fast.
- Simple Ingredients: No fancy grocery trips needed. You likely already have white chocolate and candy corn in your kitchen, or they are the first things you grab when you walk past the seasonal aisle.
- Perfect for Gifting: This is great for teacher gifts, neighbor drops, or party favors. The rustic, broken look feels homemade and thoughtful without being overly complicated.
- Crowd-Pleaser: Always gets rave reviews from kids and adults alike. Kids love the familiar candy, while adults appreciate the high-quality chocolate base.
- Unbelievably Delicious: The texture and flavor combo is next-level. The snap of the chocolate against the chew of the candy corn creates a mouthfeel that keeps you coming back for more.
What makes this recipe different from the rest is the ratio. Too much candy corn can make it overwhelmingly sweet, but when you balance it correctly with high-fat white chocolate, the result is creamy and indulgent. It is not just another version; it is my best version. I tested this multiple times to get the thickness just right so every piece has a good crunch. It is perfect for impressing guests without stress, or turning a simple afternoon snack into something memorable.
What Ingredients You Will Need
This recipe uses simple, wholesome ingredients to deliver bold flavor and satisfying texture without the fuss. The beauty of bark lies in its minimalism. You do not need a dozen spices or obscure baking powders. The magic happens through the quality of the chocolate and the freshness of the candy corn. I recommend using high-quality white chocolate chips rather than baking bars, as chips contain stabilizers that help the bark set firmer and snap better. Look for brands that list cocoa butter as the first ingredient for the best mouthfeel.
- White Chocolate Chips: Use about 2 cups of high-quality white chocolate chips. I personally prefer Ghirardelli or Guittard for their creamy texture and lack of artificial aftertaste. Do not use white chocolate coating melts if you can avoid it, as they often taste waxy. Chips provide a richer flavor profile.
- Candy Corn: You will need approximately 1 to 1.5 cups of standard candy corn. Make sure they are fresh. Old candy corn can become stale or lose its shape, which affects the final texture. If you buy a bag early, store it in an airtight container to keep it crisp.
- Vanilla Extract: A teaspoon of pure vanilla extract helps round out the sweetness of the white chocolate. It adds a subtle depth that prevents the treat from tasting one-dimensionally sweet. Use clear vanilla so it does not discolor your beautiful white bark.
- Salt (Optional): A light sprinkle of flaky sea salt on top before it sets can elevate the flavor. The salt cuts through the sugar and makes the chocolate taste more intense. If you have a sweet tooth, you can skip this, but I highly recommend it for balance.
For substitutions, you can use white chocolate chips made with coconut oil if you need a dairy-free option, though the texture might be slightly softer. You can also swap in white chocolate chunks for a more rustic look. If you want to add a seasonal twist, consider mixing in a handful of pumpkin-shaped sprinkles or crushed gingersnaps, similar to what you might find in perfect pumpkin chocolate chip cookies. Just be careful not to add too many mix-ins, or the bark won’t hold together well.
Equipment Needed
You do not need a lot of fancy gear to make this bark. A standard microwave-safe bowl is all you really need. I prefer using a glass or ceramic bowl because they heat evenly and are easy to clean. If you do not have a microwave, you can use a double boiler setup with a heatproof bowl over a pot of simmering water. Just be careful not to let water splash into the chocolate, as even a tiny drop can cause it to seize up.
A silicone baking mat or parchment paper is essential for lining your baking sheet. Silicone mats are great because they provide a non-stick surface and are reusable, which is better for the environment. Parchment paper works perfectly fine too, but you might need to replace it more often. I always keep a box of parchment paper in my pantry for quick projects like this.
A rubber spatula is your best friend here. You need something that can scrape the sides of the bowl to get all the melted chocolate. A metal spoon can scratch your bowl and does not scrape as effectively. If you are making a large batch, a larger mixing bowl will make spreading the chocolate much easier. Keep your tools simple and clean, and the process will be smooth.
Preparation Method
- Prepare your workspace: Line a large baking sheet or rimmed cookie sheet with parchment paper or a silicone mat. Set it aside. This step is crucial because the chocolate sets quickly, and you want to be ready to pour immediately. If you wait until the chocolate is melted to line the pan, you might end up with a bowl of hot chocolate and no place to put it. (Time: 2 minutes)
- Melt the chocolate: Place your white chocolate chips in a microwave-safe bowl. If using a microwave, heat on medium power in 30-second intervals. Stir well between each interval. This is the most important step for success. Do not rush the melting process. If you heat it too fast, the chocolate can burn or become grainy. You want it smooth and glossy. If using a double boiler, place the bowl over simmering water and stir constantly until melted. (Time: 3-4 minutes)
- Add flavorings: Once the chocolate is completely smooth, remove it from the heat. Stir in the vanilla extract. If you are using salt, add it now. Mix gently until fully incorporated. The residual heat will be enough to blend the vanilla without cooking it off. (Time: 1 minute)
- Combine with candy corn: Pour the candy corn into the melted chocolate. Use your spatula to gently fold the candy corn into the chocolate. You want to coat the pieces evenly, but be careful not to break the candy corn. If you stir too vigorously, the candy corn will crack, and you will lose that nice texture. Just fold until no dry spots of candy corn are visible. (Time: 1-2 minutes)
- Spread the mixture: Pour the mixture onto your prepared baking sheet. Use the spatula to spread it out into an even layer. Aim for a thickness of about 1/4 to 1/2 inch. If it is too thick, it will be hard to break into pieces later. If it is too thin, it might be brittle and shatter into dust. You want substantial chunks. (Time: 2 minutes)
- Add toppings (Optional): If you are adding extra sprinkles or sea salt, do it now. Gently press them into the surface so they stick. (Time: 1 minute)
- Chill the bark: Place the baking sheet in the refrigerator. Let it cool for at least 20-30 minutes. You want the chocolate to be completely hard and set. If you try to break it while it is still soft, it will be a sticky mess. Check it after 20 minutes by tapping the surface; it should feel firm. (Time: 20-30 minutes)
- Break and serve: Once fully set, lift the parchment paper off the sheet and break the bark into irregular pieces. Do not use a knife, as it can crush the candy corn. Use your hands to snap the chocolate along natural fault lines. This gives it that rustic, artisanal look. (Time: 2 minutes)
How do I prevent the chocolate from seizing?
Chocolate seizes when it comes into contact with even a small amount of water or steam. To prevent this, ensure your bowl and utensils are completely dry before you start. When melting in the microwave, keep the power level moderate to avoid overheating. If you notice the chocolate starting to look thick or grainy, stop heating immediately and stir vigorously. Sometimes adding a tiny teaspoon of warm cream can rescue slightly seized chocolate, but prevention is always better.
Cooking Tips & Techniques
The biggest mistake people make with chocolate bark is rushing the melting process. I learned this the hard way when I first started making treats for parties. I put the chocolate in on high power and walked away. When I came back, it was scorched and unusable. Always use medium power or a double boiler. Patience pays off with smooth, shiny chocolate.
Another tip is to temper your chocolate if you want that professional snap. However, for this recipe, simple melting works fine because the candy corn adds structure. If you do want to temper, melt the chocolate to 115°F, cool it to 82°F, and then gently reheat it to 90°F. This aligns the cocoa butter crystals for a better finish. But honestly, for a quick home treat, just melting it until smooth is sufficient.
Work quickly when spreading the mixture. Chocolate starts to set as soon as it leaves the heat. If your mixture starts to thicken while you are spreading, you can microwave it for 5 seconds to loosen it up. Have your spatula and lined pan ready before you even start melting. This workflow prevents the chocolate from cooling too much in the bowl.
Storage is key to maintaining texture. Keep the bark in an airtight container at room temperature. If it gets too warm, the chocolate will soften. If you live in a humid climate, you might need to store it in the refrigerator, but let it come to room temperature before eating to enjoy the full flavor. Avoid freezing unless necessary, as condensation can form when you take it out, making the candy corn sticky.
Variations & Adaptations
While the classic version is fantastic, there are many ways to tweak this recipe to suit your tastes or dietary needs. Here are a few variations I have tried that work well.
- Pumpkin Spice Twist: Add a teaspoon of pumpkin pie spice to the melted white chocolate before adding the candy corn. This gives it a warm, autumnal flavor that pairs beautifully with the sweetness. You could also mix in some mini pumpkin-shaped sprinkles for extra visual appeal.
- Butterscotch Chip Mix: Swap half of the white chocolate chips for butterscotch chips. This adds a caramel-like depth to the bark, making it richer and more complex. The combination of white and butterscotch chips creates a marbled effect that looks stunning.
- Gluten-Free Option: Standard candy corn is naturally gluten-free, but always check the label to be sure. Use certified gluten-free white chocolate chips if you have celiac disease or a severe allergy. This makes the treat safe for everyone to enjoy.
- Nut-Free Zone: This recipe is naturally nut-free, making it perfect for school events or parties with nut restrictions. Just ensure your chocolate chips are processed in a facility that does not handle nuts if cross-contamination is a concern.
I also tried adding a drizzle of dark chocolate on top before it set. The contrast of the dark chocolate against the white base was visually striking and added a nice bitter note to balance the sweet candy corn. It was a hit with my husband, who prefers less sweetness. Feel free to experiment with different toppings like crushed pretzels or dried cranberries to find your favorite combination.
Serving & Storage Suggestions
This bark is best served at room temperature. Cold chocolate can sometimes mute the flavor, so let it sit out for a few minutes after taking it out of the fridge. It pairs wonderfully with a hot cup of coffee or tea. If you are serving it at a party, arrange the pieces on a platter with some festive napkins. It also goes well with a glass of cold milk or a spiced apple cider, similar to the cozy vibes of cozy slow cooker spiced apple cider.
For storage, place the bark pieces in an airtight container. Line the layers with parchment paper to prevent them from sticking together. Store at room temperature for up to two weeks. If your kitchen is very warm, you may need to store it in the refrigerator. In that case, allow it to come to room temperature before serving to restore the proper texture.
You can also freeze the bark for longer storage. Place the pieces in a freezer-safe bag or container. They will keep for up to three months. Thaw them in the refrigerator overnight before serving. This is a great way to make the treat ahead of time for holidays or parties. The flavors actually seem to meld and improve slightly after a day or two in storage.
Nutritional Information & Benefits
While this treat is definitely on the sweeter side, it is made with simple ingredients that you can control. White chocolate provides calcium and some fats, while candy corn offers quick energy from sugar. One piece of bark (approximately 10 grams) contains roughly 50-60 calories. The exact count depends on the size of the piece and the specific brand of chocolate used.
The recipe is naturally gluten-free and nut-free, which is a significant benefit for those with dietary restrictions. However, it does contain dairy, so it is not suitable for vegans or those with lactose intolerance unless dairy-free alternatives are used. The high sugar content means it should be enjoyed in moderation as a special treat rather than a daily snack.
From a wellness perspective, I like that this recipe allows for portion control. Because you break it into pieces, it is easy to limit yourself to one or two pieces. It satisfies a sweet craving without requiring a full dessert plate. It is a mindful way to enjoy Halloween flavors without overindulging.
Conclusion
This crispy candy corn white chocolate bark is a simple yet delicious treat that is perfect for the fall season. It requires minimal effort but delivers maximum satisfaction. I hope you try this recipe and find as much joy in making it as I did. Feel free to customize it with your favorite toppings or spices to make it your own.
If you make this, I would love to hear how it turned out. Please leave a comment below with your thoughts or share a photo of your creation. Tag me on social media if you post it, as I love seeing your variations. This recipe is a staple in my Halloween baking rotation, and I think it will become one in yours too.
Happy baking, and enjoy every crunchy, sweet bite! Let me know if you have any questions in the comments section below.
FAQs
Can I use white chocolate bars instead of chips?
Yes, you can, but chips are generally preferred because they contain stabilizers that help the bark set firmer. If you use bars, chop them into small, even pieces to ensure they melt uniformly. The final texture might be slightly softer, so you may need to chill it longer.
How long does the candy corn last in the bark?
The candy corn stays fresh as long as the bark is stored properly in an airtight container. It should remain crisp and chewy for up to two weeks at room temperature. If it starts to feel soft or stale, it is best to discard it.
Can I make this recipe ahead of time?
Absolutely. You can make the bark up to two weeks in advance. In fact, making it a day or two before the event allows the flavors to meld. Just store it properly to maintain freshness.
Is this recipe gluten-free?
Yes, standard candy corn and white chocolate chips are naturally gluten-free. However, always check the labels of your specific brands to ensure they are processed in a gluten-free facility if you have celiac disease.
What can I use instead of candy corn?
If you do not like candy corn, you can substitute it with mini marshmallows, crushed pretzels, or dried cranberries. Each substitute will change the texture and flavor profile, so experiment to find what you like best.
Pin This Recipe!
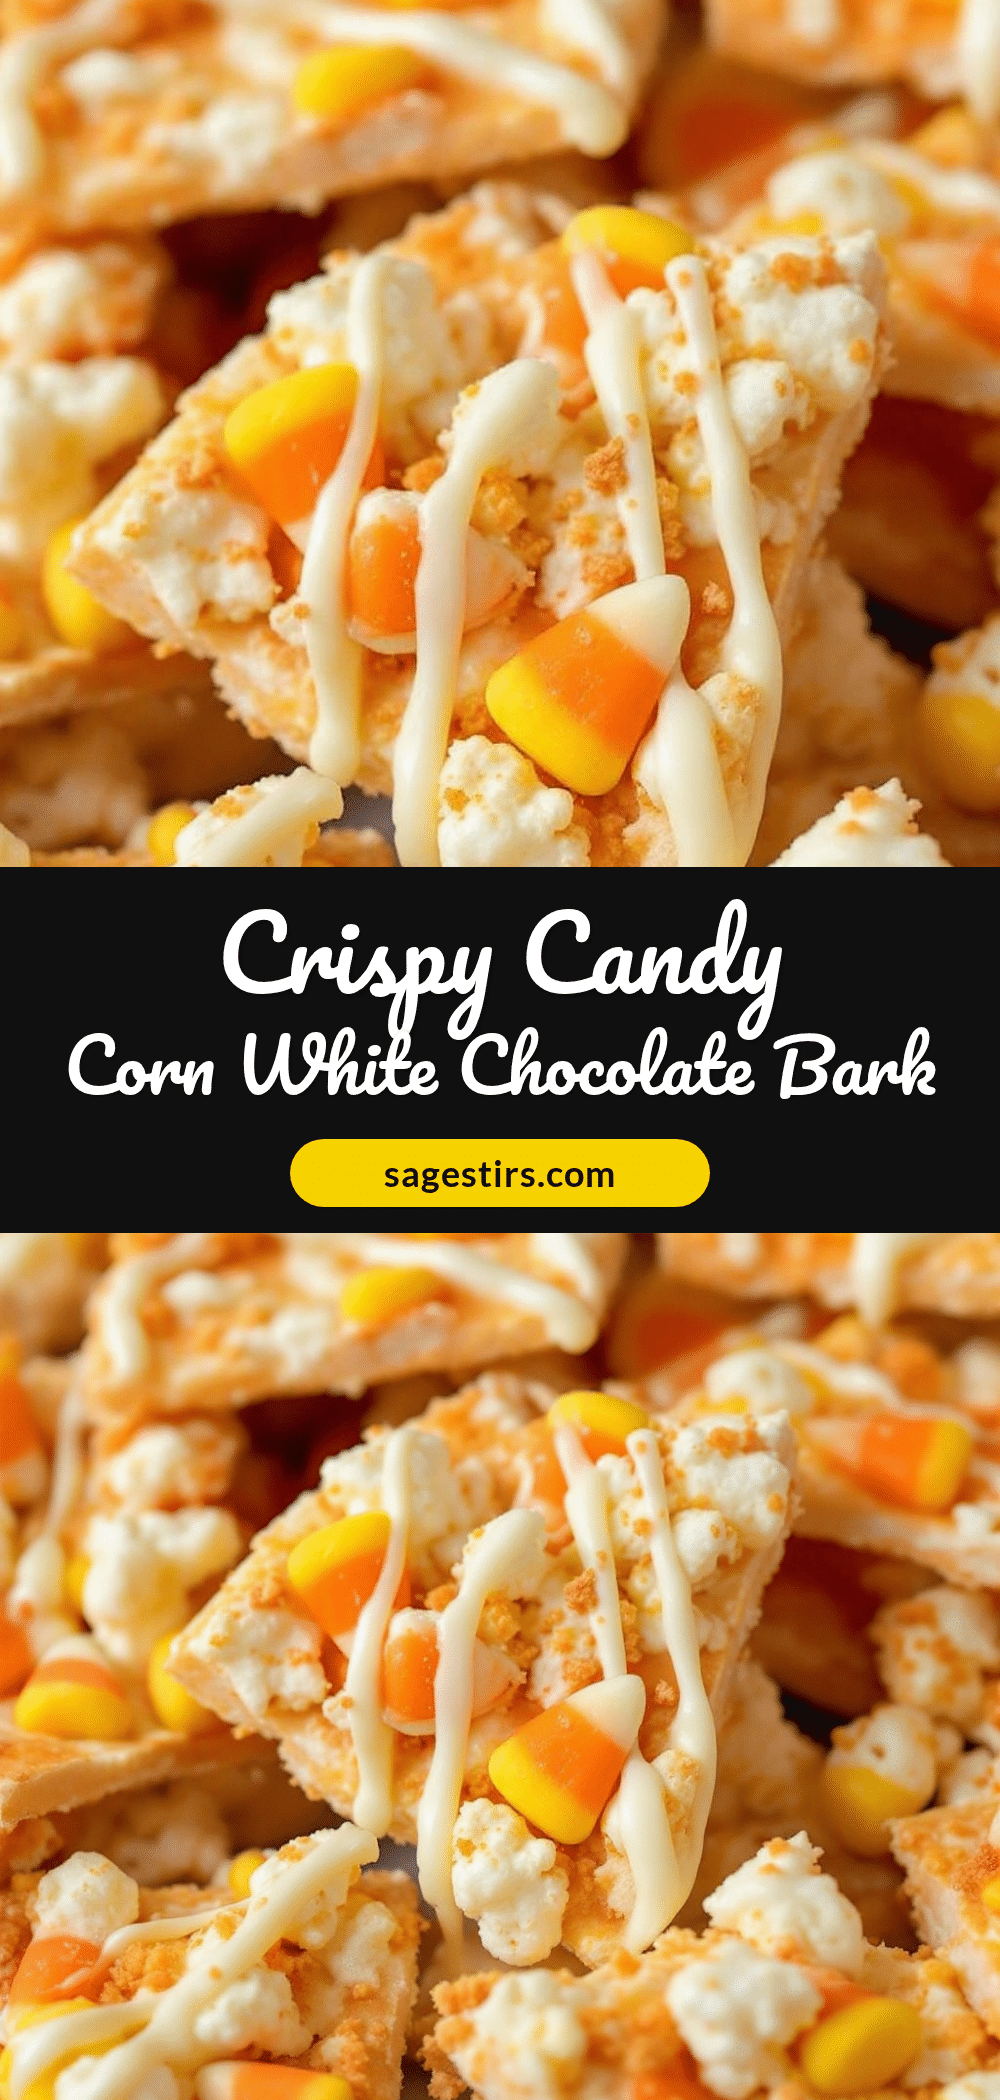
Crispy Candy Corn White Chocolate Bark
A quick and easy 5-minute Halloween treat featuring high-quality white chocolate chips and festive candy corn, resulting in a crunchy, chewy, and delicious bark perfect for gifting or snacking.
- Prep Time: 5 minutes
- Cook Time: 0 minutes
- Total Time: 25 minutes
- Yield: Approximately 10-12 servings 1x
- Category: Dessert
- Cuisine: American
Ingredients
- 2 cups high-quality white chocolate chips (such as Ghirardelli or Guittard)
- 1 to 1.5 cups standard candy corn
- 1 teaspoon pure vanilla extract
- Flaky sea salt (optional, for topping)
Instructions
- Line a large baking sheet or rimmed cookie sheet with parchment paper or a silicone mat and set aside.
- Place white chocolate chips in a microwave-safe bowl. Heat on medium power in 30-second intervals, stirring well between each interval, until smooth and glossy. Alternatively, melt using a double boiler over simmering water, stirring constantly.
- Remove the melted chocolate from the heat and stir in the vanilla extract. If using salt, add it now and mix gently until incorporated.
- Pour the candy corn into the melted chocolate. Gently fold the candy corn into the chocolate using a rubber spatula until the pieces are evenly coated, being careful not to break the candy corn.
- Pour the mixture onto the prepared baking sheet. Spread it out into an even layer approximately 1/4 to 1/2 inch thick.
- If adding extra toppings like sprinkles or sea salt, gently press them into the surface now.
- Place the baking sheet in the refrigerator and chill for 20-30 minutes, or until the chocolate is completely hard and set.
- Once fully set, lift the parchment paper off the sheet and break the bark into irregular pieces by hand. Avoid using a knife to prevent crushing the candy corn.
Notes
Ensure all equipment is completely dry to prevent the chocolate from seizing. Use high-quality white chocolate chips rather than coating melts for better flavor and texture. Store in an airtight container at room temperature for up to two weeks, or freeze for up to three months.
Nutrition
- Serving Size: 1 piece (approx. 10
- Calories: 55
- Sugar: 6
- Sodium: 15
- Fat: 3
- Saturated Fat: 2
- Carbohydrates: 7
- Protein: 1
Keywords: Halloween treats, white chocolate bark, candy corn recipe, easy dessert, gluten-free snack, quick treats, fall baking



