Love this? Save it for later!
Share the inspiration with your friends
It was 1998, and the air was thick with tension and anticipation. I remember standing in line, shivering in a coat that felt too thin for the biting wind outside, clutching a paper plate like it was a lifeline. The chili wasn’t just food; it was a warm hand on a cold shoulder. This wasn’t the watery, tomato-heavy stuff you might find in a can. This was thick, dark, and deeply spiced, with chunks of tender beef that fell apart at the touch of a fork.
I watched the judge pour the final ladle, the steam rising in perfect, aromatic spirals. When I took that first bite, the heat didn’t just sit on my tongue; it unfolded. It was complex, smoky, and comforting all at once. I didn’t care about the blue ribbon or the trophy that was eventually handed out. I cared about that moment of pure, unadulterated satisfaction. That bowl of chili stopped my shivering and settled in my stomach like a promise kept.
Over the years, I’ve tried hundreds of recipes. Some were too spicy, some too sweet, and some just… flat. But this one? This is the one that sticks. It’s the recipe I pull out when the world feels heavy or when I need to fill a house with a smell that says, “You are home.” It’s not complicated. It doesn’t need fancy ingredients or hours of fussing. It just needs patience and a willingness to let the flavors marry. Honestly, it’s the closest thing I’ve found to that exact moment in time, and I think you will love it too.
Why You’ll Love This Award-Winning Beef and Bean Chili
Let’s be honest, not all chili is created equal. Some are just spicy tomato soup with meat floating in them. Others are dry, dusty affairs that need a gallon of water to go down. This award-winning beef and bean chili is different because it strikes that perfect, rare balance between hearty and flavorful. It’s the kind of dish that commands respect in the kitchen.
Here is why this recipe has earned its stripes and why it will earn a permanent spot in your rotation:
- Quick & Easy: While it simmers for a while to develop depth, the actual hands-on prep is under 30 minutes. It’s perfect for busy weeknights when you want something gourmet but don’t have hours to spare.
- Simple Ingredients: You likely have most of this in your pantry right now. No obscure spices or hard-to-find cuts of meat. Just good, honest food made from staples.
- Perfect for Game Day: Whether it’s the big game or just a cozy Friday night, this chili is the ultimate crowd-pleaser. It’s hearty enough to be a meal on its own but also works as a hearty dip for nachos.
- Crowd-Pleaser: I’ve served this to picky eaters and hardcore chiliheads alike. Everyone agrees on one thing: it’s delicious. It’s familiar yet elevated.
- Unbelievably Delicious: The texture is rich and thick, not runny. The flavor profile has a deep, smoky kick that lingers pleasantly. It’s comfort food reimagined—soul-soothing without being heavy.
What makes this recipe stand out from the rest is the technique. We aren’t just throwing everything in a pot. We are building layers. We start by browning the beef properly to get that Maillard reaction—the fancy term for the delicious, browned crust that adds umami. Then, we use a specific ratio of beans to meat that ensures every spoonful has substance. It’s not just another version of chili; it’s the version that makes you close your eyes and sigh after the first bite.
What Ingredients You Will Need
This recipe uses simple, wholesome ingredients to deliver bold flavor and satisfying texture without the fuss. The beauty of this chili lies in the quality of the basics. You don’t need expensive wagyu beef or imported saffron. You need good ground beef, solid canned beans, and a spice blend that hits every note.
Here is what you will need to gather:
- Ground Beef (2 lbs): Use 80/20 lean-to-fat ratio. You need that fat for flavor. Lean beef will make the chili dry and bland. (I prefer grass-fed brands like Swiftgrass for cleaner taste, but any good quality beef works).
- Onion (1 large): Yellow onion, diced. This forms the sweet, savory base of the dish.
- Garlic (4 cloves): Freshly minced. Pre-minced garlic lacks the punch we need here.
- Diced Tomatoes (2 cans, 14.5 oz each): Fire-roasted tomatoes add a smoky depth that regular tomatoes miss. Don’t skip this step.
- Tomato Paste (2 tbsp): This concentrates the tomato flavor and helps thicken the chili.
- Black Beans (1 can, 15 oz): Rinsed and drained. They add creaminess and bulk.
- Kidney Beans (1 can, 15 oz): Rinsed and drained. These hold their shape well and provide a hearty bite.
- Beef Broth (2 cups): Low sodium is best so you can control the salt level. Use a high-quality broth like Pacific Foods for better depth.
- Chili Powder (2 tbsp): Use a good quality blend like McCormick or make your own. This is the backbone of the flavor.
- Cumin (1 tbsp): Ground cumin. Essential for that earthy, warm aroma.
- Smoked Paprika (1 tsp): This gives it that award-winning smokiness without needing actual smoked meats.
- Olive Oil (2 tbsp): For sautéing the aromatics.
- Salt and Black Pepper: To taste. Always season at the end.
For the beans, if you are watching sodium, make sure to rinse them thoroughly. If you want a thicker chili, you can mash a few of the beans against the side of the pot before serving. It sounds weird, but it creates a beautiful, creamy texture without adding dairy.
Equipment Needed
You don’t need a fancy sous-vide machine or a high-end induction stove for this. A heavy-bottomed pot is your best friend here. I recommend a 6-quart Dutch oven, like a Le Creuset or a simpler cast-iron alternative. The thick walls distribute heat evenly, preventing the meat from burning while it browns. If you don’t have one, a heavy stainless steel pot works too.
You will also need a large wooden spoon or silicone spatula for stirring. A sharp knife and cutting board are essential for prepping the onions and garlic. Measuring spoons are a must for the spices—guessing here can throw off the balance. Finally, a ladle for serving. Keep it simple. The tools should get out of the way and let the food do the talking.
Preparation Method
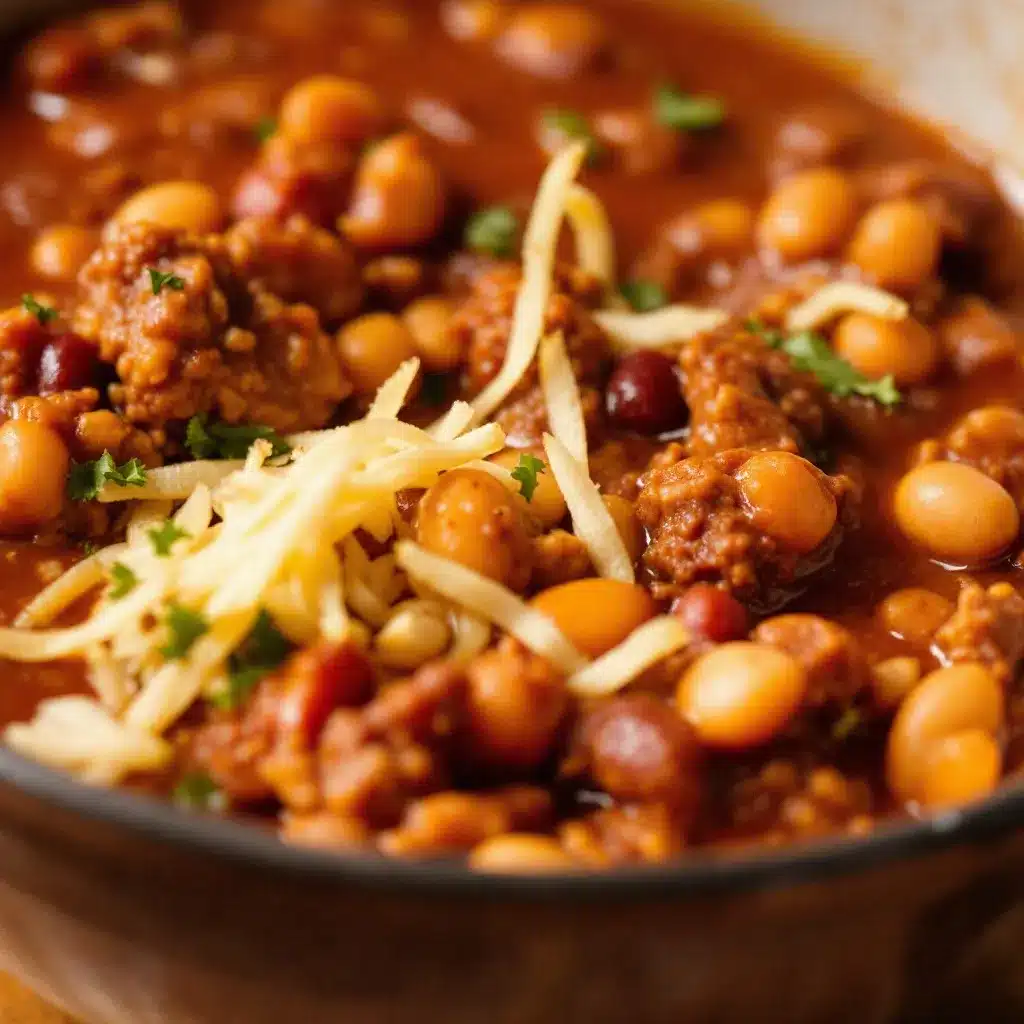
Getting this chili right is about following the steps with a bit of care. Here is how to build it from scratch.
- Prep your veggies: Dice the onion finely. Mince the garlic. If your garlic is old and sprouting, toss it; fresh garlic makes a huge difference. Set these aside.
- Brown the beef: Heat your Dutch oven over medium-high heat. Add a splash of olive oil. Once hot, add the ground beef. Break it up with your wooden spoon. Do not crowd the pan too much, or it will steam instead of brown. Cook until the meat is no longer pink, about 5-7 minutes. Drain excess fat if you have more than a tablespoon left, but keep some for flavor.
- Sauté aromatics: Reduce heat to medium. Add the diced onions to the beef. Cook for 3-4 minutes until translucent. Add the garlic and cook for just 30 seconds until fragrant. Be careful not to burn the garlic; it turns bitter instantly.
- Add spices: Sprinkle the chili powder, cumin, and smoked paprika over the meat and onions. Stir constantly for 1 minute. This “blooms” the spices, releasing their essential oils and deepening the flavor. It’s a small step that makes a big difference.
- Build the base: Stir in the tomato paste. Cook it for another minute to remove the raw metallic taste. Then, pour in the beef broth, scraping the bottom of the pot to release any browned bits (fond). Those bits are pure flavor gold.
- Simmer: Add the fire-roasted tomatoes (with their juices), rinsed black beans, and kidney beans. Stir well. Bring the mixture to a boil, then reduce heat to low. Cover partially and let it simmer gently for at least 45 minutes, preferably 1.5 hours. Stir occasionally to prevent sticking.
- Final seasoning: Taste the chili. Add salt and black pepper as needed. If it’s too thin, simmer uncovered for another 15 minutes. If it’s too thick, add a splash more broth. Let it rest for 10 minutes before serving. This allows the flavors to settle and meld together.
Cooking Tips & Techniques
There are a few tricks I’ve learned over the years that can save your chili from being mediocre. First, never rush the browning of the meat. If you pull it off the heat too early, you miss out on those caramelized bits that add depth. Second, bloom your spices. Adding them to the hot oil and meat before adding liquids wakes them up. Raw cumin tastes dusty; bloomed cumin tastes earthy and warm.
A common mistake is adding too much liquid. Beans absorb liquid as they cook, and tomatoes release water too. Start with less broth than you think you need. You can always add more, but you can’t take it out. Another tip: if you have time, let the chili sit in the fridge overnight. Reheating it the next day often tastes better because the flavors have had time to marry. It’s the “overnighter” effect that professional chefs swear by.
Also, taste as you go. Salt behaves differently in chili than in other dishes. It needs more to really pop the flavors. Don’t be shy with it, but add it gradually. And remember, heat is subjective. If you like it spicy, add a diced jalapeño with the onions or a dash of cayenne pepper with the spices.
Variations & Adaptations
One of the best things about chili is its versatility. Here are a few ways to make it your own:
- Vegetarian Version: Swap the beef for lentils or extra beans. Use vegetable broth instead of beef broth. The texture will be different, but the flavor remains robust.
- Slow Cooker Method: Brown the meat and onions on the stove first (don’t skip this!), then transfer everything to a slow cooker. Cook on low for 6-8 hours. This is great for busy days.
- Spicy Kick: Add diced fresh jalapeños or a teaspoon of cayenne pepper. Top with sliced radishes and fresh cilantro for a Tex-Mex twist.
- Chocolate Twist: Add a square of dark chocolate or a teaspoon of unsweetened cocoa powder. It adds richness and depth without making it taste like dessert. It’s a secret weapon in many award-winning recipes.
I once tried making this with turkey, but it just lacked the richness. Stick with beef for the best results. However, if you are watching calories, 93/7 lean beef works in a pinch. Just don’t expect the same mouthfeel.
Serving & Storage Suggestions
Serve this chili hot, straight from the pot. It pairs beautifully with perfect honey butter skillet cornbread, which you can use to scoop up every last bit of the thick sauce. A dollop of sour cream, shredded cheddar cheese, and fresh green onions are classic toppings that add brightness and crunch.
For storage, let the chili cool completely before transferring it to an airtight container. It will keep in the refrigerator for up to 5 days. In the freezer, it lasts for up to 3 months. Thaw it in the fridge overnight and reheat gently on the stove. Adding a splash of water or broth during reheating helps restore the consistency. The flavors actually improve after a day or two, making it perfect for meal prep.
Nutritional Information & Benefits
This chili is a nutrient-dense meal. Ground beef provides high-quality protein and iron, while the beans offer fiber and plant-based protein. Tomatoes are rich in lycopene, an antioxidant that supports heart health. Cumin aids digestion, making this a hearty meal that won’t leave you feeling sluggish. It is naturally gluten-free, making it safe for those with sensitivities. Just check your broth and spice blends to ensure they are certified gluten-free if that is a concern. It’s a balanced, wholesome dish that fuels you for the day.
Conclusion
This award-winning beef and bean chili is more than just a recipe; it’s a hug in a bowl. It’s reliable, delicious, and deeply satisfying. I hope you try it and make it your own. Feel free to adjust the spice level or add your favorite toppings. Cooking is about making it yours. If you do make it, I’d love to hear how it turned out. Leave a comment below with your tips or variations. Share it with friends and family, and let’s keep the tradition of good, hearty food alive. Enjoy every spoonful.
Frequently Asked Questions
Can I make this chili ahead of time?
Yes, this chili actually tastes better the next day. Make it 1-2 days ahead, store it in the fridge, and reheat it gently on the stove before serving.
What is the best type of beans to use?
Traditional chili uses kidney beans, but black beans add a nice creaminess. You can use a mix of both, or stick to just one type. Just make sure to rinse them well to remove excess sodium.
Can I freeze this chili?
Absolutely. Let it cool completely, portion it into freezer-safe containers, and freeze for up to 3 months. Thaw in the fridge before reheating.
Is this chili too spicy?
It has a moderate kick from the chili powder and paprika. If you are sensitive to heat, reduce the spices by half or add a bit of sugar to balance it out.
Can I use ground turkey instead of beef?
You can, but the flavor will be lighter. For best results, use 93/7 lean turkey and add a bit more olive oil and smoked paprika to compensate for the lost richness.
Pin This Recipe!
Award-Winning Beef and Bean Chili: Best Homemade Recipe

A thick, dark, and deeply spiced beef and bean chili that balances hearty texture with complex, smoky flavors. This award-winning recipe uses simple pantry staples and specific techniques like blooming spices and proper browning to create a comforting, crowd-pleasing meal.
- Prep Time: 30 minutes
- Cook Time: 45 minutes
- Total Time: 1 hour 15 minutes
- Yield: 6 servings 1x
- Category: Main Course
- Cuisine: American
Ingredients
- 2 lbs ground beef (80/20 lean-to-fat ratio)
- 1 large yellow onion, diced
- 4 cloves garlic, freshly minced
- 2 cans (14.5 oz each) fire-roasted diced tomatoes
- 2 tbsp tomato paste
- 1 can (15 oz) black beans, rinsed and drained
- 1 can (15 oz) kidney beans, rinsed and drained
- 2 cups beef broth (low sodium)
- 2 tbsp chili powder
- 1 tbsp ground cumin
- 1 tsp smoked paprika
- 2 tbsp olive oil
- Salt and black pepper to taste
Instructions
- Dice the onion finely and mince the garlic. Set aside.
- Heat a Dutch oven over medium-high heat with a splash of olive oil. Add the ground beef, breaking it up with a wooden spoon. Cook until no longer pink (5-7 minutes), draining excess fat if necessary.
- Reduce heat to medium. Add diced onions to the beef and cook for 3-4 minutes until translucent. Add garlic and cook for 30 seconds until fragrant.
- Sprinkle chili powder, cumin, and smoked paprika over the meat and onions. Stir constantly for 1 minute to bloom the spices.
- Stir in tomato paste and cook for 1 minute. Pour in beef broth, scraping the bottom of the pot to release browned bits.
- Add fire-roasted tomatoes, black beans, and kidney beans. Stir well and bring to a boil.
- Reduce heat to low, cover partially, and simmer gently for at least 45 minutes, preferably 1.5 hours, stirring occasionally.
- Taste and season with salt and black pepper. If too thin, simmer uncovered for 15 minutes. Let rest for 10 minutes before serving.
Notes
For a thicker chili, mash a few beans against the side of the pot. The flavors improve if made ahead and refrigerated overnight. If using lean beef, the chili may be drier. For a spicy kick, add diced jalapeños or cayenne pepper. A square of dark chocolate can be added for richness.
Nutrition
- Serving Size: 1 bowl
- Calories: 450
- Sugar: 8
- Sodium: 600
- Fat: 22
- Saturated Fat: 8
- Carbohydrates: 35
- Fiber: 12
- Protein: 30
Keywords: beef chili, bean chili, award-winning recipe, slow cooker chili, comfort food, game day food, gluten-free chili, homemade chili



