Love this? Save it for later!
Share the inspiration with your friends
The stark, white contrast of the rib cage against the dark green background is what I made this for — everything else is secondary.
Honestly, I spent twenty minutes last Tuesday staring at a cucumber like it owed me money. I was trying to figure out how to make a vegetable look like it was screaming. Not in a scary, jump-scare way, but in that cartoonish, “whoops, I fell down the stairs” sort of way. That is the whole point.
Most people think Halloween food has to be sugary. You know, brown sugar and melted chocolate and things that will rot your teeth by October 31st. But let’s face it, after three days of trick-or-treating, my kids are already running on fumes and sugar crashes. I needed something that looked wicked but actually kept them alive long enough for the movie marathon.
I started with a standard veggie tray. It was boring. It was sad. It looked like something you’d find in a hospital cafeteria. Then I grabbed a sharp paring knife and started cutting. Just simple slices. But when you arrange them just right, the geometry changes. The white flesh of the vegetable pops out. It looks like bone.
This Fun Halloween Veggie Skeleton Platter isn’t just about being spooky. It’s about changing the way your family sees raw food. It turns a “no” into a “wait, let me try that rib.”
I remember making this for my neighbor’s party last year. She’s usually very polite about eating her vegetables. She’d pick at them, leave most on the plate. But that night? She ate three “ribs” off the skeleton. She said it was the most fun she’d had with a cucumber all year.
That stuck with me. It’s not about the nutrition, though that helps. It’s about the moment you stop thinking about what you’re eating and start thinking about how silly it is.
I still have that same green cutting board. It has a few scratches from where I tried to carve teeth out of a bell pepper once. (Don’t try that. It’s too hard. Stick to the cucumber.)
If you’re looking for something that fits the theme without the stress of cooking a whole roast chicken, this is your answer. It’s quiet, it’s clever, and it doesn’t require an oven.
Why You’ll Love This Recipe
You might be wondering why you should bother arranging cucumbers into a spooky shape instead of just grabbing a bag of chips. Here is the truth: this recipe works because it tricks the brain.
I’ve tested dozens of veggie tray ideas over the years. Some are fancy. Some are complicated. This one is just smart. It leverages the natural color contrast of the ingredients to do the heavy lifting for you. You don’t need to be an artist. You just need to follow the pattern.
Here is why this specific platter wins every time:
- Quick & Easy: You can assemble this entire skeleton in under 15 minutes. I timed it. It’s faster than boiling water for pasta. Perfect for busy weeknights or last-minute cravings when guests show up unexpectedly.
- Simple Ingredients: No fancy grocery trips needed. You likely already have cucumbers, carrots, and peppers in your fridge. Maybe some ranch or hummus. That’s it. No obscure spices or expensive garnishes.
- Perfect for Halloween Parties: Great for school drop-off treats, office Halloween parties, or cozy dinners at home. It fits the theme without being childish.
- Crowd-Pleaser: Always gets rave reviews from kids and adults alike. The kids think it’s a game. The adults appreciate the lack of calories.
- Unbelievably Delicious: The texture and flavor combo is next-level comfort food. The crunch of the raw vegetable is satisfying. It’s crisp, fresh, and hydrating.
What makes this recipe different from the rest is the visual impact. Most veggie platters are just a scattered mess of colors. This one has structure. It has a face. It demands attention.
Whether it is the specific way you overlap the cucumber slices to mimic ribs, or the way the carrot teeth sit in the pepper jaw, it’s a creative twist on standard appetizers. This isn’t just another version—it’s your best version.
This recipe isn’t just good—it is the kind that makes you close your eyes after the first bite of that crisp, cool cucumber. It’s comfort food reimagined—healthier, faster, but with the same soul-soothing satisfaction.
Perfect for impressing guests without stress, or turning a simple meal into something memorable. It bridges the gap between “healthy” and “fun.”
What Ingredients You Will Need
This recipe uses simple, wholesome ingredients to deliver bold flavor and satisfying texture without the fuss. The magic here is in the contrast. You need ingredients that are firm enough to hold their shape but colorful enough to pop on the plate.
I prefer using organic produce when possible, mostly because the skin tastes better on the cucumbers. But honestly, standard grocery store veggies work fine if you wash them well.
Here is what you need to build your skeleton:
The Bones (The Rib Cage)
- English Cucumber: 1 large, peeled. (The long, thin ones work best. They have fewer seeds and a smoother texture.)
- Peeling method: You will need to peel strips down the side. Leave some green skin on if you want a striped look, but fully peeled gives the whitest “bone” color.
The Skull and Jaw
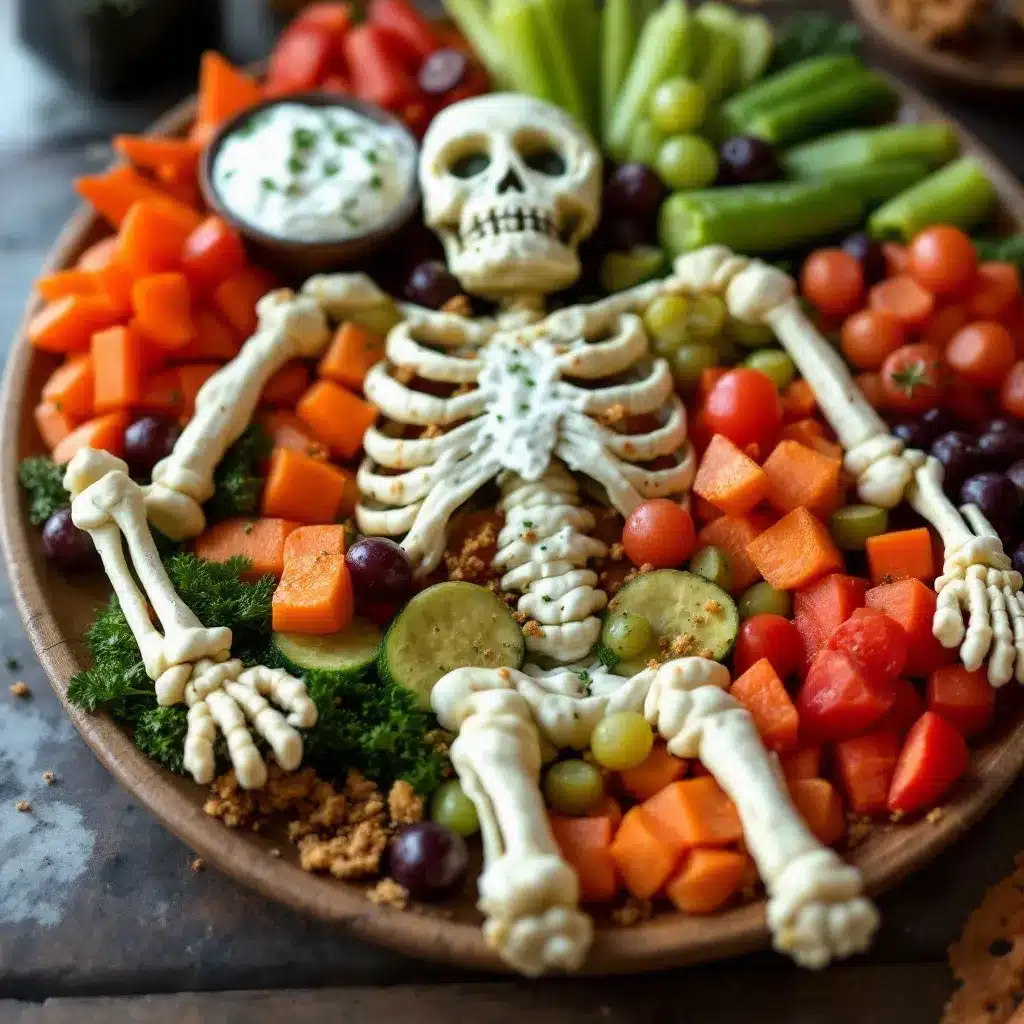
- Red Bell Pepper: 1 medium. (Look for one that is firm and has a flat bottom. It needs to stand up or lie flat securely. I recommend Valencia brand peppers if you can find them; they are thicker and sturdier.)
- Carrots: 2 large, peeled. (These will become the teeth. You need them to be long and straight. If they are curly, peel them gently to straighten them out.)
- Cherry Tomatoes: 4-6 small. (These are the eyes. Pick ones that are round and bright red. If they are too big, they will look like they have glaucoma. Small is better.)
The Brain and Extras
- Green Bell Pepper: 1 small. (Optional. You can cut this into strips to act as “hair” or extra ribs if the cucumber runs out. It adds a nice color contrast.)
- Dip: Ranch dressing, hummus, or blue cheese dressing. (The dip goes in the “brain” area or on the side. I personally prefer a creamy ranch for the crunch factor.)
You can substitute the red pepper with a yellow one if you are allergic or just prefer the color. The green pepper strips can be swapped for celery sticks if you want a lighter crunch.
For the dip, if you want to avoid dairy, a cashew-based hummus works surprisingly well. It holds its shape like a brain if you scoop it out.
Keep in mind that the vegetables will release water over time. That is why you want to assemble this close to serving time. Fresh is best.
Equipment Needed
You don’t need a lot of fancy gear for this. In fact, the less equipment you use, the faster you’ll get it done.
- Sharp Chef’s Knife: This is the most important tool. A dull knife will crush the cucumber and make a mess. I use a Wüsthof classic 8-inch knife. It glides through the pepper like butter. If you don’t have a good knife, go sharpen one. It’s worth it.
- Vegetable Peeler: A standard Y-peeler works fine. You need this to remove the skin from the cucumber in long strips. A serrated peeler might tear the flesh, so stick to the smooth blade.
- Large Serving Platter: You need a flat surface. A round platter is traditional, but a rectangular slate board looks very modern and spooky. Black slate makes the white cucumber ribs pop even more.
- Spoon: A small teaspoon or melon baller. You’ll use this to scoop out the seeds from the red pepper to make the jaw and mouth cavity.
- Bowl for Dip:: If you aren’t using the pepper cavity for dip, you’ll need a small ramekin or bowl for the ranch or hummus.
If you don’t have a sharp knife, be very careful. I once sliced my thumb trying to force a dull blade through a carrot tooth. It wasn’t pretty. Take your time.
You can also use a cookie cutter for the tomato eyes if you want them perfectly round, but a small knife works just as well and is faster.
Preparation Method
Let’s get into the nitty-gritty. This is where the magic happens. Follow these steps closely.
- Prep the Cucumber Ribs (5 minutes): Take your large cucumber and wash it thoroughly. Peel off the skin. You can leave it all off for a pure white bone look, or peel strips for a striped effect. I prefer all off for the skeleton look. Cut the cucumber in half crosswise. Then, take each half and slice it lengthwise into thin strips. You want them about 1/4 inch thick. These are your ribs. Keep them together in a pile.
- Prepare the Skull Base (3 minutes): Take your red bell pepper. Wash it. Cut off the top (the stem part) and set it aside for later. You want to hollow out the pepper. Use your spoon to scrape out the seeds and the white pith from the inside. You want a clean cavity. This will be the jaw. If you want a more open mouth, cut a slit in the bottom of the pepper too.
- Carve the Teeth (4 minutes): Take your carrots. Peel them completely. Cut them into lengths that fit inside your pepper cavity. You want about 6-8 teeth. Cut the bottom of each carrot stick at a slight angle so they look like they are growing out of the gum. Place them inside the pepper jaw. They should stick up. If they are too loose, you can use a tiny dab of cream cheese or hummus to stick them in place, but usually, they fit tight enough.
- Assemble the Ribs (3 minutes): Lay your red pepper jaw flat on the platter. Take your cucumber rib strips. Arrange them in a fan shape on top of the pepper. Start with the longest strips in the middle and shorter ones on the sides. You want them to overlap slightly, like shingles on a roof. This creates the rib cage effect. Don’t worry about perfection. Overlap is key.
- Add the Eyes and Nose (2 minutes): Take your cherry tomatoes. Cut them in half. Place the cut sides down on the platter to form the eyes. They should be on the top part of the pepper, where the “face” would be. If you have a small piece of black olive or a drop of balsamic glaze, you can add pupils. But the red tomato halves alone look creepy enough. Use a small piece of carrot or olive for the nose triangle.
- Final Touches: Scoop your dip (ranch, hummus, etc.) into the hollowed-out top of the pepper, or place it in a bowl next to the skeleton. This represents the brain or just a side dip. Garnish with a few loose carrot sticks around the platter to look like “spilled guts” or just extra veggies. You’re done!
The total time is about 15-17 minutes. That’s it.
Cooking Tips & Techniques
I’ve made this platter a dozen times now. Here are the things I learned so you don’t make the same mistakes.
First, the knife skills matter more than you think. When you slice the cucumber ribs, try to keep the thickness consistent. If some are too thick, they won’t lay flat. They’ll curl up and look like a weird worm. Flat is better.
Second, don’t skip the drying step. After you wash the cucumbers and peppers, dry them with a paper towel. Wet veggies slide around on the platter. You want them to stay in place. If the cucumber is too wet, the ribs will slip off the pepper jaw.
Third, the carrots for teeth can be tricky. If your carrots are old and limp, they will bend. Use fresh, crisp carrots. If you can’t find straight ones, buy a bag of baby carrots. They are pre-peeled and usually straighter. Just cut them in half lengthwise to make them thinner.
I once tried to use bell pepper slices for the ribs instead of cucumber. It didn’t work. The pepper was too soft and wilted within an hour. Stick to cucumber for the bones. It holds its crunch for hours.
Timing is everything. If you make this too early, the tomatoes will get mushy. The cucumber might sweat. Assemble it right before you leave for the party or right before you sit down to eat.
If you are making this for a crowd, make two skeletons. One for the kids’ table and one for the adults. Or make one big one that spans the whole table.
Don’t overcomplicate the face. The eyes are the most important part. If the eyes are off-center, the skeleton looks drunk. Keep them symmetrical.
Variations & Adaptations
This recipe is very flexible. You can tweak it based on what you have or what your guests like.
- Gluten-Free Option: This recipe is naturally gluten-free. Just make sure your dip (ranch or hummus) is certified gluten-free. Most are, but check the label.
- Dairy-Free Option: Swap the ranch for a dairy-free hummus or a simple olive oil and balsamic dip. The skeleton itself is vegan.
- Spicy Variation: Add some jalapeño slices for “blood” dripping from the mouth. Or use a spicy salsa instead of ranch. This adds a kick for the adults.
- Seasonal Swap: In the fall, you can use small pumpkins or gourds as the base instead of the pepper. It’s more work, but very festive. Use the pumpkin seeds for the eyes.
- Kid-Friendly Twist: Make the skeleton smile. Use a carrot slice for a wide grin instead of just the teeth. Kids love a happy skeleton.
I once tried using zucchini for the ribs. It worked, but it was too watery. The cucumber is the king here. Stick to cucumber.
If you have leftover dip, use it as a veggie dip for the rest of the week. Don’t waste it.
Serving & Storage Suggestions
Serve this platter immediately after assembly. It looks best when the veggies are crisp and cold.
Pair it with a light white wine or a sparkling water with lemon. It cuts the richness of the dip.
If you have leftovers, store the skeleton in the refrigerator. Cover it loosely with plastic wrap. It will last for 24 hours. The veggies might lose a little crunch, but they will still be edible.
Do not freeze this. The water content in the cucumbers will turn to ice crystals and ruin the texture. It will become mushy when thawed.
Reheating is not recommended. This is a cold dish. Eat it cold.
The flavors don’t really develop over time. It’s meant to be eaten fresh. The brightness of the raw veggies is the point.
Nutritional Information & Benefits
This platter is a nutritional powerhouse. Cucumbers are hydrating and low in calories. Bell peppers are loaded with Vitamin C. Carrots provide Vitamin A.
A typical serving of this platter (one skeleton) has roughly 100-150 calories, depending on the dip. It’s a light snack.
It’s great for people watching their sugar intake. It’s also good for digestive health thanks to the fiber in the veggies.
Just be mindful of the dip. Ranch and blue cheese can add a lot of fat and sodium. Use hummus for a lighter option.
I love this recipe because it makes me feel like I’m feeding my family something healthy without them realizing it. It’s a win-win.
Conclusion
This Fun Halloween Veggie Skeleton Platter is worth trying because it’s easy, healthy, and genuinely funny. It doesn’t require cooking skills. It just requires a knife and a sense of humor.
I encourage you to customize it. Make it bigger. Make it smaller. Change the dip. Make it your own.
I love this recipe because it brings a smile to everyone’s face. Even the grumpy uncle at the party will chuckle at the cucumber ribs.
Please leave a comment below if you make this. I’d love to see your creations. Share your photos on social media and tag me.
Happy Halloween!
FAQs
Can I make this platter ahead of time?
You can assemble it up to 2 hours before serving. Keep it covered in the fridge. The veggies will stay crisp. Do not make it the night before, as they will wilt.
What dip goes best with this skeleton?
Ranch dressing is the classic choice. Hummus is a great healthy alternative. Blue cheese or spicy salsa also work well for different flavor profiles.
Can I use zucchini instead of cucumber?
You can, but zucchini is softer and has more seeds. It won’t hold the “rib” shape as well. Cucumber is the best choice for structure and crunch.
How do I keep the carrot teeth from falling out?
Make sure the carrot sticks are the right size for your pepper cavity. If they are loose, use a tiny dab of cream cheese or hummus to glue them in place.
Is this recipe gluten-free?
Yes, the vegetables are naturally gluten-free. Just ensure your dip is also gluten-free. Most ranch and hummus brands are, but always check the label.
Pin This Recipe!
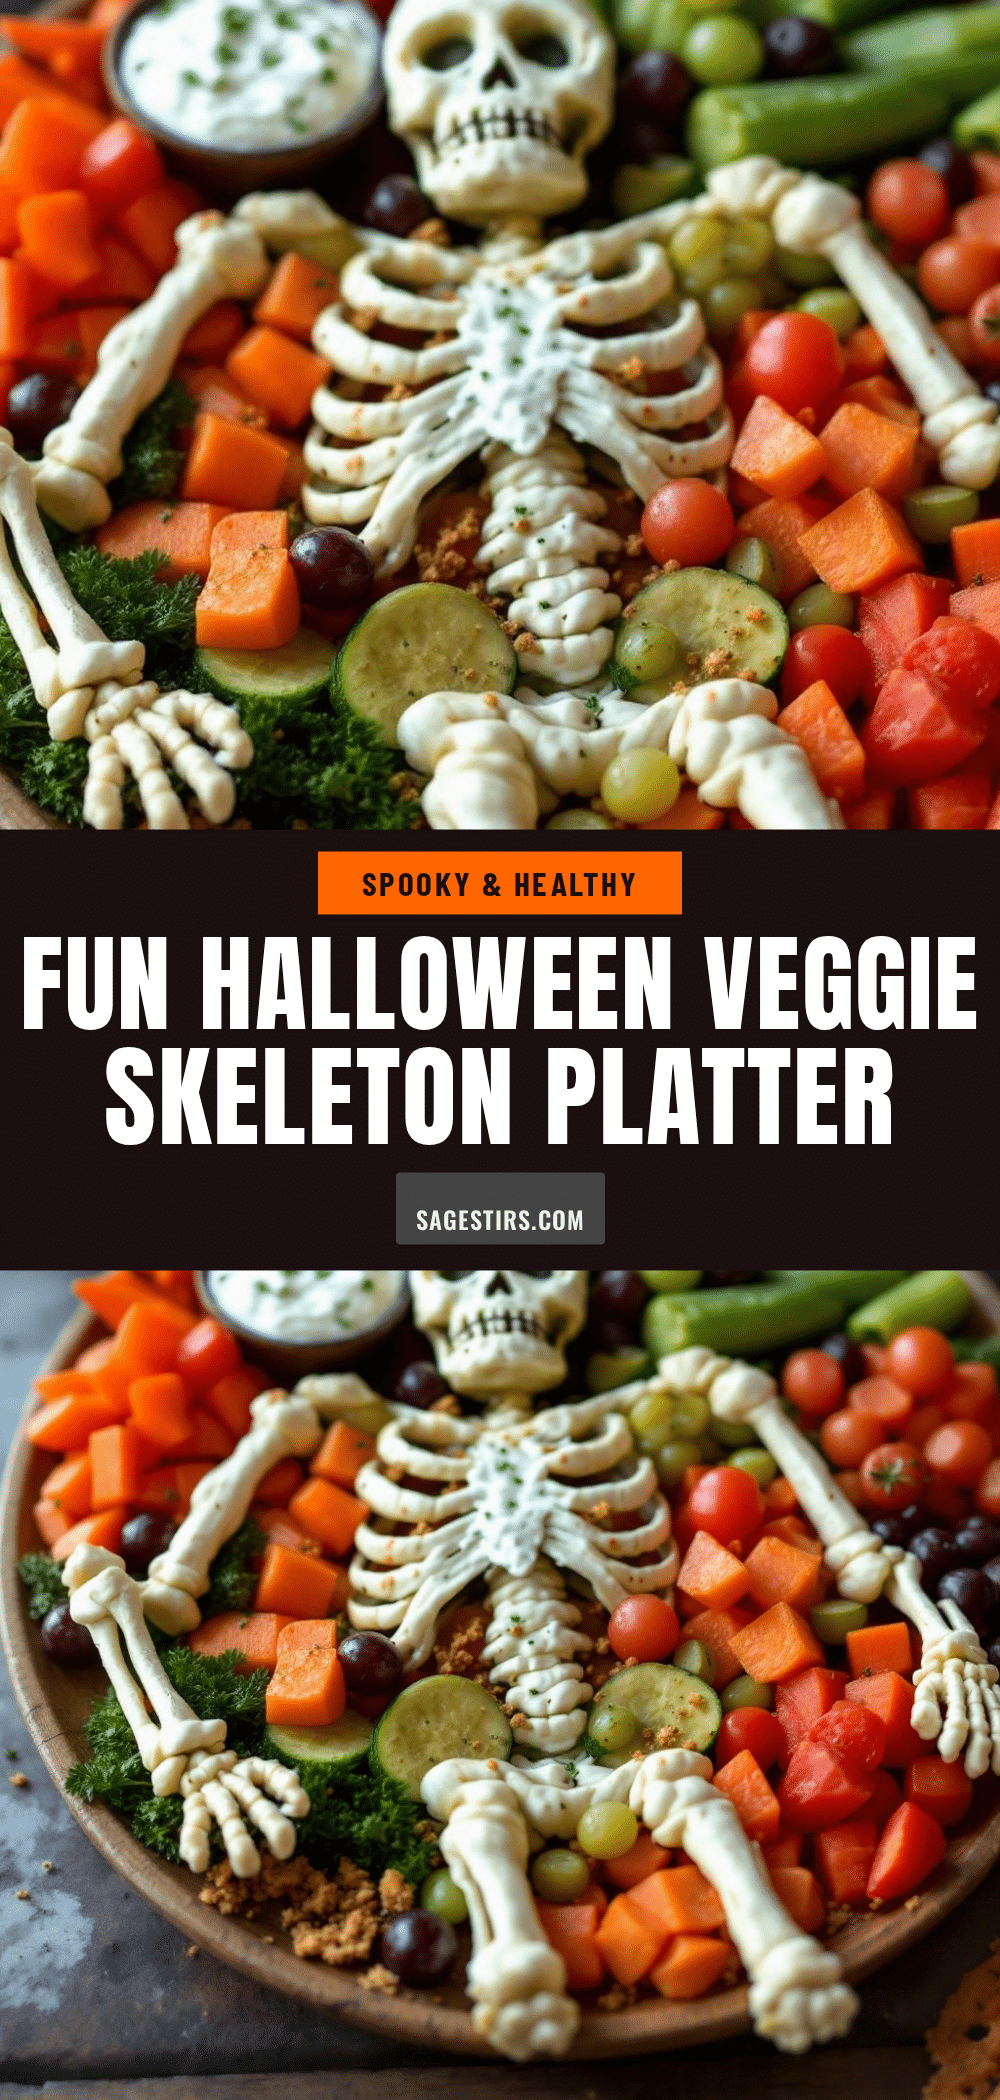
Fun Halloween Veggie Skeleton Platter: Easy 5-Step Snack
A spooky yet healthy Halloween snack that transforms simple vegetables into a skeleton shape. This easy, no-cook appetizer is perfect for parties and kids, offering a fun twist on traditional veggie trays.
- Prep Time: 15 minutes
- Cook Time: 0 minutes
- Total Time: 15 minutes
- Yield: 1 skeleton platter (serves 4-6) 1x
- Category: Appetizer
- Cuisine: American
Ingredients
- 1 large English cucumber, peeled
- 1 medium red bell pepper
- 2 large carrots, peeled
- 4–6 small cherry tomatoes
- 1 small green bell pepper (optional, for hair/extra ribs)
- Ranch dressing, hummus, or blue cheese dressing for dipping
Instructions
- Wash the cucumber thoroughly and peel off the skin completely (or in strips for a striped look). Cut the cucumber in half crosswise, then slice each half lengthwise into thin strips (about 1/4 inch thick) to create the ‘ribs’.
- Wash the red bell pepper and cut off the top (stem part). Use a spoon to scrape out the seeds and white pith from the inside to create a hollow cavity for the jaw.
- Peel the carrots and cut them into lengths that fit inside the pepper cavity. Cut the bottom of each carrot stick at a slight angle to resemble teeth. Place them inside the pepper jaw so they stick up.
- Lay the red pepper jaw flat on a large serving platter. Arrange the cucumber rib strips in a fan shape on top of the pepper, overlapping them slightly like shingles to create the rib cage effect.
- Cut the cherry tomatoes in half and place them cut-side down on the top part of the pepper to form the eyes. Add a small piece of carrot or olive for the nose.
- Scoop the chosen dip into the hollowed-out top of the pepper (representing the brain) or place it in a bowl on the side. Garnish with loose carrot sticks if desired.
Notes
[‘Dry vegetables thoroughly after washing to prevent slipping.’, ‘Assemble close to serving time to maintain crispness.’, ‘Use fresh, straight carrots for the teeth; baby carrots work well if cut lengthwise.’, ‘Do not freeze this recipe as the water content will ruin the texture.’, ‘Leftovers can be stored in the fridge for up to 24 hours.’]
Nutrition
- Serving Size: 1 skeleton platter
- Calories: 125
- Sugar: 8
- Sodium: 200
- Fat: 5
- Saturated Fat: 1
- Carbohydrates: 15
- Fiber: 3
- Protein: 2
Keywords: Halloween snack, veggie platter, skeleton recipe, healthy appetizer, kid-friendly food, cucumber ribs, no-cook recipe, party food