Love this? Save it for later!
Share the inspiration with your friends
Introduction
Last summer, I was helping out at a local flea market, sorting through an eclectic mix of vintage kitchen gadgets and dusty cookbooks. Amid the clatter and chatter, the quietest person you’d expect—Mr. Jenkins, a mild-mannered accountant with a penchant for obscure hobbies—started chatting about his “secret weapon” in the kitchen: his crispy garlic dill refrigerator pickles. Honestly, it caught me off guard. I mean, you don’t usually picture tax forms and spreadsheets turning into culinary inspiration, right?
He pulled out a crumpled, hand-written recipe from his wallet and described how these pickles come together in just 24 hours, packed with that perfect crunch and punchy garlic-dill flavor. I was skeptical at first; you know that feeling when something sounds too good to be true? But curiosity got the better of me, and I tried making them the very next day. Spoiler alert: they were addictive.
What’s wild is the simplicity of the whole thing—no fancy canning, no long waits. Just straightforward ingredients and a little patience. Maybe you’ve been there, craving that tangy, crisp pickle but without the fuss of traditional pickling. This recipe stuck with me because it’s the kind of thing that makes you smile every time you open the fridge. Let me tell you, these pickles aren’t just a side— they’re a star performer that livens up any meal or snack.
Why You’ll Love This Recipe
After testing and tweaking this recipe multiple times, I can vouch for its ease and flavor. It’s the kind of recipe that welcomes both beginners and seasoned cooks alike. Here’s why this crispy garlic dill refrigerator pickles recipe has earned a permanent spot in my kitchen:
- Quick & Easy: Ready in just 24 hours, perfect for those last-minute cravings or a spontaneous snack upgrade.
- Simple Ingredients: Uses pantry staples and fresh cucumbers—no need to make a special trip to the store.
- Perfect for Any Occasion: Whether it’s a barbecue, picnic, or just a weeknight dinner, these pickles add that satisfying crunch and tang.
- Crowd-Pleaser: Friends and family always ask for seconds, and kids surprisingly love the garlicky zing.
- Unbelievably Delicious: The balance of dill and garlic with a crisp bite makes it more than just your average pickle.
What sets this recipe apart is the use of fresh dill combined with just the right amount of garlic, and a brine that’s light but flavorful—no overpowering vinegar or sugar. Plus, the fridge method keeps these pickles crispy, avoiding that soggy texture you sometimes get with traditional pickling. Honestly, it’s like having homemade deli-style pickles without the wait or the fuss.
So if you’re craving a crunchy, garlicky pickle fix fast, this recipe is your new best friend.
What Ingredients You Will Need
This recipe relies on fresh, straightforward ingredients to bring out that classic garlic dill pickle flavor. Most of these are pantry staples, making it super convenient to whip up a batch anytime you want.
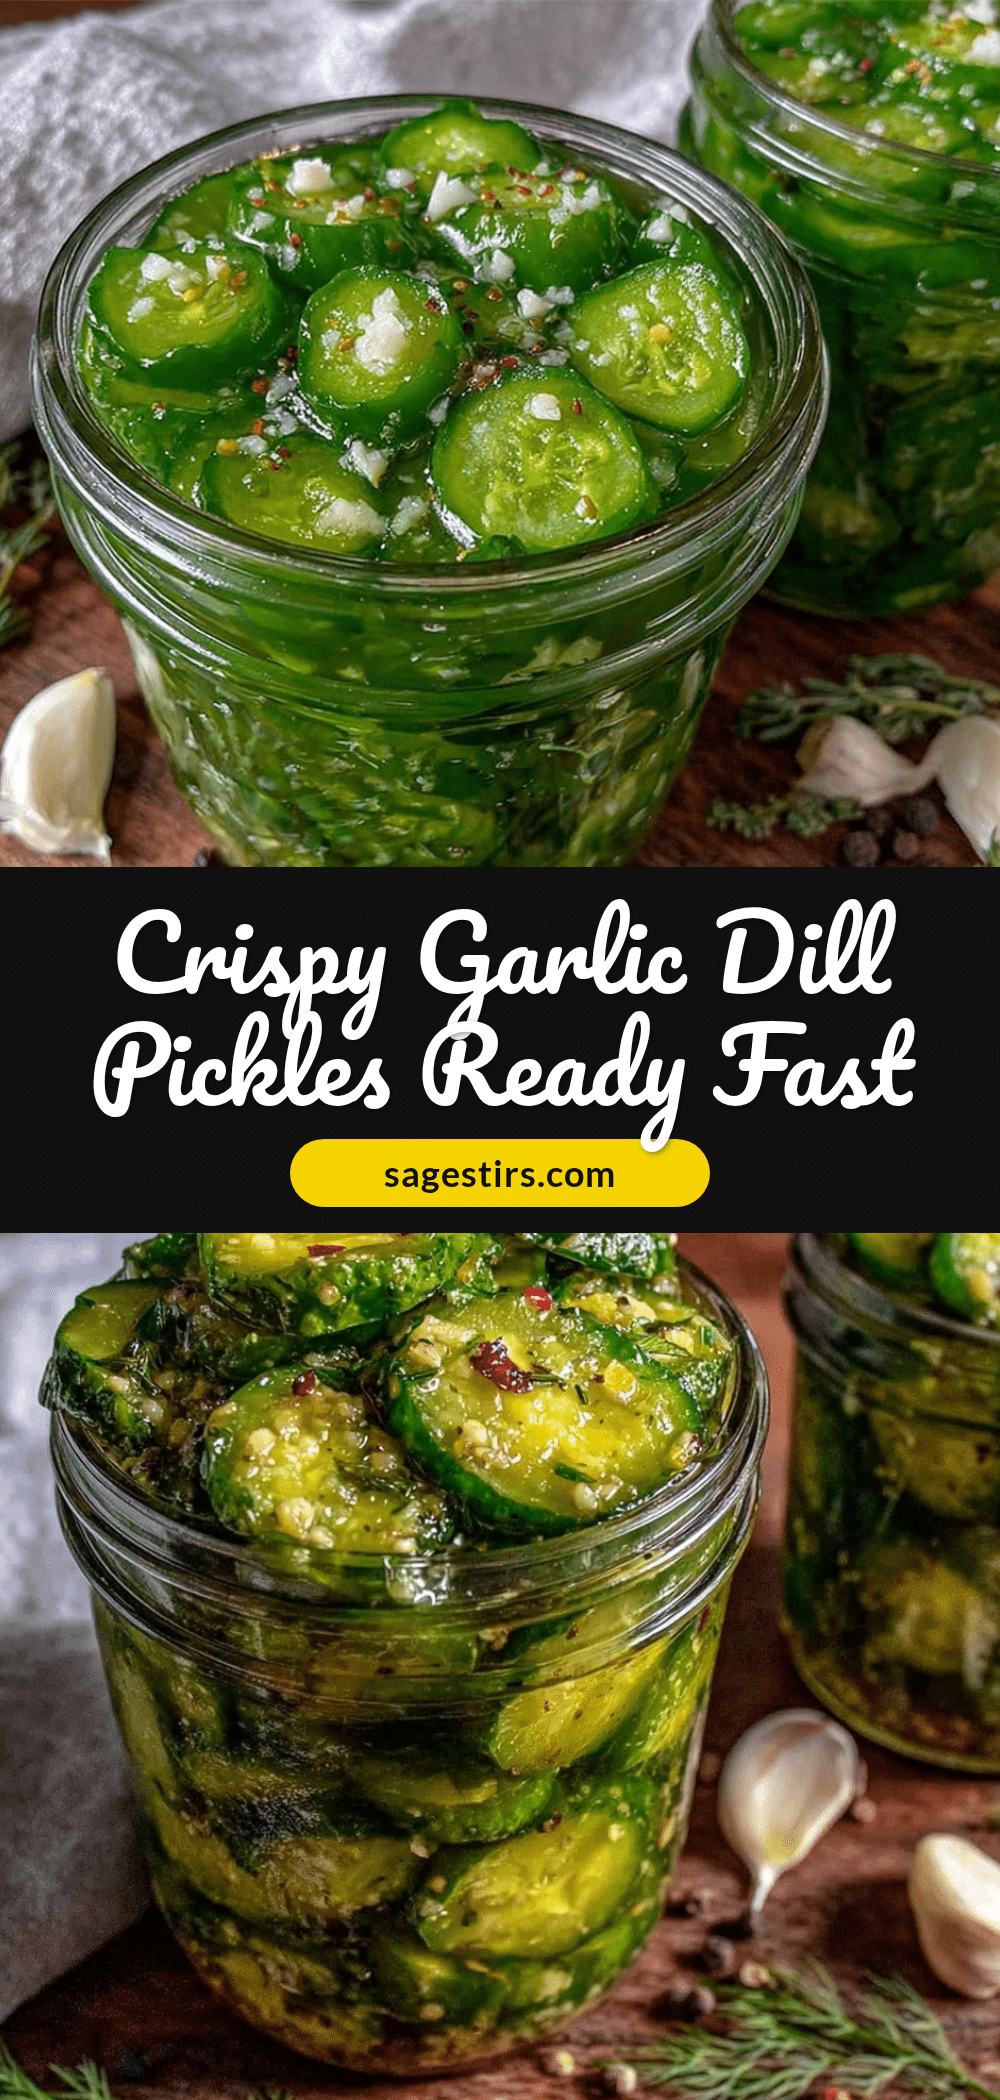
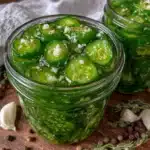
- Fresh cucumbers: About 4-5 medium Kirby cucumbers or pickling cucumbers, washed and sliced (Kirbys hold their crunch best)
- Garlic cloves: 4-5 large cloves, peeled and smashed (adds bold punch)
- Fresh dill sprigs: 4-6 sprigs, washed and trimmed (for that signature dill aroma)
- White vinegar: 1 cup (240 ml), use 5% acidity for best results
- Water: 1 cup (240 ml), filtered or distilled preferred to keep flavors clean
- Salt: 2 tablespoons kosher salt or pickling salt (iodized table salt can make brine cloudy)
- Granulated sugar: 1 teaspoon (balances acidity without sweetness)
- Black peppercorns: 1 teaspoon whole (adds subtle spice)
- Red pepper flakes: ¼ teaspoon, optional (for a little kick)
If you don’t have kosher salt, just reduce iodized salt slightly to avoid over-salting. For a gluten-free twist, this recipe is naturally free of gluten, no worries there. When it comes to brands, I usually reach for Diamond Crystal kosher salt because it dissolves nicely and keeps the brine clear.
In summer, you can play around by adding fresh herbs like tarragon or swapping some garlic for shallots for a milder twist. But honestly, sticking to these basics guarantees that classic crispy garlic dill flavor every time.
Equipment Needed
Not much is required here, which is part of why this recipe is so approachable. Here’s what you’ll want on hand:
- Glass jar or container with lid: A quart-sized (1-liter) mason jar works perfectly, but any clean, airtight container will do.
- Measuring cups and spoons: For precise brine ratios.
- Sharp knife and cutting board: To slice the cucumbers evenly.
- Small saucepan: To gently warm the brine ingredients (optional but helpful).
- Mixing bowl: To toss cucumbers with garlic and dill before packing.
If you don’t have a mason jar, a food-grade plastic container with a tight lid is fine. Just make sure it seals well to keep those pickles fresh and crunchy. Pro tip: avoid metal lids with plastic liners that can degrade with acidic ingredients. I’ve tried using a plastic container and found the pickles keep just as crisp, so no need to splurge on fancy equipment.
Preparation Method
- Prep the cucumbers: Wash 4-5 medium Kirby cucumbers thoroughly. Slice them into ¼-inch (6 mm) rounds or spears, depending on your preference. Uniform slices help them pickle evenly. This step should take about 10 minutes.
- Prepare the brine: In a small saucepan, combine 1 cup (240 ml) white vinegar, 1 cup (240 ml) water, 2 tablespoons kosher salt, and 1 teaspoon granulated sugar. Warm the mixture over medium heat just until salt and sugar dissolve—don’t boil. Remove from heat and let it cool slightly (about 5 minutes).
- Combine aromatics: In a clean mixing bowl, add smashed garlic cloves (4-5 large), fresh dill sprigs (4-6), 1 teaspoon whole black peppercorns, and optional ¼ teaspoon red pepper flakes. Toss the sliced cucumbers gently with these aromatics to distribute flavor.
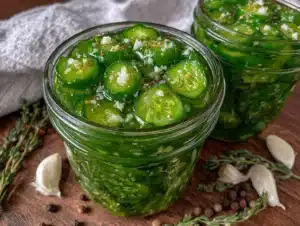
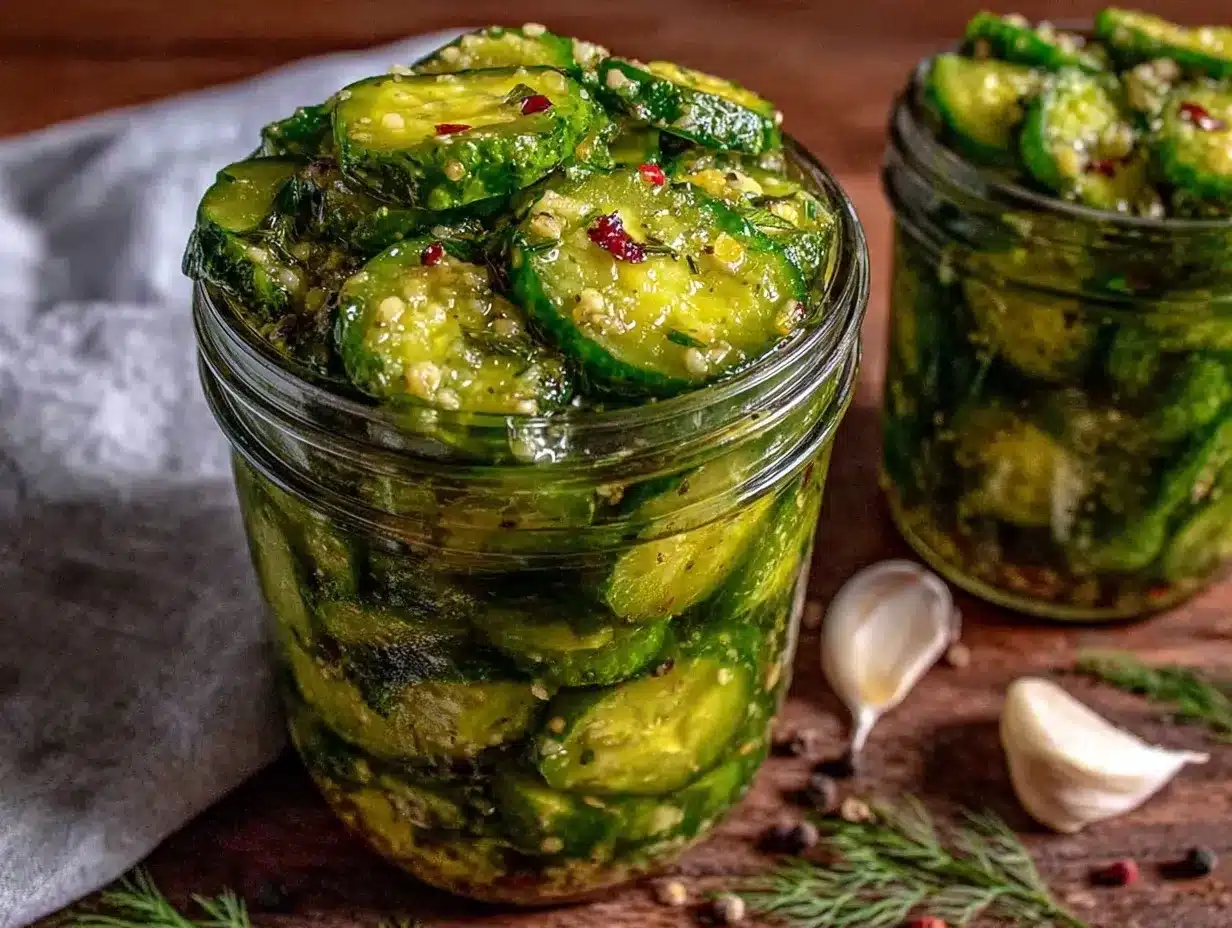
- Pack the jar: Transfer the cucumber mixture into a quart-sized glass jar, packing them in snugly but without crushing. Pour the warm brine over the cucumbers, making sure they’re fully submerged (leave about ½ inch or 1.5 cm headspace). If needed, use a small piece of clean parchment paper or a pickle weight to keep cucumbers submerged.
- Seal and refrigerate: Screw on the lid tightly and place the jar in the refrigerator. Let the pickles sit for at least 24 hours before tasting. For best flavor, wait up to 48 hours. The pickles will keep for up to 3 weeks refrigerated.
Watch out for floating cucumbers—they can get soggy if not submerged. I once forgot to press mine down and ended up with half-crisp, half-soggy pickles. Lesson learned: use a weight or a small clean rock wrapped in parchment to keep everything under the brine.
The smell of garlic and dill will get stronger as the pickles marinate, and the crunch will stay impressively crisp thanks to the cold brining method. You’ll know they’re ready when the cucumbers have turned a slightly translucent green and carry that tangy but balanced flavor.
Cooking Tips & Techniques
Making crispy garlic dill refrigerator pickles is simple, but a few tricks can really make a difference:
- Choose the right cucumber: Pickling or Kirby cucumbers are your best bet. They have fewer seeds and thicker skins, which help maintain crunch.
- Don’t skip the salt: Salt draws out moisture and firms up the cucumbers. Using kosher or pickling salt avoids cloudiness in your brine.
- Warm brine, not boiling: Heating the brine just enough to dissolve salt and sugar helps infuse flavors faster without cooking the cucumbers.
- Keep cucumbers submerged: Exposure to air makes them soft and slimy. Use weights or a clean utensil to keep them under brine.
- Refrigerate promptly: This method depends on cold fermentation, so don’t leave pickles at room temperature for long.
My first batch went a bit cloudy and soft because I used table salt and left the jar open too long. Now, I’m religious about salt type and sealing the jar tight. Also, slicing cucumbers evenly helps avoid some pieces turning mushy while others stay firm. Multitasking tip: prep your pickles while cooking dinner—the brine only takes a few minutes to make, and the waiting mostly happens in the fridge.
Variations & Adaptations
This recipe is a fantastic base for experimenting, here are some fun ways to customize it:
- Spicy kick: Add sliced jalapeños or increase red pepper flakes for heat lovers.
- Herb swap: Try replacing dill with fresh tarragon or thyme for a unique herbaceous twist.
- Low sodium: Reduce salt to 1 tablespoon, but note the pickles might be less crisp and have a shorter shelf life.
- Vinegar variations: Use apple cider vinegar for a milder, fruitier tang instead of white vinegar.
- Garlic alternatives: Roasted garlic offers a sweeter, mellow flavor if raw garlic feels too sharp.
Personally, I once made a batch with fresh lemon peel and coriander seeds—it was surprisingly bright and fragrant. Also, if you want to try a slightly sweeter pickle, adding a tablespoon of honey instead of sugar works well. For a keto-friendly version, this recipe is already great since it’s low in carbs and sugar.
Serving & Storage Suggestions
These pickles are best served cold straight from the fridge. The crisp bite and garlicky dill punch pair beautifully with sandwiches, burgers, or even as a tangy snack on their own.
Try them alongside a creamy creamy macaroni salad or tossed into a fresh green salad for extra zing. They also complement rich dishes like smoked meats or grilled chicken perfectly.
Store your pickles in the refrigerator in a sealed jar for up to 3 weeks. The flavor intensifies over time, but the texture remains satisfyingly crunchy thanks to the cold brining method.
When reheating leftovers with pickles on the side, keep them chilled and add just before serving to preserve their texture. If you notice any cloudiness or off smells after a couple of weeks, it’s best to discard them.
Nutritional Information & Benefits
This crispy garlic dill refrigerator pickles recipe is low in calories and carbs, making it a guilt-free flavorful snack or side. On average, one serving (about ¼ cup or 30 grams) contains roughly:
| Calories | 10 |
|---|---|
| Carbohydrates | 2g |
| Fat | 0g |
| Protein | 0g |
| Sodium | 400mg (varies with salt amount) |
Besides being a crunchy, flavorful treat, cucumbers provide hydration and antioxidants. Garlic offers immune-boosting properties, and dill contains vitamins A and C and helps with digestion. This recipe is naturally gluten-free, vegan, and low-calorie.
From a wellness perspective, I love that these pickles satisfy cravings for something tangy and crunchy without added sugars or preservatives typical in store-bought versions.
Conclusion
In the end, this crispy garlic dill refrigerator pickles recipe is exactly the kind of no-fuss, flavorful dish that makes you wonder why you didn’t try it sooner. It’s fast, reliable, and endlessly satisfying. I encourage you to make it your own—tweak the garlic, experiment with herbs, or dial the spice to match your mood.
I keep coming back to this recipe because it’s a quick way to bring fresh flavor and crunch to any meal. Plus, it’s a little reminder that great food inspiration can come from the most unexpected places—like a quiet accountant at a flea market, of all people!
If you give this recipe a shot, I’d love to hear how it turns out or what creative variations you come up with. Share your stories and tweaks in the comments—it’s always a joy to see your versions and tips.
Happy pickling, and may your fridge always be stocked with these perfect crunchy gems!
FAQs
How long do refrigerator pickles last in the fridge?
They typically stay fresh and crisp for up to 3 weeks when kept sealed and refrigerated.
Can I use regular cucumbers instead of Kirby cucumbers?
Yes, but Kirbys are preferred because they hold their crunch better due to their thicker skin and fewer seeds.
Do I need to boil the cucumbers before pickling?
Nope! This recipe uses a cold brine method, so the cucumbers stay crisp and fresh without cooking.
Can I make these pickles spicy?
Absolutely! Add sliced jalapeños or increase red pepper flakes to your taste for a spicy kick.
Is it necessary to warm the brine?
Warming helps dissolve the salt and sugar faster but avoid boiling. You can also stir the brine cold until dissolved, though it takes longer.
Pin This Recipe!
Crispy Garlic Dill Refrigerator Pickles
A quick and easy refrigerator pickle recipe ready in 24 hours, featuring fresh garlic and dill for a perfect crunchy and tangy flavor without the fuss of traditional canning.
- Prep Time: 15 minutes
- Cook Time: 5 minutes
- Total Time: 24 hours 20 minutes
- Yield: About 4 servings 1x
- Category: Side Dish
- Cuisine: American
Ingredients
- 4–5 medium Kirby cucumbers, washed and sliced
- 4–5 large garlic cloves, peeled and smashed
- 4–6 fresh dill sprigs, washed and trimmed
- 1 cup (240 ml) white vinegar (5% acidity)
- 1 cup (240 ml) water, filtered or distilled
- 2 tablespoons kosher salt or pickling salt
- 1 teaspoon granulated sugar
- 1 teaspoon whole black peppercorns
- ¼ teaspoon red pepper flakes (optional)
Instructions
- Wash 4-5 medium Kirby cucumbers thoroughly and slice into ¼-inch (6 mm) rounds or spears.
- In a small saucepan, combine 1 cup white vinegar, 1 cup water, 2 tablespoons kosher salt, and 1 teaspoon granulated sugar. Warm over medium heat until salt and sugar dissolve, do not boil. Remove from heat and let cool slightly (about 5 minutes).
- In a mixing bowl, add smashed garlic cloves, fresh dill sprigs, black peppercorns, and optional red pepper flakes. Toss sliced cucumbers with these aromatics.
- Pack the cucumber mixture into a quart-sized glass jar snugly but without crushing. Pour the warm brine over the cucumbers, ensuring they are fully submerged with about ½ inch headspace. Use a weight or parchment paper to keep cucumbers submerged if needed.
- Seal the jar tightly and refrigerate for at least 24 hours before tasting. For best flavor, wait up to 48 hours. Pickles keep up to 3 weeks refrigerated.
Notes
Use kosher or pickling salt to avoid cloudy brine. Keep cucumbers fully submerged to maintain crunch. Warming the brine helps dissolve salt and sugar faster but avoid boiling. Use Kirby cucumbers for best crunch. Pickles keep up to 3 weeks refrigerated. Variations include adding jalapeños for spice or swapping dill for other herbs.
Nutrition
- Serving Size: About ¼ cup (30 gram
- Calories: 10
- Sodium: 400
- Carbohydrates: 2
Keywords: refrigerator pickles, garlic dill pickles, quick pickles, easy pickles, crunchy pickles, homemade pickles, no canning pickles