Love this? Save it for later!
Share the inspiration with your friends
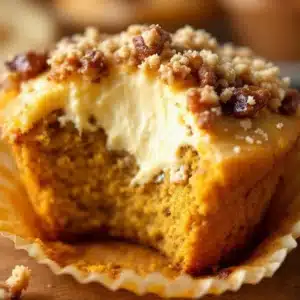
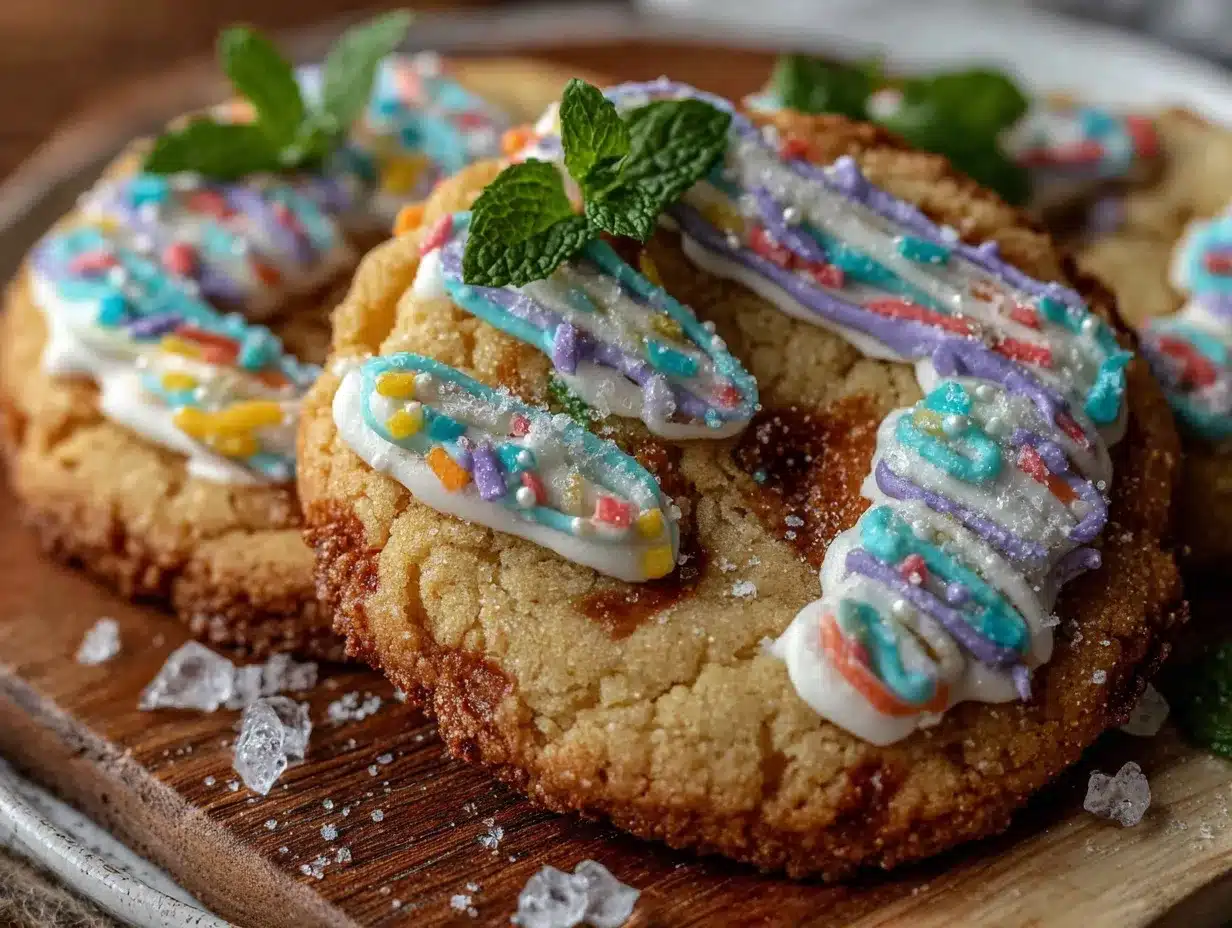
The cookie tray was empty before I could even grab a second cup of coffee. Third party this month where those alphabet sugar cookies disappeared fast. Honestly, I didn’t expect the simple idea of decorating cookies with letters to get such a reaction from both kids and adults. The mix of buttery sugar cookie dough baked just right, topped with bright, glossy royal icing letters, seemed to hit a nostalgic sweet spot. Someone immediately asked for the recipe, and a few texts popped up later from friends eager to recreate them for their own kids’ parties. It’s funny how a project that started as a quick idea to keep little hands busy turned into a recipe people trust for celebrations.
It all began when I was scrambling to find a kid-friendly party treat that wasn’t just sweet but interactive. You know, something that lets kids pick their letters, spell their names, or even attempt silly words. The colorful royal icing became my secret weapon—bright, smooth, and just the right consistency to pipe neat letters without frustration. I’ll admit, the first batch was a bit messy, but that buttery sugar cookie base was forgiving enough to encourage a few tries. Over time, this easy alphabet sugar cookies recipe became my go-to for parties, classroom treats, or just a fun weekend activity. It’s a quiet joy to see those little faces light up when they recognize their own initials, or when a friend spells out a funny word. The recipe stuck because it’s simple, reliable, and surprisingly charming.
So, if you’re looking for a cookie that brings a playful twist to the usual sweet treats, this one quietly delivers. It’s not about fancy decorations or complicated steps—just buttery cookies with colorful, glossy letters that speak for themselves. And honestly, that’s all the reason I need to keep making them again and again.
Why You’ll Love This Recipe
Having tested this recipe across multiple kids’ parties and casual get-togethers, I can say it holds its own in the busy world of party treats. Here’s what makes these easy alphabet sugar cookies with colorful royal icing stand out:
- Quick & Easy: The dough comes together in under 15 minutes, and baking is straightforward—perfect for last-minute party plans or weekend baking sessions.
- Simple Ingredients: No fancy, hard-to-find components here. If you have butter, sugar, and eggs, you’re halfway there. The royal icing uses just a few basics, too.
- Perfect for Kids’ Parties: These cookies double as edible name tags or spelling games, making them a hit at birthday parties, school events, or family gatherings.
- Crowd-Pleaser: The buttery sugar cookie base is soft yet holds shape well, while the royal icing adds a pop of color and sweetness that both kids and adults can’t resist.
- Unbelievably Delicious: The texture contrast between tender cookie and smooth icing is next-level cozy comfort food that brings out smiles.
What sets this recipe apart is the balance in the royal icing—easy to pipe but dries to a smooth, shiny finish without cracking. Plus, the cookie dough recipe is my personal favorite because it doesn’t spread too much, so your letters stay sharp and legible. Honestly, I tried a few other sugar cookie recipes before settling on this one, and the difference was night and day. It’s the kind of recipe that quietly impresses guests without any fuss, and that’s why I keep coming back to it.
What Ingredients You Will Need
This recipe uses simple, wholesome ingredients to deliver bold flavor and satisfying texture without the fuss. Most are pantry staples, and you can easily swap some to accommodate dietary needs or preferences.
- For the Sugar Cookies:
- Unsalted butter (1 cup / 227 g), softened – I prefer Land O’Lakes for consistent texture
- Granulated sugar (¾ cup / 150 g)
- Large egg (1), room temperature
- Pure vanilla extract (1 teaspoon)
- All-purpose flour (2 ½ cups / 312 g), sifted – fresh flour helps keep cookies tender
- Baking powder (1 teaspoon)
- Salt (¼ teaspoon)
- For the Royal Icing:
- Powdered sugar (4 cups / 480 g), sifted – ensures smooth icing
- Pasteurized egg whites or meringue powder (3 tablespoons) – I usually use meringue powder for ease and safety
- Warm water (5-6 tablespoons)
- Pure vanilla extract or lemon juice (1 teaspoon) for flavor
- Gel food coloring in assorted colors – gel colors provide vibrant hues without thinning the icing
Optional: You can swap out all-purpose flour for a gluten-free blend, like Bob’s Red Mill 1-to-1 gluten-free flour, for allergen-friendly baking. For the royal icing, dairy-free egg white substitutes exist, but I haven’t tested them extensively.
Equipment Needed
- Mixing bowls – I like using glass or stainless steel for easy cleanup
- Electric hand mixer or stand mixer – speeds up creaming the butter and mixing the icing
- Measuring cups and spoons – precise measurements are key
- Rolling pin – a smooth wooden or silicone one works best for even thickness
- Cookie cutters: Alphabet letter cutters (ideally 2-3 inch size) – if you don’t have letter cutters, you can use small round or square cutters and pipe letters on top
- Baking sheets lined with parchment paper or silicone mats – prevents sticking and helps with even baking
- Piping bags with small round tips (size #1 or #2) – for neat letter icing
- Cooling rack – to let your cookies cool evenly
- Optional: Food-safe paintbrushes for blending colors or adding details to icing
If you’re on a budget, disposable piping bags or plastic sandwich bags with a tiny corner cut off can work. For rolling, a wine bottle or clean glass can substitute for a rolling pin in a pinch. I learned that investing in good cookie cutters makes a big difference in ease and precision—cheap cutters tend to dull quickly and squish the dough unevenly.
Preparation Method
- Make the sugar cookie dough (15 minutes prep + chilling): In a large bowl, cream together 1 cup softened unsalted butter and ¾ cup granulated sugar using an electric mixer on medium speed until light and fluffy (about 3-4 minutes). Beat in the egg and 1 teaspoon vanilla extract until combined.
- Mix the dry ingredients: In a separate bowl, whisk together 2 ½ cups sifted all-purpose flour, 1 teaspoon baking powder, and ¼ teaspoon salt. Gradually add the dry mix to the wet ingredients, blending on low speed until just combined. Avoid overmixing to keep cookies tender.
- Chill the dough: Divide the dough in half, wrap each in plastic wrap, and refrigerate for at least 1 hour or up to overnight. Chilling stops spreading and makes rolling easier.
- Preheat oven and prepare surface: Preheat your oven to 350°F (175°C). Line baking sheets with parchment paper or silicone mats. Lightly flour your work surface and rolling pin.
- Roll and cut out cookies (15-20 minutes): Take one dough portion out of the fridge, let it sit 5 minutes to soften slightly. Roll out dough evenly to about ¼-inch (6 mm) thickness. Use alphabet cookie cutters to cut letters. Transfer carefully to baking sheets, spacing them 1 inch apart.
- Bake the cookies: Bake for 8-10 minutes or until edges just start to turn golden. Watch closely—the cookies should stay pale for that soft sugar cookie texture. Let them cool on the sheet for 5 minutes, then transfer to a cooling rack to cool completely.
- Prepare the royal icing (while cookies bake): In a bowl, combine 4 cups sifted powdered sugar, 3 tablespoons meringue powder, and 5 tablespoons warm water. Beat on medium speed until glossy and stiff peaks form (about 5-7 minutes). Add 1 teaspoon vanilla extract or lemon juice. Adjust consistency by adding small water amounts for piping (should hold its shape but flow smoothly).
- Color your icing: Divide icing into small bowls and tint each with gel food coloring. Stir gently to avoid air bubbles. For neat letters, fill piping bags fitted with small round tips.
- Decorate the cookies: Pipe letters carefully onto cooled cookies. If you want crisp edges, outline the letter and then flood inside with thinner icing. Let dry at room temperature uncovered for at least 3-4 hours or overnight to set fully.
Pro tip: If the dough feels sticky while rolling, chill it a bit longer. And if royal icing thickens too much while decorating, add a teaspoon of water to loosen. I always label my icing bowls with colors to keep things organized during decorating frenzy.
Cooking Tips & Techniques
Getting these easy alphabet sugar cookies just right took some trial and error—here’s what I learned so you can avoid the same pitfalls:
- Don’t skip chilling: Chilling the dough is crucial. It prevents excessive spreading, so your letters don’t lose shape in the oven.
- Roll evenly: Uneven dough thickness leads to uneven baking. Use rolling pin guides or measure thickness with a ruler to get consistent cookies.
- Use gel food coloring: Liquid dyes thin out your royal icing, making it harder to pipe crisp letters. Gel coloring keeps the icing thick and vibrant.
- Practice piping on parchment: Before decorating cookies, test your letter piping on parchment paper. It saves frustration and builds confidence.
- Keep royal icing covered: When not using, cover icing with a damp towel or plastic wrap touching the surface to prevent drying out.
- Don’t rush icing drying: Let letters dry completely at room temperature. Rushing this step causes smudging or cracking.
One time I ignored the chilling step and ended with a plate of flat, unrecognizable letters—lesson learned! Also, I found multitasking helps here: bake one batch while mixing icing and prepping colors for the next. That way, you’re not overwhelmed during decorating.
Variations & Adaptations
These easy alphabet sugar cookies lend themselves well to several fun twists and dietary tweaks:
- Gluten-Free Version: Swap all-purpose flour for a 1:1 gluten-free baking blend. Just be sure to chill the dough longer to help with texture.
- Vegan Adaptation: Use vegan butter and substitute the egg with flax egg (1 tbsp flaxseed meal + 3 tbsp water, let sit 5 minutes). For royal icing, try aquafaba (chickpea water) instead of egg whites.
- Seasonal Themes: Swap gel colors to match holidays—reds and greens for Christmas, pastels for Easter. Add edible glitter or small sprinkles before icing dries for extra sparkle.
- Flavor Boost: Add lemon or almond extract to the cookie dough for a subtle twist. You can also mix in finely grated zest for a fresh aroma.
- Personalized Messages: Instead of single letters, spell out names or short words for special occasions. It’s a crowd-pleaser at baby showers or graduations.
Personally, I once made a batch using lemon coconut shortbread cookie dough to mix things up. The letters still piped well on top, and the tropical flavor was a surprise hit!
Serving & Storage Suggestions
These cookies are best served at room temperature to enjoy the full flavor and texture contrast. I usually arrange them on a colorful platter to highlight the bright royal icing letters—makes for a festive centerpiece at kids’ parties.
Pair them with simple drinks like milk, lemonade, or fruit punch to keep the focus on the fun cookie decorating. They also make a delightful addition to a brunch spread, alongside dishes like easy no-fail breakfast basics or light veggie-packed egg white scramble.
Storage: Store cooled cookies in an airtight container at room temperature for up to 4 days. For longer storage, freeze undecorated cookies in a single layer, then stack with parchment paper between layers in a freezer-safe container. Royal icing-decorated cookies freeze best if wrapped individually to avoid smudging.
Reheating: No need to reheat—these cookies are great as-is. However, if you prefer a softer texture, warming them in a low oven (250°F / 120°C) for 5 minutes can bring back that fresh-baked feel.
Flavors tend to mellow and meld over a day or two, making these cookies even more enjoyable when made a little ahead of time. Just don’t wait too long if you want that fresh, vibrant icing shine!
Nutritional Information & Benefits
Estimated per cookie (based on 24 cookies per batch):
| Calories | 120 |
|---|---|
| Fat | 5g |
| Carbohydrates | 18g |
| Protein | 1g |
| Sugar | 10g |
While these sugar cookies are a treat, the recipe uses real butter and eggs, which provide some natural nutrients like vitamin A and protein. The royal icing is mostly sugar, so it’s best enjoyed in moderation, especially for kids. Choosing pasteurized egg whites or meringue powder adds safety and reduces risk.
For those watching gluten intake, the recipe adapts well to gluten-free flour blends. And if you want to keep things lighter, pairing these cookies with a nutrient-rich breakfast like the healthy high-protein Greek yogurt parfait balances indulgence with nourishment.
Conclusion
Easy alphabet sugar cookies with colorful royal icing have quietly become a staple in my baking repertoire. They’re straightforward enough for a novice but deliver impressive results that delight kids and adults alike. What I love most is their versatility—whether spelling out names, messages, or just letting imagination run wild, these cookies make every occasion a little more special.
Feel free to tweak the colors, flavors, or cookie shapes to suit your style. Baking these is as much about joyful moments as it is about the final treat. I hope this recipe becomes one you come back to when you want to add a bit of fun and sweetness to your gatherings.
Give it a try, and if you do make them, I’d love to hear how your alphabet cookies turned out or what playful variations you came up with!
FAQs
Can I make the cookie dough ahead of time?
Absolutely! The dough can be refrigerated for up to 3 days or frozen for up to 1 month. Just thaw before rolling and cutting.
What if I don’t have alphabet cookie cutters?
No worries! You can cut cookies into simple shapes like circles or squares and pipe letters on top with royal icing. Alternatively, freehand cutting with a knife works if you’re confident.
How do I store decorated sugar cookies?
Store in an airtight container at room temperature for up to 4 days. For longer storage, freeze undecorated cookies or wrap decorated ones carefully to avoid smudging.
Can I use powdered food coloring instead of gel?
Gel coloring is best for royal icing because it doesn’t thin the consistency. Powdered food coloring can work but may require more adjusting of icing texture.
Is it safe to use raw egg whites in royal icing?
To be safe, use pasteurized egg whites or meringue powder, which is a common and safe substitute preferred by many bakers.
Pin This Recipe!
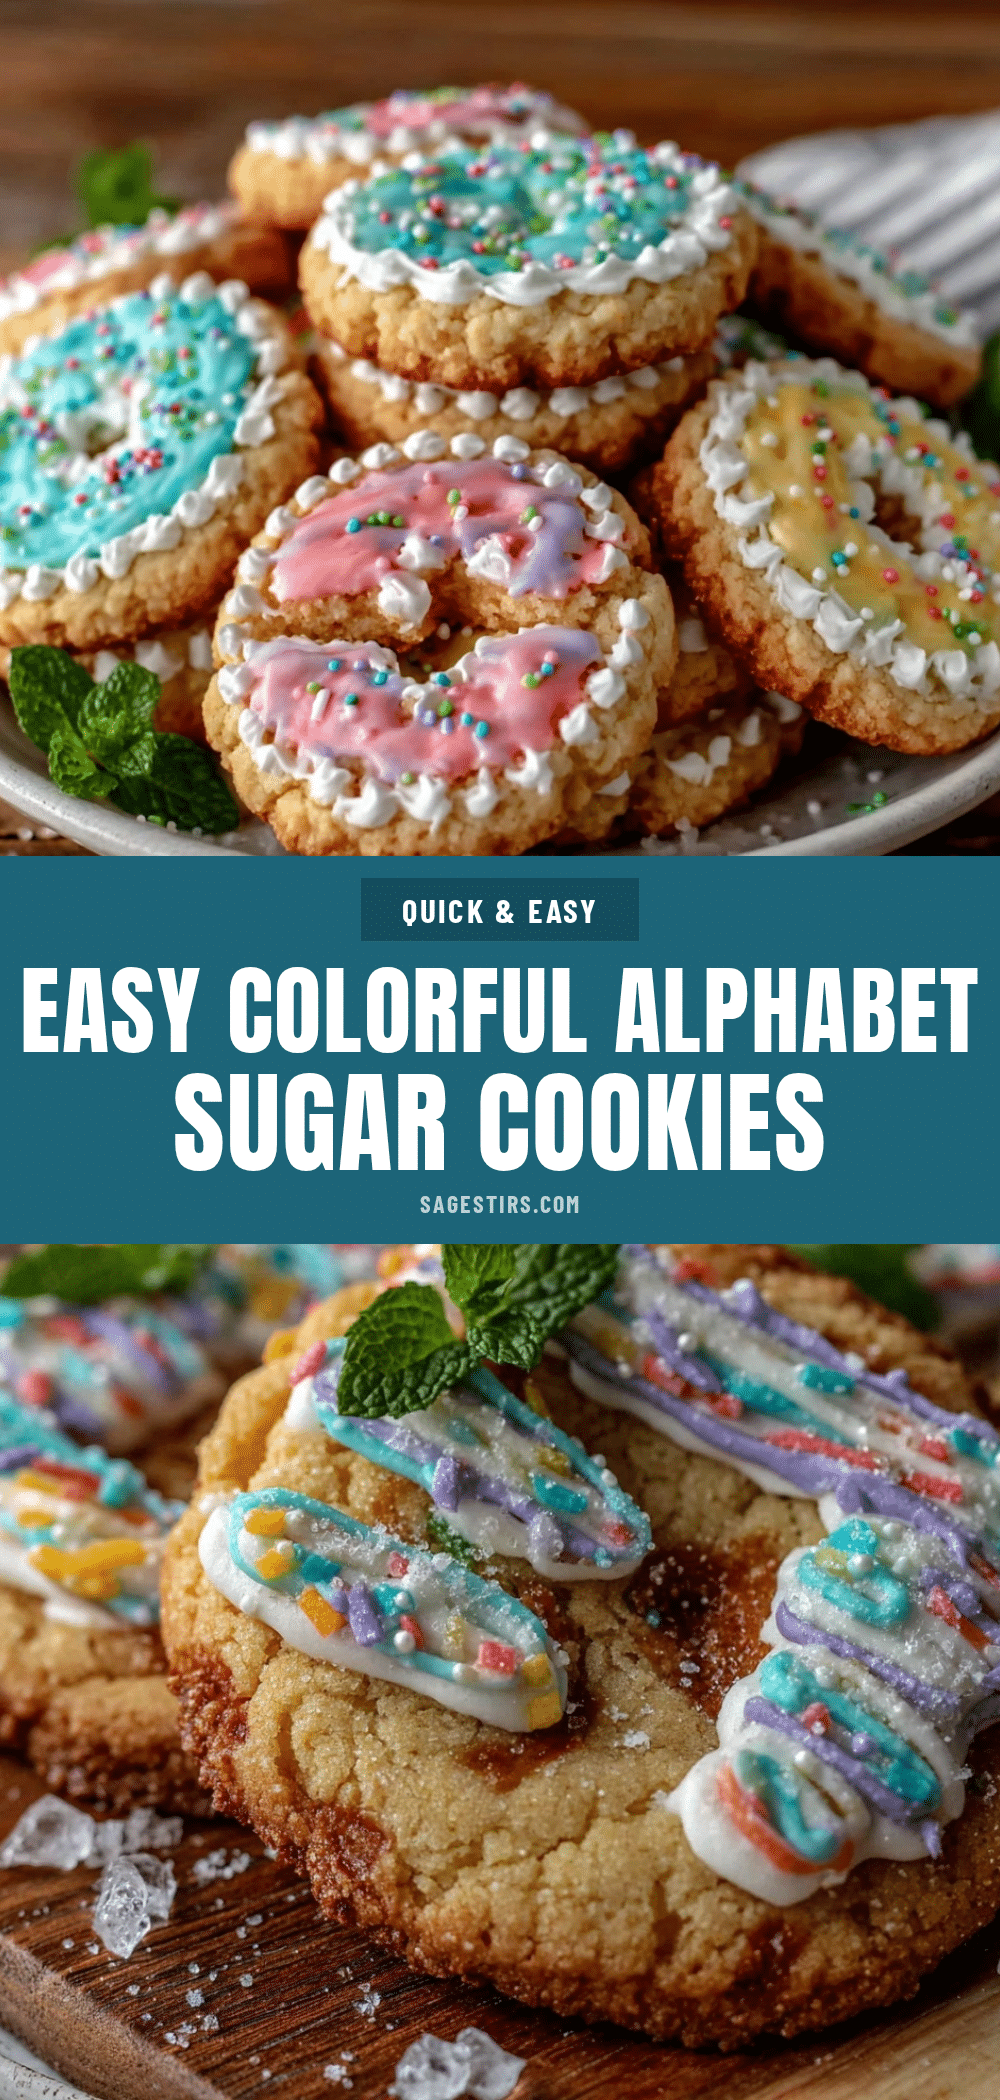
Easy Alphabet Sugar Cookies with Colorful Royal Icing

Buttery sugar cookies topped with bright, glossy royal icing letters, perfect for kids’ parties and fun edible name tags.
- Prep Time: 15 minutes
- Cook Time: 10 minutes
- Total Time: 1 hour 30 minutes
- Yield: 24 cookies 1x
- Category: Dessert
- Cuisine: American
Ingredients
- 1 cup (227 g) unsalted butter, softened
- 3/4 cup (150 g) granulated sugar
- 1 large egg, room temperature
- 1 teaspoon pure vanilla extract
- 2 1/2 cups (312 g) all-purpose flour, sifted
- 1 teaspoon baking powder
- 1/4 teaspoon salt
- 4 cups (480 g) powdered sugar, sifted
- 3 tablespoons pasteurized egg whites or meringue powder
- 5–6 tablespoons warm water
- 1 teaspoon pure vanilla extract or lemon juice
- Gel food coloring in assorted colors
Instructions
- In a large bowl, cream together 1 cup softened unsalted butter and 3/4 cup granulated sugar using an electric mixer on medium speed until light and fluffy (about 3-4 minutes). Beat in the egg and 1 teaspoon vanilla extract until combined.
- In a separate bowl, whisk together 2 1/2 cups sifted all-purpose flour, 1 teaspoon baking powder, and 1/4 teaspoon salt. Gradually add the dry mix to the wet ingredients, blending on low speed until just combined. Avoid overmixing to keep cookies tender.
- Divide the dough in half, wrap each in plastic wrap, and refrigerate for at least 1 hour or up to overnight.
- Preheat oven to 350°F (175°C). Line baking sheets with parchment paper or silicone mats. Lightly flour your work surface and rolling pin.
- Take one dough portion out of the fridge, let it sit 5 minutes to soften slightly. Roll out dough evenly to about 1/4-inch (6 mm) thickness. Use alphabet cookie cutters to cut letters. Transfer carefully to baking sheets, spacing them 1 inch apart.
- Bake for 8-10 minutes or until edges just start to turn golden. Let cool on the sheet for 5 minutes, then transfer to a cooling rack to cool completely.
- While cookies bake, prepare royal icing: combine 4 cups sifted powdered sugar, 3 tablespoons meringue powder, and 5 tablespoons warm water. Beat on medium speed until glossy and stiff peaks form (about 5-7 minutes). Add 1 teaspoon vanilla extract or lemon juice. Adjust consistency by adding small water amounts for piping.
- Divide icing into small bowls and tint each with gel food coloring. Stir gently to avoid air bubbles. Fill piping bags fitted with small round tips.
- Pipe letters carefully onto cooled cookies. For crisp edges, outline the letter and then flood inside with thinner icing. Let dry at room temperature uncovered for at least 3-4 hours or overnight.
Notes
Chill dough for at least 1 hour to prevent spreading and keep letter shapes sharp. Use gel food coloring for vibrant, thick royal icing. Practice piping on parchment paper before decorating cookies. Keep royal icing covered when not in use to prevent drying. Let icing dry completely at room temperature to avoid smudging or cracking.
Nutrition
- Serving Size: 1 cookie
- Calories: 120
- Sugar: 10
- Fat: 5
- Carbohydrates: 18
- Protein: 1
Keywords: alphabet sugar cookies, royal icing, kids party treats, sugar cookies, colorful cookies, easy baking, party cookies