Love this? Save it for later!
Share the inspiration with your friends
“It was the kind of sticky July evening when the last thing anyone wanted was to turn on the oven,” I remember thinking as I wiped sweat from my brow. My tiny apartment kitchen, facing west, transformed into a sauna by mid-afternoon, and honestly, the thought of baking anything felt like a cruel joke. That’s when my neighbor, Carla, popped her head in with a grin, holding a small container of what she called her ‘secret weapon’—an easy no-bake summer dessert that promised freshness without the heat.
Carla wasn’t one to fuss in the kitchen, usually grabbing takeout or quick snacks. But this recipe? It was different. She swore it was the perfect light treat for hot days, and after just one bite, I was hooked. The cool, creamy texture mingled with bursts of fresh fruit felt like a breeze on my tongue. No oven, no fuss, just pure summer joy in a bowl.
Maybe you’ve been there too—that desperate craving for something sweet but not heavy, something that feels like a reward without the mess. These easy no-bake summer desserts are exactly that. They’re quick to whip up, use simple ingredients you probably have around, and leave your kitchen blissfully cool. Let me tell you, once you try these, they’ll become your go-to when the thermometer climbs and you want a fresh, light treat that feels like a mini vacation.
Why You’ll Love This Recipe
After testing countless versions of easy no-bake summer desserts, I can say these five recipes stand out for a bunch of solid reasons. Here’s why they’ve earned a permanent spot in my warm-weather repertoire:
- Quick & Easy: Each dessert comes together in under 20 minutes—perfect when you want something sweet without the wait.
- Simple Ingredients: No fancy trips to specialty stores needed. Most ingredients are pantry staples or fresh fruits you can grab at the corner market.
- Perfect for Summer Gatherings: Whether it’s a casual backyard barbecue or an impromptu picnic, these treats fit right in.
- Crowd-Pleasers: From kids to adults, these desserts get rave reviews every time I bring them along.
- Unbelievably Delicious: The combination of creamy textures and fresh flavors hits just the right note of comfort and refreshment.
What makes these recipes different? For starters, I’ve included a couple of clever twists like using whipped coconut cream for a dairy-free option or adding a zesty citrus glaze that brightens the whole dish. One recipe blends cottage cheese for an ultra-smooth touch, making it feel indulgent without the heaviness.
Honestly, these desserts aren’t just good—they’re the kind of bites that make you close your eyes and smile. They’re the kind of light treats that don’t weigh you down, perfect for those long summer afternoons when you want to keep things fresh and easy.
What Ingredients You Will Need
These no-bake summer desserts rely on simple, wholesome ingredients that deliver bold flavor and satisfying texture without any fuss. Most are pantry staples with a handful of fresh fruits or nuts to add that seasonal touch.
For the Creamy Base
- Greek yogurt (full-fat or low-fat, depending on preference; provides tangy creaminess)
- Cottage cheese (small-curd preferred for smooth texture)
- Heavy cream or coconut cream (chilled, for whipping—coconut cream is great for dairy-free)
- Sweeteners: Honey, maple syrup, or agave nectar (adjust to taste)
- Vanilla extract (adds warm aroma and depth)
For the Fruit & Flavor
- Fresh berries – strawberries, blueberries, raspberries (in summer, swap frozen if needed)
- Citrus zest (lemon or lime, for brightness)
- Fresh mint (optional, for garnish and fresh notes)
- Chopped nuts (almonds, pistachios, or walnuts for crunch)
- Chia seeds (optional, to add texture and nutrition)
For the Crust or Base
- Graham crackers or digestive biscuits (crushed, for no-bake crust)
- Unsalted butter or coconut oil (melted, to bind the crust)
I usually recommend brands like Fage for Greek yogurt due to its thick consistency and clean flavor. For those who want gluten-free options, almond flour or crushed gluten-free cookies work beautifully for the crust. If you’re vegan or dairy-free, coconut cream paired with maple syrup creates a luscious alternative that doesn’t skimp on richness.
Don’t stress if you don’t have every ingredient—these recipes are forgiving. Substitutions like swapping honey for agave or using frozen fruit in a pinch won’t mess up the final result.
Equipment Needed
- Mixing bowls: A few sizes to combine different ingredients comfortably.
- Electric mixer or whisk: For whipping cream or blending cottage cheese smoothly. A hand whisk works in a pinch but requires more effort.
- Measuring cups and spoons: Accuracy helps, especially for sweeteners and zest.
- Spatula: Essential for folding ingredients gently without deflating cream.
- Springform pan or small ramekins: For setting layered desserts. If you don’t have a springform, a regular cake pan lined with parchment works fine.
- Food processor or plastic bag: For crushing graham crackers or cookies. Use a rolling pin if you don’t have either.
I once tried making a no-bake cheesecake with just a fork to mix, and let me tell you, it took forever! Investing in a small electric hand mixer made a huge difference in texture and speed. If you’re on a budget, a sturdy whisk and some elbow grease will do the trick too.
Preparation Method
- Prepare the crust (10 minutes): Crush 1 ½ cups (150g) of graham crackers or digestive biscuits into fine crumbs using a food processor or a rolling pin inside a sealed plastic bag. Mix with 6 tablespoons (85g) melted unsalted butter or coconut oil until evenly combined. Press the mixture firmly into the base of a 9-inch (23cm) springform pan or individual ramekins. Chill in the fridge for at least 15 minutes to set.
- Make the creamy filling (15 minutes): In a mixing bowl, combine 2 cups (480g) Greek yogurt, 1 cup (225g) cottage cheese, ¼ cup (60ml) honey or maple syrup, and 1 teaspoon vanilla extract. Use an electric mixer to blend until smooth and creamy. If you prefer lighter texture, fold in 1 cup (240ml) whipped heavy cream or whipped coconut cream gently using a spatula.
- Add fruit and flavor (5 minutes): Fold in 1 cup (150g) fresh berries gently to the creamy mixture. Add 1 tablespoon lemon or lime zest for brightness. If using, sprinkle in 1 tablespoon chia seeds or chopped nuts for extra texture.
- Assemble the dessert (5 minutes): Pour the creamy filling over the chilled crust layer. Smooth the top with a spatula. Cover loosely with plastic wrap or a lid.
- Chill to set (at least 4 hours or overnight): Place the dessert in the fridge to firm up. This helps the flavors meld and the texture become luscious. If you’re in a hurry, 2 hours in the freezer can help, but watch closely to avoid freezing solid.
- Serving: Before serving, garnish with additional fresh berries, a sprig of mint, or a drizzle of honey for a pretty finish.
Pro tip: If your cottage cheese feels too lumpy, give it a quick blitz in the food processor before mixing. This smooths the texture and makes the dessert feel more indulgent. Also, don’t skip the chilling step—even though it’s tempting to dig in right away, waiting really pays off in flavor and texture.
Cooking Tips & Techniques
One trick I learned the hard way is to avoid overmixing when folding whipped cream into the yogurt base. You want to keep as much air as possible to maintain a light texture. Overmixing can deflate your dessert, turning it dense and less enjoyable.
Also, when pressing the crust, use the back of a spoon or a flat-bottomed glass to get an even, compact layer. This prevents it from crumbling when you slice into the dessert later.
Don’t rush the chilling time. It might feel like forever, but the dessert needs those hours to set properly. I once skipped this step entirely, and the result was a sad, runny mess.
For multitasking, prepare the crust and filling while the kids are finishing homework or during a quick TV commercial break. That way, you’re not stuck in the kitchen for long stretches.
Finally, always taste your filling before assembling. Adjust sweetness or tartness by adding a little more honey or citrus zest, depending on your mood and fruit choice.
Variations & Adaptations
- Dairy-Free Version: Swap Greek yogurt and cottage cheese for full-fat coconut yogurt. Use whipped coconut cream instead of dairy cream. Sweeten with maple syrup for a rich, tropical vibe.
- Chocolate Lover’s Twist: Stir ¼ cup (25g) cocoa powder into the creamy base and add mini chocolate chips to the crust for a decadent touch.
- Seasonal Fruit Variations: In late summer or early fall, replace berries with diced peaches, nectarines, or even sliced figs for a fresh seasonal twist.
- Nut-Free Option: Skip nuts entirely or swap them with toasted sunflower seeds to keep texture without allergens.
Personally, I once tried adding a splash of rose water and pistachios to one batch—it was a lovely floral surprise that guests couldn’t get enough of. Feel free to experiment with flavors that speak to you or your crowd.
Serving & Storage Suggestions
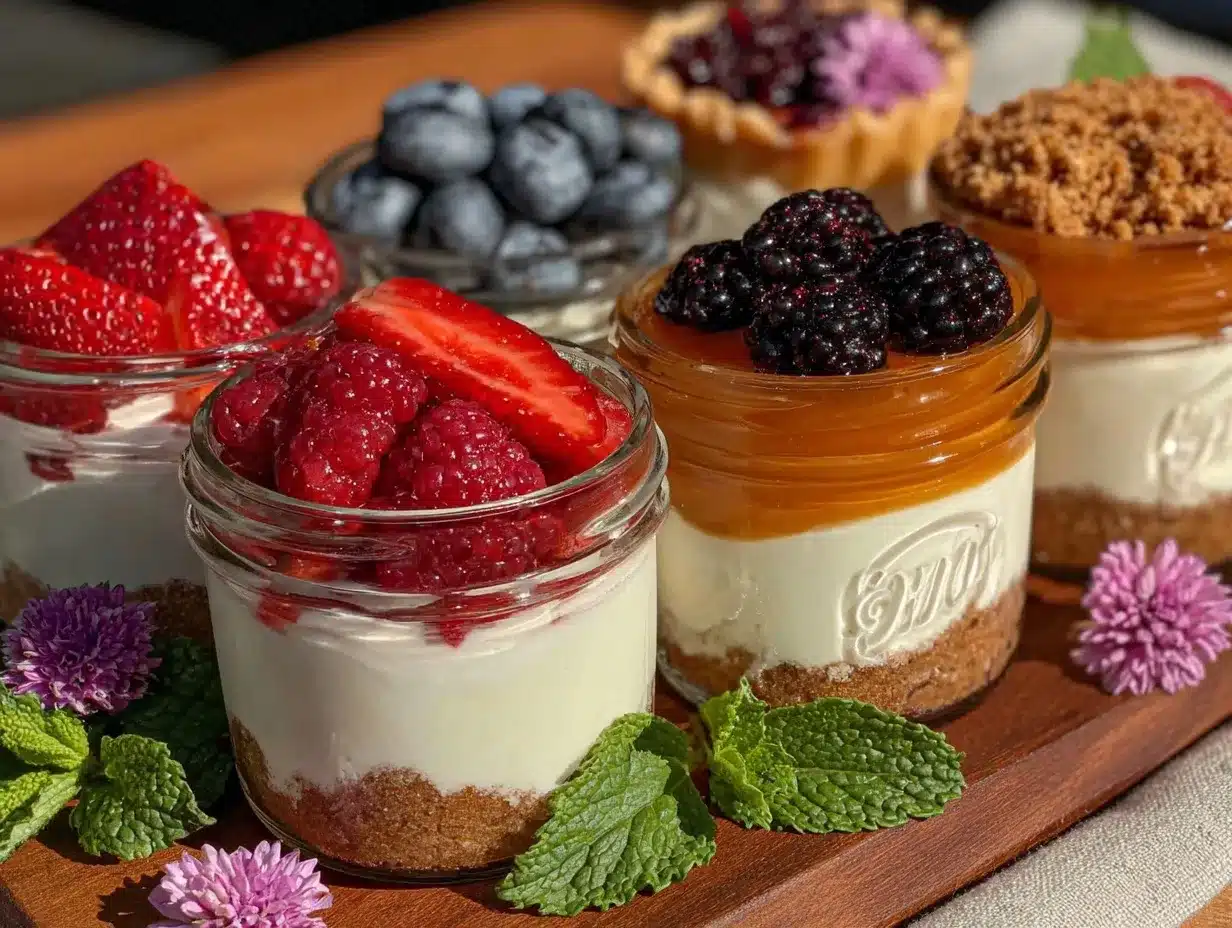
Serve these easy no-bake summer desserts chilled straight from the fridge for that refreshing coolness. They look beautiful topped with fresh fruit and a small mint leaf or edible flower to brighten presentation. Pair with a light iced tea or sparkling water with lemon for a balanced summer treat.
Store leftovers covered in the fridge for up to 3 days. The flavors actually deepen overnight, making the dessert even more delightful the next day. If you want to prepare ahead, assemble and refrigerate up to 24 hours before serving.
To reheat gently (if you prefer a softer texture), let the dessert sit at room temperature for 15 minutes before serving. Avoid microwaving or warm ovens, as heat can spoil the fresh, creamy texture.
Nutritional Information & Benefits
Each serving of these no-bake summer desserts provides a balanced mix of protein, healthy fats, and natural sugars from fruit and honey. Greek yogurt and cottage cheese contribute high-quality protein and calcium, supporting bone health and muscle maintenance.
The fresh fruit adds vitamins, antioxidants, and fiber, making this treat a smarter option than many heavy, sugar-laden desserts. For those watching carbs, swapping in coconut yogurt and using less sweetener can keep the recipe low-carb and dairy-free.
Be mindful of potential allergens like nuts and dairy, but luckily, these recipes are easy to adapt for most dietary needs without losing their fresh, light charm.
Conclusion
Easy no-bake summer desserts are the kind of recipes you’ll return to again and again, especially when the heat is on and you want something fresh, light, and satisfying without fuss. Whether you’re hosting a casual get-together or just treating yourself to a sweet moment, these recipes deliver on flavor and ease.
Try customizing the flavors and ingredients to suit your taste—there’s so much room for creativity here. Honestly, these desserts remind me of those slow summer evenings when everything feels just right and a simple, cool treat is the perfect way to end the day.
Give these recipes a try and let me know which one becomes your favorite. Share your twists or questions in the comments—I love hearing how you make these desserts your own!
FAQs About Easy No-Bake Summer Desserts
Can I make these desserts ahead of time?
Yes! They can be assembled up to 24 hours before serving and stored in the fridge. Just keep them covered to maintain freshness.
What if I don’t have a springform pan?
No worries—regular cake pans or individual ramekins lined with parchment paper work just fine.
How do I prevent the crust from getting soggy?
Make sure to chill the crust well before adding the filling, and press it firmly to create a solid base.
Can I use frozen fruit instead of fresh?
Absolutely. Just thaw and drain any excess liquid before folding into the creamy base to avoid watering down the dessert.
Are these desserts suitable for kids?
Definitely! They’re mild, sweet, and generally allergy-friendly with easy substitutions, making them a hit with little ones and grown-ups alike.
Pin This Recipe!

Easy No-Bake Summer Desserts

A collection of five quick and light no-bake summer dessert recipes that are perfect for hot days, using simple ingredients and requiring no oven.
- Prep Time: 20 minutes
- Cook Time: 0 minutes
- Total Time: 4 hours 20 minutes
- Yield: 8 servings 1x
- Category: Dessert
- Cuisine: American
Ingredients
- 1 ½ cups (150g) graham crackers or digestive biscuits, crushed
- 6 tablespoons (85g) unsalted butter or coconut oil, melted
- 2 cups (480g) Greek yogurt (full-fat or low-fat)
- 1 cup (225g) cottage cheese, small-curd preferred
- ¼ cup (60ml) honey, maple syrup, or agave nectar
- 1 teaspoon vanilla extract
- 1 cup (240ml) whipped heavy cream or whipped coconut cream
- 1 cup (150g) fresh berries (strawberries, blueberries, raspberries)
- 1 tablespoon lemon or lime zest
- 1 tablespoon chia seeds (optional)
- 1 tablespoon chopped nuts (almonds, pistachios, or walnuts, optional)
- Fresh mint for garnish (optional)
- Additional fresh berries for garnish
- Honey for drizzle (optional)
Instructions
- Prepare the crust: Crush graham crackers or digestive biscuits into fine crumbs using a food processor or rolling pin inside a sealed plastic bag.
- Mix crushed crumbs with melted unsalted butter or coconut oil until evenly combined.
- Press the mixture firmly into the base of a 9-inch (23cm) springform pan or individual ramekins.
- Chill in the fridge for at least 15 minutes to set.
- Make the creamy filling: In a mixing bowl, combine Greek yogurt, cottage cheese, honey or maple syrup, and vanilla extract.
- Use an electric mixer to blend until smooth and creamy.
- Fold in whipped heavy cream or whipped coconut cream gently using a spatula for lighter texture.
- Add fruit and flavor: Fold in fresh berries gently to the creamy mixture.
- Add lemon or lime zest for brightness.
- If using, sprinkle in chia seeds or chopped nuts for extra texture.
- Assemble the dessert: Pour the creamy filling over the chilled crust layer.
- Smooth the top with a spatula.
- Cover loosely with plastic wrap or a lid.
- Chill to set: Place the dessert in the fridge for at least 4 hours or overnight to firm up.
- Alternatively, chill in the freezer for 2 hours but watch closely to avoid freezing solid.
- Before serving, garnish with additional fresh berries, a sprig of mint, or a drizzle of honey.
Notes
Avoid overmixing when folding whipped cream to keep dessert light and airy. Press crust firmly to prevent crumbling. Chill dessert for at least 4 hours for best texture and flavor. Cottage cheese can be blitzed in a food processor for smoother texture. Substitutions like frozen fruit or alternative sweeteners work well. For dairy-free, use coconut yogurt and whipped coconut cream.
Nutrition
- Serving Size: 1 slice or ramekin s
- Calories: 250
- Sugar: 15
- Sodium: 120
- Fat: 15
- Saturated Fat: 8
- Carbohydrates: 20
- Fiber: 2
- Protein: 8
Keywords: no-bake dessert, summer dessert, easy dessert, light treat, Greek yogurt dessert, no oven dessert, healthy dessert, quick dessert