Love this? Save it for later!
Share the inspiration with your friends
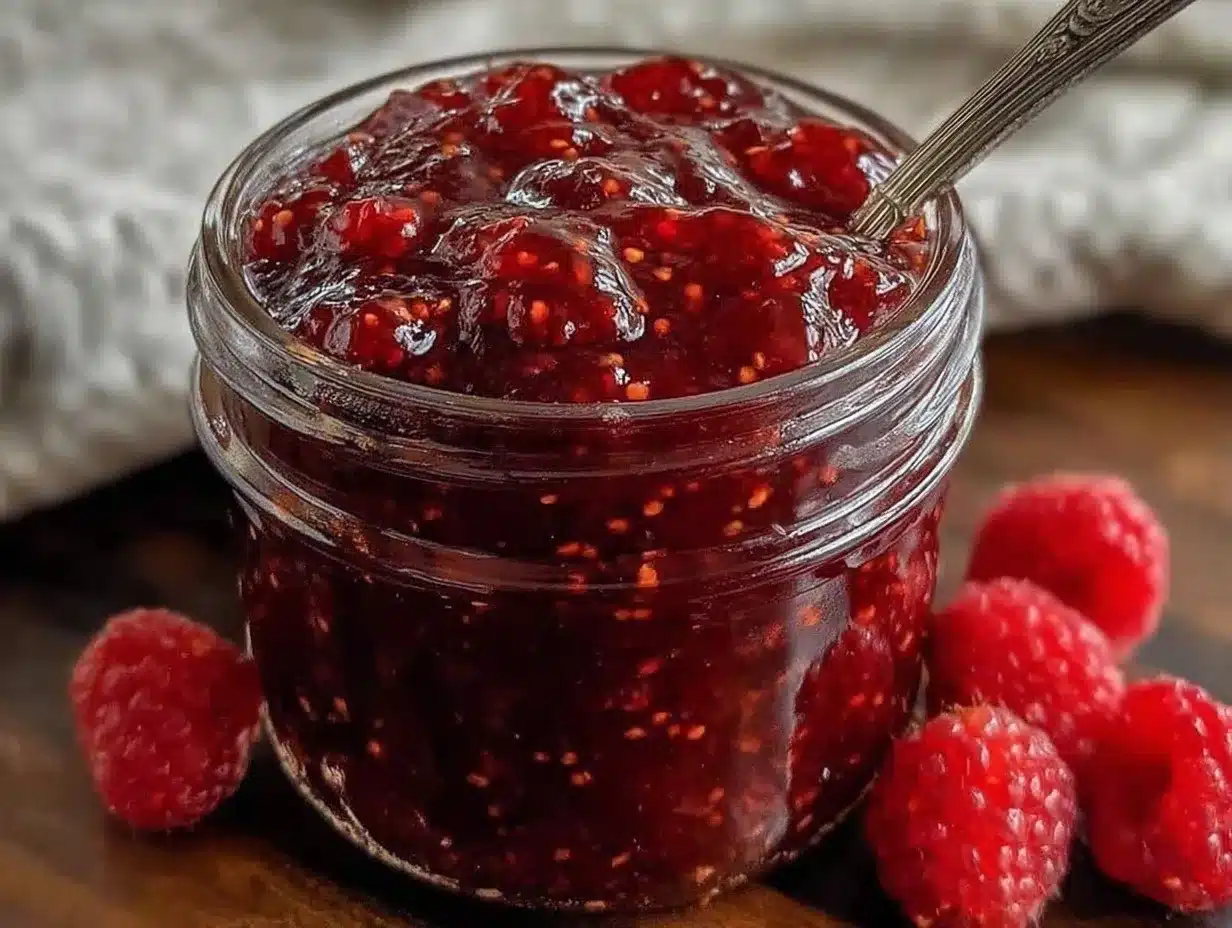
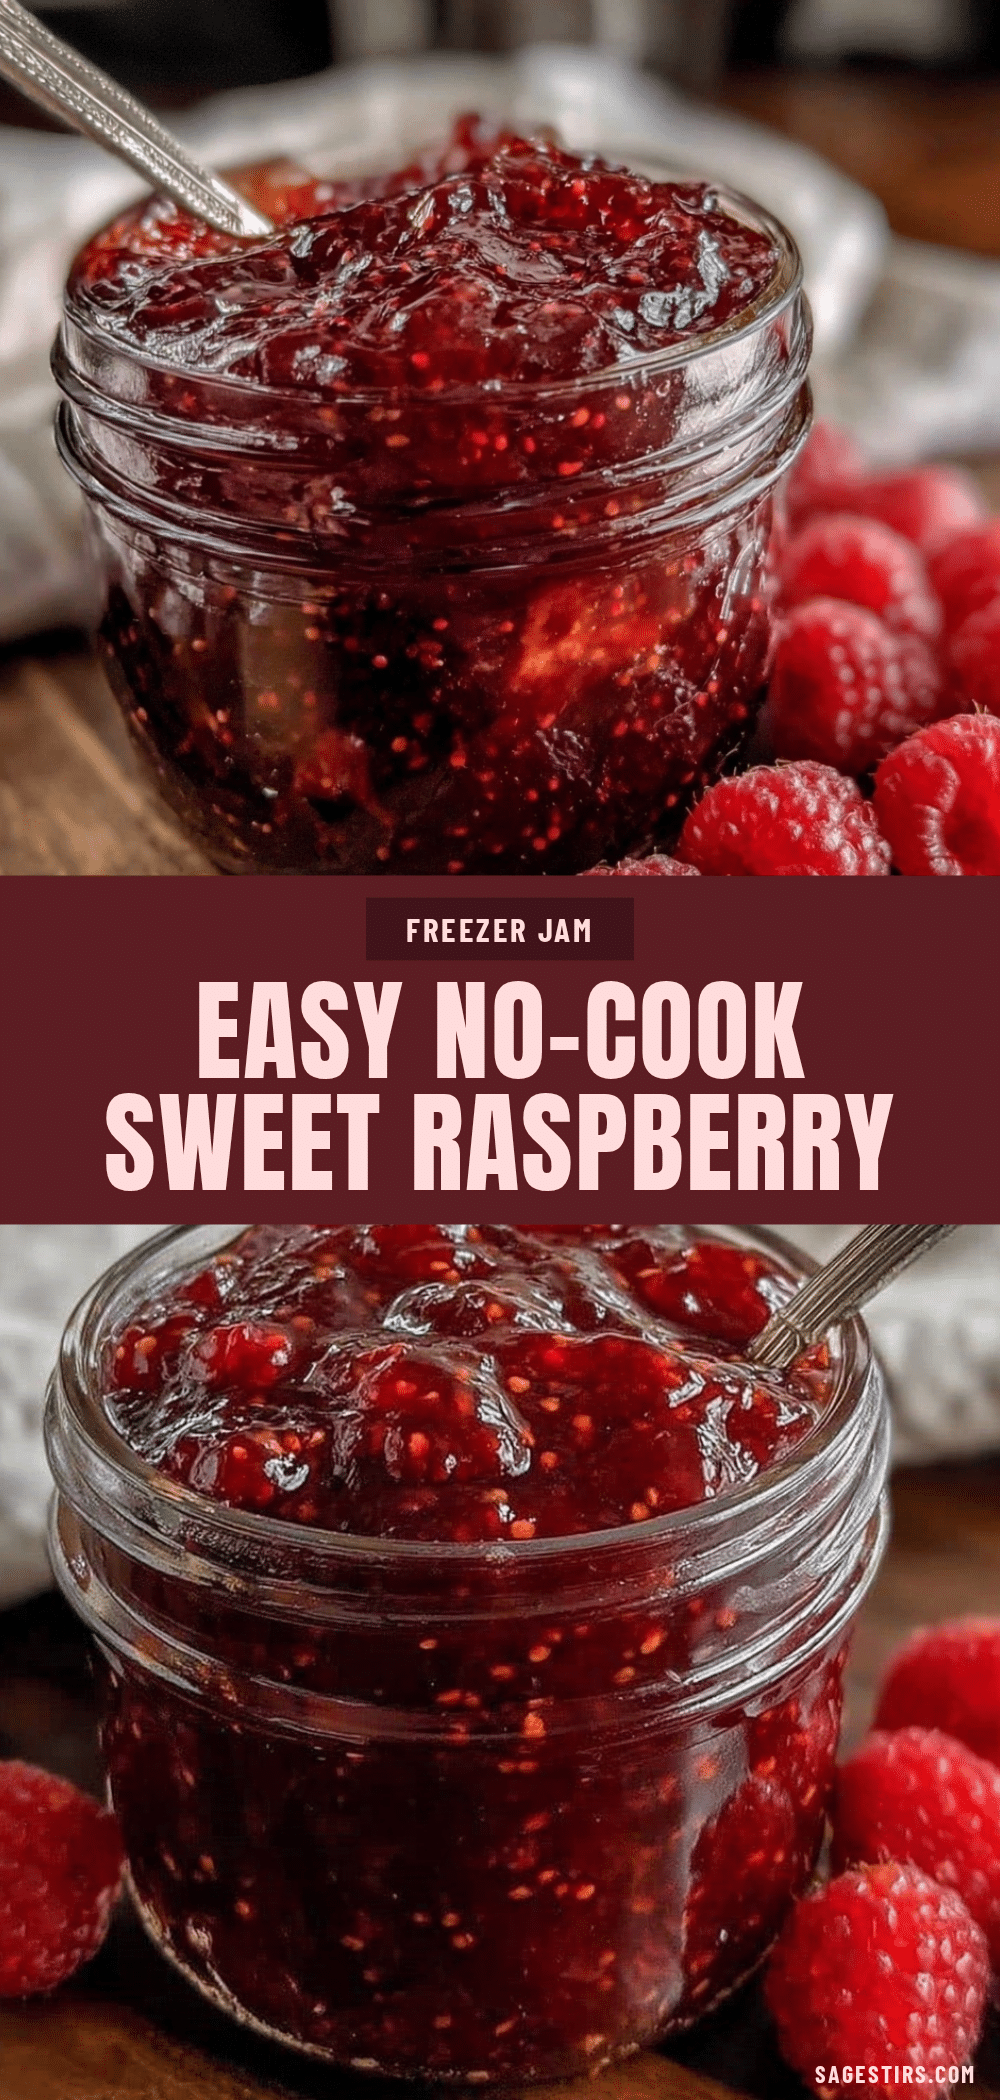
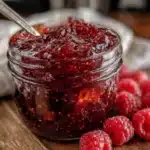
Glistening, jewel-like raspberry seeds suspended in gleaming ruby-red gel — and that’s the whole point. This jam’s texture is what made me come back to this recipe again and again, long before I even tasted it. I’m the kind of cook who first judges a dish by how it feels between my fingers or catches the way light dances through a spoonful. The way this raspberry freezer jam holds its vivid, tender structure without cooking is oddly mesmerizing.
One afternoon, I was wrestling with the idea of preserving fresh raspberries without turning them into a sticky, overboiled mess. The usual jam-making process felt daunting and time-consuming, but I wanted that fresh-picked flavor to shine through — unmasked by hours on the stove. So I tried this no-cook freezer jam recipe, and honestly, it felt like magic. The texture was soft yet spreadable, full of little bursts from the seeds, not mushy or syrupy like many jams can get.
There’s something quietly satisfying about stirring together a handful of ingredients, watching the natural pectin work its slow magic, and knowing it’s ready to enjoy in just five minutes. The ruby-red color stays bright, the seeds keep their gentle crunch, and it’s just ripe enough to feel fresh and homemade. No need to babysit a bubbling pot or guess if you’ve boiled it long enough.
I admit, I first made this raspberry freezer jam out of sheer curiosity, but it stuck because it’s so approachable and rewarding. It’s not fancy, but that’s the charm. It’s the kind of recipe that lets the vibrant raspberries sing without overcomplication, perfect for quick gifts or a simple breakfast upgrade. I always keep a jar ready in my fridge to bring a little sparkle to toast, yogurt, or even a quick dollop on pancakes.
That texture, the bright color, the ease of making it — it’s a subtle promise of fresh summer mornings no matter the season. And honestly, that’s why this recipe stuck with me.
Why You’ll Love This Easy No-Cook Raspberry Freezer Jam Recipe
Let’s be real: jam usually means a long, slow boil and watching the pot like a hawk. This no-cook raspberry freezer jam recipe flips that on its head, letting you whip up a fresh batch in under five minutes. I’ve tested this over several seasons and with different brands of pectin, and here’s why this version keeps winning in my kitchen:
- Quick & Easy: You can have jam ready to chill in just 5 minutes — no stove required. It’s a lifesaver for busy mornings or last-minute gift ideas.
- Simple Ingredients: Just fresh raspberries, sugar, and no-cook pectin. No weird additives or complicated steps, and you probably have these staples on hand.
- Perfect for Beginners: If you’ve never made jam before, this is the no-fail way to get started. No guesswork about cooking times or temperatures.
- Crowd-Pleaser: Kids and adults both love the fresh, natural raspberry flavor and the soft, spreadable texture that’s easy on toast, biscuits, or even ice cream.
- Unbelievably Delicious: The natural sweetness and tartness of raspberries come through perfectly, with that special jammy consistency that’s not too runny or stiff.
What sets this recipe apart? It’s the use of no-cook pectin that means you don’t have to heat the fruit, so the bright raspberry flavor stays intact and fresh-tasting. Plus, the texture — that balance between slightly chunky and perfectly spreadable — is a result of a gentle mash and careful mixing. There’s no overcooking or caramelization, so every spoonful tastes just like fresh-picked raspberries.
This jam isn’t just a condiment; it became my go-to comfort for quick breakfasts or spontaneous gatherings. It’s easy to make, easy to share, and honestly, it feels like a small fresh luxury in a jar.
What Ingredients You Will Need
This recipe uses simple, wholesome ingredients to deliver bold raspberry flavor and satisfying texture without the fuss. Most are pantry staples or fresh produce you can find at any market. Here’s everything you’ll want ready before you start:
- Fresh Raspberries (4 cups / 600g) – Use ripe, firm berries for best results. If fresh isn’t in season, frozen raspberries (thawed) work fine too, but fresh really shines.
- Granulated Sugar (3 cups / 600g) – I prefer organic cane sugar for a clean taste, but white sugar works well too.
- Powdered No-Cook Fruit Pectin (1 packet, about 1.75 oz / 49g) – This is the key to thickening without boiling. I recommend Sure-Jell or Ball RealFruit no-cook pectin for consistent results.
- Water (1/2 cup / 120 ml) – To dissolve the pectin before mixing with fruit.
- Lemon Juice (2 tablespoons / 30 ml, fresh) – Adds brightness and helps with setting. Freshly squeezed is best.
Ingredient tips: Look for small-curd raspberries if you can find them, as they yield a smoother jam texture. If you want to cut back on sugar, this recipe allows for slight reduction, but expect a softer set. For a dairy-free option, this jam pairs beautifully spread on coconut yogurt or your favorite plant-based butter.
Equipment Needed
Making this no-cook raspberry freezer jam requires minimal kitchen tools, which is part of what makes it so accessible. Here’s what you’ll need:
- Large Mixing Bowl – To gently mash and combine the raspberries and sugar.
- Measuring Cups and Spoons – For precise ingredient amounts.
- Medium Saucepan or Small Bowl – To dissolve the powdered pectin in water.
- Wooden Spoon or Silicone Spatula – For stirring the jam mixture without damaging the fruit texture.
- Clean Glass Jars or Airtight Containers – For storing the jam in the freezer or fridge.
If you don’t have a masher, a fork or potato masher works just fine for crushing the raspberries. I’ve also used a handheld immersion blender on low speed for a smoother texture, but be careful not to overdo it or the jam turns too runny. For storage, simple mason jars or BPA-free plastic containers with tight lids are perfect to keep the jam fresh and easy to scoop.
Preparation Method
- Prepare your raspberries: Gently rinse 4 cups (600g) of fresh raspberries and drain well. Place them into a large mixing bowl. Using a potato masher or fork, gently crush the raspberries until you get your desired texture — about half smashed but some whole bits remain for that nice seed crunch. This should take about 1-2 minutes.
- Mix sugar and berries: Add 3 cups (600g) granulated sugar to the mashed raspberries. Stir well with a wooden spoon or spatula until sugar is evenly distributed and the raspberries start releasing their juices. Let this sit while you prepare the pectin — about 5 minutes helps the sugar dissolve a bit.
- Dissolve the pectin: In a small saucepan or microwave-safe bowl, combine 1 packet (1.75 oz / 49g) of no-cook fruit pectin with 1/2 cup (120 ml) cold water. Heat gently on the stove or microwave in 15-second bursts, stirring until the pectin dissolves completely and the mixture looks smooth and clear. This usually takes 30-60 seconds.
- Add lemon juice: Stir 2 tablespoons (30 ml) of freshly squeezed lemon juice into the dissolved pectin. This adds brightness and helps the jam set properly.
- Combine pectin mixture with berries: Pour the pectin and lemon juice mixture into the bowl with the raspberry and sugar mix. Stir quickly but gently for about 3 minutes, ensuring the pectin is fully incorporated. The mixture will start thickening as you stir.
- Transfer to containers: Spoon the jam into clean glass jars or airtight containers, leaving about 1/2 inch headspace. Seal tightly and let the jam sit at room temperature for 30 minutes before refrigerating or freezing.
- Chill and set: Refrigerate for up to 3 weeks or freeze for longer storage. The jam will thicken further as it chills, becoming perfectly spreadable.
Pro tip: Stirring continuously while adding the pectin prevents clumps, and don’t rush the process. If your jam looks too liquidy at first, give it a few hours in the fridge — it sets as it cools. If you want a smoother jam, mash the raspberries finer before mixing.
Cooking Tips & Techniques
There’s a simplicity to no-cook freezer jam, but a few tricks can make your batch turn out just right every time. Here’s what I’ve learned from multiple tries:
- Choose the right pectin: Not all pectins are created equal. Use a no-cook pectin labeled for freezer jam like Sure-Jell No-Cook Pectin to get that perfect set without heating.
- Don’t over-mash the fruit: You want some texture and bite, so mash gently. Over-mashing leads to a runny jam that won’t hold its shape well.
- Stir for the full 3 minutes: This step activates the pectin’s thickening power. Skimping here can result in a runnier consistency.
- Use fresh lemon juice: Bottled lemon juice can work in a pinch, but fresh really brightens the flavor and helps the jam set.
- Patience matters: The jam will seem loose right after mixing but thickens as it chills. Don’t be tempted to judge it immediately.
- Clean jars and lids: Always use sterilized containers to avoid spoilage and extend shelf life.
My first batch was too runny because I didn’t stir long enough. Lesson learned: a few extra minutes of stirring makes all the difference. Also, letting the sugar sit with the berries for a few minutes before adding pectin helps dissolve the sugar and infuse the berry juice, improving texture.
If you’re juggling dinner too (maybe like when I’m prepping a quick chicken meal — I love dishes from my easy quick chicken dinner ideas for busy weeknights post), set a timer to keep your stirring on track without distraction.
Variations & Adaptations
This raspberry freezer jam recipe is a fantastic base that you can tweak depending on your pantry, diet, or mood. Here are some ways I’ve played around with it:
- Mixed Berry Jam: Swap half the raspberries for strawberries or blackberries for a complex berry blend. Adjust sugar slightly based on the sweetness of your fruit.
- Low-Sugar Version: Use less sugar (try 2 cups / 400g) and add a natural sweetener like honey or maple syrup once the jam is set. Note: the texture will be softer.
- Seedless Jam: For a smoother jam, strain the mashed berries through a fine mesh sieve before mixing with sugar and pectin. This removes seeds but keeps flavor.
- Vegan Coconut Jam: Add a tablespoon of coconut cream for richness and a tropical twist, perfect spread on toast or stirred into coconut yogurt.
When I’m in a rush but want a slightly different flavor, I sometimes add a splash of vanilla extract or a pinch of cinnamon for warmth. It’s a quick way to change things up without extra effort. For a completely different set of flavors, check out my fresh Mediterranean mezze platter recipe that pairs beautifully with sweet spreads like this jam for a balanced snack.
Serving & Storage Suggestions
This jam is best served chilled or at room temperature. Slather it on toasted sourdough, spread it on freshly baked biscuits, or swirl a spoonful into plain yogurt for a bright breakfast treat. I love pairing it with a simple buttered croissant or alongside creamy dishes like my creamy honey butter corn casserole for a touch of sweetness contrast.
Storage tips: Keep your jam tightly sealed in the fridge if you plan to use it within three weeks. For longer storage, freeze it in freezer-safe containers for up to a year. Thaw in the fridge overnight before use. The texture stays remarkably fresh after freezing, though stirring a bit after thawing helps redistribute any separated juices.
Since this is a no-cook jam, it’s important to keep it refrigerated or frozen to maintain freshness and prevent fermentation. I usually make small batches so I can enjoy it fresh without worrying about spoilage.
Nutritional Information & Benefits
One tablespoon (about 20g) of this raspberry freezer jam contains approximately:
| Calories | 50 |
|---|---|
| Carbohydrates | 13g (mostly sugar) |
| Fiber | 1g |
| Vitamin C | 8% Daily Value |
Raspberries are packed with antioxidants and vitamin C, which support immune health and skin vitality. Using fresh fruit preserves these nutrients better than long cooking. The natural pectin adds soluble fiber, aiding digestion. This recipe is gluten-free and can be adapted for vegan diets easily. Just watch the sugar amount if you are managing carb intake.
From a wellness perspective, I appreciate that this jam delivers real fruit flavor with minimal processing — a simple way to add a little fruit boost to breakfast or snacks while avoiding artificial preservatives.
Conclusion
This easy no-cook raspberry freezer jam recipe is a jewel of simplicity and freshness. It’s perfect for anyone who wants homemade jam without the fuss or long wait times. The texture is soft yet vibrant, the flavor is pure raspberry without any cooked-over notes, and it comes together faster than you can toast your bread.
Feel free to play with the fruit combinations or sweetness to make it truly your own. I’ve loved this recipe for years because it fits right into my busy mornings and spontaneous meals, adding a little homemade goodness with almost no effort. If you give it a try, I’d love to hear how you customize it or what you pair it with — sharing those moments makes cooking feel even more special.
Here’s to fresh, easy, and delicious raspberry jam that anyone can make in minutes.
Frequently Asked Questions
Can I use frozen raspberries for this freezer jam?
Yes! Just thaw them completely and drain excess liquid before mashing. Frozen berries may yield a slightly softer jam but still tasty.
How long does no-cook freezer jam last?
Stored in the refrigerator, it lasts up to 3 weeks. In the freezer, it can keep for up to one year if sealed properly.
What if my jam is too runny?
Make sure you stir the pectin mixture thoroughly for the full 3 minutes. Also, chilling helps it set. If still loose, next time try less mashing or use a bit more pectin.
Can I reduce the sugar in this recipe?
You can reduce sugar slightly, but it may affect the jam’s set and shelf life. For lower sugar, consider adding natural sweeteners after setting.
Is this jam safe to can for shelf storage?
No, this recipe is meant to be frozen or refrigerated only since it’s not cooked. For shelf-stable jam, you’ll need a traditional cooked recipe with proper canning methods.
Pin This Recipe!
Easy No-Cook Raspberry Freezer Jam Recipe
A quick and simple no-cook raspberry freezer jam that preserves fresh raspberry flavor and texture, ready in just 5 minutes without any boiling.
- Prep Time: 10 minutes
- Cook Time: 0 minutes
- Total Time: 40 minutes
- Yield: About 4 cups (approximately 16 servings, 1 tablespoon each) 1x
- Category: Condiment
- Cuisine: American
Ingredients
- 4 cups (600g) fresh raspberries
- 3 cups (600g) granulated sugar
- 1 packet (1.75 oz / 49g) powdered no-cook fruit pectin
- 1/2 cup (120 ml) water
- 2 tablespoons (30 ml) fresh lemon juice
Instructions
- Gently rinse 4 cups (600g) of fresh raspberries and drain well. Place them into a large mixing bowl. Using a potato masher or fork, gently crush the raspberries until about half are smashed but some whole bits remain, about 1-2 minutes.
- Add 3 cups (600g) granulated sugar to the mashed raspberries. Stir well until sugar is evenly distributed and raspberries start releasing juices. Let sit for about 5 minutes.
- In a small saucepan or microwave-safe bowl, combine 1 packet (1.75 oz / 49g) no-cook fruit pectin with 1/2 cup (120 ml) cold water. Heat gently until pectin dissolves completely and mixture is smooth and clear, about 30-60 seconds.
- Stir 2 tablespoons (30 ml) fresh lemon juice into the dissolved pectin mixture.
- Pour the pectin and lemon juice mixture into the bowl with raspberries and sugar. Stir quickly but gently for about 3 minutes until fully incorporated and mixture starts thickening.
- Spoon jam into clean glass jars or airtight containers, leaving about 1/2 inch headspace. Seal tightly and let sit at room temperature for 30 minutes.
- Refrigerate for up to 3 weeks or freeze for longer storage. Jam will thicken further as it chills.
Notes
Use no-cook pectin labeled for freezer jam like Sure-Jell for best results. Do not over-mash raspberries to maintain texture. Stir pectin mixture fully for 3 minutes to activate thickening. Fresh lemon juice helps jam set better. Jam thickens as it chills; if runny, refrigerate longer. Store jam in sterilized containers to avoid spoilage.
Nutrition
- Serving Size: 1 tablespoon (about
- Calories: 50
- Sugar: 12
- Carbohydrates: 13
- Fiber: 1
Keywords: raspberry jam, no-cook jam, freezer jam, easy jam recipe, beginner jam recipe, quick jam, fresh raspberry jam