Love this? Save it for later!
Share the inspiration with your friends
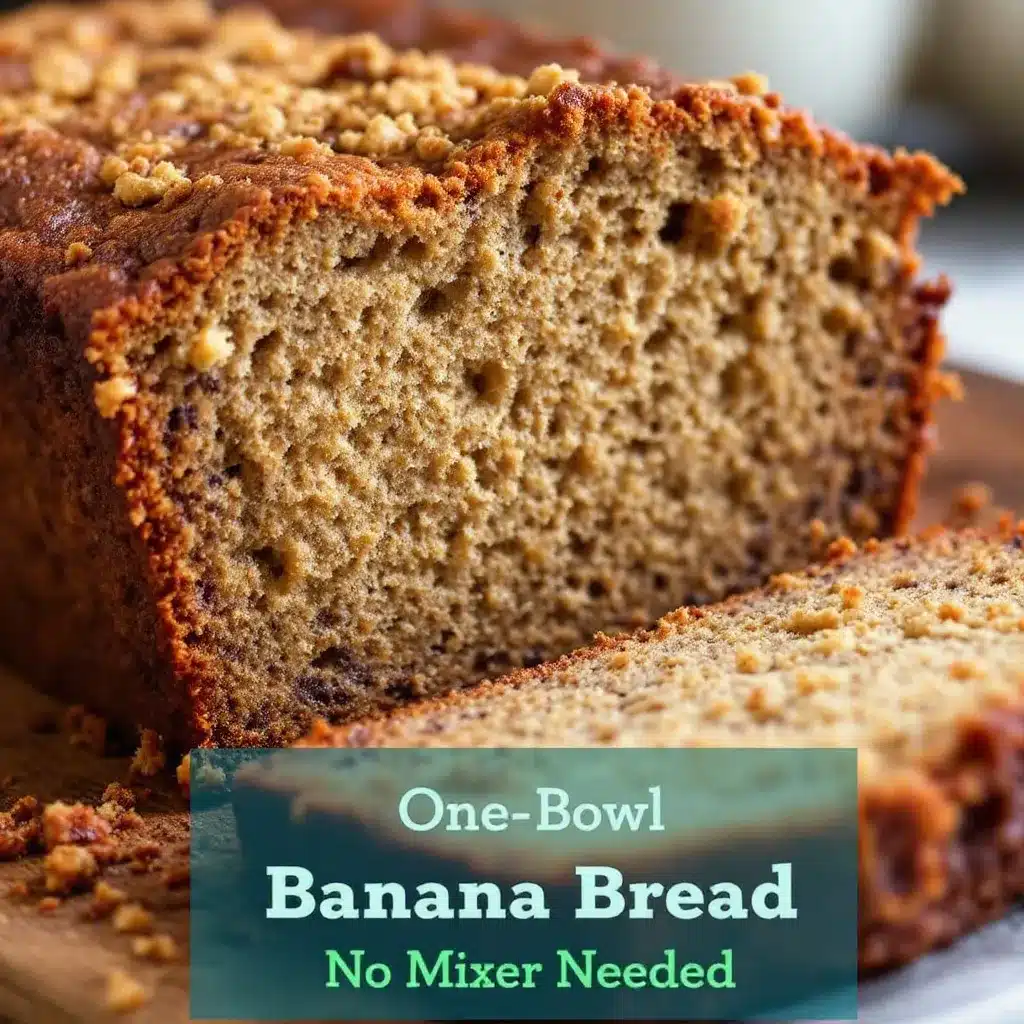
Why You’ll Love This Moist One-Bowl Banana Bread No Mixer
Let’s face it, most banana bread recipes are a bit of a hassle. You end up with a sink full of dirty bowls, a mixer covered in batter, and a loaf that turns out dry as a brick. I had been looking for a banana bread that actually stayed moist for days without requiring a stand mixer or a dozen separate measuring cups. It wasn’t about being lazy; it was about wanting that specific, dense, buttery crumb without the cleanup drama. For a while, I just accepted that quick breads weren’t going to taste like the ones from my grandmother’s kitchen unless I spent an hour whisking egg whites.
Then I found this method. It’s not magic, it’s just simple chemistry done right. The key is using overripe bananas and mixing them gently so you don’t develop too much gluten. Honestly, it’s the kind of recipe that feels like a cheat code. You throw everything into one bowl, stir it until it looks slightly lumpy (which is good), and bake it. No electric mixer needed. No fuss. Just real ingredients and a little bit of patience.
I remember the first time I made this, I was half-asleep on a Saturday morning. I didn’t want to wake up the whole house with the whir of a mixer. I just wanted coffee and something warm. This recipe delivered. It’s quiet, it’s easy, and the smell that fills the kitchen is enough to wake anyone up. It’s become my go-to when I have three brown bananas staring at me from the counter, begging to be used before they turn to mush. And let’s be honest, they always turn to mush eventually.
What makes this version different is the fat content. We use a bit more butter than some skinny recipes, which keeps the crumb tender. It’s not just good—it’s the kind that makes you close your eyes after the first bite. It’s comfort food reimagined—faster, simpler, but with the same soul-soothing satisfaction. Whether you are making it for breakfast or a late-night snack, this loaf sticks to your ribs and your heart. It’s the kind of baking that builds trust, one slice at a time.
What Ingredients You Will Need
This recipe uses simple, wholesome ingredients to deliver bold flavor and satisfying texture without the fuss. You likely have everything in your pantry right now. The beauty of this one-bowl method is that the ingredients are standard staples, but the ratio is what makes it shine. We aren’t using fancy flours or exotic spices here. Just good, honest baking basics.
- Ripe Bananas: You will need three medium to large bananas. They need to be heavily spotted, almost black. The browner the peel, the sweeter the bread. (adds natural sweetness and moisture)
- All-Purpose Flour: Two cups of standard flour. I recommend King Arthur for its consistent protein content, which helps with structure. (provides the base structure)
- Sugar: One cup of granulated white sugar. You can use brown sugar for a deeper molasses flavor, but white keeps it light. (sweetness and tenderizing)
- Baking Soda: One teaspoon. This is our leavening agent. Make sure it’s fresh, or your bread won’t rise properly. (helps the bread rise)
- Salt: Half a teaspoon. This balances the sweetness and brings out the banana flavor. (flavor enhancer)
- Unsalted Butter: Half a cup, melted. Do not use oil; butter gives it that rich, bakery-style taste. (adds richness and moisture)
- Large Eggs: Two eggs, room temperature. These bind everything together. (binding agent)
- Vanilla Extract: One teaspoon. Pure vanilla, not imitation. (flavor depth)
- Optional Mix-ins: One cup of walnuts or chocolate chips. I usually skip nuts for a softer loaf, but they add a nice crunch. (texture contrast)
If you are out of butter, you can substitute with an equal amount of coconut oil, though the flavor will change slightly. For a gluten-free option, swap the all-purpose flour for a 1-to-1 gluten-free baking blend. Just be sure to let the batter rest for 10 minutes before baking so the flour can hydrate properly. Also, if your bananas are not ripe enough, you can bake them at 300°F for 15 minutes until the skins are black to speed up the process.
Equipment Needed
You don’t need much for this recipe, which is the whole point. A standard 9×5 inch loaf pan is all you really need. I prefer a metal pan because it conducts heat evenly, leading to a better crust. Glass pans can sometimes result in a soggy bottom because they heat up slower. If you don’t have a loaf pan, you can use a muffin tin to make banana bread muffins, which bake faster.
You will also need a large mixing bowl. Since this is a one-bowl recipe, make sure it is big enough to handle the batter without splashing. A medium whisk or a sturdy spoon is sufficient for mixing. You don’t need an electric mixer at all. In fact, using one might overwork the flour, making the bread tough. A simple spatula is great for scraping the sides and folding in any mix-ins gently.
Finally, a cooling rack is essential. Letting the bread cool in the pan for 10 minutes, then transferring it to a rack, prevents condensation from making the bottom crust soggy. I once left a loaf in the pan for an hour, and the bottom was a mess. Don’t make that mistake. A budget-friendly metal loaf pan from a local hardware store works just as well as expensive ceramic ones.
Preparation Method
Start by preheating your oven to 350°F (175°C). Grease your 9×5 inch loaf pan with butter or non-stick spray. This step is crucial; banana bread is sticky, and you want it to release easily. If you are feeling fancy, line the bottom with parchment paper for easy removal.
Next, take your ripe bananas and peel them. Place them in your large mixing bowl. Use a potato masher or a fork to mash them until they are mostly smooth with a few small lumps remaining. You want about one cup of mashed banana. (Time: 2 minutes)
To the mashed bananas, add the melted butter. Stir it in until the bananas are fully coated. The butter should be melted but not piping hot, or you might cook the eggs when we add them later. (Time: 1 minute)
Add the sugar, eggs, and vanilla extract to the bowl. Whisk these ingredients together vigorously for about a minute. You want to break up the eggs and incorporate them fully into the banana-butter mixture. The batter should look somewhat separated and curdled at first, which is normal. (Time: 1 minute)
Now, add the dry ingredients. Sprinkle the flour, baking soda, and salt over the wet mixture. Do not overmix here. Switch to a spatula or a wooden spoon and gently fold the ingredients together. Stop as soon as you no longer see streaks of flour. The batter will be thick and sticky. If you overmix, you will develop gluten, and the bread will be tough and chewy instead of tender. (Time: 2 minutes)
If you are adding nuts or chocolate chips, fold them in now. Be gentle. Pour the batter into your prepared loaf pan. Use the spatula to smooth the top into an even layer.
Bake for 55 to 65 minutes. The exact time will depend on your oven and the size of your bananas. The bread is done when a toothpick inserted into the center comes out clean or with just a few moist crumbs. Do not rely solely on the time; check it at 50 minutes. If the top is browning too quickly, loosely tent a piece of aluminum foil over the loaf for the last 15 minutes of baking. (Time: 55-65 minutes)
Once baked, remove the loaf from the oven and let it cool in the pan for 10 minutes. Then, transfer it to a wire rack to cool completely. Slicing warm banana bread can be messy and gummy. Patience is key here. (Time: 10 minutes cooling in pan)
Cooking Tips & Techniques
The biggest mistake people make with banana bread is using bananas that aren’t ripe enough. Green or yellow bananas lack the sweetness and moisture needed for this recipe. Wait until the peels are completely black. It looks ugly, but it tastes amazing. I keep a bag of bananas in the fridge once they are ripe; the skin will turn black, but the fruit inside stays good for days.
Another common error is overmixing the batter. When you add the flour, mix just until combined. Overmixing activates the gluten in the flour, resulting in a dense, rubbery loaf. Think of it like making pancakes; you want them lumpy. Same principle applies here. (Time: minimal)
Check your baking soda. If it’s been sitting in your cabinet for two years, it might not be active. Test it by dropping a little vinegar on it; if it doesn’t fizz, throw it out. Old leavening agents lead to flat, heavy bread.
Also, consider your oven temperature. Ovens can be inaccurate. If your bread is consistently burning on top but raw in the middle, you might need to lower the temperature by 25°F and bake it longer. Use an oven thermometer to check if your oven is running hot.
Finally, don’t skip the cooling step. Cutting into hot bread releases steam, making the texture gummy. Let it cool completely for the best slice-ability and flavor development.
Variations & Adaptations
While the classic version is perfect, you can easily adapt this recipe. For a healthier twist, substitute half the all-purpose flour with whole wheat flour. This adds fiber and a nuttier flavor, though the bread will be slightly denser.
If you want a chocolate version, fold in one cup of semi-sweet chocolate chips. The contrast between the sweet banana and the bitter chocolate is unbeatable. You can also add a pinch of cinnamon or nutmeg for a warmer spice profile.
For a dairy-free option, swap the butter for coconut oil or a neutral vegetable oil. The texture will be slightly different, but it will still be moist. You can also use plant-based eggs if needed, though regular eggs provide the best structure.
Seasonal variations are fun too. In the fall, add some pumpkin puree and spice. In the winter, add cranberries and white chocolate. The base recipe is a blank canvas for creativity. Just be mindful that adding wet ingredients like fruit puree might require a slight adjustment in baking time.
Serving & Storage Suggestions
Serve this banana bread warm with a pat of butter on top. It melts into the crumb and creates an incredible experience. It pairs well with a hot cup of coffee or tea. For a dessert version, serve it with a dollop of whipped cream or a scoop of vanilla ice cream.
Store leftover banana bread in an airtight container at room temperature for up to three days. If you live in a humid climate, refrigerate it to prevent mold. For longer storage, wrap the loaf tightly in plastic wrap and aluminum foil, then freeze it for up to three months. Thaw it at room temperature before serving.
You can also freeze individual slices for a quick snack. Just wrap each slice in plastic wrap and store them in a freezer bag. This is great for lunches or quick breakfasts on busy mornings.
The flavors actually improve after a day or two as the banana flavor melds with the spices and sugar. So, if you can wait, let the loaf rest overnight before slicing.
Nutritional Information & Benefits
While this is a treat, bananas offer some nutritional benefits. They are a good source of potassium, vitamin B6, and fiber. Using ripe bananas means you get natural sweetness without needing excessive added sugar.
Each slice (assuming 10 slices per loaf) contains approximately 220 calories, 3g of protein, 30g of carbohydrates, and 10g of fat. These values are estimates and will vary based on your specific ingredients and slice size.
For those watching their sugar intake, you can reduce the sugar to three-quarters of a cup without significantly affecting the texture. The bananas provide enough sweetness for most palates. This recipe is not gluten-free unless you use a gluten-free flour blend, and it contains dairy and eggs, so be mindful of allergens.
Personally, I appreciate that this recipe uses whole foods. It’s not just empty calories; there’s actual nutrition in the bananas and the butter. It’s a balanced indulgence.
Conclusion
This Moist One-Bowl Banana Bread No Mixer is a game-changer for anyone who loves baking but hates the cleanup. It’s simple, reliable, and incredibly delicious. I hope you give it a try and enjoy the process as much as I do. Feel free to customize it with your favorite mix-ins or spices.
If you make this recipe, please leave a comment below and let me know how it turned out. I love hearing from you. Share your photos on social media and tag me so I can see your creations. Happy baking!
FAQs
Can I use frozen bananas?
Yes, frozen bananas work perfectly. Just let them thaw completely and drain any excess liquid before mashing. They actually produce a more intense banana flavor.
Why is my banana bread dense?
This usually happens if you overmix the batter or use old baking soda. Make sure to mix gently and check your leavening agents.
Can I make muffins instead?
Absolutely. Fill muffin liners 2/3 full and bake for 20-25 minutes at 350°F. Check with a toothpick to ensure they are done.
How do I know when the bread is done?
Insert a toothpick into the center. If it comes out clean or with a few moist crumbs, it’s done. The top should also be golden brown.
Can I add nuts?
Yes, one cup of walnuts or pecans is a great addition. Fold them in gently after the batter is mixed.
Pin This Recipe!
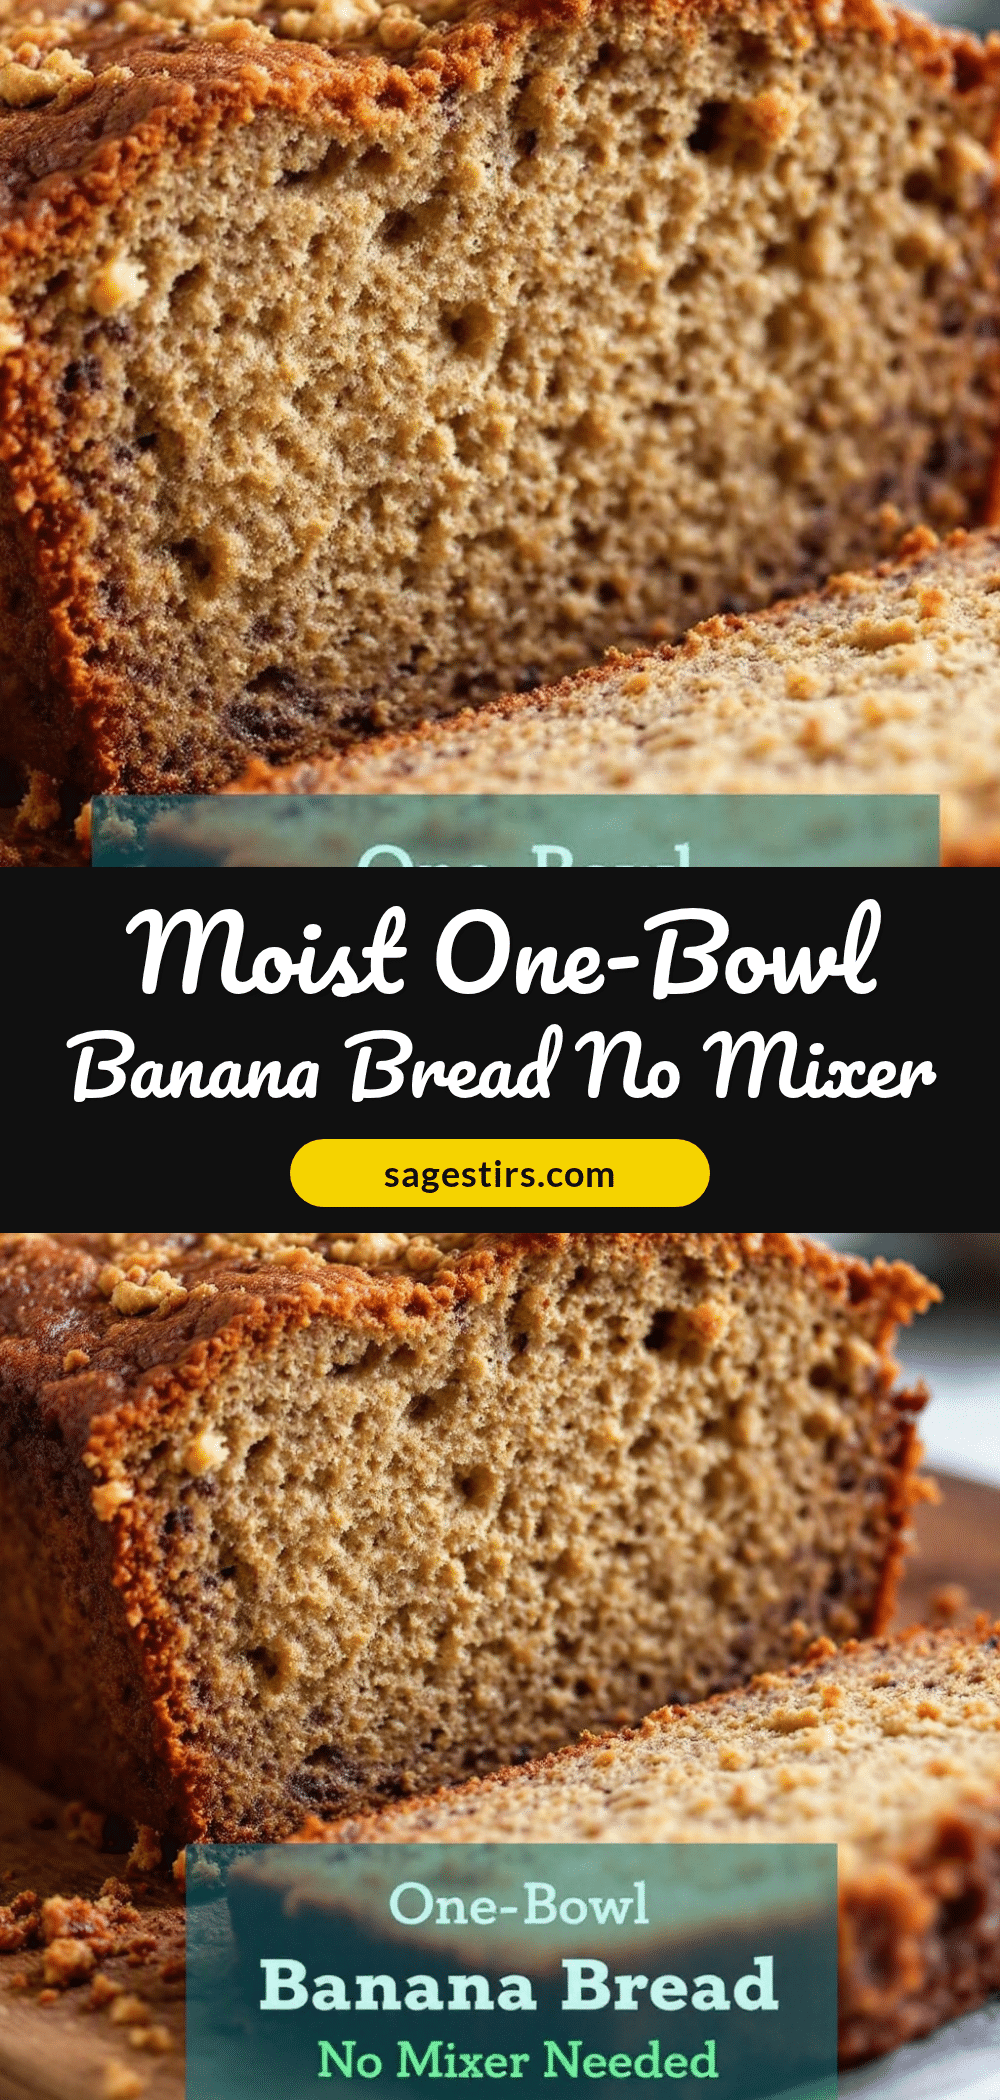
Moist One-Bowl Banana Bread No Mixer
A simple, moist banana bread recipe that requires no electric mixer. Made with just one bowl and standard pantry ingredients, this loaf delivers a dense, buttery crumb and rich flavor with minimal cleanup.
- Prep Time: 10 minutes
- Cook Time: 55-65 minutes
- Total Time: 75-85 minutes
- Yield: 10 servings 1x
- Category: Dessert
- Cuisine: American
Ingredients
- 3 medium to large ripe bananas (heavily spotted/black)
- 2 cups all-purpose flour
- 1 cup granulated white sugar
- 1 teaspoon baking soda
- 1/2 teaspoon salt
- 1/2 cup unsalted butter, melted
- 2 large eggs, room temperature
- 1 teaspoon vanilla extract
- 1 cup walnuts or chocolate chips (optional)
Instructions
- Preheat oven to 350°F (175°C). Grease a 9×5 inch loaf pan with butter or non-stick spray, optionally lining the bottom with parchment paper.
- Peel the ripe bananas and place them in a large mixing bowl. Mash them with a potato masher or fork until mostly smooth with a few small lumps remain (about 1 cup).
- Add the melted butter to the mashed bananas and stir until fully coated. Ensure butter is melted but not piping hot.
- Add the sugar, eggs, and vanilla extract to the bowl. Whisk vigorously for about 1 minute until incorporated, even if the mixture looks curdled.
- Sprinkle the flour, baking soda, and salt over the wet mixture. Gently fold with a spatula or wooden spoon until just combined and no flour streaks remain. Do not overmix.
- If using, gently fold in walnuts or chocolate chips.
- Pour batter into the prepared loaf pan and smooth the top.
- Bake for 55 to 65 minutes, or until a toothpick inserted into the center comes out clean. Tent with foil if the top browns too quickly.
- Cool in the pan for 10 minutes, then transfer to a wire rack to cool completely before slicing.
Notes
Use bananas that are heavily spotted or black for maximum sweetness and moisture. Do not overmix the batter once flour is added to avoid a tough texture. If bananas are not ripe enough, bake them at 300°F for 15 minutes to speed up the process. For gluten-free, use a 1-to-1 gluten-free baking blend and let batter rest 10 minutes before baking.
Nutrition
- Serving Size: 1 slice
- Calories: 220
- Sugar: 20
- Sodium: 200
- Fat: 10
- Saturated Fat: 5
- Carbohydrates: 30
- Fiber: 1
- Protein: 3
Keywords: banana bread, one bowl recipe, no mixer, moist banana bread, quick bread, easy baking, gluten-free option