Love this? Save it for later!
Share the inspiration with your friends
I was standing in the cramped pantry aisle of my local grocery store last Tuesday, staring at a box of elbow macaroni, when the fluorescent lights flickered and the smell of stale cardboard hit me — and suddenly I was nineteen, sitting cross-legged on the thin carpet of my first dorm room, a steaming mug of microwave mac and cheese balanced on my knee. That room was barely bigger than a walk-in closet, with a roommate who snored like a freight train and a window that faced a brick wall. But in that moment, with that cheap, cheesy mug in my hands, everything felt manageable. I mean, honestly, college was a blur of all-nighters, questionable decisions, and instant ramen, but this particular mac and cheese? It was my anchor. The person who made it for me was my RA, a senior named Jenna who had a knack for turning dorm-room desperation into something that felt almost like home. She showed me this trick during the first week of freshman year, and I remember thinking, “Wait, that’s it? That’s all it takes?” She laughed and said, “Sometimes the best things are the simplest.” She graduated that year, and I never saw her again, but every time I make this, I think of her sitting on that ugly plaid couch, handing me a mug full of comfort. Maybe you’ve been there — that feeling of being overwhelmed and broke, but still craving something that tastes like a hug. This recipe stayed with me because it’s proof that you don’t need a fancy kitchen or a lot of money to make something genuinely good. It’s just you, a microwave, and a few ingredients that come together to save the day. Every single time.
Why You’ll Love This Recipe
Let me tell you, this isn’t your average boxed mac and cheese. This is the version I’ve been making and tweaking for years, and it’s the one that actually delivers on flavor without any complicated steps or special equipment. I’ve tested this in dorm microwaves, break room microwaves, and even a sketchy one in a hostel kitchen in Prague — it works every time.
- Quick & Easy: This comes together in under 10 minutes. Seriously, from start to finish, you’re looking at about eight minutes of total time. Perfect for those nights when you’re starving and the dining hall is closed.
- Simple Ingredients: You probably already have most of these in your pantry. No fancy cheeses, no heavy cream, no roux. Just five basic ingredients that won’t break the bank.
- Perfect for Dorm Life: This is the ultimate dorm room recipe. It requires no stove, no oven, and minimal cleanup. Just a microwave-safe mug or bowl and a fork.
- Crowd-Pleaser: I’ve made this for friends in study lounges, and it always gets rave reviews. It’s comfort food that everyone loves, regardless of their cooking skills.
- Unbelievably Delicious: The texture is creamy, the cheese is perfectly melted, and the flavor is pure nostalgia. It’s the kind of mac and cheese that makes you close your eyes after the first bite.
What makes this recipe different from the rest is the technique. Instead of just boiling pasta and adding cheese, we’re using a clever method that creates a silky, smooth sauce without any lumps. It’s not just another dorm room hack — it’s the best version I’ve ever made. This isn’t just good; it’s the kind of comfort food that makes you feel like everything is going to be okay. It’s perfect for late-night study sessions, lazy Sundays, or when you just need a little taste of home.
What Ingredients You Will Need
This recipe uses five simple, wholesome ingredients to deliver bold flavor and satisfying texture without the fuss. The beauty of this dish is that everything is a pantry staple, so you can whip it up anytime the craving hits.
- Elbow Macaroni (1/2 cup / 60g): The classic choice for mac and cheese. I prefer the small elbows because they cook evenly in the microwave. You can use any small pasta shape, like shells or ditalini. Just avoid large shapes that might cook unevenly.
- Water (1 cup / 240ml): Tap water is fine. The pasta will absorb most of it during cooking. I’ve tried this with filtered water, and honestly, it doesn’t make a noticeable difference. Just use what you have.
- Milk (2 tablespoons / 30ml): Whole milk gives the creamiest result, but I’ve used 2% and even almond milk in a pinch. The key is to add it after the pasta is cooked so it doesn’t curdle. I recommend using whatever milk you have on hand.
- Shredded Cheddar Cheese (1/4 cup / 30g): Sharp cheddar packs the most flavor, but mild cheddar or a Mexican blend works too. I’ve found that pre-shredded cheese melts fine in the microwave, but freshly shredded melts even smoother. For best results, use a good quality cheddar.
- Butter (1 tablespoon / 14g): Unsalted butter is best so you can control the salt level. But salted butter works too — just skip adding any extra salt. The butter adds richness and helps create that silky sauce.
- Salt (a pinch): Optional, but I find it enhances the cheese flavor. Start with a small pinch and adjust to your taste.
That’s it! Five ingredients (six if you count salt) and you’re on your way to the best dorm room mac and cheese of your life. I’ve made this with different cheese blends — a mix of cheddar and mozzarella is fantastic for extra gooeyness. If you’re feeling adventurous, add a dash of garlic powder or paprika.
Equipment Needed
The beauty of this recipe is that you don’t need much. Here’s what you’ll need to get started:
- Microwave-Safe Mug or Bowl (12-16 oz / 350-475ml): A large mug works perfectly for a single serving. Make sure it’s microwave-safe and has enough room for the pasta to expand. I use a 16-ounce mug that I picked up at a thrift store for a dollar.
- Fork or Spoon: For stirring. A fork works best for testing pasta doneness.
- Measuring Cups and Spoons: If you don’t have measuring cups, a standard coffee mug is roughly 8 ounces, and a soup spoon is about a tablespoon. But honestly, I eyeball it now.
- Paper Towel or Plate: To place under your mug in case of spills. Trust me on this one.
I’ve made this in countless dorm rooms and break rooms, and the only thing that ever gave me trouble was a mug that was too small. The pasta needs room to bubble up, so go bigger than you think. If you don’t have a microwave, this recipe won’t work, but you can cook the pasta on a stovetop and follow the same steps for the sauce.
Preparation Method
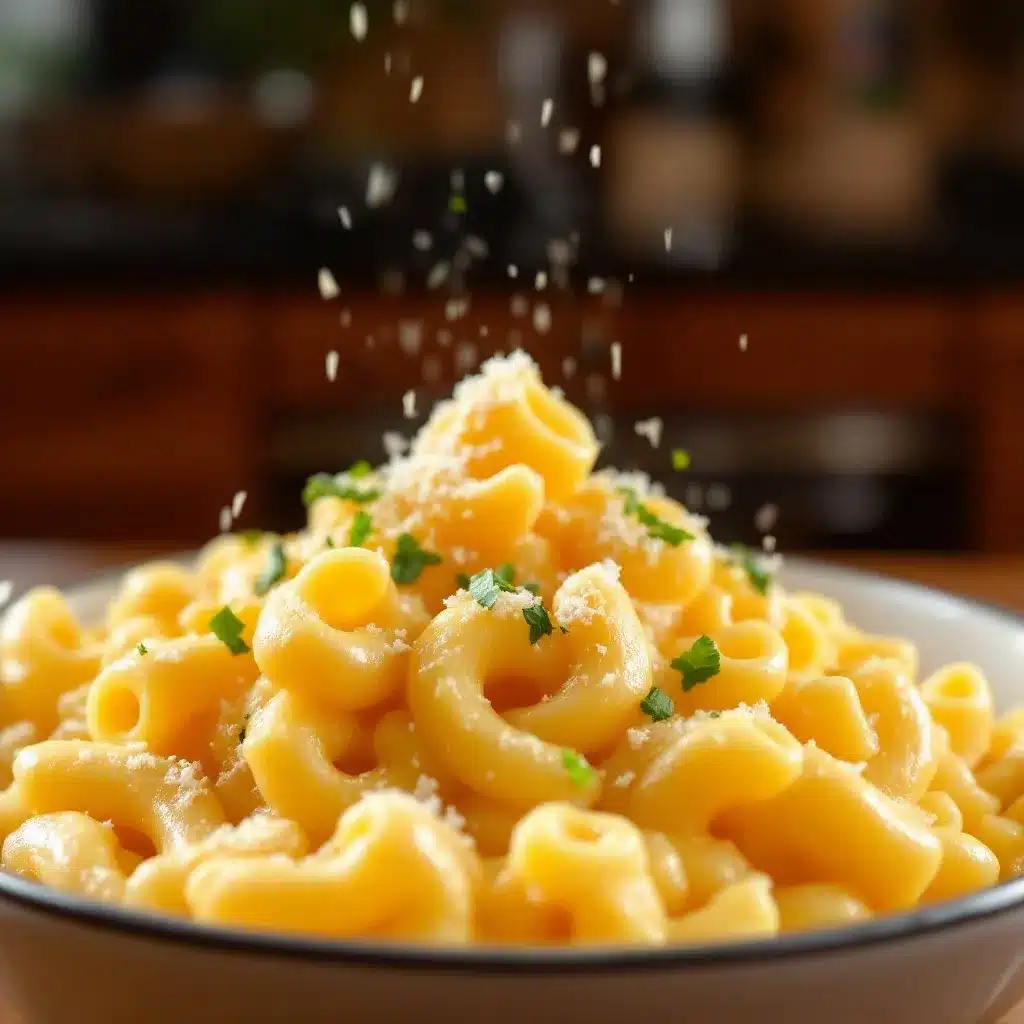
Alright, let’s get cooking. This is so simple, you’ll memorize it after one try.
- Add the pasta and water to your mug. Pour in 1/2 cup of elbow macaroni and 1 cup of water. Make sure the water covers the pasta completely. If it doesn’t, add a splash more. Don’t add any salt yet — we’ll do that later.
- Microwave on high for 2 minutes. Set your microwave to high power and cook for 2 minutes. The water will start to bubble, and the pasta will begin to soften. Keep an eye on it — if your microwave is particularly powerful, it might bubble over. If it looks like it’s about to overflow, pause it for a few seconds.
- Stir and microwave for another 2 minutes. Take the mug out carefully (it will be hot!) and give the pasta a good stir. This helps it cook evenly. Return it to the microwave and cook for another 2 minutes on high.
- Check the pasta. After 4 minutes total, the pasta should be mostly tender but still have a tiny bite to it. It will continue to cook slightly after you add the other ingredients. If it’s still too firm, microwave in 30-second increments until it’s al dente. The water should be mostly absorbed by now.
- Drain any excess water. If there’s still water in the mug (there shouldn’t be much), carefully pour it off. Be careful — the mug is hot! I usually hold a paper towel over the top and drain it over the sink.
- Add the butter and milk. While the pasta is still hot, add 1 tablespoon of butter and 2 tablespoons of milk. Stir until the butter is completely melted. This is where the magic starts — the heat from the pasta will melt the butter into a creamy base.
- Add the cheese. Sprinkle in 1/4 cup of shredded cheddar cheese and stir vigorously until it’s fully melted and smooth. If the sauce seems too thick, add a tiny splash more milk. If it’s too thin, let it sit for a minute — it will thicken as it cools.
- Season and enjoy. Add a pinch of salt if you like, give it one final stir, and dig in. The mac and cheese will be piping hot, so let it cool for a minute before taking that first bite.
A few notes from my many trials: If your cheese isn’t melting smoothly, your pasta might have cooled down too much. Make sure you add the cheese while the pasta is still steaming hot. Also, don’t overcook the pasta in the first step — it will continue to cook when you add the hot butter and milk. You want it al dente, not mushy. The sauce should look glossy and coat the pasta beautifully.
Cooking Tips & Techniques
I’ve made this recipe more times than I can count, and I’ve learned a few things along the way. Here are my best tips for perfect results every time.
Don’t rush the pasta. Microwaves vary wildly in power. A 700-watt microwave will take longer than a 1200-watt one. The first time you make this, check the pasta after 3 minutes and adjust from there. It’s better to undercook slightly than to end up with mushy pasta.
Use room temperature ingredients. If you can, let your milk and butter sit out for a few minutes before starting. Cold ingredients can cause the cheese to seize up and become grainy. I learned this the hard way during a late-night craving when I used milk straight from the fridge — the sauce was lumpy and sad.
Stir, stir, stir. The key to a smooth sauce is constant stirring when you add the cheese. Don’t just dump it in and hope for the best. Stir in a circular motion until every strand of pasta is coated. This also helps distribute the heat evenly.
Watch for boil-overs. Pasta water can bubble up quickly in the microwave. I always place a paper towel under my mug to catch any spills. If you see the water rising too high, pause the microwave for 10 seconds to let it settle. This is especially important with smaller mugs.
Experiment with add-ins. Once you’ve mastered the basic recipe, try adding a pinch of garlic powder, a dash of hot sauce, or some cooked broccoli. I once added leftover taco meat and it was surprisingly amazing. The possibilities are endless.
I remember one time in my sophomore year, I was so tired I forgot to add the butter. The mac and cheese was still edible, but it was dry and not nearly as creamy. That’s when I realized the butter isn’t just for flavor — it’s essential for that luxurious texture. Don’t skip it.
Variations & Adaptations
This recipe is incredibly versatile. Here are a few ways to change it up based on what you have on hand or what you’re in the mood for.
- Vegan Version: Use 2 tablespoons of nutritional yeast instead of cheese, and swap the butter for a plant-based alternative. Use unsweetened almond milk or oat milk. The nutritional yeast gives a cheesy, nutty flavor that’s surprisingly satisfying. I tried this for a vegan friend, and she said it was the best dorm-room mac she’d ever had.
- Spicy Buffalo Mac: Add 1 tablespoon of buffalo sauce along with the cheese. Stir in a little extra butter to balance the heat. Top with a sprinkle of blue cheese crumbles if you have them. This is my go-to when I want something with a kick.
- Loaded Baked Potato Style: Stir in some cooked bacon bits (or bacon-flavored bits for a vegetarian option), a dollop of sour cream, and a sprinkle of chives. It sounds weird, but it works. The sour cream adds an extra layer of creaminess.
- Broccoli Cheddar: Add a handful of frozen broccoli florets to the pasta during the last minute of cooking. They’ll steam perfectly and add some green to your bowl. Just make sure the broccoli is cut into small pieces so it cooks through.
- Gluten-Free Option: Use gluten-free elbow pasta. The cooking time might vary slightly, so check it a minute early. I’ve used brown rice pasta and quinoa pasta with great results. Just be careful not to overcook it, as gluten-free pasta can get mushy quickly.
My personal favorite variation is the buffalo version. I discovered it during a particularly stressful finals week, and it became my go-to study snack. The heat wakes you up, and the cheese calms you down. It’s the perfect balance.
Serving & Storage Suggestions
This mac and cheese is best enjoyed immediately, straight from the mug. That’s part of its charm. But here’s how to handle leftovers or make it ahead of time.
Serving: Serve it hot, right after you’ve stirred in the cheese. The texture is at its peak — creamy, smooth, and comforting. I like to eat it with a fork, but a spoon works too. If you’re feeling fancy, sprinkle some extra shredded cheese or a dash of paprika on top for presentation.
Storage: If you somehow have leftovers, let the mac and cheese cool completely, then transfer it to an airtight container. It will keep in the refrigerator for up to 3 days. The texture will change — it will become thicker and more solid — but it’s still tasty.
Reheating: To reheat, add a splash of milk (about a tablespoon) to the mac and cheese and microwave in 30-second intervals, stirring between each, until it’s hot and creamy again. The milk helps restore the sauce’s original texture. Don’t microwave it for too long at once, or it might become dry.
Freezing: I don’t recommend freezing this dish. The cheese sauce can separate and become grainy when thawed. It’s really best made fresh. But if you’re meal prepping, you can cook the pasta ahead of time and store it in the fridge, then make the sauce fresh when you’re ready to eat.
One thing I’ve noticed is that the flavors actually meld together a bit after sitting in the fridge for a day. The cheese becomes more pronounced, and the pasta absorbs some of the sauce. It’s different from fresh, but still delicious in its own way.
Nutritional Information & Benefits
Here’s a rough estimate of the nutritional content for one serving of this mac and cheese. Keep in mind that these values can vary based on the specific brands and ingredients you use.
| Nutrient | Amount per Serving |
|---|---|
| Calories | ~400 |
| Total Fat | 18g |
| Saturated Fat | 11g |
| Cholesterol | 50mg |
| Sodium | 450mg |
| Total Carbohydrates | 45g |
| Dietary Fiber | 2g |
| Sugars | 3g |
| Protein | 14g |
| Calcium | 200mg |
This dish provides a good amount of protein and calcium from the cheese and milk. It’s also a source of energy from the carbohydrates in the pasta. While it’s not a health food, it’s a satisfying meal that can fit into a balanced diet. If you’re watching your sodium, use unsalted butter and low-sodium cheese. For a lighter version, use low-fat milk and reduced-fat cheese. The taste will be slightly different, but it’s still creamy and delicious.
I personally see this as a comfort food that’s perfect for those days when you need a little pick-me-up. It’s not about being healthy — it’s about being happy. And sometimes, that’s exactly what you need.
Conclusion
So there you have it — the easiest, most satisfying 5-ingredient dorm room microwave mac and cheese you’ll ever make. It’s quick, it’s cheap, and it tastes like a warm hug in a mug. I’ve been making this for years, and it never gets old. Whether you’re a stressed-out college student, a busy professional, or just someone who wants a comforting meal without the fuss, this recipe is for you.
I encourage you to make it your own. Experiment with different cheeses, add some spices, or throw in whatever leftovers you have in the fridge. That’s the beauty of this recipe — it’s a blank canvas for your creativity. And when you find your perfect combination, share it in the comments below. I’d love to hear about your variations and how this recipe fits into your life.
Go ahead, grab a mug and give it a try. You deserve a little comfort, and this mac and cheese delivers every single time. Happy cooking!
Frequently Asked Questions
Can I use a different type of pasta?
Absolutely! Small pasta shapes work best because they cook evenly in the microwave. Try shells, ditalini, or even broken spaghetti. Just avoid large shapes like lasagna noodles or large shells, as they won’t cook through properly.
What if I don’t have a microwave-safe mug?
You can use any microwave-safe bowl or container. Just make sure it’s large enough to hold the pasta and water without overflowing. A standard cereal bowl works great. Avoid using metal containers or anything with metallic trim.
Can I make this without milk?
Yes, you can substitute the milk with water, but the sauce won’t be as creamy. For a dairy-free option, use unsweetened almond milk, oat milk, or even a splash of pasta cooking water. The texture will be slightly thinner, but it’s still tasty.
How do I prevent the cheese from becoming clumpy?
The key is to add the cheese while the pasta is still very hot. Make sure the butter and milk are fully incorporated before adding the cheese, and stir constantly until it’s melted. If it still clumps, try adding a tiny splash of milk and microwaving for 10 seconds.
Can I double this recipe?
Yes, but you’ll need a larger microwave-safe bowl. Double all the ingredients and increase the cooking time. Start with 4 minutes, stir, then cook in 1-minute increments until the pasta is al dente. The total cooking time will be around 6-8 minutes, depending on your microwave.
Pin This Recipe!
Easy 5-Ingredient Dorm Room Microwave Mac and Cheese

A quick, creamy, and comforting mac and cheese made entirely in the microwave with just five simple ingredients. Perfect for dorm rooms, late-night cravings, or when you need a warm hug in a mug.
- Prep Time: 2 minutes
- Cook Time: 6 minutes
- Total Time: 8 minutes
- Yield: 1 serving 1x
- Category: Main Course
- Cuisine: American
Ingredients
- 1/2 cup (60g) elbow macaroni
- 1 cup (240ml) water
- 2 tablespoons (30ml) milk (whole milk preferred)
- 1/4 cup (30g) shredded cheddar cheese (sharp cheddar recommended)
- 1 tablespoon (14g) unsalted butter
- Pinch of salt (optional)
Instructions
- Add the pasta and water to a microwave-safe mug or bowl. Ensure the water covers the pasta completely.
- Microwave on high for 2 minutes. Watch for boil-overs; pause if needed.
- Stir the pasta and microwave for another 2 minutes on high.
- Check the pasta for doneness. It should be al dente. If still firm, microwave in 30-second increments until tender. Most water should be absorbed.
- Carefully drain any excess water from the mug.
- Add the butter and milk to the hot pasta. Stir until the butter is completely melted.
- Sprinkle in the shredded cheddar cheese and stir vigorously until fully melted and smooth. Add a splash more milk if too thick.
- Season with a pinch of salt if desired. Let cool for a minute before serving.
Notes
For best results, use room temperature milk and butter to prevent the cheese from seizing. Microwaves vary in power; adjust cooking time as needed. Do not overcook the pasta initially as it will continue to cook when hot butter and milk are added. The sauce should be glossy and coat the pasta evenly. For a vegan version, use nutritional yeast, plant-based butter, and unsweetened almond or oat milk.
Nutrition
- Serving Size: 1 mug (approximately
- Calories: 400
- Sugar: 3
- Sodium: 450
- Fat: 18
- Saturated Fat: 11
- Carbohydrates: 45
- Fiber: 2
- Protein: 14
Keywords: microwave mac and cheese, dorm room recipe, easy mac and cheese, 5 ingredient mac and cheese, quick comfort food, college meal, single serving mac and cheese



