Love this? Save it for later!
Share the inspiration with your friends
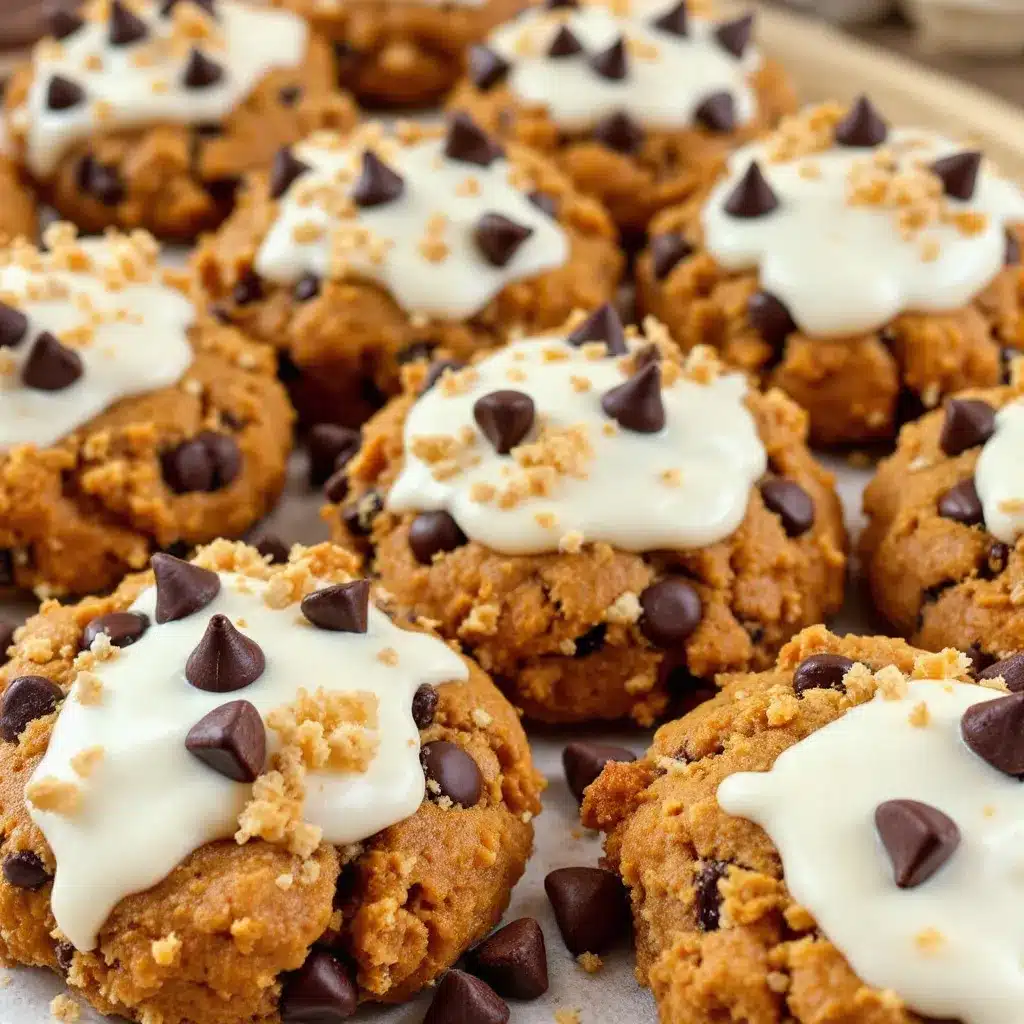
The way the cream cheese icing sits on top of these cookies—thick, white, with a tiny bit of drag when you spread it—that’s the whole reason I keep making them. Everything else is just supporting the vision. I mean, the pumpkin cookie itself is soft, almost like a little cake, and the chocolate chips are there to give you those tiny pockets of bitterness. But that icing? That’s the star. It’s not too sweet, not too thin, and it stays put without sliding off the sides. I’ve tried a lot of pumpkin cookies over the years, and most of them are either too dry or too flat. This one is neither. It’s the kind of cookie that makes you slow down while you’re eating it, because you want the icing to last until the very last bite.
I first made these on a rainy Tuesday afternoon in October, when the light was all gray and the house smelled like cinnamon from the candle I had burning in the kitchen. I had a can of pumpkin puree sitting on the counter, leftover from a batch of no-bake pumpkin pie I made the weekend before, and I just started throwing things together. Honestly, the first batch was a mess—too much pumpkin, not enough flour, and the icing was way too runny. But I learned. The second batch, I dialed in the ratio. The third batch, I figured out the chilling time. And by the fourth batch, I had these perfect little pillows of pumpkin goodness topped with a cream cheese icing that actually stays thick and creamy. So here’s the version that works, every single time.
Why You’ll Love This Recipe
I’ve tested this recipe more times than I care to admit, and I can tell you with confidence—these are not your average pumpkin cookies. They’re soft, they’re flavorful, and that icing is the kind of thing you’ll want to put on everything. Here’s why they work so well:
- Soft and Cake-Like: The pumpkin keeps these cookies incredibly tender, almost like a little muffin top in cookie form. No dry, crumbly mess here.
- Perfectly Spiced: I use a mix of cinnamon, nutmeg, ginger, and a tiny pinch of cloves. It’s warm without being overpowering, and it lets the pumpkin flavor shine through.
- Easy Cream Cheese Icing: This is the part that takes these cookies from good to unforgettable. The icing is thick, tangy, and sets up beautifully without being too sweet.
- Simple Ingredients: You probably have most of these in your pantry right now. No weird specialty items, no expensive extracts.
- Great for Fall Baking: These are perfect for Halloween parties, Thanksgiving dessert tables, or just a cozy afternoon snack. I’ve brought them to potlucks and they disappear faster than anything else on the table.
- Kid-Approved: My niece, who is notoriously picky about anything with “pumpkin” in the name, ate three of these in one sitting. That’s the kind of endorsement that matters.
What makes these different from other pumpkin cookies I’ve tried is the texture. A lot of recipes end up with cookies that are either too flat or too puffy. These are just right—soft, slightly domed, and sturdy enough to hold a generous swirl of icing without falling apart. Plus, the chocolate chips add just enough richness to balance the tangy cream cheese. It’s a flavor combination that works on every level.
What Ingredients You Will Need
This recipe uses pretty standard baking ingredients, but there are a few things worth paying attention to. The quality of your pumpkin puree, the type of chocolate chips, and the temperature of your cream cheese all matter more than you’d think. Here’s what you’ll need:
For the Cookies
- 1 cup (226g) unsalted butter, softened — I use salted butter sometimes in a pinch, but unsalted gives you more control over the final flavor. Let it sit out for at least 30 minutes before you start.
- 1 cup (200g) granulated sugar — Regular white sugar works fine here. It helps the cookies spread just enough.
- 1/2 cup (100g) packed light brown sugar — This adds moisture and a little depth. Dark brown sugar works too, but the flavor will be slightly more molasses-forward.
- 1 cup (240g) pumpkin puree — Not pumpkin pie filling! Make sure you get 100% pure pumpkin puree. I prefer Libby’s for its consistent texture, but store brands work fine too.
- 1 large egg, room temperature — Cold eggs can make the batter seize up. Let it sit out with the butter.
- 1 teaspoon vanilla extract — Pure vanilla is better, but imitation works in a pinch.
- 2 cups (250g) all-purpose flour — Spoon and level it. Don’t scoop straight from the bag or you’ll end up with too much flour and dry cookies.
- 1 teaspoon baking soda — This helps the cookies rise and stay tender.
- 1/2 teaspoon baking powder — Adds a little extra lift.
- 1/2 teaspoon salt — Balances the sweetness.
- 1 teaspoon ground cinnamon — The backbone of the spice blend.
- 1/2 teaspoon ground nutmeg — Freshly grated is amazing if you have it.
- 1/4 teaspoon ground ginger — Adds warmth without being spicy.
- 1/8 teaspoon ground cloves — A little goes a long way.
- 1 cup (170g) semi-sweet chocolate chips — I like Ghirardelli for the size and melt quality. Dark chocolate chips work great too.
For the Cream Cheese Icing
- 4 ounces (113g) cream cheese, softened — Full-fat is non-negotiable here. Low-fat cream cheese makes the icing too thin and runny.
- 1/4 cup (56g) unsalted butter, softened — Same deal, let it come to room temperature.
- 1 1/2 cups (180g) powdered sugar — Sift it if you want a super smooth icing, but I’m usually too lazy and it turns out fine.
- 1/2 teaspoon vanilla extract — Adds a little warmth to the tangy cream cheese.
- 1-2 tablespoons heavy cream or milk — Start with one tablespoon and add more if needed. You want the icing to be thick but spreadable.
Equipment Needed
Nothing too fancy here, but having the right tools makes the process smoother. Here’s what I use:
- Large mixing bowls — At least two. One for the wet ingredients, one for the dry.
- Electric hand mixer or stand mixer — You can do this by hand with a whisk, but a mixer makes the creaming process much easier and faster.
- Rubber spatula — For scraping down the sides of the bowl and folding in the chocolate chips.
- Measuring cups and spoons — Accurate measurements matter in baking. I use dry measuring cups for flour and sugar, and a liquid measuring cup for the pumpkin puree.
- Baking sheets — I use light-colored aluminum sheets. Dark sheets can cause the bottoms to brown too quickly.
- Parchment paper or silicone baking mats — Parchment paper is my go-to. It prevents sticking and makes cleanup a breeze.
- Wire cooling rack — Essential for cooling the cookies evenly before icing them.
- Small offset spatula or butter knife — For spreading the icing. An offset spatula gives you more control, but a butter knife works just fine.
If you don’t have an electric mixer, you can cream the butter and sugar by hand with a wooden spoon. It takes a little longer, but it’s totally doable. Just make sure the butter is really soft before you start.
Preparation Method
Alright, let’s get into the actual process. I’ve broken this down into clear steps so you don’t miss anything. Take your time, especially with the chilling step—it really makes a difference.
Step 1: Preheat and Prep
Preheat your oven to 350°F (175°C). Line two baking sheets with parchment paper or silicone mats. Set them aside while you make the dough.
Step 2: Cream the Butter and Sugars
In a large mixing bowl, beat the softened butter, granulated sugar, and brown sugar together on medium speed until light and fluffy. This takes about 2-3 minutes with an electric mixer. You want the mixture to look pale and airy. Scrape down the sides of the bowl with a spatula halfway through.
Step 3: Add the Wet Ingredients
Add the pumpkin puree, egg, and vanilla extract to the butter mixture. Beat on low speed until everything is combined. The mixture will look a little curdled at this point—that’s totally normal. Don’t panic. Just keep mixing until it comes together into a smooth, orange-tinted batter.
Step 4: Combine the Dry Ingredients
In a separate bowl, whisk together the flour, baking soda, baking powder, salt, cinnamon, nutmeg, ginger, and cloves. Make sure the spices are evenly distributed. Nobody wants a bite with nothing but cloves.
Step 5: Mix Wet and Dry
Gradually add the dry ingredients to the wet mixture, mixing on low speed. Stop as soon as the flour disappears. Overmixing at this stage will make the cookies tough. You should have a soft, slightly sticky dough.
Step 6: Fold in the Chocolate Chips
Use a rubber spatula to gently fold in the chocolate chips. Make sure they’re evenly distributed throughout the dough. If you want a few extra chips on top for looks, reserve a small handful and press them into the dough balls later.
Step 7: Chill the Dough
Cover the bowl with plastic wrap and refrigerate the dough for at least 30 minutes. This is a crucial step. Chilling the dough prevents the cookies from spreading too much in the oven and helps develop the flavor. I’ve left it for up to 2 hours with great results.
Step 8: Scoop and Bake
Using a cookie scoop or a tablespoon, drop rounded balls of dough onto the prepared baking sheets, spacing them about 2 inches apart. If you reserved extra chocolate chips, press a few into the tops of the dough balls now. Bake for 12-14 minutes, or until the edges are set and lightly golden. The centers will look slightly underdone—that’s what you want. They’ll continue to set as they cool.
Step 9: Cool Completely
Let the cookies cool on the baking sheet for 5 minutes, then transfer them to a wire cooling rack. Let them cool completely before icing. If you ice them while they’re still warm, the icing will melt into a puddle.
Step 10: Make the Cream Cheese Icing
While the cookies are cooling, make the icing. In a medium bowl, beat the softened cream cheese and butter together until smooth and creamy. Add the powdered sugar and vanilla extract, and beat on low speed until combined. Add 1 tablespoon of heavy cream or milk and beat until the icing is smooth and spreadable. If it’s too thick, add another tablespoon of cream. If it’s too thin, add a little more powdered sugar.
Step 11: Ice the Cookies
Once the cookies are completely cool, spread a generous amount of icing on top of each one. I like to leave the edges a little exposed so you can see the cookie underneath. Sprinkle with a tiny pinch of cinnamon or a few extra chocolate chips if you’re feeling fancy.
Cooking Tips & Techniques
I’ve made these cookies enough times to know where things can go wrong. Here are a few things I’ve learned the hard way:
Don’t skip the chilling step. I know it’s tempting to just scoop and bake, but the dough needs time to firm up. Without chilling, the cookies will spread into flat, thin discs instead of staying thick and soft. Trust me on this one—I learned it the hard way with my first batch.
Use room temperature ingredients. Cold butter doesn’t cream properly, and cold cream cheese makes lumpy icing. Set everything out on the counter about 30-45 minutes before you start. If you forget, you can soften the butter in the microwave in 10-second bursts, but be careful not to melt it.
Measure your flour correctly. Spoon the flour into your measuring cup and level it off with a knife. If you scoop directly from the bag, you can end up with up to 25% more flour than the recipe calls for. That leads to dry, dense cookies.
Watch the bake time. Ovens vary, so start checking at the 12-minute mark. The cookies are done when the edges are set and the centers look slightly soft. Overbaking will give you dry cookies, and nobody wants that.
Let the cookies cool completely. This is non-negotiable for the icing. If you rush it, you’ll end up with a mess. I usually bake the cookies first, let them cool while I make the icing, and then ice them right before serving.
Variations & Adaptations
One of the best things about this recipe is how easy it is to change up. Here are a few variations I’ve tried and loved:
Gluten-Free Version: Substitute the all-purpose flour with a 1:1 gluten-free baking flour blend. I’ve used Bob’s Red Mill with great results. The texture will be slightly more delicate, but they’re still delicious.
Dairy-Free Option: Use vegan butter and a dairy-free cream cheese alternative. Miyoko’s is my favorite for the cream cheese. The icing won’t be quite as thick, but it still tastes amazing.
Spice It Up: Add a pinch of cayenne pepper or a teaspoon of pumpkin pie spice to the dry ingredients for an extra layer of warmth. I did this once on a whim and it was surprisingly good.
White Chocolate Chips: Swap the semi-sweet chips for white chocolate chips. The sweetness pairs beautifully with the tangy cream cheese icing. I’ve also used butterscotch chips for a different flavor profile.
Add Nuts: Fold in 1/2 cup of chopped pecans or walnuts along with the chocolate chips. The crunch adds a nice contrast to the soft cookie.
Make Them Mini: Use a small cookie scoop and bake for 8-10 minutes instead of 12-14. Perfect for parties or cookie platters. You’ll get about 36 mini cookies from this recipe.
Serving & Storage Suggestions
These cookies are best served at room temperature, with the icing set but still soft. I like to arrange them on a platter with a few extra chocolate chips scattered around for visual appeal. They pair beautifully with a hot cup of coffee or a glass of cold milk.
Storage: Store the cookies in an airtight container in the refrigerator for up to 5 days. The cream cheese icing needs to stay chilled, so don’t leave them out at room temperature for more than 2 hours. If you’re stacking them, place a layer of parchment paper between each layer to prevent the icing from smudging.
Freezing: You can freeze the unbaked cookie dough for up to 3 months. Scoop the dough into balls, place them on a baking sheet, and freeze until solid. Then transfer the dough balls to a freezer bag. Bake from frozen, adding 2-3 minutes to the bake time. You can also freeze the baked cookies without the icing for up to 3 months. Thaw them in the refrigerator and ice them before serving.
Reheating: If you want a warm cookie, pop one in the microwave for 10-15 seconds. The icing will soften slightly, but it won’t melt completely. For a crispier edge, reheat in a 300°F oven for 5 minutes.
One thing I love about these cookies is that the flavors actually get better after a day in the fridge. The pumpkin and spices meld together, and the icing sets into a perfect creamy layer. So don’t be afraid to make them a day ahead.
Nutritional Information & Benefits
Here’s an approximate nutritional breakdown per cookie (based on 24 cookies):
- Calories: 210
- Total Fat: 11g
- Saturated Fat: 7g
- Cholesterol: 35mg
- Sodium: 120mg
- Total Carbohydrates: 28g
- Dietary Fiber: 1g
- Sugars: 18g
- Protein: 3g
While these are definitely a treat, there are a few nutritional perks worth mentioning. Pumpkin is packed with vitamin A and fiber, which supports eye health and digestion. The cinnamon in the recipe has anti-inflammatory properties, and the cream cheese provides a small amount of calcium and protein. Of course, the chocolate chips and sugar are there for indulgence, but hey—balance is key.
If you’re watching your sugar intake, you can reduce the granulated sugar to 3/4 cup, but the cookies will be slightly less tender. For a lower-carb option, try using a sugar substitute like monk fruit sweetener, though the texture will be a bit different.
Frequently Asked Questions
Can I use pumpkin pie filling instead of pumpkin puree?
No, don’t do that. Pumpkin pie filling is already sweetened and spiced, so it will throw off the balance of the recipe. Stick with 100% pure pumpkin puree for the best results.
Why did my cookies turn out flat?
Most likely, the dough wasn’t chilled long enough. The pumpkin adds a lot of moisture, which can cause the cookies to spread if the dough is too warm. Make sure you chill the dough for at least 30 minutes, and don’t skip that step.
Can I make the icing ahead of time?
Yes, you can make the icing up to 3 days in advance. Store it in an airtight container in the refrigerator. Let it sit at room temperature for about 15 minutes before spreading, then give it a quick stir to smooth it out.
How do I get the icing to look smooth and pretty?
Make sure your cream cheese and butter are fully softened before you start. Sifting the powdered sugar helps too, but honestly, I don’t always bother. Use a small offset spatula for the smoothest application, and don’t be afraid to go back and smooth out any lumps.
Can I freeze these cookies with the icing?
I don’t recommend it. The cream cheese icing can get grainy and separate when frozen and thawed. It’s better to freeze the cookies without the icing, then make a fresh batch of icing when you’re ready to serve them.
Conclusion
These pumpkin chocolate chip cookies with cream cheese icing are the kind of recipe that makes you look forward to fall all year long. They’re soft, they’re flavorful, and that icing is just the right amount of tangy sweetness to balance everything out. Whether you’re making them for a Halloween party, a Thanksgiving dessert table, or just because you need a little comfort on a rainy afternoon, they never disappoint.
I love how forgiving this recipe is. You can tweak the spices, swap the chocolate chips, or adjust the icing to your liking, and it still turns out great. That’s the mark of a good recipe, in my book. So go ahead and make a batch. Or two. I won’t judge.
If you try these cookies, I’d love to hear how they turned out. Leave a comment below or tag me in your photos. And if you’re in the mood for more fall baking, check out my pumpkin cream cheese muffins or these pumpkin spice snickerdoodles for even more seasonal goodness. Happy baking!
Pin This Recipe!
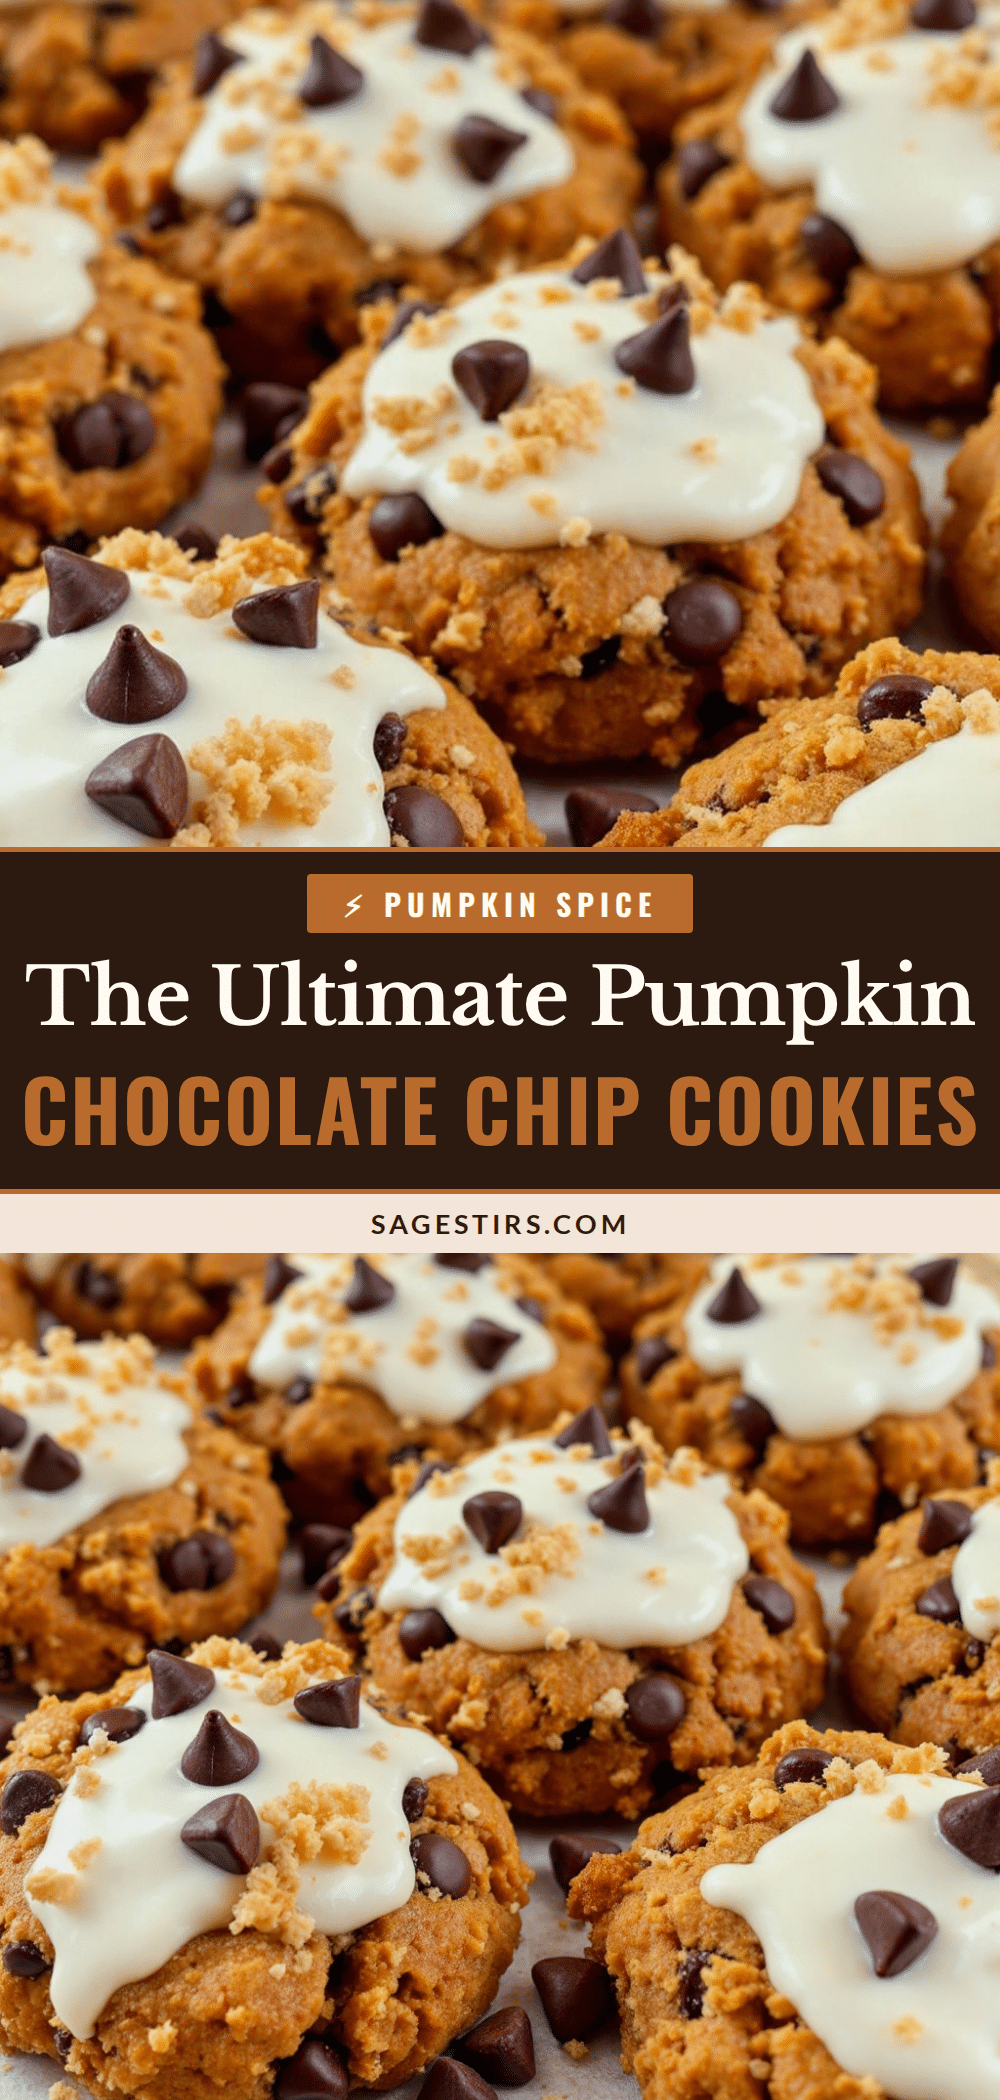
Perfect Pumpkin Chocolate Chip Cookies: Easy Cream Cheese Icing

Soft, cake-like pumpkin cookies studded with semi-sweet chocolate chips and topped with a thick, tangy cream cheese icing. This foolproof recipe delivers perfectly spiced, tender cookies that are ideal for fall baking.
- Prep Time: 15 minutes
- Cook Time: 12-14 minutes
- Total Time: 1 hour (including chilling)
- Yield: 24 cookies 1x
- Category: Dessert
- Cuisine: American
Ingredients
- 1 cup (226g) unsalted butter, softened
- 1 cup (200g) granulated sugar
- 1/2 cup (100g) packed light brown sugar
- 1 cup (240g) pumpkin puree (not pumpkin pie filling)
- 1 large egg, room temperature
- 1 teaspoon vanilla extract
- 2 cups (250g) all-purpose flour
- 1 teaspoon baking soda
- 1/2 teaspoon baking powder
- 1/2 teaspoon salt
- 1 teaspoon ground cinnamon
- 1/2 teaspoon ground nutmeg
- 1/4 teaspoon ground ginger
- 1/8 teaspoon ground cloves
- 1 cup (170g) semi-sweet chocolate chips
- 4 ounces (113g) cream cheese, softened
- 1/4 cup (56g) unsalted butter, softened
- 1 1/2 cups (180g) powdered sugar
- 1/2 teaspoon vanilla extract
- 1–2 tablespoons heavy cream or milk
Instructions
- Preheat oven to 350°F (175°C). Line two baking sheets with parchment paper or silicone mats.
- In a large bowl, beat softened butter, granulated sugar, and brown sugar on medium speed until light and fluffy (2-3 minutes). Scrape down sides.
- Add pumpkin puree, egg, and vanilla extract. Beat on low until combined (mixture may look curdled).
- In a separate bowl, whisk together flour, baking soda, baking powder, salt, cinnamon, nutmeg, ginger, and cloves.
- Gradually add dry ingredients to wet mixture, mixing on low just until flour disappears. Do not overmix.
- Gently fold in chocolate chips with a rubber spatula. Reserve a handful for topping if desired.
- Cover bowl with plastic wrap and refrigerate dough for at least 30 minutes (up to 2 hours).
- Drop rounded balls of dough (about 1.5 tablespoons each) onto prepared baking sheets, spacing 2 inches apart. Press extra chips on top if desired.
- Bake for 12-14 minutes, until edges are set and lightly golden. Centers will look slightly underdone.
- Cool on baking sheet for 5 minutes, then transfer to wire rack to cool completely.
- For icing: Beat softened cream cheese and butter until smooth. Add powdered sugar and vanilla, beat on low. Add 1 tablespoon cream/milk, beat until smooth. Add more cream if needed for spreadable consistency.
- Once cookies are completely cool, spread icing on top. Sprinkle with cinnamon or extra chips if desired.
Notes
Chilling the dough is crucial to prevent spreading. Use room temperature ingredients for best results. For gluten-free, substitute 1:1 gluten-free flour blend. For dairy-free, use vegan butter and dairy-free cream cheese. Store in refrigerator up to 5 days. Unbaked dough can be frozen for up to 3 months.
Nutrition
- Serving Size: 1 cookie
- Calories: 210
- Sugar: 18
- Sodium: 120
- Fat: 11
- Saturated Fat: 7
- Carbohydrates: 28
- Fiber: 1
- Protein: 3
Keywords: pumpkin cookies, chocolate chip cookies, cream cheese icing, fall baking, pumpkin dessert, soft cookies



