Love this? Save it for later!
Share the inspiration with your friends
I used to think pumpkin pie was overrated. For years, I avoided it at Thanksgiving, passed it over at potlucks, and politely declined slices offered by well-meaning friends. The filling was fine, I guess, but that traditional pastry crust always felt like a flimsy excuse to hold everything together. Honestly, I didn’t get the hype.
Then my neighbor Carol showed up at my door last November holding a pie plate with a cracked rim. She had just moved in and wanted to introduce herself, and she brought dessert. “It’s pumpkin,” she said with a shrug, “but not the kind you’re thinking.” I took a slice to be polite—and found myself going back for a second one before she even left the porch.
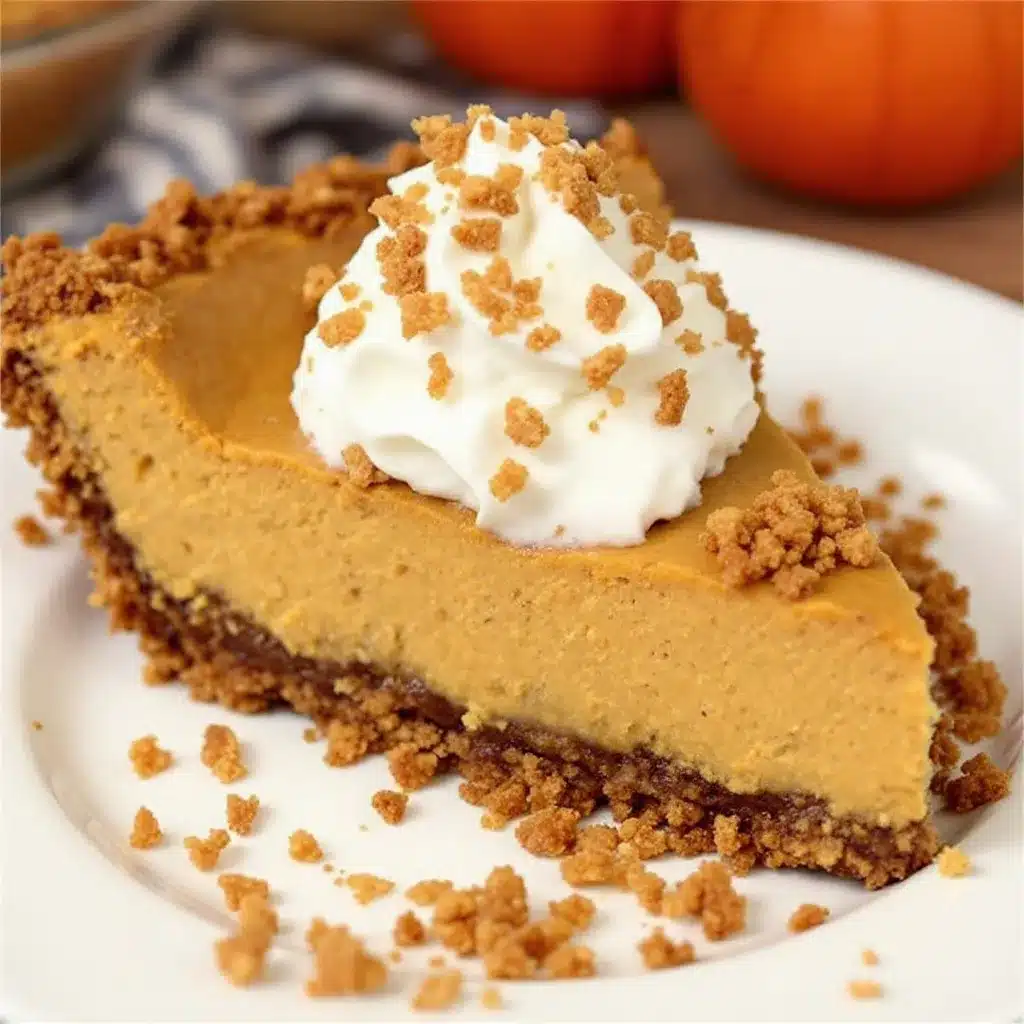
The crust was this incredible, spicy, crunchy thing made from crushed gingersnaps. The filling was impossibly creamy, almost like a mousse, with just the right balance of pumpkin and warm fall spices. And the whole thing had been sitting in her fridge, not the oven. No blind baking. No cracked tops. No stress.
I asked for the recipe before she made it back to her car. And let me tell you, I’ve been making it ever since. Maybe you’ve had your own run-ins with disappointing pumpkin pies—the soggy crusts, the watery fillings, the ones that take over your oven when you need it for everything else. This one solves all of that. It’s the pie that changed my mind about pumpkin pie, and I have a feeling it might do the same for you.
Why You’ll Love This Recipe
This Creamy No-Bake Pumpkin Pie with Gingersnap Crust is the kind of recipe that makes you look like a hero without breaking a sweat. I’ve tested it at three different holiday gatherings now, and every single time, people ask for the recipe before they finish their first slice. Here’s why it works so well:
- No Oven Required — This pie sets up beautifully in the refrigerator. Perfect for when your oven is already packed with stuffing, casseroles, or a turkey.
- Rich and Creamy Texture — The filling is silky smooth, almost like a pumpkin cheesecake, without any of the cracking or water bath fuss.
- Gingersnap Crust That Actually Stays Put — No soggy bottoms here. The spiced cookie crust holds its structure and adds a gorgeous crunch that complements the creamy filling.
- Make-Ahead Magic — You can assemble this pie a full day ahead of time. The flavors actually get better as they meld together overnight.
- Simple Pantry Ingredients — Nothing fancy required. Most of what you need is probably in your kitchen right now.
What makes this recipe different from every other no-bake pumpkin pie out there? It’s the combination of cream cheese and stabilized whipped cream that gives the filling that dreamy, mousse-like consistency without being too heavy. And the crust? I experimented with four different brands of gingersnaps before landing on the perfect ratio of cookie to butter. This version stays crisp and doesn’t crumble apart when you slice it.
This is the pie that makes people close their eyes after the first bite. It’s comfort food reimagined—easier, faster, but with the same soul-soothing satisfaction that a great pumpkin pie should deliver. Perfect for impressing guests without the stress, or turning a simple Tuesday night into something worth celebrating.
What Ingredients You Will Need
This recipe uses simple, wholesome ingredients that come together to create something truly special. Most of these are pantry staples, especially once fall baking season rolls around. Let me walk you through each one.
For the Gingersnap Crust
- 2 cups (about 200g) gingersnap cookie crumbs — I prefer Nabisco or Anna’s brand for the best spice balance. You can crush them in a food processor or by hand in a zip-top bag with a rolling pin. (Go for fine crumbs for a crust that holds together well.)
- 6 tablespoons (85g) unsalted butter, melted — Use real butter here, not margarine. It makes a noticeable difference in flavor and how the crust sets.
- 2 tablespoons (25g) granulated sugar — Just a touch to round out the spices. If your gingersnaps are already very sweet, you can reduce this to 1 tablespoon.
- ¼ teaspoon salt — Balances the sweetness and brings out the ginger and molasses flavors.
For the Creamy Pumpkin Filling
- 8 ounces (226g) cream cheese, softened — Full-fat is best here for that luscious texture. Let it sit on the counter for at least 30 minutes before starting.
- 1 cup (240ml) heavy whipping cream — This gets whipped into stiff peaks to give the filling its airy, mousse-like structure. Keep it cold until you’re ready to whip.
- 1 cup (245g) canned pumpkin puree — Not pumpkin pie filling! Make sure you grab 100% pure pumpkin. Libby’s is my go-to brand.
- ¾ cup (150g) packed light brown sugar — Adds depth and a subtle molasses note that pairs beautifully with the gingersnap crust.
- 1 teaspoon vanilla extract — Pure vanilla, not imitation, if you have it on hand.
- 1½ teaspoons pumpkin pie spice — I use McCormick, but you can make your own blend with cinnamon, ginger, nutmeg, and allspice.
- ¼ teaspoon salt — Don’t skip this. It makes all the flavors pop.
- 1 tablespoon (7g) powdered gelatin — This is the secret to a sliceable, stable filling that doesn’t weep. Don’t worry, it’s easy to work with.
- 3 tablespoons (45ml) cold water — For blooming the gelatin.
Equipment Needed
You don’t need any fancy equipment for this recipe, which is part of its charm. Here’s what you’ll need:
- 9-inch pie plate — A standard glass or ceramic pie dish works perfectly. I use a deep-dish Pyrex one that I’ve had for years.
- Food processor or rolling pin — For crushing the gingersnaps. A food processor gives you the most consistent crumbs, but a sturdy zip-top bag and a rolling pin work just fine if you want to get out some aggression.
- Medium mixing bowl — For combining the crust ingredients.
- Electric hand mixer or stand mixer — You’ll need this for whipping the cream and beating the cream cheese. A whisk and some serious arm strength could technically work, but I wouldn’t recommend it.
- Small microwave-safe bowl — For blooming and melting the gelatin.
- Rubber spatula — For folding everything together gently.
- Plastic wrap — For covering the pie while it chills.
If you don’t own a food processor, don’t let that stop you. I made this pie for two years using nothing but a bag and a rolling pin, and it came out great every time. Just make sure you crush the cookies into fine, uniform crumbs—nobody wants a chunk of cookie in their slice.
Preparation Method
Let me walk you through this step by step. I’ve made this pie at least a dozen times, so I’ll share all the little tricks I’ve learned along the way.
Step 1: Make the Gingersnap Crust
Start by crushing your gingersnaps into fine crumbs. If you’re using a food processor, pulse about 40 cookies until they look like coarse sand. If you’re going the bag-and-rolling-pin route, seal the cookies in a zip-top bag and go to town. I won’t judge if you need to take out some frustrations here.
Transfer the crumbs to a medium bowl. Add the melted butter, sugar, and salt, and stir with a fork until every crumb is coated. The mixture should look like wet sand and hold together when you squeeze a handful.
Press the mixture firmly into your 9-inch pie plate. Start with the sides, working your way around the edge, then move to the bottom. Use the bottom of a flat measuring cup or a glass to really pack it down tight. This is important—a loosely packed crust will crumble when you try to slice the pie later.
Pop the crust into the refrigerator for at least 30 minutes to firm up while you make the filling.
Step 2: Bloom the Gelatin
In a small microwave-safe bowl, sprinkle the powdered gelatin over the cold water. Let it sit for 5 minutes without stirring. It will look like a weird, bumpy, jiggly mess—that’s exactly what you want. This is called blooming, and it ensures the gelatin dissolves smoothly later.
Step 3: Whip the Cream
In a large mixing bowl, pour the cold heavy cream. Using your electric mixer, whip it on medium-high speed until stiff peaks form. You’ll know it’s ready when you lift the beaters and the cream stands up in peaks that don’t flop over. Be careful not to overwhip, or you’ll end up with butter. Trust me, I’ve done it, and it’s not pretty. Set the whipped cream aside in the refrigerator for now.
Step 4: Make the Pumpkin Filling Base
In another large bowl, beat the softened cream cheese with your electric mixer until it’s smooth and fluffy, about 2 minutes. Scrape down the sides of the bowl with your spatula. Add the brown sugar and beat for another minute until well combined and slightly lighter in color.
Add the pumpkin puree, vanilla extract, pumpkin pie spice, and salt. Beat on medium speed until everything is smooth and uniform. Stop and scrape the bowl a couple of times to make sure there are no hidden streaks of cream cheese.
Step 5: Melt and Add the Gelatin
Now for the gelatin. Microwave the bloomed gelatin for about 10 seconds, or until it becomes liquid. Stir it gently—it should be clear and smooth, not clumpy. If it’s not fully melted, give it another 5 seconds. Don’t overheat it, or it can lose its thickening power.
With the mixer running on low, slowly pour the melted gelatin into the pumpkin mixture. Mix until it’s fully incorporated, about 30 seconds. This step is crucial for giving the pie that clean, sliceable texture.
Step 6: Fold It All Together
Take your whipped cream out of the fridge. Add about one-third of it to the pumpkin mixture and stir it in gently with your spatula to lighten things up. Then add the remaining whipped cream and fold it in carefully. Use a gentle cutting-and-folding motion—you want to keep as much air in the mixture as possible. Fold until you don’t see any white streaks, but don’t overmix.
Step 7: Assemble and Chill
Take your chilled crust out of the refrigerator. Spoon the filling into the crust and spread it evenly with your spatula. Give the pie plate a few gentle taps on the counter to release any air bubbles. Smooth the top.
Cover the pie loosely with plastic wrap and refrigerate for at least 6 hours, but overnight is better. The filling needs time to set up properly. I know it’s tempting to dig in early, but trust me on this one—waiting makes a huge difference.
Cooking Tips & Techniques
After making this pie more times than I can count, I’ve collected a few lessons the hard way so you don’t have to.
Don’t skip the gelatin. I know some no-bake pie recipes skip it, but those pies tend to be softer and harder to slice cleanly. The gelatin gives this pie structure without making it stiff or rubbery. If you’re vegetarian, you can use agar agar, but I haven’t tested that substitution myself, so you’ll need to experiment a bit.
Temperature matters more than you think. Your cream cheese needs to be truly softened—not cold, not melted. If it’s too cold, you’ll end up with lumpy filling. If it’s too warm, the filling won’t hold its structure. Let it sit on the counter for a good 30 to 45 minutes before you start. The cream, on the other hand, needs to be ice cold. I keep my bowl and beaters in the fridge for 10 minutes before whipping.
Press that crust like you mean it. My first attempt at this pie had a crust that fell apart into a million pieces when I tried to serve it. I hadn’t packed it firmly enough. Use the bottom of a measuring cup or a glass and really apply some pressure. You want the crust to feel solid and compact.
Let the pie set fully. I once tried to rush the chilling process and served the pie after only 4 hours. The filling was still a bit soft and didn’t slice cleanly. It still tasted amazing, but the presentation was a mess. Give it the full overnight chill if you can. Your patience will be rewarded.
Use room temperature eggs if you’re adding them. Wait—this recipe doesn’t use eggs. That’s one of the best things about it! No worrying about undercooked eggs or curdled custard. Just creamy, no-bake perfection.
Variations & Adaptations
This recipe is wonderfully flexible. Here are some ways I’ve adapted it over the years:
Gluten-Free Version: Use gluten-free gingersnap cookies for the crust. I’ve tested this with several brands, and they all work beautifully. Just check the package to make sure you’re getting enough cookies to yield 2 cups of crumbs.
Dairy-Free Adaptation: Substitute the cream cheese with a good-quality dairy-free version (Kite Hill works well) and use coconut cream instead of heavy whipping cream. Chill the can of coconut cream overnight and scoop only the solid white part. The texture will be slightly different but still delicious.
Spice It Up: Add ¼ teaspoon of black pepper to the filling for a warm, unexpected kick. I tried this on a whim last Thanksgiving, and it was a huge hit. The pepper doesn’t make it spicy—it just deepens the pumpkin flavor somehow.
Chocolate Drizzle: Melt ½ cup of dark chocolate chips with a teaspoon of coconut oil and drizzle it over the finished pie. The chocolate and ginger combination is absolutely stunning.
Individual Servings: Instead of a full pie, press the crust into the bottom of 6 to 8 small mason jars or ramekins. Divide the filling among them and chill. These are perfect for parties or gifting.
Maple Variation: Replace the brown sugar with ½ cup of pure maple syrup. Reduce the heavy cream by 2 tablespoons to compensate for the extra liquid. The maple adds a lovely woodsy sweetness that pairs beautifully with the gingersnaps.
Serving & Storage Suggestions
This pie is best served cold, straight from the refrigerator. The filling should be firm but creamy, and the crust should have a satisfying snap. Here’s how I like to present it:
Run a thin, sharp knife under hot water and wipe it dry before making each slice. This gives you those clean, beautiful slices that look like they came from a bakery. Top each slice with a dollop of lightly sweetened whipped cream and a sprinkle of cinnamon or crushed gingersnaps.
For a truly stunning presentation, add a few candied pecans or a drizzle of caramel sauce. I’ve also served it with a side of vanilla ice cream, and let me tell you—that combination is dangerous.
Storage: Cover the pie tightly with plastic wrap or transfer slices to an airtight container. It will keep in the refrigerator for up to 4 days. The crust stays crisp for the first 2 days, then softens slightly after that. It’s still delicious, just different.
Freezing: This pie freezes beautifully. Wrap the entire pie (or individual slices) in plastic wrap, then in aluminum foil. Freeze for up to 2 months. Thaw overnight in the refrigerator before serving. Don’t thaw at room temperature, or the filling may get weepy.
One thing I love about this recipe is that the flavors actually improve after a day in the fridge. The spices meld together, the pumpkin flavor deepens, and everything becomes more cohesive. So if you can make it a day ahead, you’re in for a real treat.
Nutritional Information & Benefits
Here’s the estimated nutritional breakdown for one slice of this pie (based on 8 servings):
- Calories: 385
- Fat: 24g
- Saturated Fat: 14g
- Carbohydrates: 39g
- Sugar: 27g
- Fiber: 2g
- Protein: 5g
- Sodium: 320mg
Pumpkin is packed with vitamin A, which supports eye health and immune function. It’s also a good source of fiber and antioxidants. The cream cheese and heavy cream add calcium and protein, though this is definitely a treat, not a health food. I like to think of it as a dessert that gives you a little something back.
If you’re watching your sugar intake, you can reduce the brown sugar to ½ cup and use a sugar substitute in the crust. The pie will still be delicious, just slightly less sweet.
This recipe contains dairy and gluten (unless you use the substitutions mentioned above). It does not contain eggs, nuts, or soy.
Conclusion
This Creamy No-Bake Pumpkin Pie with Gingersnap Crust has become my go-to fall dessert for a reason. It’s simple enough for a random Tuesday but impressive enough for Thanksgiving dinner. It frees up your oven when you need it most. And honestly? It tastes better than any baked pumpkin pie I’ve ever had.
I love that this recipe lets me enjoy all the flavors of fall without the stress of pastry dough or the worry of a cracked filling. It’s forgiving, flexible, and always delivers. Whether you’re a pumpkin pie skeptic like I used to be or a lifelong fan looking for something new, I think you’ll fall for this one.
Try it, and then come back and tell me how it went. Did you add your own twist? Did your family fight over the last slice? I’d love to hear about it in the comments below. And if you share it on social media, tag me—I want to see your beautiful creation!
Frequently Asked Questions
Can I use homemade pumpkin puree instead of canned?
Yes, but you’ll need to strain it first. Homemade pumpkin puree tends to be more watery than canned. Spread it on a paper towel-lined baking sheet for about 15 minutes to remove excess moisture before using. Otherwise, your filling might be too soft to slice cleanly.
How far in advance can I make this pie?
You can make this pie up to 2 days ahead of time. In fact, I recommend making it at least 24 hours in advance because the flavors meld and deepen overnight. Just keep it covered in the refrigerator until you’re ready to serve.
Can I use a different cookie for the crust?
Absolutely. Graham crackers, vanilla wafers, or shortbread cookies all work well. Keep in mind that the spice profile will change. Graham crackers give a milder flavor, while shortbread creates a buttery, neutral crust. If you use a less spicy cookie, you might want to add ¼ teaspoon of ground ginger to the crust mixture.
My filling came out too soft. What went wrong?
This usually happens for one of three reasons: the gelatin wasn’t fully dissolved, the pie didn’t chill long enough, or the cream wasn’t whipped to stiff peaks. Make sure your gelatin is completely clear and liquid before adding it, and give the pie a full 6 to 8 hours in the fridge. If you’re in a hurry, you can pop it in the freezer for 2 hours, but watch it carefully so it doesn’t freeze solid.
Can I skip the gelatin entirely?
You can, but the texture will be much softer—more like a mousse than a sliceable pie. If you’re serving it in bowls or cups, that’s totally fine. For a traditional pie presentation, I really recommend keeping the gelatin in. It’s what gives this pie that perfect, clean slice.
Pin This Recipe!
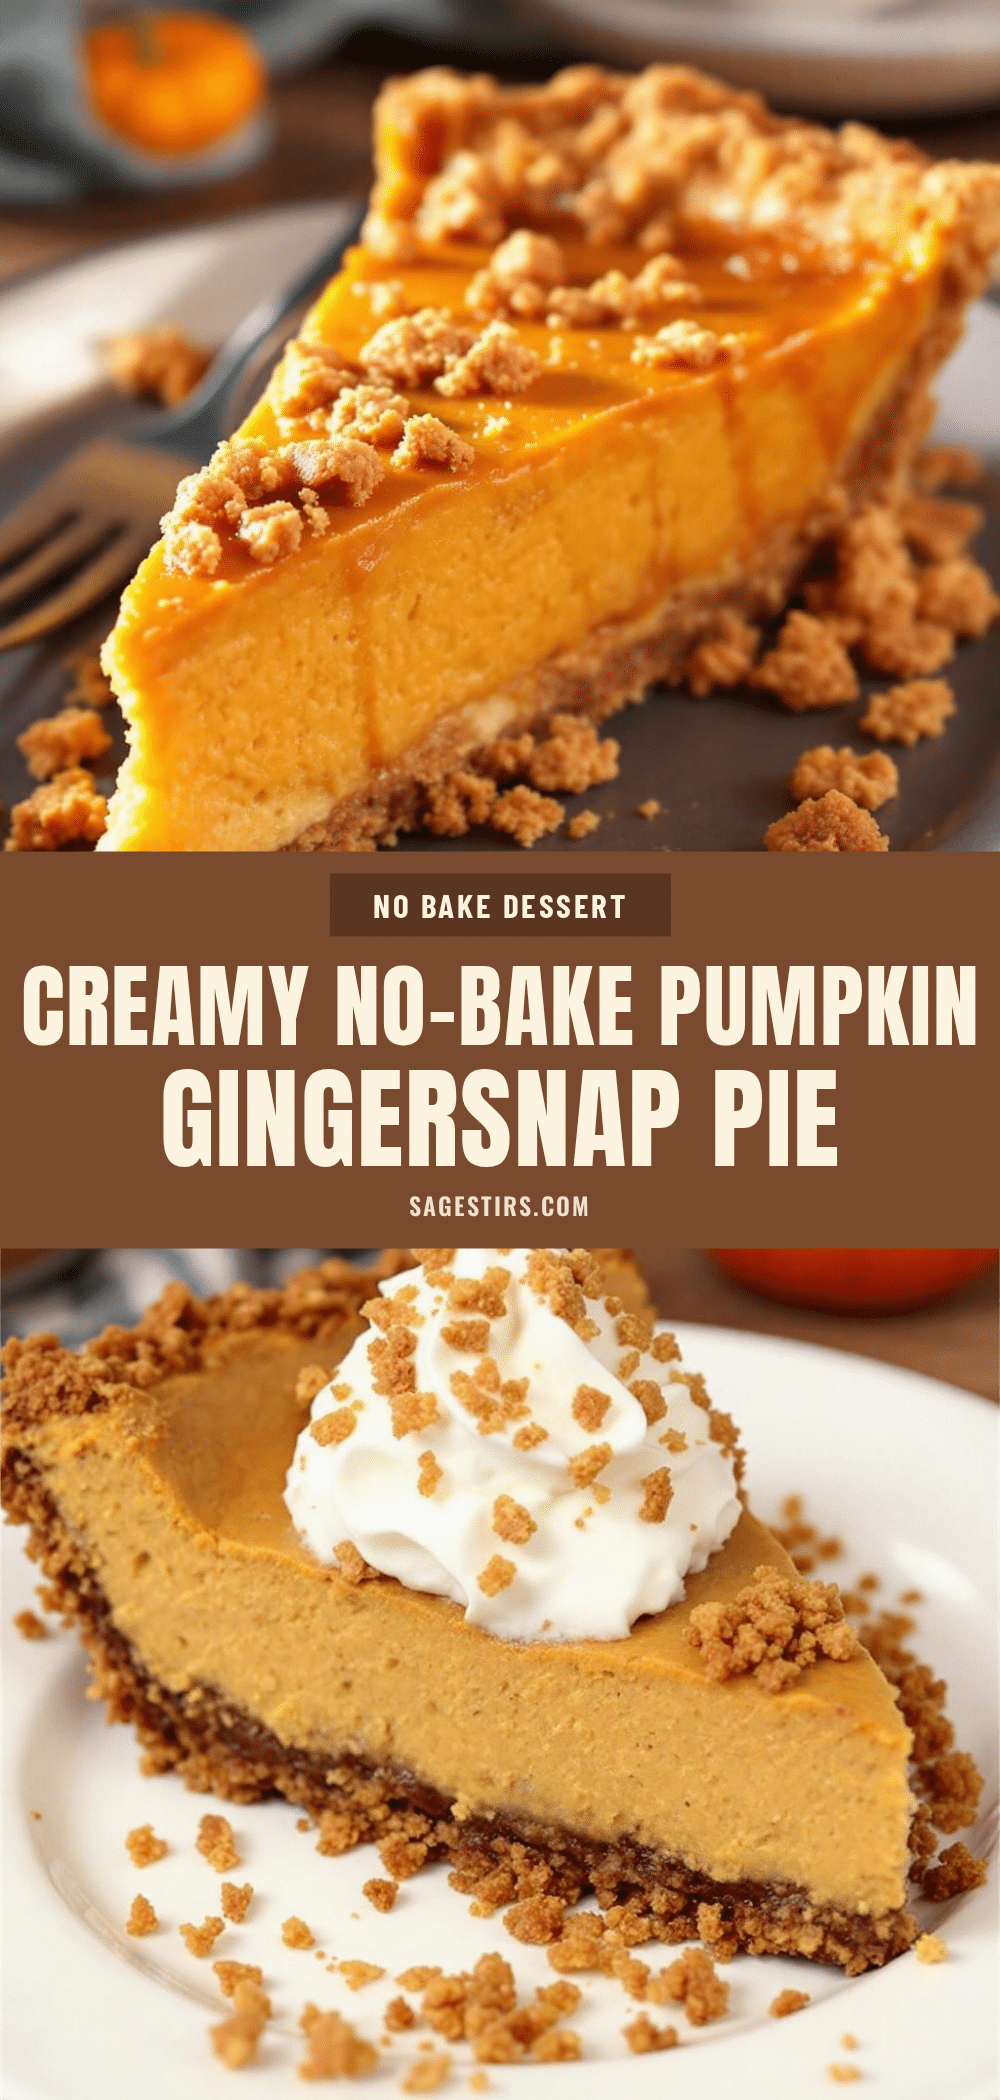
Creamy No-Bake Pumpkin Pie with Gingersnap Crust

A rich, creamy no-bake pumpkin pie with a spicy gingersnap crust that sets up perfectly in the refrigerator. This easy, make-ahead dessert is ideal for Thanksgiving or any fall gathering, with a mousse-like filling that slices cleanly every time.
- Prep Time: 30 minutes
- Cook Time: 0 minutes
- Total Time: 6 hours 30 minutes (includes chilling)
- Yield: 8 servings 1x
- Category: Dessert
- Cuisine: American
Ingredients
- 2 cups (about 200g) gingersnap cookie crumbs
- 6 tablespoons (85g) unsalted butter, melted
- 2 tablespoons (25g) granulated sugar
- ¼ teaspoon salt
- 8 ounces (226g) cream cheese, softened
- 1 cup (240ml) heavy whipping cream
- 1 cup (245g) canned pumpkin puree
- ¾ cup (150g) packed light brown sugar
- 1 teaspoon vanilla extract
- 1½ teaspoons pumpkin pie spice
- ¼ teaspoon salt
- 1 tablespoon (7g) powdered gelatin
- 3 tablespoons (45ml) cold water
Instructions
- Make the crust: Crush gingersnaps into fine crumbs. In a medium bowl, combine crumbs with melted butter, sugar, and salt. Press firmly into a 9-inch pie plate, starting with the sides then the bottom. Refrigerate for at least 30 minutes.
- Bloom the gelatin: In a small microwave-safe bowl, sprinkle gelatin over cold water. Let sit for 5 minutes without stirring.
- Whip the cream: In a large bowl, whip cold heavy cream to stiff peaks. Refrigerate until needed.
- Make the filling base: In another large bowl, beat softened cream cheese until smooth. Add brown sugar and beat for 1 minute. Add pumpkin puree, vanilla, pumpkin pie spice, and salt; beat until smooth.
- Melt and add gelatin: Microwave bloomed gelatin for about 10 seconds until liquid. With mixer on low, slowly pour melted gelatin into pumpkin mixture and mix until fully incorporated.
- Fold together: Add one-third of the whipped cream to the pumpkin mixture and gently fold. Add remaining whipped cream and fold until no white streaks remain.
- Assemble and chill: Spoon filling into chilled crust, spread evenly, and tap gently to release air bubbles. Cover with plastic wrap and refrigerate for at least 6 hours, preferably overnight.
Notes
For best results, let the pie chill overnight. The flavors meld and deepen, and the filling sets perfectly for clean slices. If using homemade pumpkin puree, strain it first to remove excess moisture. For a dairy-free version, use dairy-free cream cheese and coconut cream.
Nutrition
- Serving Size: 1 slice
- Calories: 385
- Sugar: 27
- Sodium: 320
- Fat: 24
- Saturated Fat: 14
- Carbohydrates: 39
- Fiber: 2
- Protein: 5
Keywords: no-bake pumpkin pie, gingersnap crust, pumpkin dessert, Thanksgiving pie, easy pumpkin pie, make-ahead dessert



