Love this? Save it for later!
Share the inspiration with your friends
October, and the only thing my six-year-old wants is candy corn. Not to eat, mind you—she wants to look at it. She lines the little triangles up on the kitchen counter like tiny traffic cones, arranging them by color, then rearranging them. I stood there watching her one rainy Tuesday afternoon, and it hit me: candy corn is basically just a garnish in our house. It sits in the bowl looking festive until March, when I finally throw the sad, dusty remnants away.
So I grabbed a bag of marshmallows, a stick of butter, and the box of cereal on top of the fridge. I figured if I couldn’t get her to eat the candy corn, I could at least make her want to eat around it. And that is exactly how these Easy Candy Corn Rice Krispie Treats were born—out of a mom’s mild frustration and a pantry that refused to cooperate.
The first batch was a mess, honestly. Too sticky, too sweet, and the candy corn bled its orange into the marshmallow in a way that looked more like a science experiment than a dessert. But the second batch? That was the one. The candy corn stayed intact, the marshmallow stayed soft, and my daughter ate three of them before I could even snap a picture. That’s when I knew I had something worth sharing.
These aren’t fancy. They aren’t complicated. They’re just really, really good—the kind of treat that makes you feel like you’ve got your act together even when you’re just winging it. And honestly, that’s my favorite kind of recipe.
Why You’ll Love This Recipe
Let me tell you why these Easy Candy Corn Rice Krispie Treats have become my go-to for fall gatherings, classroom parties, and lazy Sunday afternoons.
- No oven required. You don’t even need to turn on your stove for more than a few minutes. This is a stovetop-and-microwave situation, which means your kitchen stays cool and your energy bill stays low.
- Three main ingredients. Marshmallows, butter, and crispy rice cereal. That’s it. The candy corn is technically optional, but why would you skip it?
- Ready in 20 minutes. From start to finish, including the time it takes to stare at the marshmallows melting and question your life choices. Twenty minutes, I promise.
- Perfect for Halloween parties. These look adorable on a dessert table next to our Crispy Bacon Wrapped Smokies or a bowl of Easy Buffalo Chicken Dip. They balance out the savory stuff beautifully.
- Kid-approved and adult-friendly. My husband rolled his eyes when he saw me making these. Then he ate four. The man has no shame, and neither should you.
What makes these different from every other rice krispie treat recipe out there? It’s the texture. Most recipes end up either rock-hard or soggy within hours. These stay soft and chewy for days—if they last that long, which they won’t. The secret is in how you handle the marshmallows, and I’ll walk you through every step.
What Ingredients You Will Need
This recipe uses simple, pantry-friendly ingredients that come together in a way that feels almost magical. No fancy shopping trips. No obscure items you’ll use once and forget about.
- 6 tablespoons unsalted butter (salted works too, just cut back on any added salt). I prefer using unsalted so I can control the salt level myself. Kerrygold is my go-to for the richest flavor, but any brand works fine.
- 10 ounces mini marshmallows (about one standard bag, plus a little extra if you’re feeling generous). The mini ones melt faster and more evenly than the big ones, which matters more than you think.
- 6 cups crispy rice cereal (like Rice Krispies or a store brand). I’ve tested this with generic cereal and honestly couldn’t tell the difference, so save your money.
- 1 cup candy corn (plus extra for topping). Get the classic Brach’s or a seasonal brand—just make sure it’s fresh. Stale candy corn gets hard and weirdly chalky.
- 1/4 teaspoon vanilla extract (optional, but highly recommended). It rounds out the sweetness and makes everything taste more like a treat and less like straight sugar.
- Pinch of salt (if using unsalted butter). Don’t skip this. Salt makes the sweetness pop and keeps the whole thing from being cloying.
If you’re looking for a dairy-free option, swap the butter for a plant-based alternative like Miyoko’s or Earth Balance. The texture will be slightly different—a little less firm—but still delicious. And if you want to add a fall twist, stir in 1/4 teaspoon of pumpkin pie spice along with the vanilla. It gives the treats a subtle warmth that pairs beautifully with the candy corn.
One more thing: don’t use stale marshmallows. I know that sounds silly, but if your marshmallows have been sitting open in the pantry for three months, they won’t melt properly. You’ll end up with a grainy, lumpy mess. Fresh bag, people. Trust me on this.
Equipment Needed
You don’t need much for these Easy Candy Corn Rice Krispie Treats, which is part of the appeal. Here’s what you’ll need:
- Large pot or Dutch oven (at least 4 quarts). You need room to stir everything without it spilling over the sides. I use my old enameled cast iron pot, but any heavy-bottomed pot works.
- Rubber spatula (silicone, preferably). Metal spoons will scratch your pot and also make you want to cry when the marshmallow sticks to them. A silicone spatula is your best friend here.
- 9×13 inch baking dish (or a 9×9 for thicker treats). I use a glass dish because I can see how evenly the mixture spreads, but metal works too.
- Parchment paper (not wax paper—learn from my mistakes). Parchment makes lifting the treats out a dream. Wax paper will melt and stick, and you will hate yourself.
- Sharp knife (for cutting clean squares). A dull knife will squish the treats and make them look sad. Use something sharp and wipe it clean between cuts.
- Small bowl of water (for wetting your hands or spatula). Marshmallow is sticky. Water is the antidote. Keep it handy.
If you don’t have a 9×13 dish, you can use a sheet pan with raised edges. The treats will be thinner, but they’ll still taste the same. I’ve also made these in a muffin tin for individual portions—just grease the cups well and press the mixture in with wet fingers.
Preparation Method
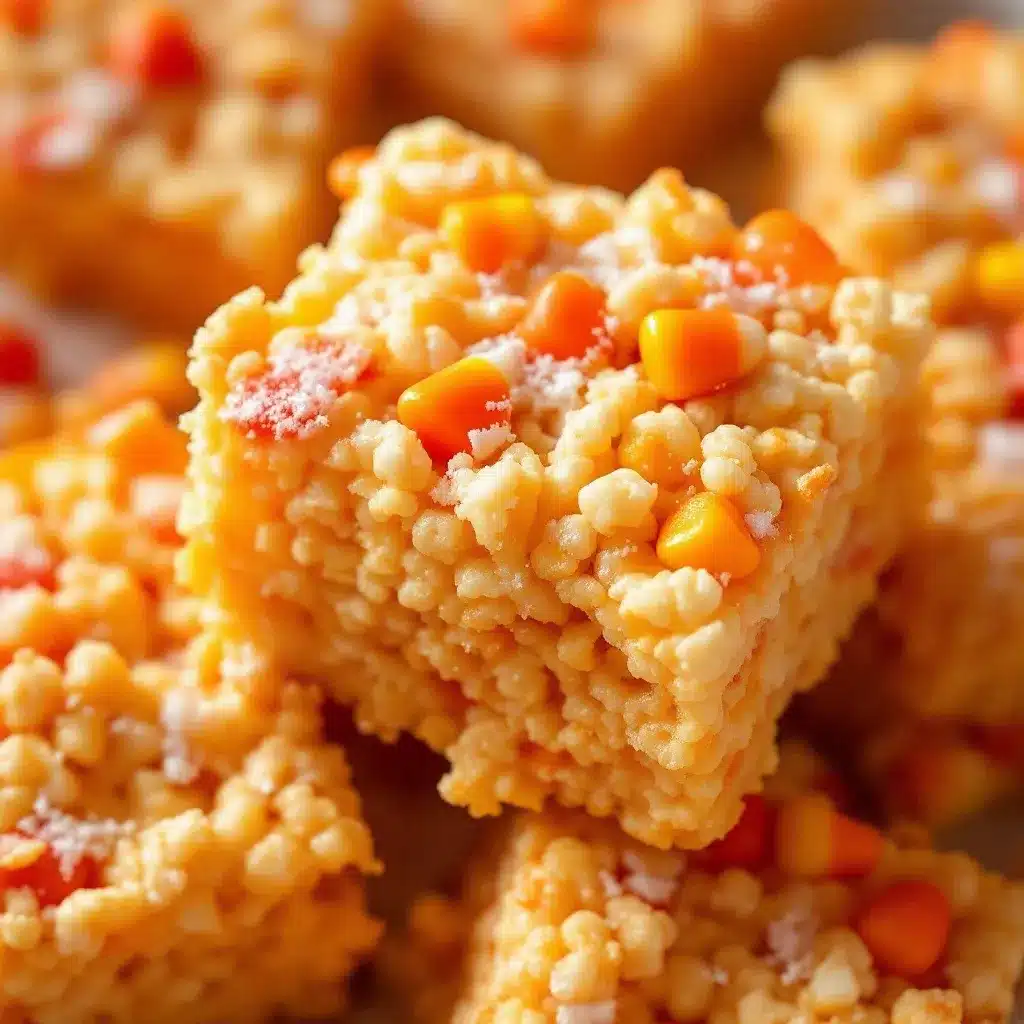
Let’s make these Easy Candy Corn Rice Krispie Treats. I’ll walk you through every step so you don’t end up with a sticky disaster like I did the first time.
- Prep your pan. Line your 9×13 baking dish with parchment paper, leaving a few inches of overhang on two sides. This creates little handles that make lifting the finished treats out super easy. Lightly grease the parchment with butter or cooking spray so nothing sticks.
- Melt the butter. Place your large pot over medium-low heat and add the 6 tablespoons of butter. Let it melt slowly, swirling the pan occasionally. You want it fully melted but not bubbling aggressively—gentle heat is the key here. This takes about 2-3 minutes.
- Add the marshmallows. Dump the entire 10-ounce bag of mini marshmallows into the melted butter. Stir constantly with your rubber spatula. The marshmallows will start to puff up and then collapse into a gooey, glossy pool. Keep stirring until the mixture is completely smooth with no lumps. This takes about 5-7 minutes. Don’t walk away—burnt marshmallow smells terrible and tastes worse.
- Add vanilla and salt. Once the marshmallows are fully melted, remove the pot from the heat. Stir in the vanilla extract and salt (if using). The mixture will smell incredible at this point—like a warm, buttery hug.
- Fold in the cereal. Add the 6 cups of crispy rice cereal all at once. Fold it gently into the marshmallow mixture using a cutting and folding motion. Don’t stir vigorously or you’ll crush the cereal into dust. You want the cereal to stay mostly intact so the treats have that satisfying crunch. This takes about 2 minutes of gentle folding.
- Add the candy corn. Once the cereal is mostly coated, sprinkle in 1 cup of candy corn. Fold it in gently, just a few turns. You don’t want to overmix or the candy corn will start to melt and streak orange everywhere. Some pieces will stay visible, others will hide inside—that’s perfect.
- Transfer to the pan. Scrape the mixture into your prepared baking dish. Don’t dump it all in one spot—spread it around as evenly as you can with your spatula.
- Press it flat. Here’s the trick: wet your hands with a little water (or lightly grease your spatula) and press the mixture firmly into an even layer. The water prevents the marshmallow from sticking to your hands. Press firmly but not aggressively—you want the treats to hold together without being compacted into bricks. Sprinkle extra candy corn on top and press them in gently.
- Let them set. Let the treats cool at room temperature for at least 30 minutes. Don’t rush this step. If you cut them too soon, they’ll fall apart and you’ll be eating crumbly marshmallow cereal with a spoon. Not that I’ve done that. Multiple times.
- Cut and serve. Lift the treats out of the pan using the parchment overhang. Place them on a cutting board and use a sharp knife to cut into squares. Wipe the knife clean between cuts for neat edges. I usually get 12-16 squares depending on how big I cut them.
Cooking Tips & Techniques
I’ve made these Easy Candy Corn Rice Krispie Treats at least a dozen times, and I’ve learned a few things the hard way. Here are my best tips so you don’t have to repeat my mistakes.
Use low heat. I cannot stress this enough. High heat will scorch the marshmallows and leave you with a bitter, brown mess. Low and slow is the way. The marshmallows will melt eventually—be patient.
Don’t overmix the cereal. I know it’s tempting to keep stirring until everything looks perfectly uniform, but stop a few turns early. Overmixing crushes the cereal and makes the treats dense and sad. You want some texture variation.
Watch the candy corn. Candy corn is basically just sugar, which means it melts fast. If you stir it too much or add it while the marshmallow is still screaming hot, you’ll end up with orange-streaked treats that look tie-dyed. That’s fine for a fun twist, but if you want distinct candy corn pieces, fold it in gently and let the mixture cool for a minute before adding.
Press with wet hands. This is the single most important tip for getting an even layer without sticking. Keep a small bowl of water nearby and dip your fingers before pressing. Re-wet as needed. Your hands will thank you, and your treats will look professional.
Cut with a wet knife. Same logic applies here. Run your knife under warm water and wipe it dry before each cut. The warm blade glides through the marshmallow without dragging or squishing. It makes a noticeable difference.
I once forgot to grease the parchment and ended up peeling paper off each treat like a weird, sticky puzzle. Don’t be me. Grease everything.
Variations & Adaptations
These Easy Candy Corn Rice Krispie Treats are surprisingly versatile. Here are some ways to switch things up depending on your mood or what you have on hand.
Chocolate drizzle. Melt 1/2 cup of dark or white chocolate chips with a teaspoon of coconut oil and drizzle it over the cooled treats. The chocolate adds richness that balances the candy corn sweetness. I did this for a Halloween party and they disappeared in minutes.
Peanut butter twist. Stir 1/3 cup of creamy peanut butter into the marshmallow mixture right after you take it off the heat. The peanut butter adds a savory depth that makes the whole thing taste like a candy bar. My husband’s favorite version by far.
Pumpkin spice version. Add 1/2 teaspoon of pumpkin pie spice and 1/4 teaspoon of cinnamon to the marshmallow mixture along with the vanilla. The warm spices make these feel extra cozy for fall. Pair them with a batch of Cozy Pumpkin Sourdough Bread for a full autumn spread.
Gluten-free option. Most crispy rice cereals are naturally gluten-free, but double-check the label if you’re serving someone with celiac. The rest of the ingredients are gluten-free, so this is an easy adaptation.
Vegan version. Use vegan marshmallows (Dandies brand works great) and plant-based butter. The texture will be slightly softer, but the flavor is spot-on. I tested this for a friend’s vegan Halloween party and nobody knew the difference until I told them.
If you’re feeling extra festive, swap the candy corn for candy pumpkins. Same concept, different shape. Or use a mix of both for a colorful, chaotic treat platter.
Serving & Storage Suggestions
These Easy Candy Corn Rice Krispie Treats are best served at room temperature, right after they’ve set. The texture is soft and chewy with just the right amount of crunch from the cereal and the candy corn.
For presentation, arrange them on a platter with a few extra candy corn pieces scattered around for color. They look especially cute on a white or orange plate for Halloween. If you’re bringing them to a party, stack them in a mason jar or a clear container so everyone can see the layers of candy corn peeking through.
These pair beautifully with a warm drink. Serve them alongside a Cozy Homemade Pumpkin Spice Latte or a cup of hot apple cider for a cozy fall afternoon treat. They also work great on a dessert table next to savory options like Ultimate Game Day Loaded Nacho Bar—the sweet and salty combo always wins.
Storage: Keep the treats in an airtight container at room temperature for up to 5 days. Don’t refrigerate them—the fridge dries them out and makes the cereal stale. If your kitchen is warm, they’ll last about 3 days before starting to get a little too soft.
Freezing: You can freeze these for up to 3 months. Wrap each square individually in plastic wrap, then place them in a freezer bag. Thaw at room temperature for about 30 minutes before serving. The texture won’t be quite as perfect as fresh, but they’re still delicious.
Reheating: If the treats have gone a little stale, pop one in the microwave for 5-10 seconds. It softens the marshmallow and brings back that fresh-from-the-pan texture. Just don’t overdo it or you’ll end up with a puddle.
Nutritional Information & Benefits
Let’s be real—these Easy Candy Corn Rice Krispie Treats are a treat, not a health food. But here’s the estimated breakdown so you know what you’re working with.
Per serving (1 square, based on 16 servings):
- Calories: 185
- Fat: 7g
- Carbohydrates: 30g
- Sugar: 18g
- Protein: 1g
- Sodium: 95mg
The butter provides a small amount of vitamin A, and the cereal is fortified with iron and B vitamins. So technically, there’s some nutritional value buried under all that sugar. I’m not saying these are good for you. I’m saying they’re good for your soul.
If you’re looking for a slightly healthier version, you can use a lower-sugar cereal or reduce the candy corn by half. You can also swap in brown rice cereal for extra fiber. But honestly? Sometimes a treat is just a treat, and that’s okay. These are for the moments when you want something fun and nostalgic without overthinking it.
Keep in mind that candy corn is mostly sugar and corn syrup, so if you’re watching your sugar intake, these are an occasional indulgence, not an everyday snack. But for a Halloween party or a fall gathering? They’re perfect.
Conclusion
These Easy Candy Corn Rice Krispie Treats are exactly what a good recipe should be: simple, reliable, and genuinely fun to eat. They come together in under 30 minutes with ingredients you probably already have, and they deliver that perfect combination of chewy, crunchy, and sweet that makes everyone reach for seconds.
What I love most about this recipe is how adaptable it is. You can dress it up with chocolate or keep it classic. You can make it for a Halloween party or a Tuesday afternoon. It doesn’t judge you, and it doesn’t demand perfection. It just shows up and tastes good.
I’d love to hear how yours turn out. Did you add chocolate? Swap the candy corn for something else? Leave a comment below and tell me about your version. And if you’re looking for more easy, crowd-pleasing recipes, check out our Easy One Bowl Chocolate Chip Pumpkin Bread for another fall favorite.
Go make some treats. You deserve them.
Frequently Asked Questions
Can I use regular marshmallows instead of mini marshmallows?
Yes, but they take longer to melt and you’ll need to stir more carefully to avoid scorching. Mini marshmallows are preferred because they melt faster and more evenly. If you only have large marshmallows, cut them into smaller pieces before adding them to the butter.
Why did my treats turn out hard?
You likely overcooked the marshmallow mixture. Marshmallows become hard and brittle when they’re heated too long or at too high a temperature. Keep the heat low and remove the pot from the stove as soon as the marshmallows are fully melted and smooth. Also, pressing the mixture too firmly into the pan can make the treats dense and hard.
Can I make these ahead of time?
Absolutely. These treats stay fresh at room temperature for up to 5 days in an airtight container. You can also freeze them for up to 3 months. Just wrap each square individually in plastic wrap and thaw at room temperature before serving. They’re perfect for prepping ahead of Halloween parties or classroom celebrations.
How do I keep the candy corn from melting into the treats?
Let the marshmallow mixture cool for 1-2 minutes before adding the candy corn. If the mixture is too hot, the candy corn will melt and create orange streaks. Also, fold the candy corn in gently with just a few turns—overmixing is the main culprit. For the most distinct pieces, press extra candy corn on top after spreading the mixture in the pan.
Can I use a different cereal?
Yes, but the texture will change. Fruity pebbles or cocoa krispies work well for a flavor twist. Avoid anything too heavy or dense, like granola, which won’t hold together properly. If you’re looking for a lower-sugar option, puffed brown rice cereal works great and keeps the treats lighter.
Pin This Recipe!
Best Easy Candy Corn Rice Krispie Treats Recipe

These Easy Candy Corn Rice Krispie Treats are a quick, no-bake fall dessert made with just three main ingredients plus candy corn. They stay soft and chewy for days and are perfect for Halloween parties, classroom treats, or a fun afternoon snack.
- Prep Time: 10 minutes
- Cook Time: 10 minutes
- Total Time: 20 minutes
- Yield: 16 servings 1x
- Category: Dessert
- Cuisine: American
Ingredients
- 6 tablespoons unsalted butter
- 10 ounces mini marshmallows (about 1 standard bag)
- 6 cups crispy rice cereal (like Rice Krispies)
- 1 cup candy corn (plus extra for topping)
- 1/4 teaspoon vanilla extract (optional)
- Pinch of salt (if using unsalted butter)
Instructions
- Prep your pan: Line a 9×13-inch baking dish with parchment paper, leaving a few inches of overhang on two sides. Lightly grease the parchment with butter or cooking spray.
- Melt the butter: Place a large pot over medium-low heat and add 6 tablespoons of butter. Let it melt slowly, swirling occasionally, until fully melted but not bubbling aggressively (about 2-3 minutes).
- Add the marshmallows: Dump the entire 10-ounce bag of mini marshmallows into the melted butter. Stir constantly with a rubber spatula until the marshmallows are completely smooth and melted (about 5-7 minutes). Do not walk away.
- Add vanilla and salt: Remove the pot from the heat. Stir in the vanilla extract and salt (if using).
- Fold in the cereal: Add 6 cups of crispy rice cereal all at once. Fold gently using a cutting and folding motion until the cereal is mostly coated (about 2 minutes). Do not overmix.
- Add the candy corn: Sprinkle in 1 cup of candy corn and fold gently, just a few turns, to distribute without melting the candy corn.
- Transfer to the pan: Scrape the mixture into the prepared baking dish and spread it evenly with the spatula.
- Press it flat: Wet your hands with water (or lightly grease your spatula) and press the mixture firmly into an even layer. Sprinkle extra candy corn on top and press in gently.
- Let them set: Cool at room temperature for at least 30 minutes before cutting.
- Cut and serve: Lift the treats out using the parchment overhang. Place on a cutting board and cut into squares with a sharp knife, wiping the knife clean between cuts. Makes 12-16 squares.
Notes
Use low heat to avoid scorching the marshmallows. Let the marshmallow mixture cool for 1-2 minutes before adding candy corn to prevent melting. Press with wet hands for an even layer. Store in an airtight container at room temperature for up to 5 days. Freeze for up to 3 months.
Nutrition
- Serving Size: 1 square
- Calories: 185
- Sugar: 18
- Sodium: 95
- Fat: 7
- Saturated Fat: 4
- Carbohydrates: 30
- Protein: 1
Keywords: candy corn rice krispie treats, easy halloween dessert, no-bake treats, fall dessert, kid-friendly dessert



