Love this? Save it for later!
Share the inspiration with your friends
Third batch in two weeks, and I finally figured out why the first two just weren’t right. The cheese was leaking out, the bacon was either flabby or burnt, and honestly, I was starting to wonder if oven-baked poppers were a myth. But there’s something about that combination—spicy pepper, cool cream cheese, salty bacon—that kept me pulling another tray out of the fridge at 9 PM on a Tuesday. I’d seen them disappear at every party I’d ever been to, always the first thing gone from the snack table, and I was determined to crack the code at home without a deep fryer.
The problem was always the same: timing. Bacon needs high heat to get crispy, but cream cheese filling just weeps and turns into a greasy mess. I tried pre-cooking the bacon (too chewy by the time the pepper softened), tried cold filling (didn’t help), and tried higher racks (nope). It wasn’t until I started thinking about it backwards—what if the pepper itself needed a head start?—that things finally clicked. And when I pulled that third batch out, the bacon was actually shattering when I bit into it, the jalapeño was tender but still had a little fight, and the filling was molten and contained.
These crispy bacon-wrapped jalapeño poppers are the result of that obsessive week. They’re the kind of appetizer that makes people stand around the kitchen island pretending to have a conversation while they’re really just waiting for the next tray. I’m not saying I’ve made them four more times since then, but I’m also not saying I haven’t. Some recipes just grab you, and this one grabbed me by the collar and wouldn’t let go until I got it right.
Why You’ll Love This Recipe
Let me tell you why these are different from every other popper recipe you’ve tried. First off, the bacon gets genuinely crispy. No flabby, sad bacon here—we’re talking shatter-in-your-mouth texture that actually stays crispy even after they’ve sat out for a bit. That alone took me a dozen tries to figure out, and I’m sharing every shortcut I learned so you don’t have to repeat my mistakes.
- Oven-Baked, Not Fried: No deep fryer needed, no splattering oil, and way less mess. Just a baking sheet and some parchment paper.
- Perfect for Game Day: These disappear faster than anything else on the table. Pair them with our easy buffalo chicken dip for the ultimate spread.
- Simple Ingredients: You only need five things—jalapeños, cream cheese, bacon, and a couple of pantry seasonings. No weird specialty items.
- Crowd-Pleaser: I’ve brought these to three parties in the last month, and every single time someone asked for the recipe before they’d even finished eating.
- Make-Ahead Friendly: Assemble them the night before, pop them in the oven when guests arrive, and look like a hero with zero day-of stress.
The secret here is a two-step baking method that gives the peppers a head start before the bacon even goes on. It sounds counterintuitive, but trust me—it’s the difference between good poppers and the ones people fight over. I tested this against the standard “just wrap and bake” method side by side, and there was no contest. The pre-baked version won every single time, with bacon that actually crunches and a filling that stays exactly where it’s supposed to.
What Ingredients You Will Need
This recipe keeps things simple, but each ingredient plays a specific role. Here’s what you’ll need and why it matters.
- Fresh jalapeños (12-15 medium): Look for firm, dark green peppers with no soft spots. The size matters here—too small and they’re hard to fill, too large and they take forever to cook. Medium ones, about 3-4 inches long, are perfect. If you want less heat, look for ones with smoother skin (those tend to be milder).
- 8 ounces cream cheese, softened: Full-fat is non-negotiable here. Low-fat cream cheese gets watery when it bakes and won’t give you that luscious, thick filling. Let it sit out for at least 30 minutes before mixing, or microwave it for 10 seconds if you’re impatient like me.
- 1/2 cup shredded cheddar cheese: Sharp cheddar adds a tang that cuts through the richness of the cream cheese. You can use Monterey Jack for a milder flavor, or pepper jack if you want extra heat.
- 1/4 cup crumbled cooked bacon (optional but recommended): I know we’re wrapping these in bacon, but mixing a little extra into the filling adds another layer of smoky flavor. Use the pre-cooked bacon bits from a jar in a pinch, but fresh-cooked is better.
- 1/2 teaspoon garlic powder: Don’t use fresh garlic here—it can burn and turn bitter during baking. Garlic powder gives you that savory depth without the risk.
- 1/2 teaspoon onion powder: Same logic as the garlic powder. It adds a subtle sweetness that balances the heat.
- 1/4 teaspoon smoked paprika: This is my secret weapon. It reinforces the smoky bacon flavor and gives the filling a beautiful pale orange color.
- 12-15 slices thin-cut bacon: This is crucial. Thick-cut bacon takes too long to cook through and will leave you with undercooked bacon or overcooked peppers. Thin-cut bacon crisps up perfectly in the same time it takes the peppers to soften. I prefer Wright Brand or Oscar Mayer for consistent thickness.
- Salt and black pepper to taste: Go easy on the salt since the bacon and cheese are already salty.
That’s it. Five core ingredients plus a few pantry spices. Nothing fancy, nothing hard to find, and everything comes together in about 40 minutes from start to finish.
Equipment Needed
You don’t need much for these, which is part of the appeal. Here’s what I use:
- Baking sheet (half-sheet size): A rimmed baking sheet is best to catch any grease drips. I use Nordic Ware because it doesn’t warp at high heat.
- Parchment paper or aluminum foil: Lining the sheet makes cleanup infinitely easier. Trust me on this—the cheese that leaks out will glue itself to an unlined pan.
- Wire cooling rack: This is the game-changer. Placing the poppers on a rack set inside the baking sheet lets air circulate underneath, which means the bacon crisps on the bottom too. If you don’t have one, you can flip them halfway through, but the rack method is better.
- Small paring knife: For cutting the jalapeños. A sharp knife makes cleaner cuts and reduces the chance of slipping.
- Small spoon or melon baller: For scooping out the seeds and membranes. A melon baller is actually perfect for this job.
- Mixing bowl and hand mixer (or fork): A hand mixer makes the filling smooth in about 30 seconds, but a fork and some elbow grease work fine too.
- Kitchen shears: For cutting the bacon slices in half. Much easier than trying to cut them with a knife on a cutting board.
If you don’t have a wire cooling rack, don’t stress. Just flip the poppers halfway through baking and drain any accumulated grease from the pan. It works, just not quite as perfectly.
Preparation Method
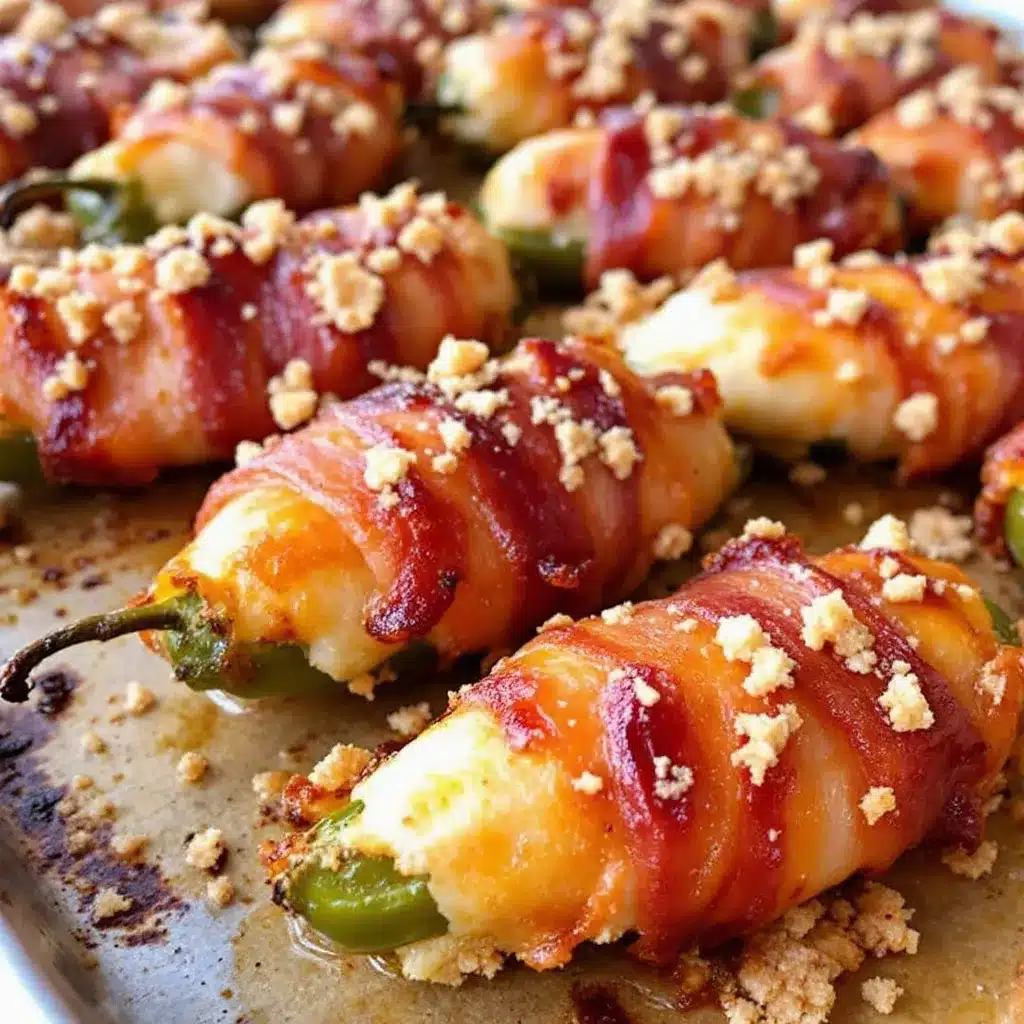
Let’s walk through this step by step. I’ll include all the little details I wish someone had told me the first time.
Step 1: Prep the Jalapeños
Preheat your oven to 400°F (200°C). Line a baking sheet with parchment paper and place a wire rack on top if you have one.
Wash and dry the jalapeños. Cut each one in half lengthwise, right through the stem. Use your small spoon or melon baller to scoop out the seeds and white membranes. This is where the heat lives, so if you want milder poppers, scrape thoroughly. If you like heat, leave a little membrane behind.
Here’s a tip I learned the hard way: wear gloves for this step. I know, I know, nobody wants to put on gloves for five minutes of work. But jalapeño oils stick to your skin and will absolutely find their way into your eyes later, no matter how many times you wash your hands. Ask me how I know. If you don’t have gloves, coat your hands in vegetable oil before handling the peppers—it helps break down the capsaicin.
Step 2: Make the Filling
In a mixing bowl, combine the softened cream cheese, shredded cheddar, crumbled bacon (if using), garlic powder, onion powder, smoked paprika, and a pinch of black pepper. Mix until everything is smooth and evenly combined. Taste it—yes, raw, it’s fine—and adjust seasoning if needed. You want the filling to be well-seasoned because it has to stand up to the bacon and pepper.
If your cream cheese is still a little cold, microwave the mixture for 10-15 seconds to soften it enough to mix smoothly. Just don’t overdo it or you’ll melt the cheese.
Step 3: Fill the Peppers
Spoon about a tablespoon of filling into each jalapeño half. Don’t overstuff them—the filling will puff up a little as it bakes, and you don’t want it overflowing. A slightly rounded spoonful is perfect. Smooth the tops with the back of the spoon so they’re relatively even.
Step 4: Wrap with Bacon
Cut each bacon slice in half crosswise. You’ll have two shorter pieces per slice. Take one piece and wrap it around the middle of a filled jalapeño half, overlapping the ends slightly on the bottom (the cut side). The bacon should cover the filling completely, with the ends tucked underneath.
This is where the rack comes in handy—the ends of the bacon stay tucked under the pepper instead of unrolling. If you’re baking directly on the pan, place the poppers seam-side down to hold the bacon in place.
Step 5: The Two-Step Bake
Here’s the trick that makes these work. Place the filled, wrapped poppers on the wire rack (or directly on the lined baking sheet) and bake at 400°F (200°C) for 10 minutes. This gives the jalapeños a head start on softening and lets some of the bacon fat start rendering.
After 10 minutes, flip each popper carefully with tongs. The bacon should be starting to brown but not yet crispy. Bake for another 12-15 minutes, until the bacon is deep golden brown and crispy, and the jalapeños are tender when pierced with a fork.
If your bacon isn’t as crispy as you’d like after 25 total minutes, switch the oven to broil for 1-2 minutes. Watch them like a hawk—broil can go from perfect to burnt in about 30 seconds flat.
Step 6: Rest and Serve
Let the poppers rest on the rack for 5 minutes before serving. This lets the filling set up slightly so it doesn’t ooze out when you bite into them. They’re hot, so the rest time also prevents burned mouths.
Serve warm, with ranch dressing or sour cream for dipping if you want to cool things down. I like them just as they are, but a little dip never hurt anybody.
Cooking Tips & Techniques
I made every mistake in the book so you don’t have to. Here’s what I learned:
Don’t skip the pre-bake flip. I know it seems fussy, but flipping the poppers halfway through is what gives you even cooking. The bottoms of the peppers get a chance to soften, and the bacon crisps on both sides. Skip this step and you’ll have flabby bacon on the bottom.
Use a thermometer if you’re nervous. The internal temperature should reach 165°F (74°C) for food safety, but honestly, if the bacon is crispy and the peppers are tender, you’re there.
Watch for cheese leakage. If you overfill the peppers, the cream cheese mixture will bubble out and create a mess. A little leakage is normal, but if you see a pool of cheese forming on the pan, spoon it off or it’ll burn and smoke.
Let them rest. I know they smell amazing and you want to eat them immediately. But that 5-minute rest is non-negotiable. The filling is molten hot straight out of the oven, and biting into one too soon is a guaranteed roof-of-mouth burn. I speak from experience.
Batch cooking tip: These reheat beautifully in an air fryer at 350°F (175°C) for 3-4 minutes. The air fryer actually re-crisps the bacon better than the microwave ever could.
Variations & Adaptations
Once you’ve mastered the basic recipe, here are some ways to change it up:
Spicy Version
Leave some of the membranes in the jalapeños, add 1/4 teaspoon cayenne pepper to the filling, and use pepper jack cheese instead of cheddar. For extra heat, drizzle with hot honey before serving.
Smoky BBQ Version
Mix 2 tablespoons of your favorite barbecue sauce into the cream cheese filling, and brush the bacon-wrapped poppers with additional BBQ sauce during the last 5 minutes of baking. These taste like little smoked meat bombs.
Keto-Friendly Version
This recipe is already low-carb as written—just skip the optional crumbled bacon in the filling if you’re watching calories, or add more cheese instead. Each popper has about 2 grams of carbs, mostly from the peppers.
Air Fryer Method
If you don’t want to heat up the oven, these work great in an air fryer. Cook at 375°F (190°C) for 10-12 minutes, flipping halfway through. You might need to work in batches depending on the size of your air fryer basket.
Dairy-Free Adaptation
Use dairy-free cream cheese and vegan shredded cheese. The texture won’t be exactly the same—it’ll be a bit softer—but the flavor is still fantastic. I’ve tested this with Kite Hill cream cheese and it works well.
Serving & Storage Suggestions
These poppers are best served warm, straight from the oven, but they’re still pretty great at room temperature for about an hour. I’ve brought them to potlucks and tailgates where they sat out for a while, and they were still the first thing gone.
For serving: Arrange them on a platter with a small bowl of ranch dressing, blue cheese dressing, or sour cream in the center. A sprinkle of fresh chopped chives or green onions on top adds a nice pop of color. They pair perfectly with game day slow cooker chili for a full spread.
For storage: Let any leftover poppers cool completely, then store them in an airtight container in the refrigerator for up to 3 days. The bacon will lose some of its crispiness, but they’re still delicious.
For reheating: The air fryer is your best friend here. Reheat at 350°F (175°C) for 3-4 minutes. The oven works too—350°F (175°C) for 8-10 minutes—but the air fryer gets the bacon crispy again. The microwave works in a pinch (30 seconds), but the bacon will be soft.
To make ahead: Assemble the poppers completely, arrange them on a baking sheet, and refrigerate uncovered for up to 24 hours. Bake straight from the fridge, adding 2-3 minutes to the cooking time. You can also freeze them unbaked for up to 3 months—just bake from frozen, adding 5-7 minutes.
Nutritional Information & Benefits
Per popper (based on 12 servings, using full-fat ingredients):
- Calories: 145
- Fat: 12g
- Carbohydrates: 2g
- Fiber: 0.5g
- Protein: 6g
- Sodium: 320mg
These are naturally low-carb and keto-friendly, making them a great option for anyone watching their carb intake. The jalapeños themselves are a good source of vitamin C and contain capsaicin, which has been shown to boost metabolism slightly. The cream cheese and cheddar provide calcium and protein, while the bacon adds a little extra protein and a whole lot of flavor.
If you’re watching sodium, you can use low-sodium bacon and reduce the added salt in the filling. The smoked paprika and garlic powder add plenty of flavor without extra salt.
Conclusion
These crispy bacon-wrapped jalapeño poppers are the appetizer that keeps on giving. They’re simple enough for a Tuesday night snack, impressive enough for a party, and adaptable enough to fit almost any dietary need. The two-step baking method is the secret that makes the bacon actually crispy and the peppers perfectly tender, and once you try it, you’ll never go back to the old way.
I love these because they remind me that sometimes the best recipes come from stubbornly refusing to give up on a good idea. I could have settled for mediocre poppers, but I knew there was a better version hiding in there somewhere. And now you have it too.
If you make these, I want to hear about it. Leave a comment below telling me how they turned out, what variations you tried, or if you found an even better way to get that bacon crispy. Tag me in your photos on social media—I love seeing your creations. And if you’re looking for another game day favorite, don’t miss our crispy bacon-wrapped smokies for the perfect sweet and savory pairing.
Happy cooking, and remember: the best poppers are the ones you share.
Frequently Asked Questions
Can I use pre-cooked bacon?
I don’t recommend it. Pre-cooked bacon doesn’t render enough fat to crisp up properly, and it tends to get chewy and tough. Stick with raw thin-cut bacon for the best results.
How do I make these less spicy?
Remove all the seeds and white membranes from the jalapeños—that’s where most of the heat lives. You can also use mini sweet peppers instead of jalapeños for a completely mild version.
Can I grill these instead of baking?
Absolutely. Grill them over medium heat (350-375°F) for about 15-20 minutes, turning occasionally, until the bacon is crispy and the peppers are tender. Keep an eye on flare-ups from the bacon grease.
How do I keep the bacon from unrolling?
Make sure the ends of the bacon are tucked underneath the pepper, and place them seam-side down on the rack or baking sheet. The weight of the pepper holds the bacon in place as it cooks.
Can I double this recipe?
Easily. Just use two baking sheets and rotate them halfway through cooking. You might need to add a few minutes to the baking time if your oven is crowded. Just watch for the bacon to be crispy and the peppers to be tender.
Pin This Recipe!
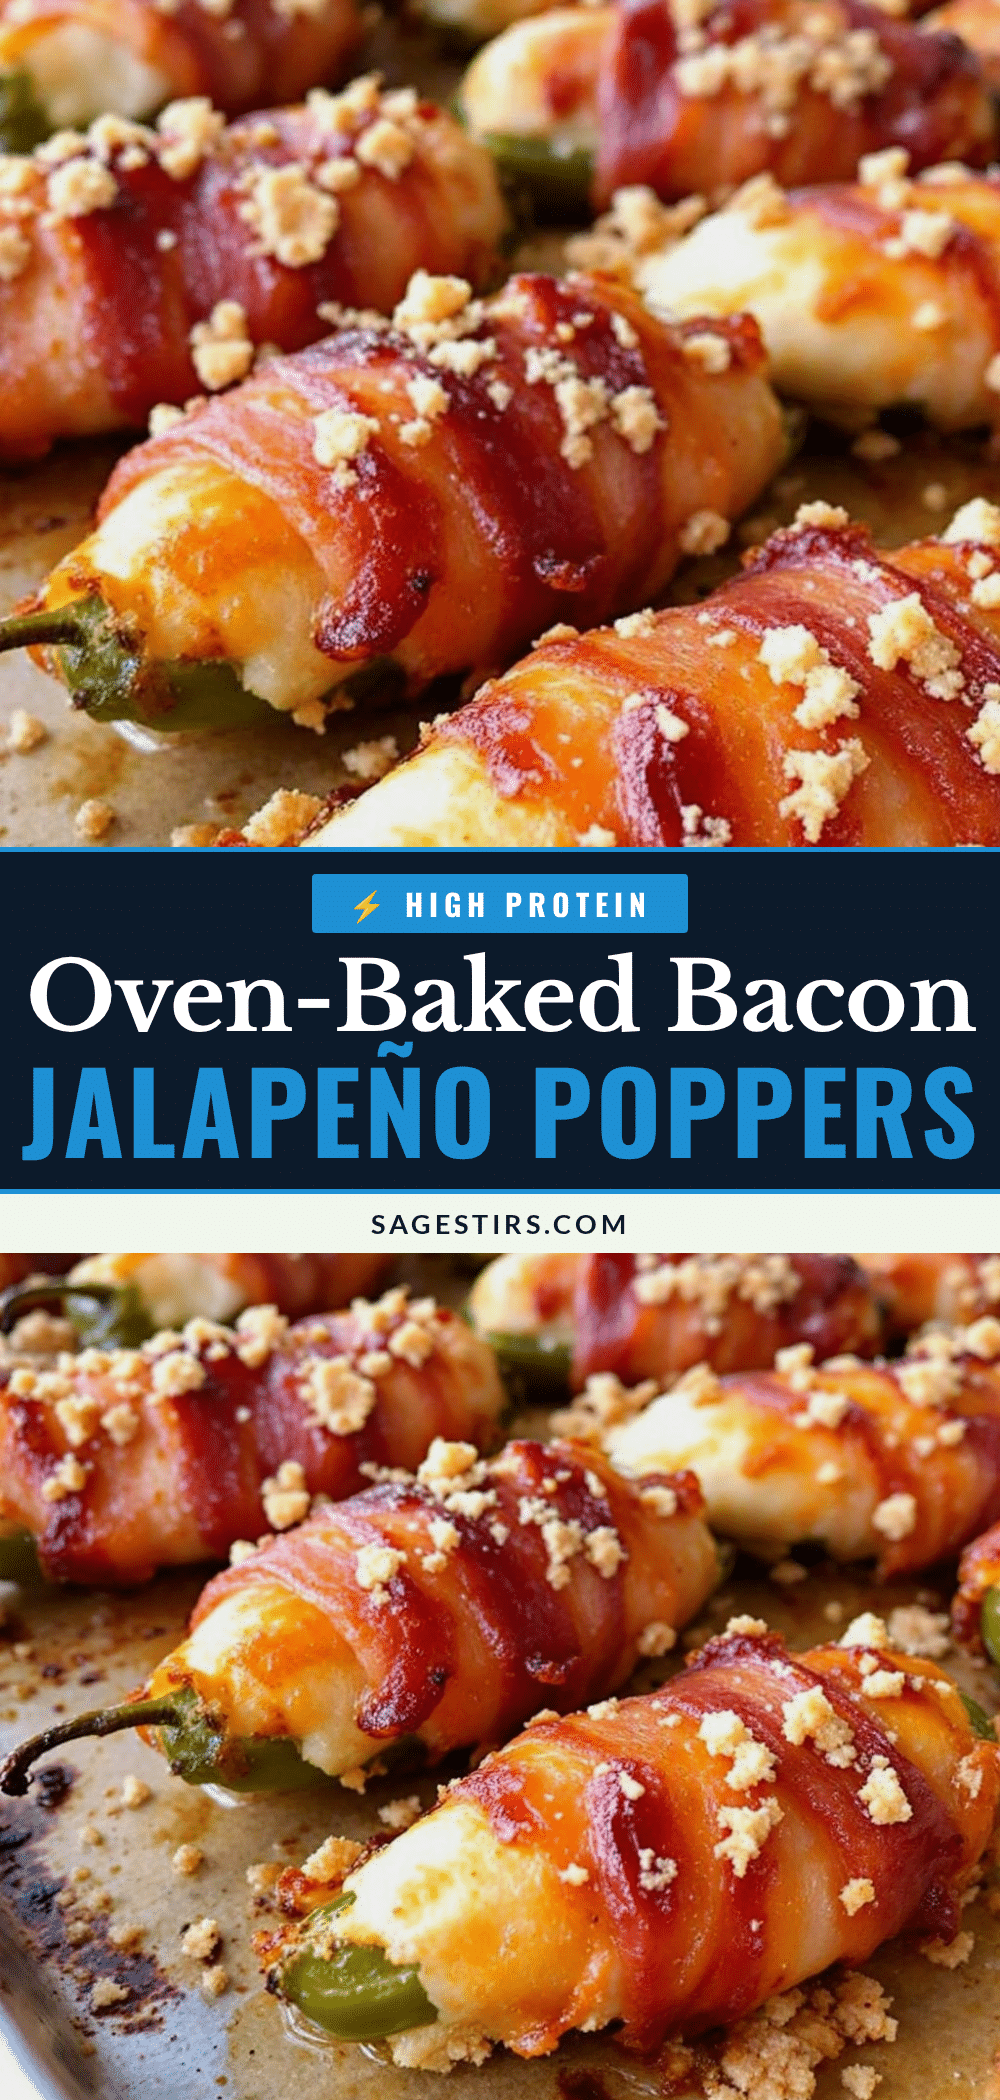
Baked Crispy Bacon-Wrapped Jalapeño Poppers (Easy Recipe)

These oven-baked jalapeño poppers feature a two-step baking method that ensures crispy bacon, tender peppers, and a molten cream cheese filling. Perfect for game day or any gathering, they’re simple to make and disappear fast.
- Prep Time: 20 minutes
- Cook Time: 25 minutes
- Total Time: 45 minutes
- Yield: 12 servings 1x
- Category: Appetizer
- Cuisine: American
Ingredients
- 12–15 fresh jalapeños, medium (about 3–4 inches long)
- 8 ounces cream cheese, softened
- 1/2 cup shredded sharp cheddar cheese
- 1/4 cup crumbled cooked bacon (optional)
- 1/2 teaspoon garlic powder
- 1/2 teaspoon onion powder
- 1/4 teaspoon smoked paprika
- 12–15 slices thin-cut bacon
- Salt and black pepper to taste
Instructions
- Preheat oven to 400°F (200°C). Line a baking sheet with parchment paper and place a wire rack on top if available.
- Wash and dry jalapeños. Cut each in half lengthwise through the stem. Use a small spoon or melon baller to remove seeds and white membranes. Wear gloves to avoid skin irritation.
- In a mixing bowl, combine softened cream cheese, shredded cheddar, crumbled bacon (if using), garlic powder, onion powder, smoked paprika, and a pinch of black pepper. Mix until smooth and evenly combined. Adjust seasoning to taste.
- Spoon about 1 tablespoon of filling into each jalapeño half. Do not overstuff; smooth tops with the back of the spoon.
- Cut each bacon slice in half crosswise. Wrap one piece around the middle of each filled jalapeño half, overlapping ends on the bottom (cut side). Place seam-side down on the wire rack or baking sheet.
- Bake for 10 minutes. Flip each popper carefully with tongs. Bake for another 12-15 minutes, until bacon is deep golden brown and crispy, and jalapeños are tender. If needed, broil for 1-2 minutes for extra crispiness, watching closely.
- Let poppers rest on the rack for 5 minutes before serving. Serve warm with ranch dressing or sour cream if desired.
Notes
The two-step baking method (pre-bake then flip) is key for crispy bacon and tender peppers. Wear gloves when handling jalapeños. Let poppers rest 5 minutes before serving to prevent burns. Reheat in an air fryer at 350°F for 3-4 minutes for best results.
Nutrition
- Serving Size: 1 popper
- Calories: 145
- Sugar: 1
- Sodium: 320
- Fat: 12
- Saturated Fat: 6
- Carbohydrates: 2
- Fiber: 0.5
- Protein: 6
Keywords: jalapeño poppers, bacon wrapped, baked appetizer, game day snack, keto appetizer, low carb



