Love this? Save it for later!
Share the inspiration with your friends
My phone buzzed against the counter at 2:47 PM on a Saturday. I was in sweatpants, halfway through a mediocre sandwich, and mentally preparing for a quiet evening of bad TV. It was my brother. “Hey, so the guys are coming over in two hours to watch the game. Like, twelve of them. And everyone’s bringing someone. Can you… you know… handle the food?”
I looked at my fridge. A pound of ground beef I’d planned to turn into tacos on Monday. Half a block of cheddar. A bag of frozen fries that were definitely not going to be enough for a side dish. And a jar of pickled jalapeños that had been sitting there since last football season. Classic. This wasn’t a crisis though—it was a challenge. And honestly, the best stuff I’ve ever made came from moments exactly like this one. When you don’t have time to overthink, you just have to cook.
That’s how this Best Game Day Chili Cheese Fries Casserole was born. It wasn’t planned, it wasn’t pretty at first, but man, it worked. The guys devoured it before halftime. My brother texted me the next day asking for the recipe—a sentence he has never uttered in his entire life. I knew I’d stumbled onto something real. This isn’t fancy food. It’s honest, messy, crowd-feeding food that makes people happy without making you sweat. And it takes thirty minutes from start to finish. Let’s make it together.
Why You’ll Love This Recipe
I’ve tested this casserole about seven times since that first chaotic Saturday. I made it for a potluck, for a birthday party, and once just for myself on a Tuesday because I needed comfort food that didn’t require a nap afterward. Every single time, people asked for the recipe. Here’s why this one sticks.
- Ready in 30 Minutes: From the moment you start browning the beef to the second you pull it out of the oven, this whole thing comes together in half an hour. No slow simmering, no complicated steps. Perfect for last-minute game day plans or weeknight cravings.
- Simple Pantry Ingredients: You probably have most of this stuff already. Ground beef, frozen fries, cheese, chili seasoning. No trips to a specialty store, no weird ingredients you’ll never use again.
- Perfect for Feeding a Crowd: This casserole is built for game day, potlucks, or any situation where you need to feed hungry people without standing over the stove all night. It scales up beautifully too—just double everything and use a bigger dish.
- Crowd-Pleaser Guaranteed: I’ve served this to kids, picky eaters, and grown men who claim they don’t like casseroles. It disappears every single time. The combination of crispy fries, savory chili, and melty cheese is basically impossible to resist.
- Unbelievably Satisfying: This isn’t one of those “healthy-ish” compromises. It’s the real deal—loaded, cheesy, and completely indulgent. But it comes together so fast that you don’t have to plan your whole day around it.
What makes this casserole different from every other chili cheese fry recipe out there? It’s the texture. Most versions turn into a soggy mess. I figured out a simple trick—par-baking the fries before layering—that keeps everything crispy on top and perfectly tender underneath. Plus, I use a quick homemade chili that’s way better than anything from a can. It’s not just another version. It’s the version you’ll actually want to make again.
This is the kind of food that makes people close their eyes after the first bite. It’s comfort food reimagined—faster, easier, but with the same soul-soothing satisfaction. Perfect for impressing guests without stress, or turning a simple Saturday into something memorable.
What Ingredients You Will Need
This recipe uses simple, hearty ingredients to deliver big flavor without the fuss. Most are pantry staples or easy to find at any grocery store. Let’s break down what you’ll need and why each one matters.
For the Chili
- 1 pound ground beef (80/20): I prefer 80/20 for this recipe because the fat adds flavor and keeps the chili moist. You can use leaner beef if you prefer, just add a tablespoon of oil to the pan. I usually grab whatever’s on sale at my local market.
- 1 medium yellow onion, diced: About one cup. Onion adds sweetness and depth. Don’t skip it—it’s the backbone of the chili flavor.
- 3 cloves garlic, minced: Fresh garlic makes a difference here. The jarred stuff works in a pinch, but fresh gives you that punchy aroma.
- 1 can (15 oz) diced tomatoes, undrained: I like fire-roasted tomatoes for extra smoky flavor. Hunt’s or Muir Glen are my go-to brands.
- 1 can (15 oz) kidney beans, drained and rinsed: Adds texture and makes the chili heartier. You can swap for black beans or pinto beans if that’s what you have.
- 2 tablespoons chili powder: This is the main seasoning. I use McCormick or my own blend. Adjust based on your heat preference.
- 1 teaspoon ground cumin: Adds warmth and earthiness. Essential for that classic chili taste.
- 1 teaspoon smoked paprika: This is my secret ingredient. It adds a subtle smokiness that makes the chili taste like it’s been simmering for hours.
- 1/2 teaspoon salt: Start with this and adjust at the end. Different brands of broth and beans have varying salt levels.
- 1/4 teaspoon black pepper: Freshly ground if you can.
- 1/2 cup beef broth: Helps thin the chili to the perfect consistency. Use low-sodium if you’re watching salt intake.
For the Casserole
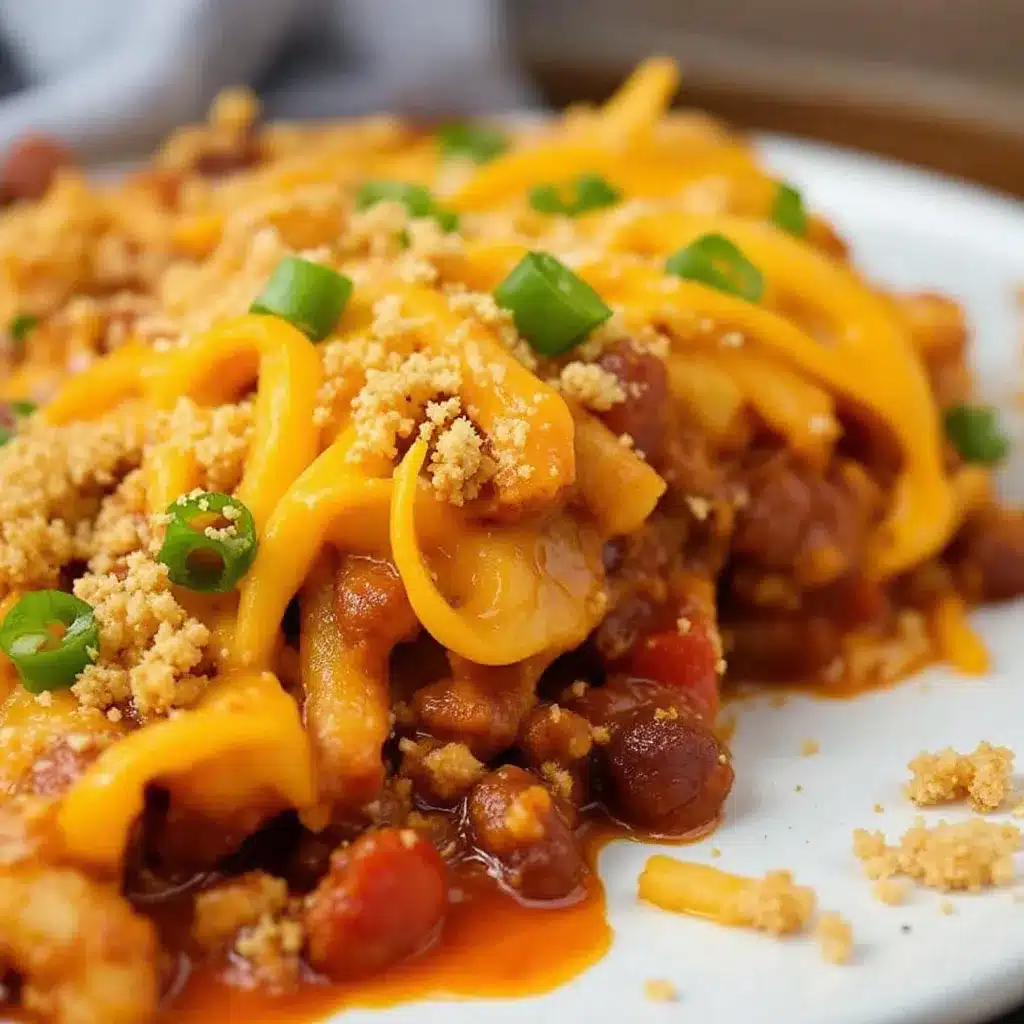
- 1 bag (28 oz) frozen shoestring or crinkle-cut fries: Don’t use steak fries—they take too long to cook through. Shoestring fries get perfectly crispy in the oven. Ore-Ida is my usual pick.
- 2 cups shredded cheddar cheese: Sharp cheddar gives the most flavor. Shred it yourself if you have time—pre-shredded cheese has anti-caking agents that prevent it from melting as smoothly.
- 1 cup shredded Monterey Jack cheese: Adds creaminess and balances the sharp cheddar. You can use all cheddar if that’s what you have.
- 1/4 cup pickled jalapeños, drained: Optional but highly recommended. They add brightness and heat that cuts through all the richness.
- 1/4 cup sliced green onions (for garnish): Adds freshness and color at the end.
- 1/2 cup sour cream (for serving): Optional, but honestly, you’re going to want it.
Ingredient Tip: For the best texture, look for frozen fries that are thin and crispy-cut. Avoid the thick, steak-cut style—they won’t cook through in the same time frame. If you’re feeling ambitious, you can use homemade fries, just par-bake them first until they’re starting to crisp.
Substitution Guidance: Use ground turkey or chicken for a lighter option. For a vegetarian version, swap the beef for a second can of beans and use vegetable broth. Use dairy-free shredded cheese if needed—just know the melt won’t be quite as gooey.
Equipment Needed
You don’t need a fancy kitchen for this recipe. Here’s what you’ll need:
- Large skillet or Dutch oven: For browning the beef and simmering the chili. A 12-inch skillet works perfectly. I use my old cast iron—it holds heat beautifully.
- 9×13-inch baking dish: This is the standard size for this casserole. A ceramic or glass dish works great. If you’re doubling the recipe, use a 9×13-inch or two 8×8-inch dishes.
- Baking sheet: For par-baking the fries. A rimmed baking sheet prevents any mess.
- Cheese grater: If you’re shredding your own cheese. I prefer a box grater—it’s faster than you think.
- Cutting board and knife: For dicing the onion and mincing the garlic.
- Wooden spoon or spatula: For breaking up the ground beef as it cooks.
- Measuring spoons and cups: Standard set for measuring ingredients.
Budget-Friendly Tip: Don’t have a 9×13-inch dish? Use a 10-inch cast iron skillet or a deep pie dish. The cooking time might vary slightly, so keep an eye on it. I’ve made this in a disposable aluminum pan for potlucks—works just fine.
Preparation Method
Let’s get cooking. This whole thing comes together in about 30 minutes, so get your ingredients ready before you start. Trust me, it makes everything smoother.
- Preheat your oven to 425°F (220°C). This high heat is key for getting the fries crispy. Place a baking sheet in the oven while it preheats—this helps the fries start cooking immediately.
- Par-bake the frozen fries. Spread the frozen fries in a single layer on the preheated baking sheet. Bake for 12-15 minutes, or until they’re just starting to turn golden and crispy on the edges. They won’t be fully cooked—that’s fine. They’ll finish in the casserole. This step is non-negotiable if you want crispy fries instead of soggy ones. I learned this the hard way after one batch turned into mush.
- While the fries bake, start the chili. Heat a large skillet over medium-high heat. Add the ground beef and cook, breaking it up with a wooden spoon, until browned—about 5-6 minutes. Don’t drain all the fat; leave about a tablespoon for flavor. If you’re using lean beef, add a tablespoon of oil.
- Add the onion and garlic. Push the beef to one side of the skillet and add the diced onion. Cook for 3-4 minutes until it starts to soften. Add the minced garlic and cook for 30 seconds until fragrant. Stir everything together. Your kitchen should start smelling amazing right about now.
- Add the seasonings. Sprinkle the chili powder, cumin, smoked paprika, salt, and pepper over the beef mixture. Stir and cook for 1 minute. This toasts the spices and wakes up their flavors. Don’t skip this step—it makes a huge difference.
- Add the tomatoes, beans, and broth. Pour in the undrained diced tomatoes, the drained kidney beans, and the beef broth. Stir everything together. Bring the chili to a simmer, then reduce the heat to medium-low. Let it bubble gently for 5-7 minutes, stirring occasionally, until it thickens slightly. The chili should be thick enough to hold its shape—not watery.
- Assemble the casserole. Remove the par-baked fries from the oven. Reduce the oven temperature to 400°F (200°C). Spread the fries evenly in the bottom of your 9×13-inch baking dish. Pour the chili over the top and spread it into an even layer. Sprinkle the shredded cheddar and Monterey Jack cheese evenly over the chili. If you’re using pickled jalapeños, scatter them on top now.
- Bake the casserole. Place the dish in the oven and bake for 12-15 minutes, until the cheese is melted, bubbly, and starting to brown in spots. The edges should be golden and the center should be hot throughout. If you want extra browning, switch to broil for the last 1-2 minutes—but watch it closely so it doesn’t burn.
- Rest and garnish. Remove the casserole from the oven and let it rest for 5 minutes. This allows the layers to set so it doesn’t turn into a soupy mess when you serve it. Sprinkle with sliced green onions and dollop with sour cream if desired.
- Serve immediately. Scoop into bowls or plates and enjoy while it’s hot and gooey. The contrast between the crispy fries, savory chili, and melted cheese is pure magic.
Sensory Cue: When the chili is ready, it should look thick and hearty—not runny. The cheese should be completely melted and stretchy when you pull a spoon through it. The fries on top should have a slight crunch, while the ones underneath are soft and soaked in chili flavor. That contrast is exactly what you want.
Cooking Tips & Techniques
After making this casserole more times than I can count, I’ve picked up a few tricks that make a real difference. Here’s what I’ve learned—including the mistakes I made so you don’t have to.
The Par-Baking Trick is Everything. I cannot stress this enough. The first time I made this, I skipped the par-baking step because I was in a hurry. Big mistake. The fries turned into a sad, soggy layer that nobody wanted to eat. Par-baking them first creates a crispy exterior that holds up to the chili and cheese. It takes an extra 12 minutes, but it’s the difference between amazing and mediocre.
Don’t Overcook the Chili. You want the chili to be thick, but not dry. Simmer it just until it reduces slightly—about 5-7 minutes. If it gets too thick, add a splash more broth. If it’s too thin, let it simmer a few minutes longer. The consistency should be like a hearty pasta sauce, not soup.
Shred Your Own Cheese. I know it’s tempting to buy the pre-shredded bags. But they contain cellulose and other anti-caking agents that prevent the cheese from melting into that glorious, stretchy layer. Shredding a block of cheddar takes two minutes and makes the casserole so much better. Trust me on this one.
Layer Strategically. Don’t just dump everything in the dish. Spread the fries in an even layer, then spoon the chili over them evenly. Make sure the chili reaches the edges so every bite has flavor. Then sprinkle the cheese evenly—don’t pile it all in the middle. Even distribution means every scoop is perfect.
Let It Rest. I know you’re hungry. But letting the casserole rest for 5 minutes after baking is crucial. It allows the cheese to set slightly and the layers to meld together. If you dig in immediately, you’ll end up with a messy plate. Patience pays off here.
Multitasking Strategy: While the fries are par-baking, start the chili. By the time the fries come out, the chili should be simmering. Then assemble and bake. This whole process flows smoothly with no downtime. If you’re making this for a party, you can prep the chili ahead of time and just assemble and bake when guests arrive.
Variations & Adaptations
This casserole is incredibly flexible. Here are some ways to make it your own.
Loaded Baked Potato Style
Swap the frozen fries for frozen potato wedges or diced potatoes. Add crumbled bacon, extra cheese, and a dollop of sour cream on top. It’s like a loaded baked potato in casserole form. I tried this for a potluck and it was gone in ten minutes.
Spicy Southwest Version
Add a diced jalapeño to the chili along with the onion. Use pepper jack cheese instead of Monterey Jack. Top with fresh cilantro and a squeeze of lime. This version has a nice kick without being overwhelming. If you love heat, add a pinch of cayenne pepper to the chili.
Vegetarian Option
Replace the ground beef with a second can of kidney beans or a can of black beans. Use vegetable broth instead of beef broth. The chili will be a bit lighter but still hearty and satisfying. Add some diced bell peppers for extra texture. I’ve made this for vegetarian friends and they loved it.
Smoky Bacon Version
Cook 4-5 slices of bacon until crispy, then crumble them. Use the rendered bacon fat to cook the ground beef instead of oil. Sprinkle the crumbled bacon over the cheese before baking. The smoky flavor takes this casserole to another level. This is my personal favorite for game day.
Low-Carb Adaptation
Replace the frozen fries with roasted cauliflower florets or zucchini slices. Par-bake them the same way. The texture won’t be exactly the same, but the flavor is still incredible. This version works well if you’re watching carbs but still want comfort food.
Serving & Storage Suggestions
Serving: Serve this casserole hot, straight from the oven. I like to set it on a trivet in the middle of the table and let everyone scoop their own portion. It’s casual, fun, and perfect for game day. Top each serving with a dollop of sour cream, a sprinkle of green onions, and maybe some hot sauce if people want extra heat.
What to Serve With It: This casserole is a meal on its own, but it pairs beautifully with a simple side salad dressed with lime vinaigrette to cut through the richness. For a full spread, serve it alongside some crispy baked chicken wings or a bowl of easy buffalo chicken dip with tortilla chips. If you want to round out the meal, a batch of game day slow cooker chili with easy cornbread would be a natural fit—though that might be overkill in the best possible way.
Storage: Leftovers (if you have any) can be stored in an airtight container in the refrigerator for up to 3 days. The fries will soften as they sit, but the flavor is still amazing. I actually love the leftovers the next day—the flavors meld together even more.
Reheating: The best way to reheat this is in the oven at 350°F (175°C) for 10-15 minutes until heated through. The microwave works in a pinch, but the fries will be softer. If you’re reheating in the oven, cover the dish with foil to prevent the cheese from burning.
Freezing: You can freeze the assembled but unbaked casserole. Assemble it in a freezer-safe dish, cover tightly with plastic wrap and foil, and freeze for up to 3 months. To bake, thaw in the refrigerator overnight, then bake as directed. The texture won’t be quite as crispy, but it’s still delicious. I’ve done this for busy weeks and it’s a lifesaver.
Nutritional Information & Benefits
Let’s be honest—this is indulgent comfort food. But here’s a rough estimate of what you’re looking at per serving (based on 8 servings):
- Calories: Approximately 450-500 per serving
- Protein: 25-30 grams (thanks to the beef and beans)
- Carbohydrates: 35-40 grams (mostly from the fries and beans)
- Fat: 25-30 grams (from the beef, cheese, and fries)
- Fiber: 6-8 grams (from the beans and onions)
- Calcium: 20-25% of daily value (from the cheese)
- Iron: 15-20% of daily value (from the beef and beans)
Health Benefits: The kidney beans add fiber and plant-based protein. The tomatoes provide lycopene, an antioxidant linked to heart health. The onions and garlic offer anti-inflammatory compounds. And the cheese gives you a good dose of calcium. Is it health food? No. But it’s real food made from real ingredients, and that counts for something.
Dietary Considerations: This recipe contains dairy (cheese) and gluten (if using standard frozen fries—check the label). For a gluten-free version, use certified gluten-free frozen fries. For a dairy-free version, use dairy-free shredded cheese. The recipe is naturally nut-free and egg-free.
My Take: I believe in balance. This casserole isn’t something I eat every day. But on game day, or a cold winter night, or a Tuesday when I need comfort food—it’s exactly what I want. Food should make you feel good, and this one does. Just pair it with a side of veggies or a salad if you want to round things out.
Conclusion
This Best Game Day Chili Cheese Fries Casserole is everything I want in comfort food—it’s quick, it’s messy, it’s cheesy, and it makes people happy. It came from a moment of panic and turned into a recipe I genuinely love. That’s the thing about cooking. Sometimes the best dishes come from the most unexpected situations.
I hope you make this for your next game day, potluck, or just a random Tuesday. Customize it however you like—add bacon, swap the beans, make it spicy. That’s the beauty of a recipe like this. It’s a starting point, not a rulebook.
If you try it, I’d love to hear how it turned out. Leave a comment below and let me know what variations you tried. Did you add bacon? Did you make it vegetarian? Did your family devour it before halftime? Share your story. And if you’re looking for more game day inspiration, don’t miss my ultimate game day loaded nacho bar with ground beef or these crispy bacon-wrapped smokies with easy brown sugar glaze.
Now go make some memories—and some mess. That’s what game day is all about.
Frequently Asked Questions
Can I make this casserole ahead of time?
Yes! You can assemble the entire casserole (without baking) up to 24 hours in advance. Cover it tightly with foil and refrigerate. When you’re ready to bake, add about 10 minutes to the baking time since you’re starting from cold. The fries won’t be quite as crispy, but the flavor is still fantastic.
Can I use homemade chili instead of the quick version?
Absolutely. If you have leftover chili from a previous meal, this is a great way to use it up. Just warm it up before assembling the casserole. You’ll need about 3-4 cups of chili. If your chili is very thick, you might want to thin it slightly with a bit of broth.
What’s the best type of frozen fries to use?
Shoestring fries or thin crinkle-cut fries work best. They cook quickly and get crispy in the oven. Avoid steak fries or thick wedges—they take too long to cook through and won’t crisp up properly in the short baking time. Ore-Ida Golden Crinkles are my go-to.
Can I double this recipe for a larger crowd?
Yes! Double all the ingredients and use a larger baking dish (or two 9×13-inch dishes). The baking time will be about the same, but you may need to add 5-10 minutes since the dish will be fuller. Keep an eye on the cheese to make sure it doesn’t burn.
How do I keep the fries from getting soggy?
The par-baking step is key. Don’t skip it. Also, make sure your chili is thick—not watery—before layering it over the fries. Let the casserole rest for 5 minutes after baking so the layers set. And serve it immediately. The longer it sits, the softer the fries will get.
Pin This Recipe!
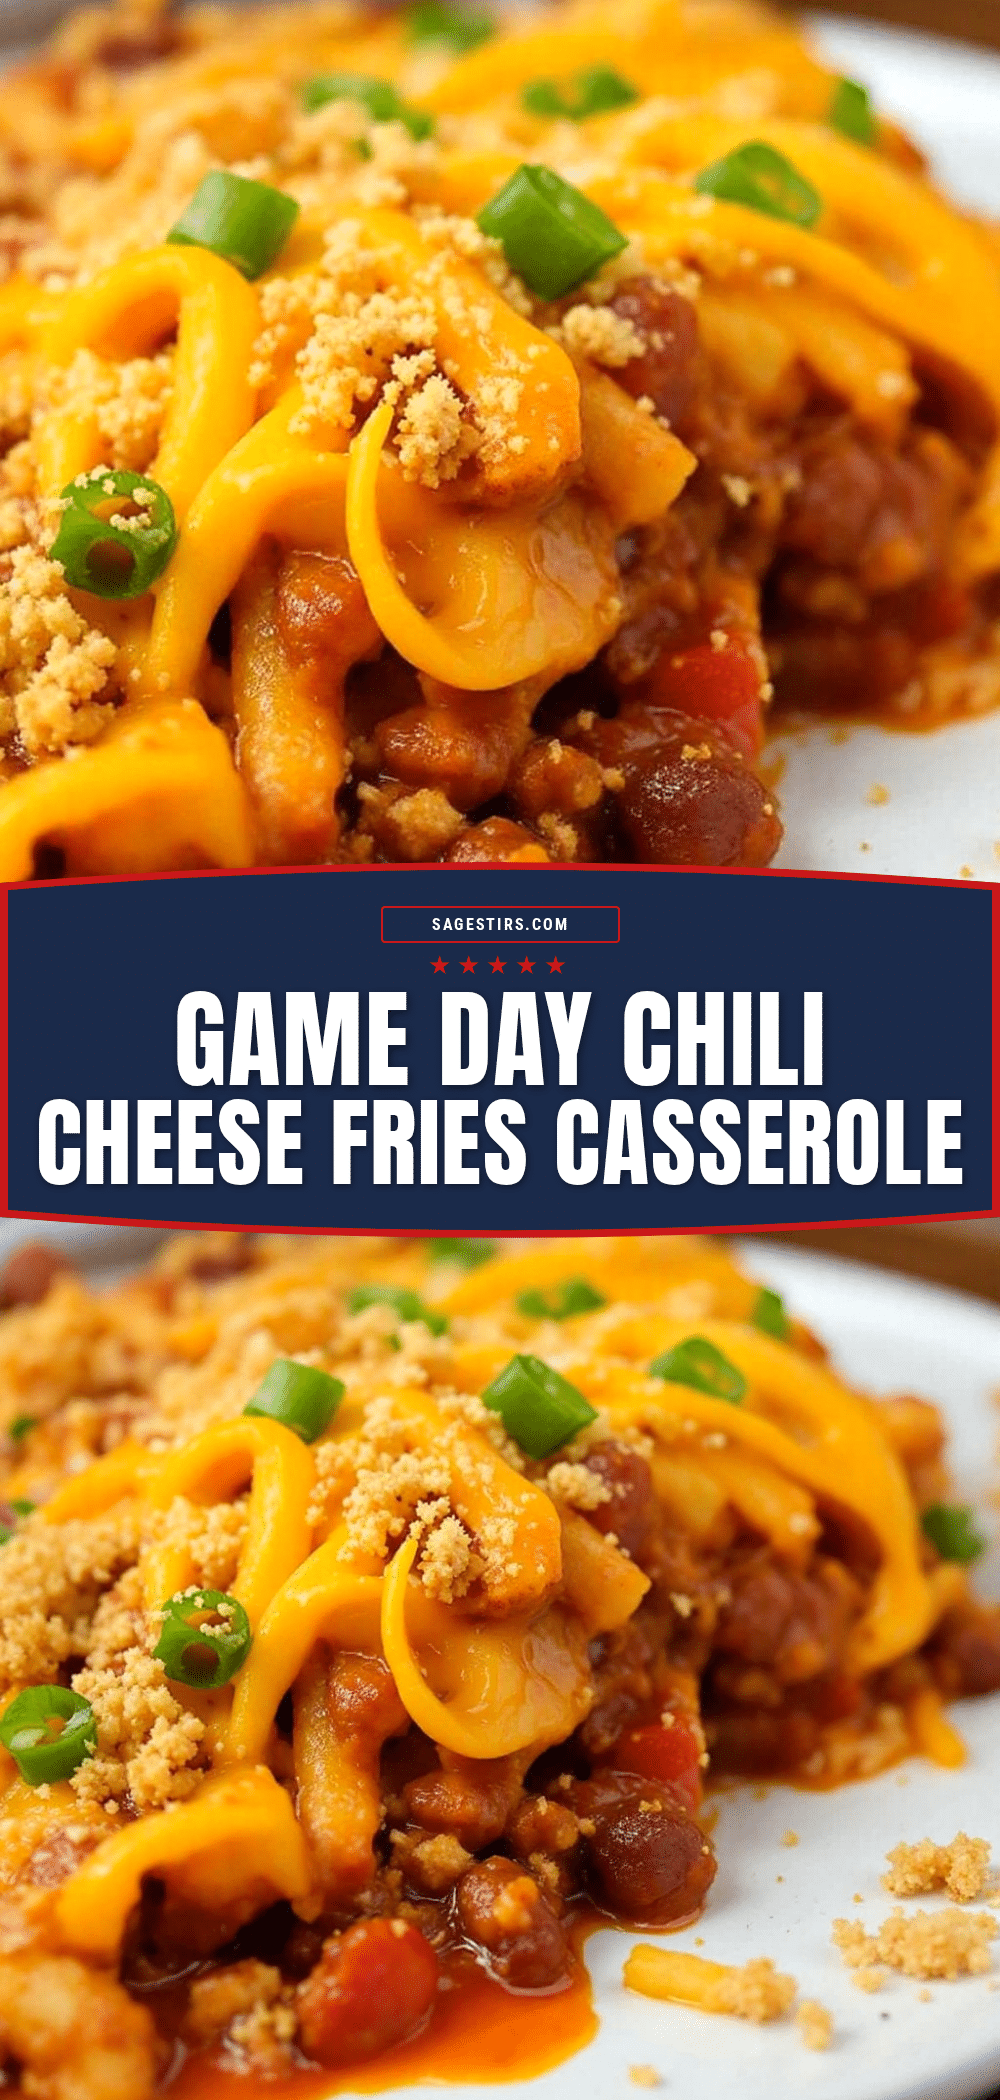
Best Game Day Chili Cheese Fries Casserole: Easy 30-Min Recipe
This quick and easy chili cheese fries casserole is perfect for game day or any crowd. Ready in 30 minutes with simple pantry ingredients, it features crispy fries, savory homemade chili, and melted cheese.
- Prep Time: 10 minutes
- Cook Time: 20 minutes
- Total Time: 30 minutes
- Yield: 8 servings 1x
- Category: Main Course
- Cuisine: American
Ingredients
- 1 pound ground beef (80/20)
- 1 medium yellow onion, diced
- 3 cloves garlic, minced
- 1 can (15 oz) diced tomatoes, undrained
- 1 can (15 oz) kidney beans, drained and rinsed
- 2 tablespoons chili powder
- 1 teaspoon ground cumin
- 1 teaspoon smoked paprika
- 1/2 teaspoon salt
- 1/4 teaspoon black pepper
- 1/2 cup beef broth
- 1 bag (28 oz) frozen shoestring or crinkle-cut fries
- 2 cups shredded cheddar cheese
- 1 cup shredded Monterey Jack cheese
- 1/4 cup pickled jalapeños, drained (optional)
- 1/4 cup sliced green onions (for garnish)
- 1/2 cup sour cream (for serving)
Instructions
- Preheat your oven to 425°F (220°C). Place a baking sheet in the oven while it preheats.
- Par-bake the frozen fries: Spread the frozen fries in a single layer on the preheated baking sheet. Bake for 12-15 minutes, until just starting to turn golden and crispy on the edges.
- While the fries bake, start the chili: Heat a large skillet over medium-high heat. Add the ground beef and cook, breaking it up, until browned (about 5-6 minutes). Leave about a tablespoon of fat in the pan.
- Add the onion and garlic: Push the beef to one side, add the diced onion, and cook for 3-4 minutes until softened. Add the minced garlic and cook for 30 seconds until fragrant. Stir together.
- Add the seasonings: Sprinkle chili powder, cumin, smoked paprika, salt, and pepper over the beef mixture. Stir and cook for 1 minute to toast the spices.
- Add the tomatoes, beans, and broth: Pour in the undrained diced tomatoes, drained kidney beans, and beef broth. Stir, bring to a simmer, then reduce heat to medium-low. Let bubble gently for 5-7 minutes until slightly thickened.
- Assemble the casserole: Remove the par-baked fries from the oven. Reduce oven temperature to 400°F (200°C). Spread the fries evenly in a 9×13-inch baking dish. Pour the chili over the top and spread into an even layer. Sprinkle cheddar and Monterey Jack cheese evenly over the chili. Scatter pickled jalapeños on top if using.
- Bake the casserole: Place the dish in the oven and bake for 12-15 minutes, until cheese is melted, bubbly, and starting to brown in spots. For extra browning, broil for 1-2 minutes, watching closely.
- Rest and garnish: Remove from oven and let rest for 5 minutes. Sprinkle with sliced green onions and dollop with sour cream if desired.
- Serve immediately: Scoop into bowls or plates and enjoy while hot and gooey.
Notes
Par-baking the fries is essential for crispy texture. Shred your own cheese for best melting. Let the casserole rest 5 minutes before serving to set layers. For a vegetarian version, replace beef with a second can of beans and use vegetable broth. For a spicier version, add a diced jalapeño to the chili or use pepper jack cheese.
Nutrition
- Serving Size: 1 serving (approxima
- Calories: 475
- Sugar: 4
- Sodium: 850
- Fat: 28
- Saturated Fat: 12
- Carbohydrates: 38
- Fiber: 7
- Protein: 27
Keywords: chili cheese fries casserole, game day recipe, easy casserole, 30-minute meal, comfort food, ground beef recipe, crowd-pleaser



