Love this? Save it for later!
Share the inspiration with your friends
The oven timer screamed just as the doorbell rang. I was standing in my kitchen, hair in a messy bun, holding a spatula like a weapon, staring at a pan that looked nothing like the glossy photos on Pinterest. Half a bag of peppermint bark was scattered across the counter, and I had exactly zero minutes to make it look intentional before my in-laws walked through the door. Let’s face it, this is how most holiday cooking goes—panic, improvisation, and hoping the sugar content masks the desperation. I hadn’t planned on baking anything fancy. I just wanted something sweet, fast, and forgiving enough to handle a distracted cook.
So I grabbed the box of blondie mix I had hiding in the pantry and started throwing things in. The peppermint bark was the leftover kind from last Christmas, the kind that gets shoved to the back of the fridge until it gets sticky. Honestly, that’s the best kind to use because it breaks apart easier. I crumbled it into the batter, added some extra white chocolate chips because why not, and slid the pan into the oven. The smell that hit me when I pulled it out was pure comfort. It wasn’t just sweet; it was sharp and creamy all at once.
My mother-in-law took one bite and stopped talking. You know that silence? The good kind? That was the moment I knew these crispy peppermint bark blondies were a keeper. They aren’t just another holiday cookie. They have this unique texture where the edges get delightfully crisp while the center stays chewy. It’s the kind of treat that disappears before you can even grab a napkin. I didn’t mean to create a masterpiece, but sometimes the best recipes come from the messiest moments. This one stuck with me because it’s real. It’s quick, it’s tasty, and it saves you when you’re running on empty.
Why You’ll Love This Recipe
There is a specific kind of magic that happens when you mix the bright, cold snap of peppermint with the warm, buttery richness of a blondie. It’s not just a dessert; it’s a mood booster. I’ve tested this recipe more times than I care to admit, tweaking the ratios of chocolate to dough until I got that perfect balance. It’s not too sweet, not too minty, and definitely not boring. Here is why this recipe has earned its spot in my regular rotation:
- Quick & Easy: You can have these from pantry to plate in under 30 minutes. It’s perfect for those last-minute holiday gatherings or when you need a sweet fix before a party.
- Simple Ingredients: You likely already have most of this in your kitchen. If you don’t have peppermint bark, a few crushed candy canes work just fine. No fancy grocery trips needed.
- Perfect for Gifting: These cut beautifully into squares and look stunning in a cellophane bag with a red ribbon. They are the ultimate hostess gift that looks homemade but requires zero stress.
- Crowd-Pleaser: Kids love the chocolate, adults love the peppermint twist. It bridges the gap between traditional holiday cookies and modern dessert bars.
- Unbelievably Delicious: The texture is everything. The contrast between the chewy blondie base and the crunchy, melting bark pieces is next-level comfort food.
What makes this recipe different from the rest is the inclusion of the bark *inside* the batter, not just on top. Most recipes just sprinkle crushed candy canes on top, which often melts into a sugary mess. By folding in the actual peppermint bark pieces, you get distinct bursts of flavor in every bite. It’s a small tweak that makes a huge difference. This isn’t just another blondie recipe; it’s your best version of holiday baking. It’s the kind of treat that makes you close your eyes after the first bite. It’s comfort food reimagined—fast, festive, and soul-soothing.
What Ingredients You Will Need
This recipe relies on the power of pantry staples to deliver bold flavor without the fuss. You don’t need exotic spices or hard-to-find items. The beauty of these crispy peppermint bark blondies is that they let the quality of the chocolate speak for itself. I like to keep things simple so the peppermint flavor can shine through without being overpowered by cinnamon or nutmeg. Here is what you need to make them:
- Blondie Mix: One standard box (about 15-16 oz). I recommend using a high-quality brand like Betty Crocker or Duncan Hines for consistent texture. If you prefer from scratch, you can use my basic brown butter blondie base.
- Peppermint Bark: About 1 cup, chopped. Look for bark that has both white and dark chocolate layers. The dark chocolate adds a nice depth that cuts the sweetness. Brands like Ghirardelli or Trader Joe’s work well.
- White Chocolate Chips: ½ cup, semi-sweet or milk chocolate. These help bind the bark pieces together and add extra creaminess. You can substitute with dark chocolate chips if you prefer less sweetness.
- Unsalted Butter: ½ cup, melted. Using melted butter ensures a chewier texture. Don’t use salted butter unless you want to adjust the salt content in the mix.
- Large Eggs: 2 large eggs, room temperature. Room temperature eggs incorporate better into the batter, creating a smoother mix.
- Vanilla Extract: 1 teaspoon. A good quality vanilla adds warmth. If you have almond extract, a teaspoon of that mixed with vanilla is a pro tip for enhancing the mint flavor.
- Flaky Sea Salt: Optional, for sprinkling on top. This adds a sophisticated finish and balances the sugar.
For the peppermint bark, if you can’t find it, you can make your own by melting white chocolate, spreading it on parchment, sprinkling crushed candy canes, and letting it set. It takes a bit more time but gives you total control over the mint intensity. For the blondie mix, check the expiration date to ensure your leavening agents are fresh. Old baking powder leads to flat blondies, and nobody wants that.
Equipment Needed
You don’t need a fancy kitchen to make these. In fact, the simpler the tools, the better. Here is what you’ll need:
- 9×9 Inch Baking Pan: A standard square pan is ideal for achieving that perfect chewy center and crispy edge ratio. If you only have an 8×8, the baking time will be slightly longer.
- Mixing Bowls: One medium bowl for the wet ingredients and one large bowl for combining everything. I usually just use the same bowl if I wash it quickly, but two keeps it organized.
- Whisk: A simple wire whisk is all you need to beat the eggs and butter together. No stand mixer required.
- Spatula: A silicone spatula is great for scraping the bowl and folding in the bark without overmixing. Overmixing makes blondies tough.
- Parchment Paper: Lining your pan is non-negotiable. It makes cleanup a breeze and ensures the blondies don’t stick. I always leave a little overhang on the sides to lift them out easily.
- Chef’s Knife: For chopping the peppermint bark into bite-sized pieces. Be careful, the chocolate is hard and can slip.
If you don’t have a 9×9 pan, a 9×13 pan will work, but your blondies will be thinner and bake faster. Keep an eye on them after 15 minutes. Budget-friendly tip: You don’t need a fancy knife. A sturdy butter knife or even a sturdy spoon can work to chop the bark if you wrap it in a towel to prevent slipping.
Preparation Method
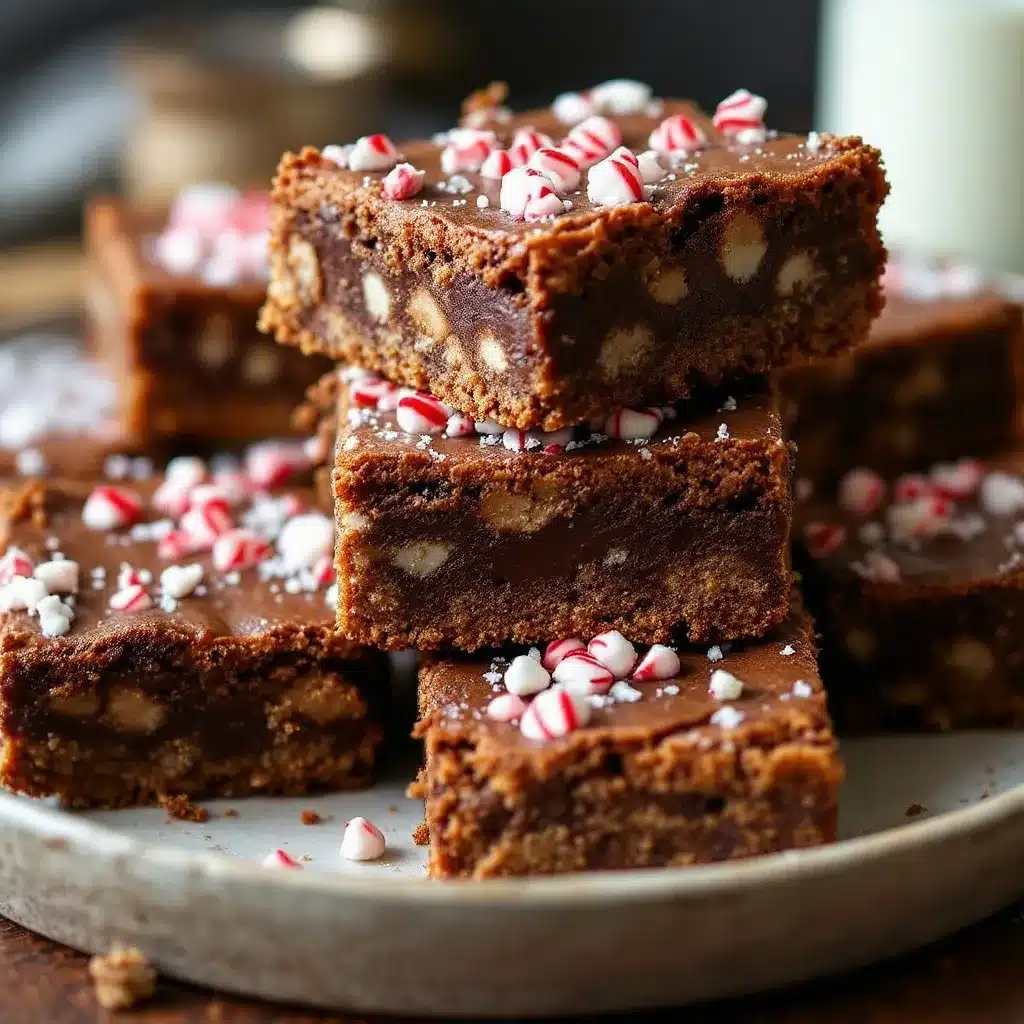
Let’s get baking. This process is straightforward, but attention to detail makes the difference between good and great.
- Prep the Pan and Oven: Preheat your oven to 350°F (175°C). Line your 9×9 inch baking pan with parchment paper, leaving a slight overhang on the long sides. This acts as a sling to lift the finished blondies out later. Spray lightly with non-stick spray if you want extra insurance.
- Melt the Butter: In a microwave-safe bowl or small saucepan, melt the ½ cup of unsalted butter. If using a microwave, heat in 30-second intervals, stirring in between, until just melted. Do not let it boil. Let it cool for a minute so it doesn’t cook the eggs.
- Mix Wet Ingredients: In a large mixing bowl, whisk the melted butter and eggs together until well combined. Add the vanilla extract and whisk again. The mixture should look glossy and uniform. This usually takes about 1-2 minutes.
- Add the Mix: Pour in the entire box of blondie mix. Stir with a spatula or wooden spoon until just combined. The batter will be thick and sticky. Do not overmix at this stage. If there are small streaks of flour, that’s okay; they will incorporate when you add the add-ins.
- Chop the Bark: While the batter mixes, take your peppermint bark and chop it into rough, bite-sized pieces. Aim for pieces about ½ inch in size. You want chunks, not dust. The white chocolate, dark chocolate, and peppermint layers should all be visible.
- Fold in Add-ins: Add the chopped peppermint bark and white chocolate chips to the batter. Gently fold them in. Use a gentle hand here. You want to distribute the pieces evenly without breaking them down too much. It should take about 30-60 seconds.
- Bake: Spread the batter evenly into the prepared pan. Bake for 20-25 minutes. The edges should be golden brown and slightly crispy, while the center should still look slightly soft and underbaked. This is crucial for that chewy texture. A toothpick inserted into the center should come out with moist crumbs, not wet batter.
- Cool and Slice: Let the blondies cool in the pan for at least 10 minutes. Then, lift them out using the parchment sling and transfer to a wire rack. Let them cool completely before slicing. This helps them set and makes clean cuts possible.
Pro Tip: If you want extra crispy edges, bake for an extra 2-3 minutes. But be careful not to dry them out. The residual heat will continue to cook them as they cool.
Cooking Tips & Techniques
I’ve learned a few things the hard way so you don’t have to. Here are some tricks to ensure your crispy peppermint bark blondies turn out perfectly every time.
- Don’t Overbake: This is the biggest mistake people make. Blondies continue to cook on the hot pan after you take them out of the oven. If they look done in the pan, they will be dry cakes once cooled. Pull them when the center looks slightly underdone.
- Room Temperature Eggs: Cold eggs can cause the melted butter to seize up, creating lumps. Let your eggs sit on the counter for 20 minutes before starting.
- Chop Consistency: Try to keep your peppermint bark pieces roughly the same size. This ensures even distribution. If you have tiny shards, they might melt completely into the batter, while huge chunks might fall out when you slice.
- Parchment is Key: I cannot stress this enough. Without parchment, you will struggle to get the blondies out in one piece. And you will be scraping burnt bits off the pan. Save yourself the headache.
- Altitude Adjustments: If you live at a high altitude, you may need to increase the oven temperature by 15°F and reduce the sugar slightly. Test a small batch first if you are unsure.
I once tried to skip the cooling step and cut into warm blondies. It was a mess. The chocolate smeared everywhere, and the texture was gummy. Patience pays off. Let them cool, and you’ll get those perfect, distinct layers of chewy dough and crunchy bark.
Variations & Adaptations
While the classic peppermint bark version is my favorite, there are plenty of ways to tweak this recipe to suit your taste or dietary needs.
- Dark Chocolate Twist: Swap the white chocolate chips for dark chocolate chips. This creates a richer, less sweet blondie that pairs beautifully with the mint. It’s a more sophisticated flavor profile.
- Gluten-Free Option: Use a gluten-free blondie mix or make your own from scratch using almond flour. Almond flour adds a nice nutty flavor that complements the peppermint well.
- Vegan Version: Use a vegan butter alternative and a flax egg (1 tbsp ground flaxseed mixed with 3 tbsp water per egg). Most blondie mixes have vegan-friendly options, so check the label.
- Red Velvet: Add a tablespoon of red food coloring to the batter for a festive red velvet peppermint bark blondie. It looks stunning and tastes amazing.
- Extra Mint: If you’re a huge mint lover, add ½ teaspoon of peppermint extract to the batter along with the vanilla. Just be careful not to overdo it, as mint flavor can become medicinal.
I once tried adding crushed red licorice to make a “candy cane” version, and it was too sour for my taste. Stick to the bark or candy canes for the best results. The balance of sweet and mint is delicate, so respect the ingredients.
Serving & Storage Suggestions
These blondies are best served at room temperature. The peppermint flavor is most pronounced when the chocolate is soft but not melted. If you serve them warm, the bark might be too hard to bite through.
- Storage: Store leftovers in an airtight container at room temperature for up to 5 days. Place a piece of parchment paper between layers if you stack them to prevent sticking.
- Freezing: You can freeze these for up to 3 months. Wrap individual squares in plastic wrap and place them in a freezer-safe bag. Thaw at room temperature for 30 minutes before eating.
- Serving Ideas: Pair with a hot cup of coffee or a glass of cold milk. They also go well with a spiced apple cider, which complements the minty notes nicely.
- Gifting: Arrange the squares in a gift box with tissue paper. Add a tag with the recipe name for a personal touch.
The flavors actually meld together over the first day, making them taste even better on day two. The mint softens the edges of the chocolate, creating a harmonious blend. It’s worth the wait.
Nutritional Information & Benefits
While these are definitely a treat, they are made with simple ingredients. Here is a rough estimate of the nutritional value per square (assuming 16 squares):
- Calories: Approx. 250-300 calories
- Fat: 12g (mostly from butter and chocolate)
- Carbs: 35g (high sugar content)
- Protein: 3g
The peppermint in the bark provides a refreshing contrast that can help cut through the richness of the chocolate. White chocolate contains cocoa butter, which has some antioxidant properties, though the high sugar content offsets this. For a healthier twist, you can reduce the sugar in the mix by using a homemade blondie base with less sugar. But honestly, these are meant to be indulged in. Enjoy them in moderation as part of a balanced holiday diet. They are a small pleasure that brings big joy.
Conclusion
These crispy peppermint bark blondies are more than just a dessert; they are a solution for holiday stress. They are quick, delicious, and surprisingly elegant. I hope you try this recipe and find it as useful in your kitchen as I have found it in mine. Don’t be afraid to customize it with your favorite chocolates or nuts. The best part about baking is making it your own.
If you make these, I’d love to see them! Tag me on social media or leave a comment below with how they turned out. Did you add extra bark? Did you use dark chocolate? I read every comment and love hearing about your creations. Share this recipe with a friend who needs a last-minute treat idea. Happy baking, and enjoy every bite!
FAQs
Can I use candy canes instead of peppermint bark?
Yes, you can. Crush candy canes into small pieces and fold them into the batter. Just note that candy canes are harder and less creamy than bark, so the texture will be crunchier rather than chewy.
Why are my blondies dry?
This usually happens from overbaking. Check them a few minutes before the timer goes off. They should look slightly underdone in the center when you pull them out. They will firm up as they cool.
Can I make these gluten-free?
Absolutely. Use a gluten-free blondie mix or substitute all-purpose flour with a 1:1 gluten-free baking blend. Almond flour also works well for a nutty flavor.
How do I store these blondies?
Store them in an airtight container at room temperature for up to 5 days. For longer storage, freeze them in a freezer-safe bag for up to 3 months.
Can I double the recipe?
Yes, but you will need a larger pan, like a 9×13 inch pan. The baking time will be similar, but keep an eye on the center to ensure it cooks through.
Pin This Recipe!
Crispy Peppermint Bark Blondies: Best 15-Min Holiday Treat

A quick and festive holiday dessert featuring chewy blondie batter studded with crunchy peppermint bark and white chocolate chips. Perfect for last-minute gatherings or gifting.
- Prep Time: 10 minutes
- Cook Time: 25 minutes
- Total Time: 35 minutes
- Yield: 16 servings 1x
- Category: Dessert
- Cuisine: American
Ingredients
- 1 box (15-16 oz) blondie mix
- 1 cup peppermint bark, chopped
- ½ cup white chocolate chips
- ½ cup unsalted butter, melted
- 2 large eggs, room temperature
- 1 teaspoon vanilla extract
- Flaky sea salt, optional for sprinkling
Instructions
- Preheat oven to 350°F (175°C). Line a 9×9 inch baking pan with parchment paper, leaving an overhang on the long sides.
- Melt the unsalted butter in a microwave-safe bowl or saucepan. Let it cool for a minute.
- In a large mixing bowl, whisk the melted butter and eggs together until well combined. Add vanilla extract and whisk again.
- Pour in the blondie mix and stir with a spatula until just combined. Do not overmix.
- Chop the peppermint bark into rough, bite-sized pieces (about ½ inch).
- Gently fold the chopped peppermint bark and white chocolate chips into the batter.
- Spread the batter evenly into the prepared pan.
- Bake for 20-25 minutes, until edges are golden brown and slightly crispy, but the center still looks slightly soft.
- Let the blondies cool in the pan for at least 10 minutes, then lift out using the parchment sling and transfer to a wire rack to cool completely before slicing.
Notes
Do not overbake as blondies continue to cook on the hot pan. Room temperature eggs help prevent the butter from seizing. For extra crispy edges, bake for an additional 2-3 minutes. If you don’t have peppermint bark, crushed candy canes can be used as a substitute.
Nutrition
- Serving Size: 1 square
- Calories: 275
- Sugar: 24
- Sodium: 180
- Fat: 12
- Saturated Fat: 7
- Carbohydrates: 35
- Fiber: 1
- Protein: 3
Keywords: peppermint bark blondies, holiday dessert, quick baking, Christmas treats, blondie recipe, easy dessert, festive baking



