Love this? Save it for later!
Share the inspiration with your friends
My roommate stared at the teriyaki sauce bottle in my hand like I was about to commit a felony against culinary decency. It was 6:30 PM on a Tuesday, the kind of evening that feels heavier than usual because the week hasn’t quite ended but the weekend is definitely not coming fast enough. I was holding the bottle over the skillet, hesitating. The chicken was already sizzling, those edges starting to crisp up in the hot oil, smelling like dinner was actually going to happen for once.
“You don’t use the whole bottle,” I said, though my hand didn’t move. “It’s too salty. You need to balance it.”
She laughed, that dry, tired laugh people make when they’re hungry and waiting for food. “Balance is for people who have time, Sarah. Dump it on. We’re eating in ten minutes.”
So I did. I dumped the whole bottle. And honestly? It worked. The sauce reduced down, caramelizing against the hot pan, turning into this sticky, glossy glaze that clung to every piece of chicken. It wasn’t refined. It wasn’t “chef-approved.” But it was delicious. That night, we ate straight out of the skillet, scraping up the burnt bits because they had the best flavor. It became a staple in our apartment, a quick fix for days when I had zero energy but high cravings.
Over time, I tweaked it. I started adding cornstarch to make it thicker, tossing in some sesame seeds for texture, and figuring out how to prep it so it didn’t get soggy in the fridge. That’s how these Crispy Teriyaki Chicken Meal Prep Bowls were born. They aren’t fancy. They don’t require a wine pairing. They are just really, really good chicken that makes Tuesday nights feel a little less like a chore and a little more like a win. Once you try them, you’ll probably stop buying takeout entirely.
Why You’ll Love This Recipe
Let’s be real for a second. Meal prepping can feel like a punishment. You spend your Sunday chopping vegetables like you’re preparing for a siege, only to eat sad, wilted lettuce by Wednesday. This recipe is different. It’s the kind of meal that actually gets you excited to open your Tupperware. I’ve tested this version dozens of times—some with low-sodium soy sauce, some with honey instead of sugar, some with boneless skinless thighs versus breasts—and this specific combination is the sweet spot. It’s the version that makes you close your eyes after the first bite and just sigh.
Here is why this recipe has earned a permanent spot in your rotation:
- Quick & Easy: The chicken cooks in under 15 minutes. The sauce reduces in 5. If you have your rice going, you can have this entire meal on the table in 25 minutes. It is perfect for those busy weeknights when you are starving but also exhausted.
- Simple Ingredients: You likely already have everything in your kitchen. Soy sauce, ginger, garlic, rice, and chicken. No fancy grocery trips needed. No obscure ingredients sitting in the back of your pantry that you bought in 2019 and forgot about.
- Perfect for Meal Prep: This is the holy grail of lunchbox food. Unlike salads that get soggy or pasta that gets mushy, teriyaki chicken actually tastes better on day two. The flavors meld together in the fridge, making the leftovers taste like they were just made.
- Crowd-Pleaser: I’ve served this to picky eaters, fitness enthusiasts, and people who claim they “don’t like Asian food.” Everyone comes back for seconds. The kids love the sweet glaze, and the adults love that it’s actually healthy.
- Unbelievably Delicious: The texture contrast is next-level. You get the crunch of the seared chicken, the chew of the rice, and the snap of the fresh veggies. It’s comfort food reimagined—healthier, faster, but with the same soul-soothing satisfaction as a takeout order.
What makes this recipe different from the rest is the technique for the chicken. Most people boil or steam their chicken for meal prep, resulting in bland, rubbery cubes. By pan-searing it first and then tossing it in a reduced glaze, you keep that crispy exterior while infusing it with flavor. It’s not just another version—it’s the best version. It’s the kind of meal that turns a simple lunch into something memorable, whether you’re eating it at your desk or on the couch.
What Ingredients You Will Need
This recipe uses simple, wholesome ingredients to deliver bold flavor and satisfying texture without the fuss. The beauty of teriyaki is that it relies on pantry staples, but the quality of those staples matters. You want fresh ginger if you can find it, because dried powder just doesn’t cut it for that bright, zesty kick. I also recommend using low-sodium soy sauce so you can control the saltiness, since teriyaki sauce can vary wildly between brands.
Here is what you’ll need to gather:
- Chicken Breasts or Thighs: 1.5 lbs, cut into bite-sized pieces. Thighs are juicier and more forgiving if you overcook them slightly, but breasts work fine if you keep an eye on the heat.
- Low-Sodium Soy Sauce: ½ cup. This is your base. I prefer Kikkoman or San-J for a clean, fermented flavor without too much preservative taste.
- Real Ginger: 1 tablespoon, freshly grated. Grate it on the fine side of your box grater. It melts into the sauce better than minced ginger.
- Garlic: 3 cloves, minced. Don’t skip this. Garlic is the backbone of the savory profile.
- Honey: 2 tablespoons. Adds natural sweetness and helps the glaze caramelize. If you are avoiding refined sugar, this is a great natural alternative.
- Rice Vinegar: 1 tablespoon. Adds a little acidity to balance the sweetness. Apple cider vinegar works in a pinch, but rice vinegar is more authentic.
- Cornstarch: 1 teaspoon. This is the secret weapon. It thickens the sauce instantly and helps it cling to the chicken.
- Sesame Oil: 1 teaspoon. Just a drizzle at the end for that nutty aroma. Toasted sesame oil is best.
- Vegetables: 2 cups of chopped broccoli or snap peas. Broccoli holds up well in the fridge and doesn’t get slimy. Snap peas add a nice crunch.
- White or Brown Rice: 2 cups cooked. Brown rice adds more fiber and nuttiness, but white rice has that classic takeout texture.
- Green Onions & Sesame Seeds: For garnish. They make the bowl look pretty and add a fresh, oniony bite.
If you are out of fresh ginger, you can use 1 teaspoon of ground ginger, but the flavor will be more muted. For the vegetables, feel free to swap in bell peppers or carrots, but keep in mind that softer veggies might get mushy after a few days in the fridge. I always suggest prepping the veggies right before you eat if you want maximum crunch.
Equipment Needed
You don’t need a fancy kitchen to make this. A large non-stick skillet or a cast-iron pan is essential. I prefer non-stick for meal prep because I’m lazy, and I don’t want to scrub burnt sauce off cast iron at 10 PM. A large bowl for tossing the chicken in cornstarch is also helpful. I use a glass measuring cup with a spout for mixing the sauce—it’s easier to pour and clean. For the rice, a standard rice cooker is my go-to, but a pot on the stove works just as well. If you don’t have a grater for the ginger, a microplane is great, but a knife and some patience will do. Keep it simple. You really only need one main pan and a few bowls.
Preparation Method
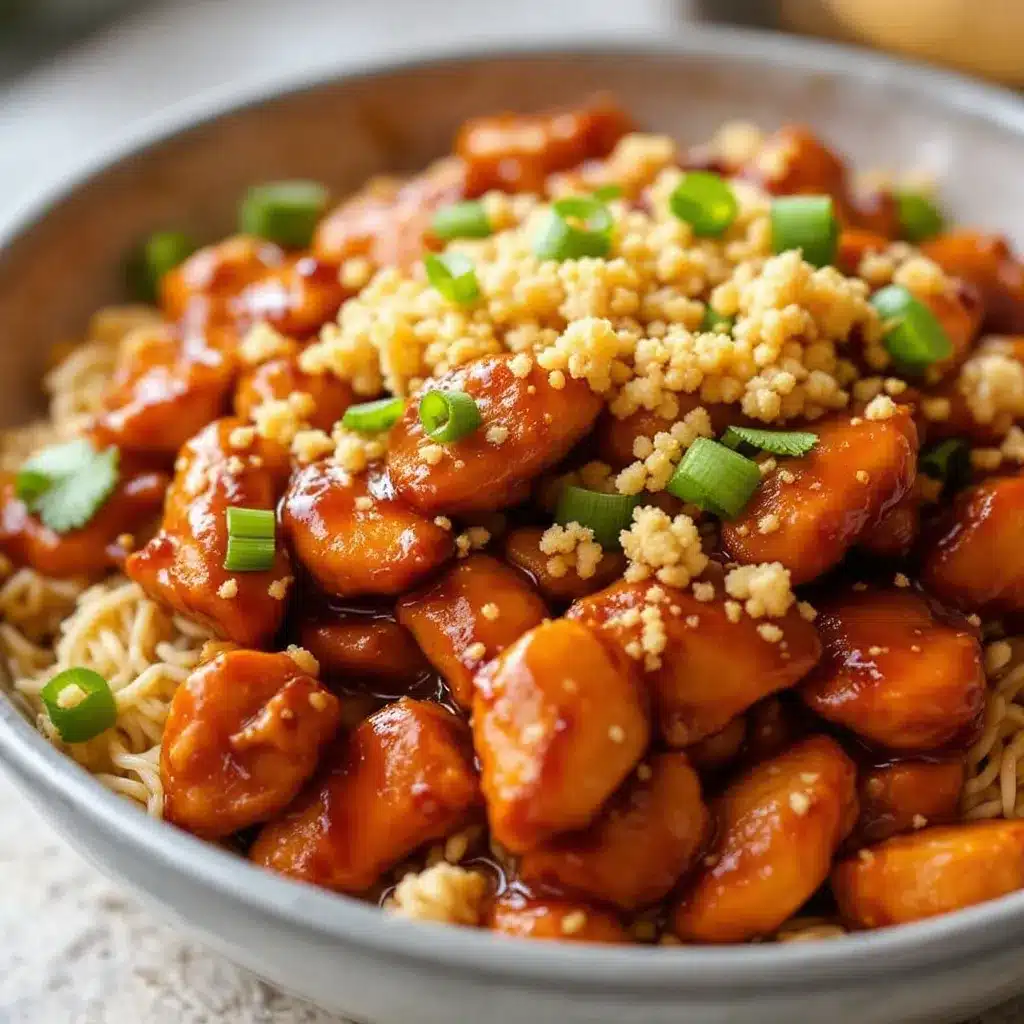
Getting this meal prepped correctly is about timing. You want the rice cooking while you prep the chicken, so everything is ready at the same time. Here is exactly how to do it.
- Cook the Rice: Start by rinsing 1 cup of rice under cold water until the water runs clear. This removes excess starch and prevents clumping. Cook it according to package directions. If you are using a rice cooker, just hit the button. If you are using a pot, bring water to a boil, add rice, cover, reduce heat to low, and simmer for 18 minutes. Let it sit off the heat for 5 minutes before fluffing. This takes about 25 minutes total.
- Prep the Chicken: While the rice cooks, cut your chicken into 1-inch cubes. Pat them dry with a paper towel. This is crucial. Wet chicken steams instead of sears. Toss the chicken cubes in 1 tablespoon of cornstarch. This creates a light coating that will get crispy in the pan and help the sauce stick later.
- Mix the Sauce: In a small bowl, whisk together the soy sauce, honey, rice vinegar, grated ginger, minced garlic, and the remaining teaspoon of cornstarch. The cornstarch will settle, so give it a quick stir right before you pour it into the pan. It should look like a thin, cloudy liquid.
- Sear the Chicken: Heat a large skillet over medium-high heat with a tablespoon of oil. Once the oil is shimmering, add the chicken in a single layer. Don’t crowd the pan. If you have a small pan, do this in two batches. Cook for 3-4 minutes without moving it too much. You want a golden-brown crust. Flip and cook for another 2-3 minutes until cooked through. The internal temperature should reach 165°F. Remove the chicken from the pan and set it aside on a plate.
- Reduce the Sauce: In the same pan, pour in your sauce mixture. It will bubble up immediately. Let it simmer for 2-3 minutes, stirring constantly. It will thicken into a glossy glaze. If it gets too thick, add a splash of water. If it’s too thin, let it cook a bit longer.
- Combine: Toss the cooked chicken back into the pan with the sauce. Stir until every piece is coated. Add your chopped broccoli or snap peas and toss for another minute just to warm them through. The residual heat will cook the broccoli slightly without making it mushy.
- Assemble: Divide the rice among your meal prep containers. Top with the chicken and vegetable mixture. Drizzle with a little sesame oil and sprinkle with green onions and sesame seeds. Let them cool completely before putting the lids on to prevent condensation and sogginess.
Pro tip: If you are making this for the whole week, let the chicken cool in the fridge before assembling. Hot chicken creates steam in the container, which leads to soggy rice. Patience pays off here.
Cooking Tips & Techniques
I’ve made this recipe enough times to know where people go wrong. The biggest mistake is overcrowding the pan. When you put too much chicken in at once, the temperature of the pan drops, and the chicken releases moisture. Instead of searing, it boils in its own juices. You end up with gray, bland chicken. Cook in batches if you have to. It takes two extra minutes, but the texture difference is night and day.
Another thing to watch is the heat. Teriyaki sauce has sugar in it (from the honey and soy sauce). Sugar burns. If your heat is too high, the sauce will turn black and bitter before it thickens. Keep it at medium. You want a gentle simmer, not a violent boil. Also, don’t skip the step of patting the chicken dry. I know it’s annoying, but that paper towel step is the difference between crispy and soggy.
For consistency, weigh your chicken. If you eyeball it, you might end up with too much chicken for your sauce, or vice versa. Having the right ratio ensures every bite has that perfect glaze. And finally, taste the sauce before you toss the chicken in. If it’s too salty, add a little more honey. If it’s too sweet, a splash of vinegar or a pinch of red pepper flakes can balance it out. Cooking is about adjusting to what you have.
Variations & Adaptations
One of the best things about this recipe is how adaptable it is. If you are gluten-free, just swap the soy sauce for tamari or coconut aminos. The flavor profile remains very similar, though coconut aminos are slightly sweeter, so you might want to reduce the honey slightly. For a spicy kick, add a teaspoon of sriracha or chili garlic sauce to the glaze. It cuts through the sweetness and adds a nice warmth.
If you want to load up on veggies, add sliced bell peppers or shredded carrots to the pan with the broccoli. They cook quickly and add color. For a protein swap, you can use tofu or shrimp instead of chicken. Shrimp cooks very fast, so add it at the very end and just toss it in the sauce for 2 minutes. I also love using cauliflower rice for a low-carb option, though it changes the texture significantly.
My personal favorite variation is adding a fried egg on top right before eating. The runny yolk mixes with the teriyaki sauce to create a rich, creamy dressing. It’s indulgent but still feels like a balanced meal. You can also swap the rice for quinoa or buckwheat noodles if you want something different. The sauce works with almost any grain base.
Serving & Storage Suggestions
These bowls are best served at room temperature or slightly warmed. I don’t recommend microwaving them for too long, as the chicken can dry out. Heat them in 30-second intervals, stirring in between. If the rice seems dry, add a teaspoon of water before heating. This helps steam the rice and brings it back to life.
For storage, keep the bowls in the refrigerator for up to 4 days. The chicken stays moist if it’s fully coated in the sauce. If you want to freeze them, I suggest freezing just the chicken and sauce, and cooking fresh rice when you’re ready to eat. Rice doesn’t freeze well texture-wise—it can get grainy and hard. If you must freeze the whole bowl, thaw it in the fridge overnight and reheat gently.
For serving, I like to add a side of edamame or a simple cucumber salad to balance the richness. A cup of green tea or a light lager pairs well with the salty-sweet profile. The flavors actually deepen after a day in the fridge, so day two is often my favorite day to eat this. The chicken absorbs more of the glaze, making it even more flavorful.
Nutritional Information & Benefits
This recipe is a balanced meal with a good mix of protein, carbs, and fats. Each serving (assuming 4 bowls) contains approximately 450 calories, with 35g of protein from the chicken, 50g of carbohydrates from the rice and vegetables, and 10g of fat from the oil and sesame seeds. The ginger and garlic have anti-inflammatory properties, and the broccoli adds fiber and vitamin C. It’s a wholesome meal that keeps you full and energized for the afternoon. Just be mindful of the sodium content in the soy sauce, which is why low-sodium is recommended. If you are watching your sodium, rinse the chicken after marinating or use less sauce.
Conclusion
These Crispy Teriyaki Chicken Meal Prep Bowls are a game-changer for anyone who wants healthy food without the hassle. They are cheap, easy to make, and actually taste good. I hope you give this recipe a try and find it becomes a staple in your own kitchen. Feel free to tweak the spice level or swap out veggies to match your preferences. If you make this, I’d love to hear how it turned out. Leave a comment below with your favorite variation or just let me know if you loved it. Share this with a friend who needs some lunch inspiration this week. Happy cooking!
Frequently Asked Questions
Can I use frozen chicken for this recipe?
It’s not recommended. Frozen chicken releases a lot of water as it thaws, which prevents it from searing properly. It’s better to use fresh chicken and thaw it in the fridge overnight if you forgot to prep it.
How long does this meal prep last in the fridge?
The chicken and veggies will stay fresh for up to 4 days in an airtight container. The rice might start to dry out after day 3, so adding a splash of water when reheating helps.
Can I make this gluten-free?
Yes! Simply substitute regular soy sauce with tamari or coconut aminos. Make sure to check that your rice vinegar and other ingredients are also gluten-free if you have a severe allergy.
Why is my teriyaki sauce too thin?
If the sauce is too thin, it might not have cooked long enough to thicken. Let it simmer for another minute or two. You can also mix a little more cornstarch with water and stir it in, but usually, just more time is the answer.
Can I use brown sugar instead of honey?
You can, but honey adds a nice floral sweetness and helps the glaze get glossy. Brown sugar will work, but the texture might be slightly grainier. If you use brown sugar, make sure to dissolve it completely in the warm sauce.
Pin This Recipe!
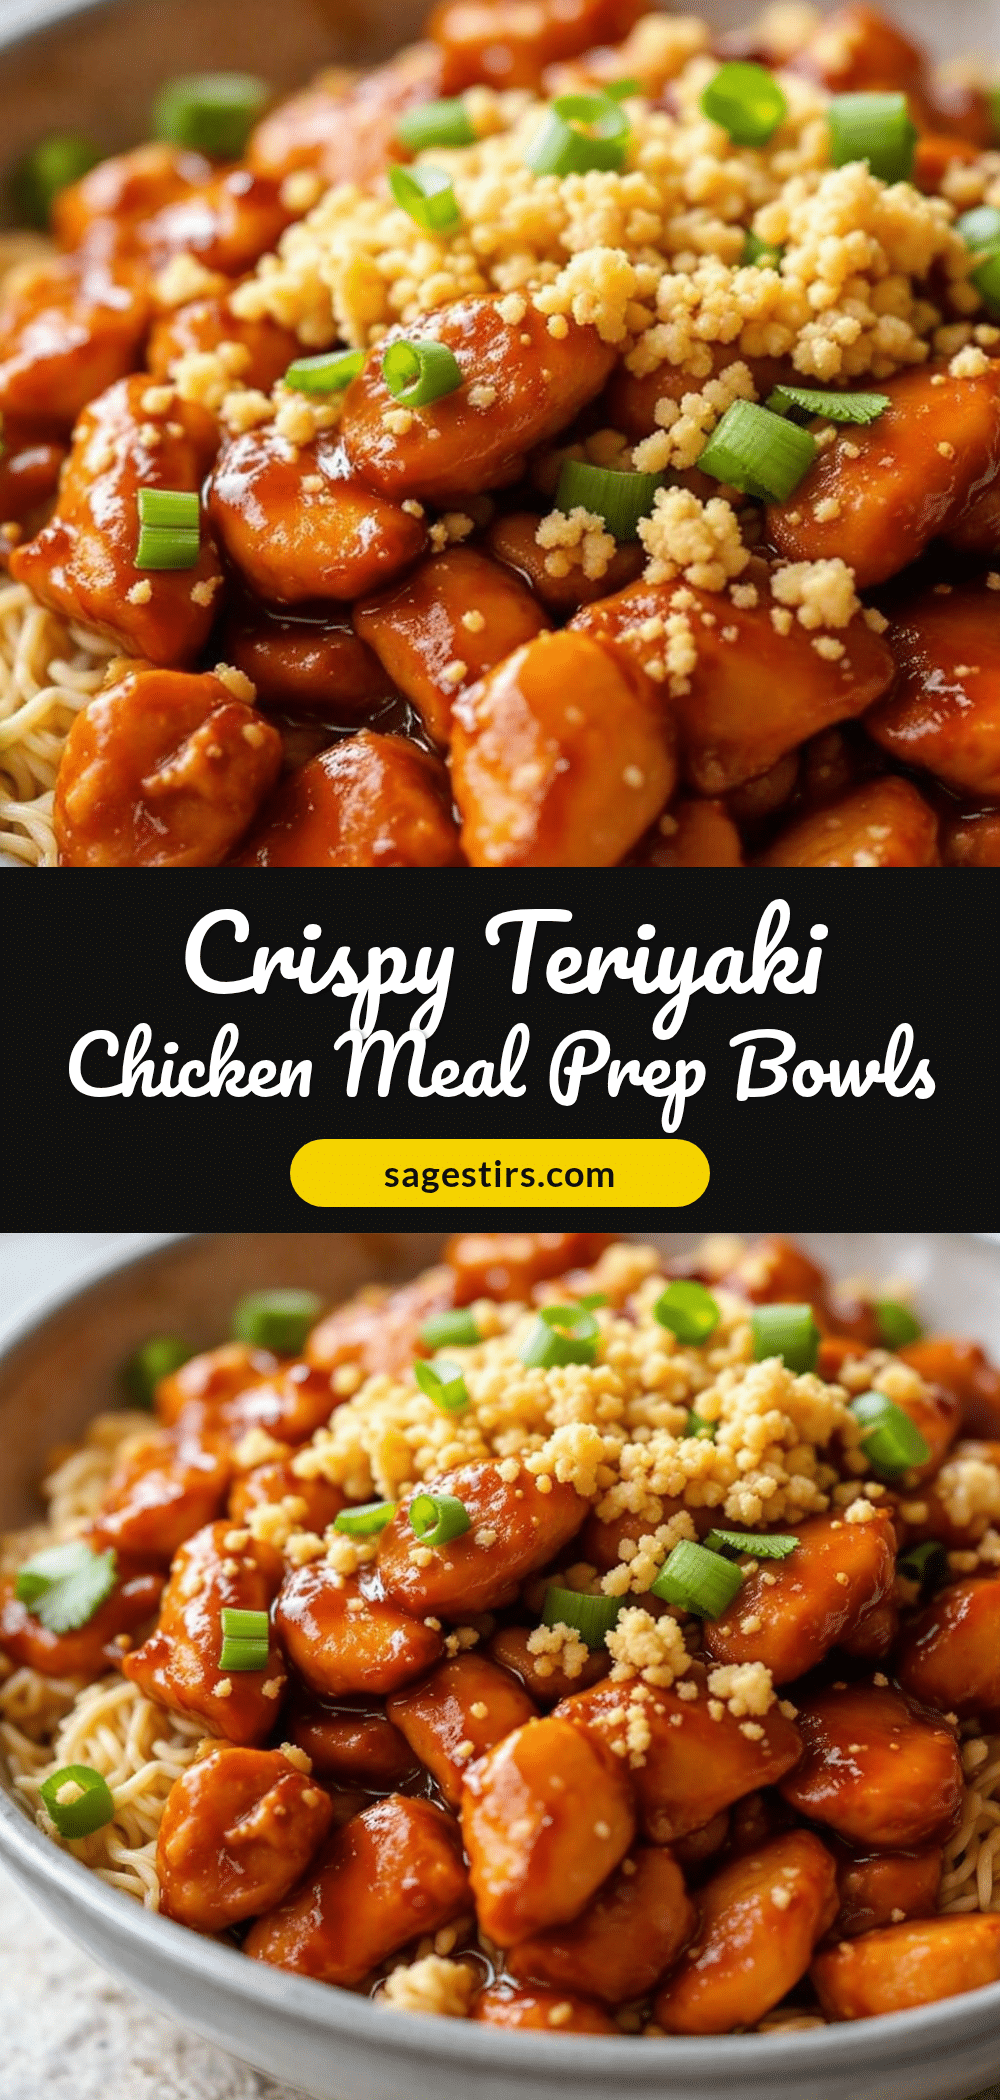
Crispy Teriyaki Chicken Meal Prep Bowls
A quick and easy healthy lunch featuring pan-seared chicken in a sticky teriyaki glaze, served over rice with vegetables. Perfect for meal prep, this recipe delivers takeout-quality flavor with simple ingredients.
- Prep Time: 10 minutes
- Cook Time: 15 minutes
- Total Time: 25 minutes
- Yield: 4 servings 1x
- Category: Main Course
- Cuisine: Asian
Ingredients
- 1.5 lbs chicken breasts or thighs, cut into bite-sized pieces
- ½ cup low-sodium soy sauce
- 1 tablespoon fresh ginger, grated
- 3 cloves garlic, minced
- 2 tablespoons honey
- 1 tablespoon rice vinegar
- 1 teaspoon cornstarch (for sauce)
- 1 tablespoon cornstarch (for coating chicken)
- 1 teaspoon toasted sesame oil
- 2 cups chopped broccoli or snap peas
- 2 cups cooked white or brown rice
- Green onions and sesame seeds, for garnish
- Oil for searing chicken
Instructions
- Rinse rice under cold water until water runs clear. Cook according to package directions (approx. 25 minutes total).
- Pat chicken pieces dry with paper towels and toss in 1 tablespoon of cornstarch to coat.
- In a small bowl, whisk together soy sauce, honey, rice vinegar, ginger, garlic, and 1 teaspoon cornstarch.
- Heat a large skillet over medium-high heat with oil. Sear chicken in a single layer (in batches if necessary) for 3-4 minutes per side until golden brown and cooked through (165°F). Remove chicken from pan.
- Pour sauce mixture into the same pan. Simmer for 2-3 minutes, stirring constantly, until it thickens into a glossy glaze.
- Return chicken to the pan and toss to coat. Add broccoli or snap peas and toss for 1 minute to warm through.
- Divide rice among containers. Top with chicken and vegetable mixture. Drizzle with sesame oil and garnish with green onions and sesame seeds.
- Let cool completely before sealing containers to prevent sogginess.
Notes
Pat chicken dry before searing to ensure crispiness. Do not overcrowd the pan. Let chicken cool in the fridge before assembling to prevent condensation. Sauce can be adjusted for saltiness or sweetness. For gluten-free, use tamari or coconut aminos.
Nutrition
- Serving Size: 1 bowl per serving
- Calories: 450
- Sugar: 12
- Sodium: 800
- Fat: 10
- Saturated Fat: 2
- Carbohydrates: 50
- Fiber: 3
- Protein: 35
Keywords: teriyaki chicken, meal prep, healthy lunch, quick dinner, chicken bowls, easy recipe, high protein



