Love this? Save it for later!
Share the inspiration with your friends
My brother-in-law, Dave, had been looking for a tailgate dish that actually survived the parking lot. Not something that needed reheating, not something that turned into a sad, soggy mess by the second quarter. Just something you could pull out of a cooler, set on a fold-out table, and watch disappear. For a while, he just accepted that tailgate food meant cold hot dogs or chips from a bag. That was the gap. The craving for something that felt like real food but didn’t demand a grill, a stove, or a moment of your attention when the game was on.
I remember standing in his driveway last September, the trunk of his SUV propped open, a cooler full of soda, and a bag of tortilla chips that had seen better days. He looked at me and said, “Why is it so hard to bring something good?” That question stuck with me. Not because it was profound, but because it was true. Most dips require baking, or a slow cooker, or at least a microwave. None of those things live in a parking lot. So I started tinkering.
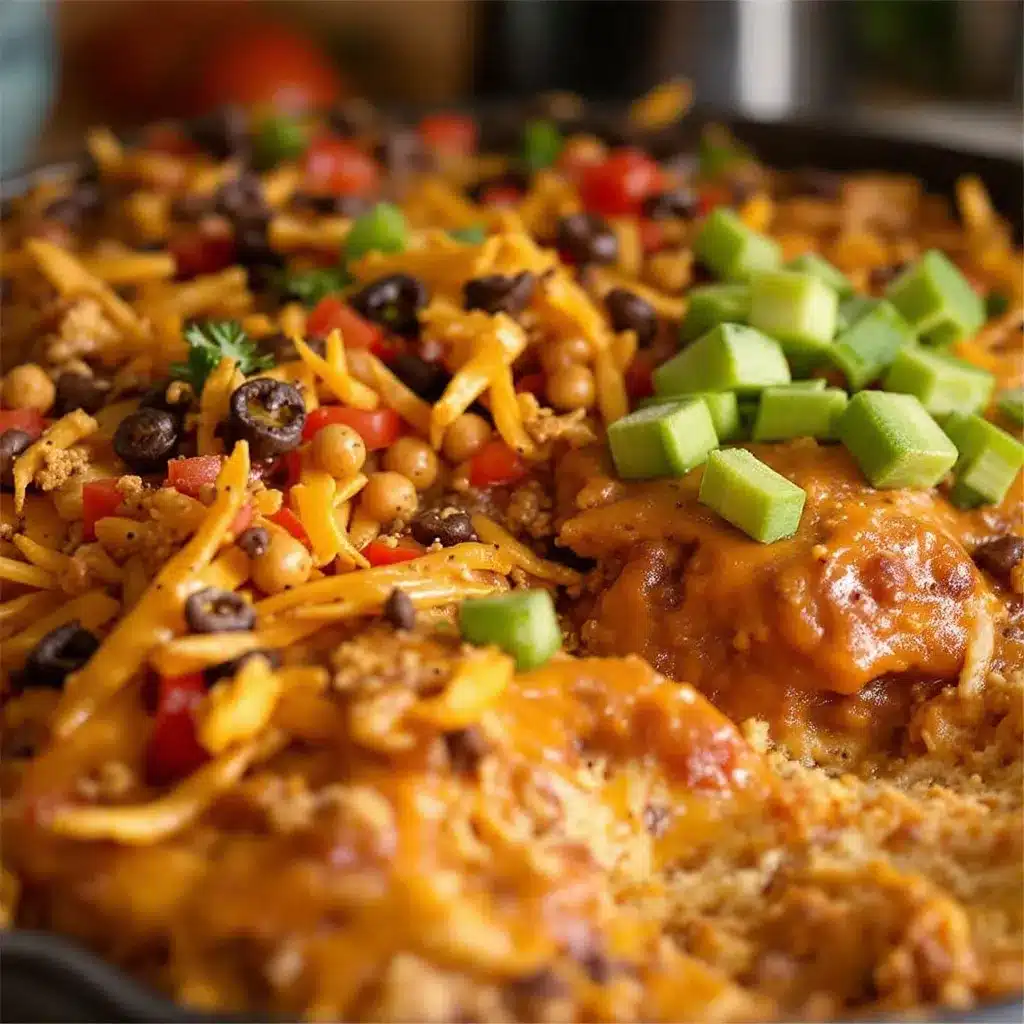
This easy 7-layer taco dip is what came out of that tinkering. It’s the no-bake tailgate recipe that finally solved Dave’s problem. Layers of seasoned refried beans, cool sour cream, chunky guacamole, and all the fixings, stacked in a dish that travels like a champ. It doesn’t need to be hot. It doesn’t need to be babysat. It just needs to be there. And honestly? It tastes better after it sits for an hour, which is the kind of honesty I appreciate in a recipe. This is the dip that made Dave stop buying pre-made platters. That’s the only review I need.
Why You’ll Love This Recipe
I’ve tested this dip at four different tailgates, two backyard barbecues, and one very serious fantasy football draft party. It passed every single test. Here’s why it works so well:
- No-Bake & Effortless : Zero oven time. Zero stove time. You just layer, chill, and serve. It’s ready in 20 minutes flat, which leaves you more time to pack the cooler and get out the door.
- Simple Ingredients : Everything comes from a standard grocery run. Canned beans, store-bought guacamole, sour cream, taco seasoning. No hunting down specialty items. You probably have most of this in your pantry right now.
- Perfect for Tailgating & Game Day : This dip travels better than any hot dish I’ve ever made. It holds its shape, doesn’t get watery, and tastes fantastic at room temperature. It’s the ultimate football Sunday companion.
- Crowd-Pleaser : I’ve watched people hover around this dish like it’s the last food on earth. It disappears fast. Kids love it, adults love it, and it plays nice with dietary restrictions if you swap in a few things.
- Unbelievably Delicious : The contrast between the cool, creamy layers and the crunchy, fresh toppings is next-level. It’s the kind of dip where you go back for “just one more chip” three times before you realize what happened.
What makes this different from every other 7-layer dip out there? It’s the layering order and the resting time. I let the refried beans sit with the taco seasoning for ten minutes before spreading them, so the flavor really sinks in. And I always drain the salsa before adding it, which keeps the dip from turning into soup. Small tweaks, huge payoff. This isn’t just another version—it’s the version I’d bring to any potluck, picnic, or parking lot party. Pair it with my game day slow cooker chili for a spread that’ll have everyone asking for your secrets.
What Ingredients You Will Need
This recipe keeps things straightforward. Every ingredient pulls its weight, and nothing feels fussy. Here’s what you’ll need to build those perfect layers:
For the Bean Layer
- 1 can (16 oz) refried beans (I prefer Rosarita for the smoothest texture, but any brand works)
- 2 tablespoons taco seasoning (store-bought is fine, or use my homemade blend: chili powder, cumin, garlic powder, onion powder, paprika, salt)
- 2 tablespoons water (helps the seasoning spread evenly through the beans)
For the Creamy Layers
- 1 cup sour cream (full-fat gives the best texture, but Greek yogurt works as a lighter swap)
- 1 cup prepared guacamole (store-bought is a lifesaver here, but homemade works if you have ripe avocados)
- 1/2 cup mayonnaise (adds richness to the sour cream layer—trust me on this)
For the Toppings
- 1 cup shredded Mexican blend cheese (cheddar, Monterey Jack, or a mix—freshly shredded melts better than pre-shredded)
- 1 cup pico de gallo or chunky salsa (drain it well to avoid watery dip)
- 1/2 cup sliced black olives (drained)
- 1/2 cup diced tomatoes (seeded and patted dry)
- 1/4 cup chopped green onions (green parts only for color)
- 1/4 cup chopped fresh cilantro (optional, but highly recommended)
For Serving
- Tortilla chips (restaurant-style or scoop chips work best for digging into the layers)
I always use canned beans here. Homemade refried beans are lovely, but this recipe is about speed and convenience. The taco seasoning does the heavy lifting for flavor, so don’t skip it. For the guacamole, I grab a tub from the refrigerated section at the store. It saves time and tastes just fine for a tailgate. If you want to go fully homemade, check out my cowboy caviar for a fresh, chunky alternative that also travels beautifully.
Equipment Needed
You don’t need much for this one. That’s the beauty of a no-bake recipe. Here’s what I use:
- 9×13-inch baking dish or serving platter (glass is ideal so you can see the layers, but any shallow dish works)
- Rubber spatula (for spreading the bean layer evenly without tearing up the dish)
- Small bowl (for mixing the taco seasoning into the refried beans)
- Chef’s knife and cutting board (for dicing tomatoes and chopping green onions)
- Measuring cups and spoons (eyeballing works, but measuring keeps the layers balanced)
- Plastic wrap or lid (for covering the dip while it chills in the fridge)
If you don’t have a 9×13 dish, a deep pie plate or even a large cast iron skillet works. Just make sure it’s wide enough to hold all the layers without overflowing. I’ve made this in a disposable aluminum pan for tailgates before, and it works perfectly. No cleanup required. For a smaller crowd, halve the recipe and use an 8×8 dish.
Preparation Method
This dip comes together in layers, and the order matters. Follow these steps, and you’ll have a picture-perfect, scoopable dip every time.
- Prep the bean layer. In a small bowl, combine the refried beans, taco seasoning, and water. Stir until the seasoning is fully incorporated and the beans are smooth. Let this sit for 10 minutes. This resting time lets the flavors meld and makes the beans easier to spread.
- Spread the beans. Using a rubber spatula, spread the seasoned bean mixture evenly across the bottom of your 9×13 dish. Aim for a smooth, even layer that reaches all the corners. Don’t worry if it’s not perfect—it’s the base, and nobody will see it.
- Make the sour cream layer. In a small bowl, mix the sour cream and mayonnaise together until smooth. This combination is creamier than sour cream alone and holds up better over time. Spread this gently over the bean layer, using the back of a spoon to smooth it out. Be careful not to mix it into the beans.
- Add the guacamole. Drop spoonfuls of guacamole over the sour cream layer, then spread it gently. If your guacamole is thick, warm it slightly by leaving it on the counter for 10 minutes before spreading. This prevents the sour cream layer from tearing.
- Sprinkle the cheese. Evenly distribute the shredded cheese over the guacamole layer. Press it down lightly with your hand or the spatula so it sticks to the dip.
- Add the drained salsa. Drain the pico de gallo or salsa in a fine-mesh strainer for a minute to remove excess liquid. Spoon it over the cheese layer in an even distribution. This step keeps your dip from getting watery overnight.
- Top with olives, tomatoes, and green onions. Sprinkle the sliced black olives, diced tomatoes, and green onions over the top. Finish with fresh cilantro if you’re using it.
- Chill for at least 1 hour. Cover the dish with plastic wrap and refrigerate for at least one hour. This step is non-negotiable—it lets the layers set and makes the dip easier to scoop. Overnight is even better. The flavors meld and deepen as it sits.
- Serve with tortilla chips. Pull the dip out of the fridge 15 minutes before serving to take the chill off. Set it out with a pile of sturdy tortilla chips and watch it disappear.
Your dip should look like a beautiful, striped work of art when you’re done. Each layer should be distinct, not swirled together. If you see the layers starting to blur, you’re pressing too hard when spreading. Go gently, and use the back of a spoon for the creamy layers.
Cooking Tips & Techniques
I’ve made this dip at least a dozen times, and I’ve learned a few things the hard way. Here are the tips that make the difference between a good dip and a great one:
- Drain everything. Salsa, olives, tomatoes—if it comes in a can or jar, drain it. Excess liquid is the enemy of a firm, scoopable dip. Pat diced tomatoes dry with a paper towel if you have time.
- Let the beans rest. That 10-minute wait after mixing the seasoning into the beans isn’t optional. It allows the dried spices to hydrate and bloom, which means more flavor in every bite. I learned this after making a batch that tasted flat. Never again.
- Use a clear dish. Glass or clear plastic lets people see the layers, which makes the dip look more impressive than it actually is. Presentation matters, even at a tailgate.
- Keep it cold. If you’re taking this to a tailgate, pack it in a cooler with an ice pack. The dip can sit at room temperature for about two hours safely, but if the game goes long, keep it chilled. Nobody wants food poisoning ruining their win.
- Double the recipe for a crowd. This dip disappears fast. If you’re feeding more than eight people, make two dishes. I learned this lesson at a Super Bowl party where the single batch was gone before halftime.
- Don’t skip the mayo in the sour cream layer. I know it sounds odd, but the mayonnaise stabilizes the sour cream and prevents it from separating. It also adds a subtle richness that balances the acidity of the salsa. Trust me on this one.
Variations & Adaptations
This dip is a canvas. You can change almost anything and it still works. Here are my favorite variations:
- Spicy Southwest Version : Add a diced jalapeño to the pico de gallo, use pepper jack cheese instead of Mexican blend, and stir a teaspoon of hot sauce into the sour cream layer. This version has a serious kick that heat-seekers love.
- Vegetarian & Vegan Option : Use vegan sour cream and vegan cheese, and swap the refried beans for black beans mashed with taco seasoning. The dip still holds up beautifully, and nobody misses the dairy.
- Loaded Baked Potato Style : Replace the refried beans with a layer of seasoned mashed potatoes, use cheddar cheese, and top with crumbled bacon and chives. It’s not traditional, but it’s absurdly good. I made this for a friend who doesn’t like beans, and she ate half the dish.
- Breakfast Dip : Swap the beans for a layer of scrambled eggs, use salsa verde instead of red salsa, and top with crumbled chorizo. Serve with tortilla chips or warm flour tortillas. This is my secret weapon for brunch tailgates.
- Low-Carb Option : Skip the beans entirely and use a layer of seasoned cream cheese mixed with taco seasoning. Use full-fat sour cream and cheese, and serve with pork rinds or cucumber slices instead of chips. It’s keto-friendly and still delicious.
I’ve tried the spicy version at a tailgate where the temperature was below freezing, and it warmed everyone up. The breakfast version was a hit at a morning tailgate for a noon kickoff. Play around with it—this dip is forgiving.
Serving & Storage Suggestions
This dip is best served cold or at room temperature. I pull it out of the fridge about 15 minutes before serving to take the chill off, but it’s fine straight from the cooler too. Arrange it on a platter with a pile of tortilla chips around the edges, or set it next to a bowl of chips and let people help themselves.
For presentation, I like to sprinkle a little extra cilantro and a few sliced jalapeños on top right before serving. It adds a pop of green and makes the dip look fresh. If you’re feeling fancy, serve it in a cast iron skillet or a shallow wooden bowl for a rustic look.
Storage: Cover the dish tightly with plastic wrap or a lid and refrigerate for up to 3 days. The flavors actually get better as they meld, so day-old dip is often better than fresh. I’ve eaten this dip on day three and it was still fantastic, though the tomatoes get a little soft.
Freezing: I don’t recommend freezing this dip. The sour cream and guacamole will separate and turn watery when thawed. Make it fresh or up to two days ahead, but don’t freeze it.
Reheating: Don’t reheat this dip. It’s meant to be served cold. If you want a hot dip, try my easy buffalo chicken dip instead.
Nutritional Information & Benefits
This dip is indulgent, and I’m not going to pretend otherwise. But here’s the breakdown if you’re curious:
- Estimated per serving (1/8 of recipe): Calories: 280, Fat: 18g, Carbohydrates: 22g, Protein: 8g, Fiber: 5g
- Health benefits: The beans provide fiber and plant-based protein. The avocado in the guacamole offers healthy monounsaturated fats and potassium. The tomatoes and cilantro add antioxidants and vitamin C.
- Dietary considerations: This recipe is naturally gluten-free. To make it vegetarian, use vegetarian refried beans (some brands use lard). For a lower-calorie version, use Greek yogurt instead of sour cream and light cheese.
- Potential allergens: Dairy (sour cream, cheese, mayonnaise). If you’re dairy-sensitive, use vegan alternatives. The dip also contains sulfites if you use packaged guacamole.
I’m not a nutritionist, but I believe in balance. This dip is for game days and celebrations, not everyday eating. Enjoy it, savor it, and don’t stress about the numbers. Life is too short to count calories at a tailgate.
Conclusion
This easy 7-layer taco dip is the no-bake tailgate recipe you’ve been looking for. It’s simple, it’s reliable, and it tastes like you put in way more effort than you actually did. The layers stack up beautifully, the flavors meld together overnight, and it feeds a crowd without any last-minute stress. Whether you’re heading to a parking lot, hosting a party, or just craving something cold and creamy with a crunch, this dip delivers.
I love this recipe because it reminds me of that afternoon in Dave’s driveway. The one where he asked why good tailgate food was so hard to find. Now I bring this dip to every gathering, and he always asks, “You brought the dip, right?” Every single time. That’s the kind of recipe this is—the one people expect, the one they look forward to, the one that gets requested before the game even starts.
Make it your own. Swap the beans, change the cheese, pile on extra toppings. This dip is forgiving and flexible. And when you make it, drop a comment below and tell me how it turned out. I love hearing about your versions. Share this with a friend who needs a great tailgate recipe, and pin it for your next game day. Let’s make every parking lot a little more delicious.
Frequently Asked Questions
Can I make this dip the night before?
Absolutely. In fact, I recommend it. Letting the dip sit overnight in the fridge allows the flavors to meld and the layers to set. Just cover it tightly with plastic wrap and add the fresh toppings like tomatoes and cilantro right before serving.
How do I keep the guacamole from turning brown?
Press a layer of plastic wrap directly onto the surface of the guacamole before adding the next layer. The lack of air exposure prevents browning. Also, the cheese and salsa on top act as a barrier, so you rarely see discoloration.
Can I use homemade refried beans?
Yes, but make sure they’re thick and not watery. Homemade beans tend to be looser than canned, so you might need to cook them down a bit before spreading. Canned beans are easier and more consistent for this recipe.
What chips work best for scooping?
Sturdy scoop-style tortilla chips are your best bet. Thin chips break under the weight of all those layers. I use Tostitos Scoops or restaurant-style chips that can handle a heavy load.
Can I add meat to this dip?
Sure. Cooked and crumbled ground beef, shredded chicken, or chorizo make great additions. Sprinkle the meat over the bean layer before adding the sour cream. Just make sure the meat is fully cooled so it doesn’t melt the sour cream layer.
Pin This Recipe!
Easy 7-Layer Taco Dip: Best No-Bake Tailgate Recipe

This no-bake 7-layer taco dip is the ultimate tailgate recipe—layers of seasoned refried beans, cool sour cream, chunky guacamole, and fresh toppings, all stacked in a dish that travels like a champ. It’s ready in 20 minutes and tastes even better after an hour in the fridge.
- Prep Time: 20 minutes
- Cook Time: 0 minutes
- Total Time: 1 hour 20 minutes (includes chilling)
- Yield: 8 servings 1x
- Category: Appetizer
- Cuisine: Mexican-American
Ingredients
- 1 can (16 oz) refried beans
- 2 tablespoons taco seasoning
- 2 tablespoons water
- 1 cup sour cream
- 1 cup prepared guacamole
- 1/2 cup mayonnaise
- 1 cup shredded Mexican blend cheese
- 1 cup pico de gallo or chunky salsa, drained
- 1/2 cup sliced black olives, drained
- 1/2 cup diced tomatoes, seeded and patted dry
- 1/4 cup chopped green onions (green parts only)
- 1/4 cup chopped fresh cilantro (optional)
- Tortilla chips for serving
Instructions
- In a small bowl, combine refried beans, taco seasoning, and water. Stir until smooth. Let sit for 10 minutes.
- Spread the seasoned bean mixture evenly across the bottom of a 9×13-inch dish using a rubber spatula.
- In a small bowl, mix sour cream and mayonnaise until smooth. Spread gently over the bean layer.
- Drop spoonfuls of guacamole over the sour cream layer and spread gently. If thick, let it sit at room temperature for 10 minutes first.
- Sprinkle shredded cheese evenly over the guacamole layer. Press down lightly.
- Drain the pico de gallo or salsa in a fine-mesh strainer. Spoon over the cheese layer.
- Top with sliced black olives, diced tomatoes, green onions, and cilantro if using.
- Cover with plastic wrap and refrigerate for at least 1 hour (overnight is better).
- Remove from fridge 15 minutes before serving. Serve with tortilla chips.
Notes
Drain all canned and jarred ingredients to prevent watery dip. Let the bean mixture rest for 10 minutes to allow flavors to meld. For best results, chill overnight. Do not freeze or reheat.
Nutrition
- Serving Size: 1/8 of recipe
- Calories: 280
- Sugar: 3
- Sodium: 520
- Fat: 18
- Saturated Fat: 6
- Carbohydrates: 22
- Fiber: 5
- Protein: 8
Keywords: 7-layer dip, taco dip, no-bake dip, tailgate recipe, game day dip, easy appetizer, cold dip



