Love this? Save it for later!
Share the inspiration with your friends
It’s 11:45 PM on a Tuesday, and the house is finally quiet. The dishwasher has stopped humming, the kids are asleep, and the only thing I want is a warm, gooey sandwich that doesn’t require standing over a hot stove for an hour. Honestly, I don’t want to cook dinner. I just want comfort. This is the exact moment these easy baked ham and cheese sliders enter my life. They aren’t fancy. They don’t have twelve ingredients you can’t pronounce. They are just soft Hawaiian rolls, sharp cheddar, sliced ham, a little mustard, and a buttery glaze that tastes like victory.
I’ve made these dozens of times. Sometimes for a crowd of twenty people at a holiday gathering, and sometimes just for myself when I’m feeling lazy. There is something deeply satisfying about sliding a whole dozen-foil tray into the oven and pulling it out ten minutes later, golden and bubbling. It feels like cheating, but it’s really just smart cooking. You know that feeling when you find a recipe that works every single time? That’s this one. It’s reliable, it’s fast, and it tastes like it took hours.
Let’s face it, life gets busy. We don’t always have time to plan elaborate meals or shop for exotic ingredients. This recipe fits into that gap perfectly. It uses pantry staples and leftovers. It’s forgiving if you forget to soften the butter. It’s perfect for those nights when you’re hungry but exhausted. The smell alone fills the house with warmth, making everyone wonder what kind of magic is happening in the kitchen. It’s simple, it’s delicious, and it’s mine.
Why You’ll Love This Recipe
I’ve tested a lot of slider recipes over the years. Some are too dry. Some fall apart the moment you pick them up. Some taste like cardboard. This one is different. It’s the result of a few burnt batches and a lot of tweaking until I got it just right. It’s my best version, and I think you’ll agree once you take that first bite.
- Quick & Easy: These come together in under 15 minutes of prep time. You just slice the rolls, add the filling, brush with butter, and bake. It’s perfect for busy weeknights or last-minute cravings when you need something fast but satisfying.
- Simple Ingredients: No fancy grocery trips needed. You likely already have everything in your kitchen. Hawaiian rolls, cheddar cheese, deli ham, mustard, and butter. That’s it. Four main ingredients plus the bread.
- Perfect for Game Day: Whether it’s football Sunday or just a casual hangout, these are the ultimate crowd-pleaser. They are easy to grab, easy to eat, and always get rave reviews from kids and adults alike.
- Unbelievably Delicious: The texture and flavor combo is next-level comfort food. The soft, sweet bread contrasts perfectly with the salty ham and sharp cheese. The buttery glaze ties it all together in a way that feels indulgent but simple.
- Consistent Results: This recipe isn’t just good—it’s the kind that makes you close your eyes after the first bite. It’s comfort food reimagined—faster, but with the same soul-soothing satisfaction. It’s perfect for impressing guests without stress, or turning a simple meal into something memorable.
What makes this recipe stand out from the rest is the technique. It’s not just stacking ingredients on bread. It’s about creating a unified, golden-brown package. The key is the glaze. When you brush that butter mixture over the top before baking, it creates a crispy exterior while keeping the inside soft. It’s a small detail that makes a huge difference. I learned this the hard way, after making sliders that were dry and bland. Now, I never skip the glaze.
Also, the choice of bread matters. Hawaiian rolls are sweet and soft, which balances the savory ham and cheese. If you use a different bread, the flavor profile changes completely. I’ve tried brioche, and it’s good, but Hawaiian rolls are the gold standard for this specific recipe. They hold up well in the oven without getting soggy or falling apart. It’s a balance of textures that works every time.
Another reason you’ll love this is its versatility. You can add pickles, jalapeños, or sauerkraut if you want. But honestly, the classic version is perfect on its own. It’s a blank canvas that invites you to experiment, but it’s also forgiving enough to be made exactly as written. It’s the kind of recipe that builds your confidence in the kitchen. You’ll make it once, and then you’ll make it again because it’s just that good.
What Ingredients You Will Need
This recipe uses simple, wholesome ingredients to deliver bold flavor and satisfying texture without the fuss. You don’t need to be a professional chef to make this work. In fact, the simplicity is the point. The ingredients are chosen for their ability to meld together in the oven, creating a cohesive flavor profile that is greater than the sum of its parts. Most of these items are pantry staples or easy-to-find deli items.
Here is what you need to gather before you start:
- Hawaiian Sweet Rolls (1 package, 12 count): This is the foundation. Look for a package that is still intact, not separated into individual rolls. Brands like King’s Hawaiian are my go-to because they are consistently soft and sweet. Avoid rolls that are too dense or dry, as they won’t bake up properly.
- Sliced Ham (8-10 ounces): You want thick-cut deli ham if you can find it. It holds together better than thin-sliced ham. Ham and Swiss is a classic combo, but I prefer ham and cheddar for a sharper flavor. You can use leftover roasted ham if you have it, just chop it up to fit the rolls.
- Cheddar Cheese Slices (8-10 slices):: Sharp cheddar adds a nice bite that cuts through the sweetness of the bread. American cheese melts better, but it’s bland. I recommend a mix if you want the best of both worlds, but sharp cheddar is my preference for flavor. Make sure they are standard lunch slices, not shredded, so they stay in place.
- Yellow Mustard (2 tablespoons): This adds a tangy kick that balances the sweetness. Dijon mustard works too, but yellow mustard is traditional and has a sharper profile. Don’t skip this, or the sliders will taste too sweet.
- Unsalted Butter (4 tablespoons): This is for the glaze. Unsalted butter allows you to control the salt level. If you only have salted butter, reduce the added salt in the glaze.
- Garlic Powder (1/2 teaspoon): This adds depth to the butter glaze. It’s subtle but important. It makes the butter taste more savory and less like plain melted fat.
- Poppy Seeds (1 teaspoon): Optional, but highly recommended. They add a nice crunch and visual appeal. If you don’t have them, sesame seeds or everything bagel seasoning work well as substitutes.
- Salt (1/4 teaspoon): Just a pinch to enhance the flavors in the glaze.
When selecting your ingredients, quality matters, but you don’t need to buy the most expensive items. The ham should be fresh and not too salty. The cheese should be a flavor you enjoy eating on its own. If the cheese is bland, the slider will be bland. I always taste my cheese before I buy it. For the butter, use real butter, not margarine. The flavor difference is significant, especially when it’s baked into the bread.
If you are making these for a specific occasion, you can adjust the ingredients. For a spicy version, add jalapeño slices. For a tangy version, add pickles. But stick to the core ingredients for the best results. The balance of sweet, salty, and savory is what makes this recipe work. Don’t overcrowd the rolls with too many fillings, or they won’t bake evenly. Less is more here.
Equipment Needed
You don’t need a lot of fancy tools to make these sliders. In fact, the beauty of this recipe is its simplicity. Here is what you’ll need:
- 9×13 Inch Baking Dish: This is the standard size for a dozen rolls. Make sure it’s deep enough to hold the rolls without spilling over. Glass or ceramic dishes work best because they distribute heat evenly. Metal pans can sometimes cause the bottoms to burn, so be careful.
- Chef’s Knife: You’ll need a sharp knife to slice the rolls in half horizontally. A serrated bread knife works well if the rolls are very soft, but a chef’s knife is easier to control.
- Small Bowl and Whisk: For mixing the glaze. A small bowl is convenient because you can dip a pastry brush directly into it. A whisk helps combine the butter and spices evenly.
- Pastry Brush: Essential for applying the glaze. Silicone brushes are easier to clean than bristle brushes. Make sure you brush every roll evenly to get that golden color.
- Aluminum Foil: You’ll need this to cover the sliders during the first part of baking. This prevents the tops from burning before the cheese melts. Heavy-duty foil works best.
If you don’t have a 9×13 dish, you can use two 8×8 dishes, but you’ll need to adjust the baking time slightly. Smaller dishes mean the heat penetrates faster, so keep an eye on them. For the knife, a dull knife will crush the rolls. Sharpen your knife or buy a new one if needed. It makes a huge difference in the presentation.
Budget-friendly options include using a standard glass baking dish from your kitchen drawer. You don’t need a special ceramic one. For the brush, a clean makeup brush works in a pinch, but a silicone pastry brush is worth the few dollars. Foil is cheap and essential. Don’t try to reuse old, torn foil. It won’t cover the dish properly, and the sliders will dry out.
Preparation Method

Getting these sliders ready is straightforward, but there are a few key steps to follow for the best results. Here is how to do it:
- Preheat the Oven: Start by preheating your oven to 350°F (175°C). This ensures the oven is at the right temperature when the sliders go in. It takes about 10-15 minutes to preheat, so start early.
- Prepare the Rolls: Place the whole pack of Hawaiian rolls on a cutting board. Using a sharp knife, slice the rolls in half horizontally. Be gentle so you don’t tear the bottom half. You should have a top layer of rolls and a bottom layer of rolls. Set them aside.
- Layer the Ham: Take the bottom layer of rolls. Lay the sliced ham over each roll. You can fold the ham in half if it’s too big, or just use one slice per roll. Make sure each roll has ham on it. This is the savory base of the slider.
- Add the Cheese: Place a slice of cheddar cheese on top of each ham slice. The cheese should cover the ham completely. If you are using a mix of cheeses, layer them now. The cheese needs to be in direct contact with the ham to melt properly.
- Top with Bread: Place the top layer of rolls back onto the ham and cheese. Press down gently to secure everything. The rolls should be stacked neatly. If any filling is sticking out, tuck it in.
- Mix the Glaze: In a small bowl, melt the butter in the microwave for 30-45 seconds. It should be liquid but not hot. Add the garlic powder, poppy seeds, and salt. Whisk until combined. The mixture should be smooth and fragrant.
- Brush the Glaze: Using a pastry brush, generously brush the butter mixture over the top of the rolls. Make sure to get into all the crevices. The rolls should look shiny and coated. This step is crucial for flavor and texture.
- First Bake: Cover the baking dish tightly with aluminum foil. Place it in the preheated oven and bake for 10 minutes. The foil traps steam, which helps the rolls heat through and the cheese melt without burning the tops.
- Uncover and Finish: Remove the foil carefully. The cheese should be melted, and the rolls should be soft. Bake for another 5 minutes uncovered. This allows the tops to turn golden brown and crisp up. Keep an eye on them to prevent burning.
- Rest and Serve: Remove from the oven and let them rest for 5 minutes. This allows the cheese to set slightly so the sliders don’t fall apart when you cut them. Serve warm.
During the preparation, pay attention to the cheese. If it’s not melting in the first 10 minutes, give it more time. But don’t burn the tops. The butter glaze can brown quickly, so watch the color. If it’s getting too dark, cover it with foil again for a minute. The goal is golden brown, not dark brown.
When brushing the glaze, don’t be shy. Use it all. The rolls need the moisture to stay soft. If you run out of glaze, don’t worry, but try to get as much as possible. The glaze is where the flavor lives. Make sure you get into the gaps between the rolls. That’s where the magic happens.
Cooking Tips & Techniques
I’ve made these sliders enough times to know what works and what doesn’t. Here are some pro tips to ensure success:
- Don’t Skip the Resting Time: I know it’s tempting to eat them right out of the oven, but wait. The cheese is molten lava when it comes out. If you cut into them immediately, it will spill out. Letting them rest for 5 minutes allows the cheese to set slightly, making them easier to eat.
- Use Room Temperature Butter: For the glaze, melted butter is best. But if your butter is too cold, it won’t mix well with the spices. Melt it in the microwave and let it cool for a minute before adding the dry ingredients. This ensures an even distribution of flavor.
- Watch the Oven Temperature: Every oven is different. If your oven runs hot, check the sliders a few minutes early. If it runs cool, they might need a minute or two longer. Use the color of the tops as your guide. Golden brown is the target.
- Don’t Overcrowd: Make sure the rolls fit snugly in the dish. If they are too spread out, they will dry out. If they are too tight, they might not bake evenly. A 9×13 dish is the right size for a dozen rolls. If you have extra rolls, use a second dish.
- Experiment with Fillings: While ham and cheese is classic, you can add other ingredients. Caramelized onions, sauerkraut, or pickles add great flavor. But don’t add wet ingredients like tomato slices, as they can make the bread soggy. If you add wet ingredients, pat them dry first.
One common mistake is using too much glaze. If you soak the rolls, they will fall apart. You want a coating, not a bath. Brush lightly and evenly. Another mistake is using cold cheese. If your cheese is straight from the fridge, it takes longer to melt. Let it sit on the counter for 10 minutes before assembling. This helps it melt faster and more evenly.
Multitasking is key here. While the sliders are baking, you can prepare a side salad or chop vegetables for a snack. The smell will fill the house, so be prepared for eager guests. Keep the oven door closed as much as possible to maintain the temperature. Opening it too often lets the heat escape and increases baking time.
Variations & Adaptations
While the classic ham and cheese is my favorite, there are many ways to twist this recipe. Here are a few ideas:
- Spicy Jalapeño: Add sliced jalapeños on top of the ham. This adds a nice kick that balances the sweetness. If you don’t like heat, use pickled jalapeños for a tangy flavor without too much spice.
- BBQ Pulled Pork: Swap the ham for pulled pork and the cheddar for pepper jack cheese. Add a drizzle of BBQ sauce before baking. This is a great alternative for those who prefer pork over ham.
- Chicken and Bacon: Use shredded rotisserie chicken and crispy bacon bits. Add a slice of Swiss cheese and a smear of mayo on the bottom roll. This is a bit more gourmet but still very easy.
- Vegetarian Option: Replace the ham with roasted vegetables like zucchini, bell peppers, and onions. Use a vegan cheese slice if needed. Add a pesto spread for extra flavor. It’s a hearty and delicious vegetarian alternative.
For dietary restrictions, you can use gluten-free Hawaiian-style rolls if you can find them. They might be slightly drier, so add a bit more glaze. For a dairy-free version, use dairy-free cheese slices and butter alternatives. The flavor will be different, but the texture will still be good.
I once tried making these with brioche rolls, and they were delicious but much richer. If you use a different bread, adjust the glaze amount. Sweeter breads need less glaze, while denser breads need more. It’s all about balance. Don’t be afraid to experiment, but stick to the core technique of layering and glazing.
Serving & Storage Suggestions
These sliders are best served warm, right out of the oven. They are perfect as an appetizer or a light lunch. Here are some serving ideas:
- Complementary Dishes: Serve with a side of crispy fries or a fresh green salad. A bowl of tomato soup is also a great pairing, especially in the fall. For a complete meal, add some fruit or crackers.
- Beverages: A cold beer or a glass of iced tea pairs well with the savory flavor. For a non-alcoholic option, try some lemonade or sparkling water with lime.
- Storage: Leftovers can be stored in an airtight container in the refrigerator for up to 3 days. They also freeze well for up to 2 months. Wrap them tightly in plastic wrap and then foil.
- Reheating: To reheat, place them in the oven at 350°F for 10 minutes, or in the microwave for 30-60 seconds. The oven method restores the crispiness of the top, while the microwave is faster but softer.
- Flavor Development: The flavors meld together nicely after a day in the fridge. The bread absorbs the moisture from the cheese and ham, making them even more cohesive. Leftovers are often better than fresh ones.
When serving, cut the sliders into individual portions. Use a sharp knife to slice between the rolls. This makes them easy to grab and eat. If you are serving them at a party, use toothpicks to hold them together. It’s a nice touch that prevents mess.
For storage, make sure the sliders are completely cool before putting them in the fridge. Trapping steam will make them soggy. When reheating, don’t overdo it. You just want them warm, not hot. Overheating can dry out the bread. Keep an eye on them in the microwave.
Nutritional Information & Benefits
While these sliders are indulgent, they are also a good source of protein and calcium. Here is a rough estimate of the nutritional value per slider:
- Calories: Approximately 250-300 calories per slider, depending on the size of the roll and amount of glaze.
- Protein: The ham and cheese provide a good amount of protein, around 10-12 grams per slider.
- Calcium: Cheddar cheese is rich in calcium, contributing to bone health.
- Dietary Considerations: These sliders contain gluten and dairy. For gluten-free options, use gluten-free rolls. For dairy-free, use vegan cheese.
- Allergens: Contains gluten, dairy, and possibly soy (in some cheese slices). Always check labels if you have allergies.
From a wellness perspective, these sliders are a treat, not a health food. But they are a balanced meal in terms of macros. The carbs from the bread, protein from the ham and cheese, and fat from the butter and cheese provide energy. They are satisfying and help curb cravings. Enjoy them in moderation as part of a balanced diet.
I love these sliders because they are a comfort food that doesn’t leave me feeling sluggish. The protein keeps me full, and the carbs give me energy. It’s a good balance. I often make them on Sundays for a relaxed lunch. They are a reminder that simple food can be nourishing and delicious.
Conclusion
Easy Baked Ham and Cheese Sliders are a staple in my kitchen for a reason. They are fast, delicious, and universally loved. Whether you are hosting a party or just craving a warm sandwich, these sliders deliver. I hope you try this recipe and enjoy it as much as I do. Don’t be afraid to customize it with your favorite ingredients. Make it your own.
I’d love to hear how they turn out for you. Leave a comment below with your variations or tips. Share your photos on social media and tag me. I love seeing your creations. And if you have any questions, feel free to ask. I’m here to help.
Happy cooking! These sliders are waiting for you. Give them a try, and I promise you won’t be disappointed. They are simple, they are tasty, and they are perfect for any occasion. Enjoy every bite.
Frequently Asked Questions
Can I freeze these sliders?
Yes, you can freeze them. Assemble the sliders but do not bake them. Wrap them tightly in plastic wrap and foil. They can be frozen for up to 2 months. Thaw in the fridge overnight before baking.
Can I use a different type of cheese?
Absolutely. Swiss, provolone, or American cheese all work well. Sharp cheddar is my preference for flavor, but feel free to use what you like.
How do I prevent the sliders from falling apart?
Make sure to press the top layer of rolls down gently after adding the filling. Also, let them rest for 5 minutes after baking. This helps the cheese set and hold everything together.
Can I make these ahead of time?
Yes, you can assemble them in the morning and bake them in the evening. Keep them covered in the fridge until you are ready to bake. The glaze should be added just before baking to prevent the bread from getting soggy.
What if I don’t have Hawaiian rolls?
You can use brioche rolls or dinner rolls. Just note that the flavor will be different. Hawaiian rolls are sweet, which balances the savory filling. Other rolls are less sweet, so you might want to add a little sugar to the glaze.
Pin This Recipe!
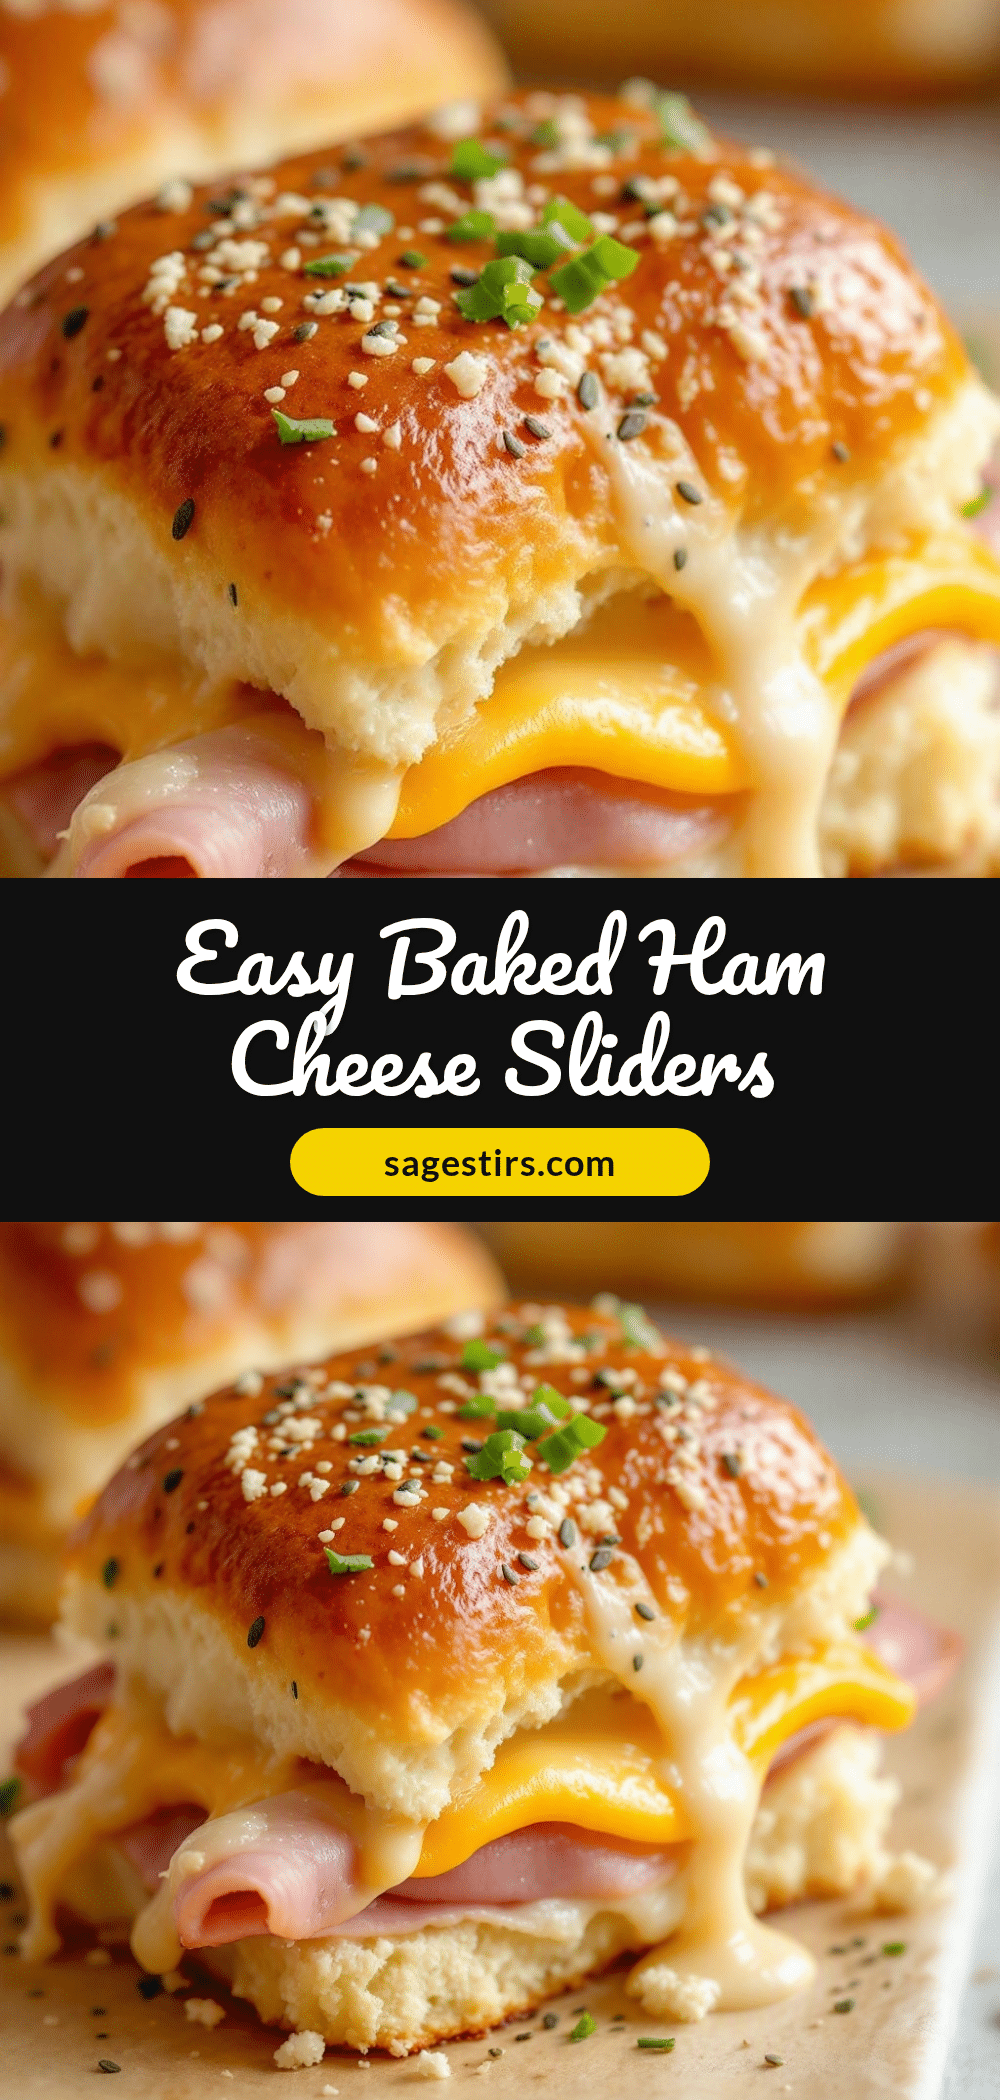
Easy Baked Ham and Cheese Sliders: 5-Ingredient Party Food

These easy baked ham and cheese sliders are a quick, comforting party food made with simple ingredients like Hawaiian rolls, sharp cheddar, and ham. They are perfect for busy weeknights or game day gatherings.
- Prep Time: 15 minutes
- Cook Time: 15 minutes
- Total Time: 30 minutes
- Yield: 12 servings 1x
- Category: Appetizer
- Cuisine: American
Ingredients
- 1 package (12 count) Hawaiian Sweet Rolls
- 8–10 ounces sliced deli ham
- 8–10 slices sharp cheddar cheese
- 2 tablespoons yellow mustard
- 4 tablespoons unsalted butter
- 1/2 teaspoon garlic powder
- 1 teaspoon poppy seeds
- 1/4 teaspoon salt
Instructions
- Preheat oven to 350°F (175°C).
- Place the whole pack of Hawaiian rolls on a cutting board and slice them in half horizontally to create a top and bottom layer.
- Lay the sliced ham over each roll on the bottom layer.
- Place a slice of cheddar cheese on top of each ham slice.
- Place the top layer of rolls back onto the ham and cheese, pressing down gently.
- In a small bowl, melt the butter in the microwave. Add garlic powder, poppy seeds, and salt, then whisk until combined.
- Generously brush the butter mixture over the top of the rolls.
- Cover the baking dish tightly with aluminum foil and bake for 10 minutes.
- Remove the foil and bake for another 5 minutes until the tops are golden brown.
- Remove from oven and let rest for 5 minutes before serving.
Notes
Let the sliders rest for 5 minutes after baking to allow the cheese to set so they don’t fall apart. Ensure the rolls fit snugly in the dish. You can substitute poppy seeds with sesame seeds or everything bagel seasoning.
Nutrition
- Serving Size: 1 slider
- Calories: 275
- Sugar: 6
- Sodium: 650
- Fat: 14
- Saturated Fat: 7
- Carbohydrates: 22
- Fiber: 1
- Protein: 11
Keywords: ham and cheese sliders, baked sliders, party food, easy recipes, Hawaiian rolls, game day food, comfort food, quick dinner