Love this? Save it for later!
Share the inspiration with your friends
The board was empty before the main course was even served. My partner looked at the wooden platter, then at me, with that familiar half-smile that says, “You know there is nothing left.” It wasn’t just eaten; it was dismantled with precision. We had planned this for a quiet Friday night in, just some wine and a little grazing while we caught up on the week. I didn’t want to cook anything heavy. I didn’t want to stand over a stove or deal with pots that needed scrubbing later. I just wanted something that felt special but required zero effort.
Honestly, I was a little nervous. Charcuterie boards can feel intimidating if you aren’t used to them. You worry about spending too much money on fancy meats or buying cheeses that go bad before you finish them. But this version? It’s different. It’s built for real life. It’s built for the nights when you’re tired but still want to feel like you made an effort.
The first time I made this, I threw together whatever was in the fridge. A few slices of salami, a wedge of brie, some crackers I already had, and a handful of grapes. I didn’t measure anything. I just piled it on a cutting board. We ate it standing up by the kitchen island. That was the moment I realized that perfection isn’t the goal. Connection is.
Now, it’s our go-to. When friends drop by unexpectedly, I don’t panic. I just grab the board. When we want a low-key date night, this is the appetizer. It’s simple, it’s satisfying, and it uses ingredients you probably already have or can grab quickly. It’s not about showing off. It’s about sharing a moment without the stress of a full meal.
I’ve tried complicated versions with five different cheeses and imported jams. They’re nice, sure. But they’re also a lot of work. This easy everyday charcuterie board for two strips it all back. It’s just five main ingredients. That’s it. No fuss, no mess, just good food and good company.
Why You’ll Love This Recipe
Let’s be honest, most appetizers require actual cooking. You have to chop, sauté, bake, or at least heat something up. This recipe flips that script. It’s built on the idea that sometimes the best meals are the ones you don’t have to work for. I’ve tested this setup many times, and it consistently wins because it removes the anxiety from hosting. You know that feeling when you’re worried the food won’t look pretty? With this board, “messy” actually looks intentional and rustic.
Here is why this specific setup works so well for you:
* **Quick & Easy**: It takes about ten minutes to assemble. That is it. You don’t need to preheat an oven or wait for water to boil. It is perfect for busy weeknights when you want to relax instead of labor in the kitchen.
* **Simple Ingredients**: You likely already have most of this in your pantry or fridge. There is no need for a special trip to a specialty shop. It uses accessible items that taste great together.
* **Perfect for Date Night**: It sets a mood without the pressure of a formal dinner. It feels intimate and casual, allowing you to focus on each other rather than the food.
* **Crowd-Pleaser**: Even people who claim they don’t like charcuterie usually love this. The combination of salty, sweet, and creamy hits all the right notes for any palate.
* **Unbelievably Delicious**: The texture contrast is what makes it special. You get the crunch of the cracker, the softness of the cheese, and the snap of the fruit. It is next-level comfort food.
* **No Waste**: Since it is for two, you buy small portions. You aren’t buying a huge wheel of cheese that will sit in your fridge for a month. You use what you need, when you need it.
What makes this different from other boards you’ve seen? It’s the balance. Many boards are too salty or too heavy. This one is balanced with fresh fruit and light crackers. It feels lighter on the stomach but still satisfying. It’s the kind of snack that makes you close your eyes after the first bite because it just works. It’s comfort food reimagined for two people who just want to enjoy each other’s company.
What Ingredients You Will Need
This recipe uses simple, wholesome ingredients to deliver bold flavor and satisfying texture without the fuss. The key here is quality over quantity. Since there are only five main components, each one needs to do its job. You don’t need the most expensive items, but you do need items that taste good on their own. If you buy the cheapest crackers available, the whole board will suffer. So, pick things you would eat plain.
Here is what you need to gather:
* **Cured Meat (4-6 ounces)**: I recommend using a mild salami or pepperoni. These slices are thin and easy to fold. Avoid thick-cut ham or roast beef, as they can feel heavy. I personally like the brand Boar’s Head for their consistency, but any deli meat works. Fold the slices loosely to create volume on the board.
* **Soft Cheese (4-6 ounces)**: A wedge of Brie or Camembert is ideal. It’s creamy and rich. Look for a cheese that is slightly soft to the touch but not runny. If you are lactose intolerant, a soft goat cheese works well too. Let it come to room temperature before serving; cold cheese doesn’t have the same flavor.
* **Crackers (1 package)**: Go for a neutral, crisp cracker. Water crackers, sesame seed crackers, or a simple wheat cracker are best. They act as the vehicle for the cheese and meat. Avoid heavily flavored crackers like garlic or herb, as they might clash with the fruit.
* **Fresh Fruit (1 cup)**: Grapes are the classic choice because they are easy to grab and sweet. You can also use apple slices or figs if they are in season. The sweetness of the fruit cuts through the saltiness of the meat. Wash and dry them thoroughly so the board doesn’t get soggy.
* **Nuts (1/4 cup)**: Walnuts or almonds add a necessary crunch. They also provide a bit of healthy fat. Toasting them lightly in a dry pan for two minutes brings out their flavor, but raw nuts work fine if you are in a rush.
You can swap ingredients based on what you like. If you don’t eat pork, switch the salami for turkey or beef. If you prefer sharper cheese, try a mild cheddar. The structure remains the same. Just keep the balance of salty, sweet, creamy, and crunchy.
Equipment Needed
You don’t need a fancy set of tools for this. The beauty of this board is that it uses what you already have.
* **Serving Board**: A large wooden cutting board, a slate tile, or even a clean marble slab works. The surface should be big enough to hold everything without crowding. I use a simple oak board from my kitchen drawer. It’s sturdy and looks nice.
* **Cheese Knife**: A standard butter knife is fine for spreading soft cheese, but a small cheese knife with a hole in the tip is handy for transferring the wedges. If you don’t have one, just use a small spoon.
* **Small Bowls**: You might want a tiny ramekin or bowl for extra nuts or a dip. It adds height and variety to the board. A small ceramic dish is perfect.
* **Napkins**: Have plenty of napkins ready. Charcuterie is a finger food, and people will get their hands sticky with cheese and fruit.
If you don’t have a dedicated serving board, a large platter from your dinnerware set works perfectly. The goal is presentation, not precision. Just make sure everything fits comfortably.
Preparation Method
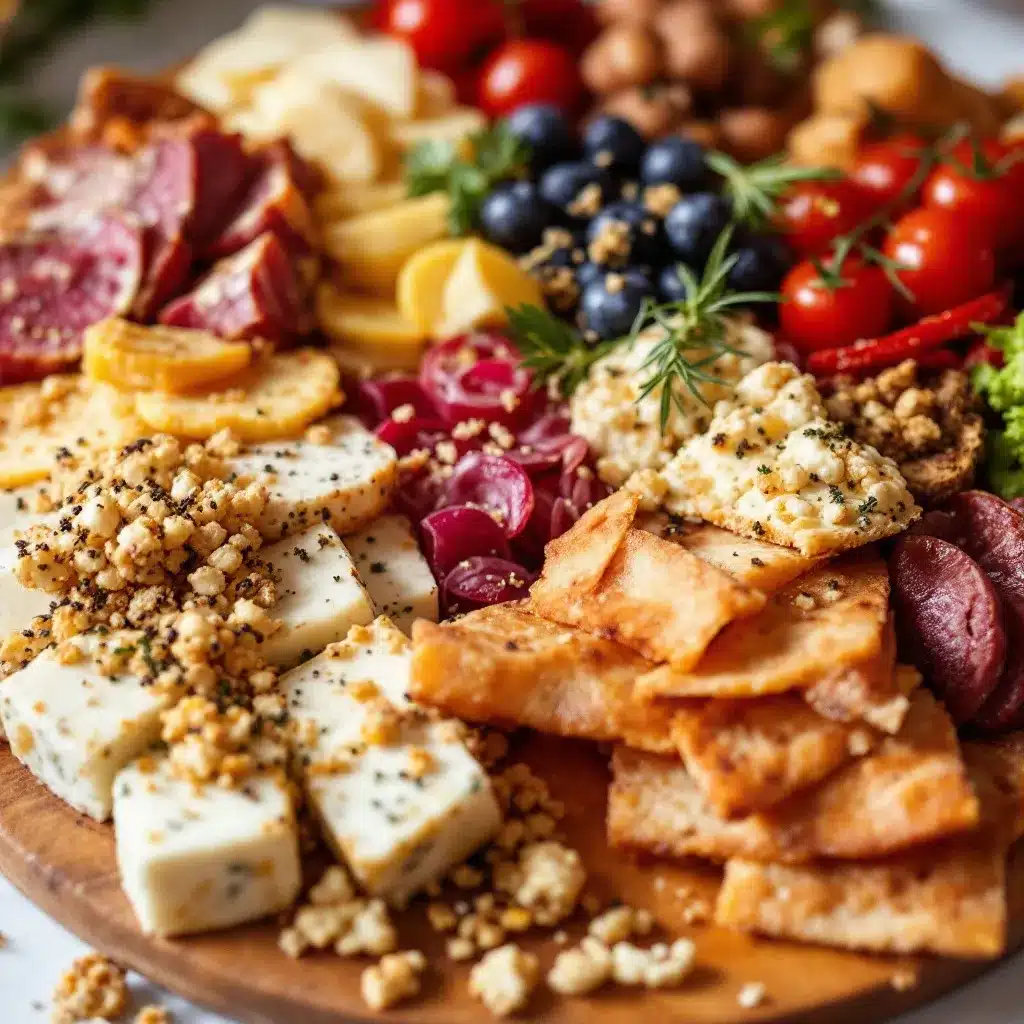
Preparing this board is straightforward. The goal is to arrange the food so it looks abundant but is easy to access. Here is how to put it together step by step.
1. **Prep the Cheese (2 minutes)**: Take the Brie or soft cheese out of the fridge. If it has a wax coating on the bottom, remove it. Place the wedge in the center of your board. This is your anchor. If you have a second cheese, place it near the first one. Let it sit for a few minutes to take the chill off.
2. **Arrange the Meat (3 minutes)**: Take the salami or cured meat slices. Instead of laying them flat, fold them in half or roll them loosely. This creates texture and makes the meat look more plentiful. Place the folded meat next to the cheese. You can tuck them under the cheese wedge for a natural look.
3. **Add the Crackers (2 minutes)**: Place the crackers on one side of the board. You can stack them slightly or fan them out. Leave some space between the crackers and the meat so people can grab them easily. If you have a variety, mix them together for visual interest.
4. **Fill with Fruit (2 minutes)**: Scatter the grapes or fruit slices around the empty spaces. Aim for clusters of three or four. This fills in the gaps and adds color. The bright green or purple of the grapes will pop against the beige crackers and white cheese.
5. **Top with Nuts (1 minute)**: Sprinkle the nuts into any remaining small holes. They act like filler and add a nice crunch. You can also pile them in a small bowl if you have one.
6. **Final Check**: Step back and look at the board. Does it look balanced? If one side looks too heavy, move some items around. Add a few more crackers or grapes if needed.
The whole process should take no more than ten minutes. Don’t overthink it. If it looks rustic, that’s a good thing. It shows you didn’t try too hard.
Cooking Tips & Techniques
There are no actual cooking steps here, but there are techniques for assembly that matter. I’ve made mistakes in the past, like putting wet fruit next to crackers, which made them soggy. Here is how to avoid those pitfalls.
* **Room Temperature is Key**: Cheese tastes bland when it’s cold. Pull your cheese out at least 30 minutes before serving. This allows the fats to soften and the flavors to bloom. It makes a huge difference in taste.
* **Create Height**: Flat boards look boring. Use the cheese wedge to create a peak. Use a small bowl for nuts to add vertical interest. This makes the board look more professional and inviting.
* **Leave Space**: Don’t cram everything in. People need room to grab a cracker without knocking over the meat. Leave small gaps between items. It looks more elegant and is easier to eat from.
* **Color Balance**: Try to have at least three colors on the board. The white of the cheese, the pink of the meat, and the green/purple of the fruit. This visual contrast makes the food more appealing to the eye.
* **Avoid Cross-Contamination**: If you are serving this to others, provide small plates or napkins. Don’t let people reach over the board with dirty hands. It’s a simple hygiene tip that keeps everyone happy.
I once made a board with honey, and I drizzled it directly on the cheese. It got sticky and hard to cut. Next time, I put the honey in a tiny separate cup. Small changes like this make the experience smoother.
Variations & Adaptations
This recipe is flexible. You can tweak it based on your dietary needs or what you have on hand.
* **Vegetarian Option**: Skip the meat entirely. Add more cheese, olives, and roasted red peppers. You can also add hummus in a small bowl for a creamy element. This turns it into a veggie grazing plate.
* **Gluten-Free**: Swap the regular crackers for rice crackers or gluten-free crispbreads. Most nuts and fruits are naturally gluten-free, so just check your cracker packaging.
* **Nut-Free**: Omit the nuts if you have allergies. Add more dried fruit, like apricots or cranberries, for chewiness. Or add some seeds, like sunflower or pumpkin seeds, for crunch.
* **Spicy Twist**: Add some spicy mustard or jalapeño slices. The heat cuts through the richness of the cheese. This is great if you like a bit of kick.
* **Seasonal Swap**: In the summer, use berries instead of grapes. In the fall, add apple slices and pear wedges. Fresh fruit changes with the seasons and keeps the recipe feeling new.
I tried a version with fig jam once, and it was amazing. The sweetness of the fig paired perfectly with the salty salami. Don’t be afraid to experiment with flavors you like.
Serving & Storage Suggestions
Serve this board immediately after assembly. The crackers stay crisp longest when they aren’t exposed to moisture for too long. Pair it with a glass of wine, like a Pinot Noir or a crisp Sauvignon Blanc. The acidity in the wine complements the cheese beautifully.
If you have leftovers, store the cheese in an airtight container in the fridge. The meat can be wrapped in plastic wrap. The crackers should be kept in a sealed bag to maintain crunch. The fruit can be stored separately in a container.
Reheating isn’t necessary, as this is a cold appetizer. However, if you made it with a dip, you can warm the dip slightly before serving. The flavors develop over time, especially the cheese, as it softens. Just let it sit out for a few minutes if it was refrigerated.
Nutritional Information & Benefits
This snack is relatively balanced. The cheese provides calcium and protein. The nuts offer healthy fats and fiber. The fruit adds vitamins and natural sugars. It’s not a light snack, so keep portion sizes in mind.
* **Calories**: Approximately 300-400 calories per serving, depending on the amount of meat and cheese.
* **Protein**: High in protein from the cheese and meat, which helps keep you full.
* **Carbs**: Moderate carbs from the crackers and fruit.
* **Fat**: Contains healthy fats from the nuts and cheese.
It’s a great option for a low-carb diet if you skip the crackers. It’s also gluten-free if you use the right crackers. It’s a mindful snack that satisfies cravings without feeling heavy.
Conclusion
This easy everyday charcuterie board for two is more than just food. It’s a way to slow down and enjoy a moment. It requires no cooking skills, just a little planning. I love it because it’s reliable. No matter how my day went, putting together this board always feels like a small victory. It’s simple, it’s delicious, and it brings people together.
I encourage you to try it your way. Add your favorite crackers, swap the cheese, or add a different fruit. Make it your own. The goal is enjoyment, not perfection.
If you make this, I’d love to hear how it went. Leave a comment below and let me know what ingredients you chose. Share your board on social media and tag me. I always enjoy seeing how you customize it. Enjoy your quiet night in.
Frequently Asked Questions
Can I make this board ahead of time?
You can assemble it up to an hour before serving. Keep it covered in the fridge until ready to eat. Take it out 30 minutes before serving to let the cheese warm up.
What wine goes best with this board?
A light red wine like Pinot Noir or a white wine like Chardonnay works well. The acidity in the wine cuts through the richness of the cheese.
Can I use hard cheese instead of soft cheese?
Yes, you can use cheddar or gouda. Slice it into cubes or sticks. It will change the texture but still taste great.
How do I keep the crackers from getting stale?
Store them in an airtight container until you are ready to assemble the board. Only put them out when you are ready to eat.
Is this board suitable for kids?
Absolutely. Kids usually love the sweet fruit and salty meat. You can cut the cheese into smaller pieces and use smaller crackers for easier handling.
Pin This Recipe!
Easy Everyday Charcuterie Board for Two: 5-Ingredient Appetizer

A simple, no-cook appetizer designed for two people that requires only five ingredients and ten minutes to assemble. Perfect for date nights or casual gatherings, this board balances salty, sweet, and creamy flavors without the stress of cooking.
- Prep Time: 10 minutes
- Cook Time: 0 minutes
- Total Time: 10 minutes
- Yield: 2 servings 1x
- Category: Appetizer
- Cuisine: American
Ingredients
- 4–6 ounces cured meat (such as salami or pepperoni)
- 4–6 ounces soft cheese (such as Brie or Camembert)
- 1 package neutral, crisp crackers (such as water crackers or sesame seed crackers)
- 1 cup fresh fruit (such as grapes, apple slices, or figs)
- 1/4 cup nuts (such as walnuts or almonds)
Instructions
- Remove the cheese from the refrigerator and let it come to room temperature for at least 30 minutes before serving. If it has a wax coating on the bottom, remove it.
- Place the cheese wedge in the center of your serving board as the anchor.
- Fold or loosely roll the cured meat slices to create volume and texture, then place them next to the cheese.
- Arrange the crackers on one side of the board, stacking or fanning them out while leaving space for easy access.
- Scatter the fresh fruit around the empty spaces in clusters of three or four to fill gaps and add color.
- Sprinkle the nuts into any remaining small holes or place them in a small bowl for added height and crunch.
- Step back and adjust the arrangement to ensure a balanced look with varied colors and textures.
- Serve immediately with wine or beverages of choice.
Notes
[‘Ensure cheese is at room temperature for best flavor.’, ‘Keep crackers in an airtight container until assembly to maintain crispness.’, ‘Wash and dry fruit thoroughly to prevent sogginess.’, ‘For a spicy twist, add spicy mustard or jalapeño slices.’, ‘Store leftovers separately: cheese in airtight container, meat wrapped in plastic, crackers in sealed bag, fruit in container.’]
Nutrition
- Serving Size: Approximately 300-40
- Calories: 350
- Sugar: 10
- Sodium: 600
- Fat: 20
- Saturated Fat: 8
- Carbohydrates: 25
- Fiber: 3
- Protein: 15
Keywords: charcuterie board, appetizer for two, date night food, no cook recipe, easy appetizer, grazing board, simple entertaining



