Love this? Save it for later!
Share the inspiration with your friends
My neighbor Margie watched me coughing through my third cup of tea last January and didn’t say anything at first. Then she just appeared at my door with a small jar of deep purple gummies, the color of a good garnet. “For your immune system,” she said, shrugging like it was no big deal. She’d been making them for years, she told me later, ever since her grandkids started bringing home every bug from school. I popped one out of curiosity, expecting that weird medicinal taste you get from store-bought supplements. Instead, I got this lovely tart-sweet burst of berry, like a sophisticated fruit snack that happened to be doing you a favor.
Honestly, I was a little intimidated to ask for the recipe at first. Margie’s one of those cooks who never measures anything, you know? She just *knows* when something feels right. But she sat me down at her kitchen table, the one with the slightly wobbly leg she keeps meaning to fix, and walked me through it. I scribbled notes on a napkin while she talked about simmering the elderberries just until they release their goodness, not a second longer. I’ve adapted her method a bit, scaling it down for my own kitchen, and tweaking the sweetener until it hit that perfect balance. This small batch version is the result of those afternoon lessons and a few of my own sticky-fingered experiments.
There’s something incredibly satisfying about making your own gummies. It feels a little like alchemy, turning a handful of dried berries and some gelatin into these little jewel-toned immune boosters. And the best part? You control exactly what goes into them. No high fructose corn syrup, no weird preservatives, no artificial colors. Just real food, doing what real food does. Maybe you’ve been there, staring at the ingredient list on a package of gummy vitamins and wondering what half those words even mean. That’s exactly why this recipe stuck with me. I keep making them because they actually work, they taste great, and honestly, they make me feel a little bit like a kitchen wizard.
Why You’ll Love This Recipe
Let me tell you, after testing this recipe about six times (and cleaning elderberry syrup off my stove more times than I care to admit), I’ve nailed down exactly why this version works so well. It’s not just another wellness trend—it’s a genuinely useful recipe that fits into real life.
- Quick & Easy: The active time here is about 15 minutes. Seriously. The hardest part is waiting for them to set in the fridge. This is perfect for a Sunday afternoon when you’re already puttering around the kitchen.
- Simple Ingredients: You need dried elderberries, water, gelatin, and a sweetener. That’s it. No trip to a specialty health food store required. I bet you already have most of these in your pantry.
- Perfect for Cold Season: These little gems are my go-to when I feel that first tickle in my throat or when everyone in the office is sniffling. They’re also great for travel—just toss a few in a small container in your bag.
- Crowd-Pleaser: I’ve given jars of these to friends who swear they don’t like “healthy stuff,” and they always ask for more. The tart, fruity flavor is genuinely delicious, not something you have to choke down.
- Cost-Effective: A bag of dried elderberries goes a long way, and making your own gummies costs a fraction of what you’d pay for fancy store-bought versions. Plus, you get way more gummies for your money.
What makes this recipe different from the dozens of others you might find online? It’s the ratio, honestly. I’ve played with the liquid-to-gelatin ratio until the gummies have that perfect texture—firm enough to hold their shape, but soft enough to be pleasant to chew. They’re not rubbery, and they’re not mushy. They’re just right. And this small batch size means you’re not committing to a massive project. It’s approachable, forgiving, and absolutely foolproof once you know a few simple tricks.
This recipe is the kind that makes you feel good about feeding yourself and your family. It’s comfort food for your immune system, made with your own two hands. There’s a quiet pride in that, you know?
What Ingredients You Will Need
This recipe uses simple, wholesome ingredients to deliver a powerful immune boost without any of the junk. Most of these are pantry staples for anyone who does even a little bit of home cooking or herbal remedies.
- Dried Elderberries (⅓ cup / about 40g): These are the star of the show. Look for dried organic elderberries from a reputable brand like Frontier Co-op or Starwest Botanicals. They should be dark, shriveled, and smell faintly sweet and earthy. Don’t use fresh elderberries—they need to be cooked to be safe, and dried berries are more concentrated and consistent for this purpose.
- Water (1 cup / 240ml): Filtered water is best, especially if your tap water has a strong chlorine taste. You want the pure elderberry flavor to shine through.
- Raw Honey or Maple Syrup (3-4 tablespoons / 45-60ml): This is your sweetener and your flavor balancer. I prefer raw honey for its additional immune-supporting properties, but maple syrup works beautifully for a vegan option. The amount is adjustable—start with 3 tablespoons and taste the syrup before you add the gelatin. You want it pleasantly sweet, not cloying. If you’re using honey, make sure it’s runny and easy to stir in.
- Unflavored Gelatin Powder (3 tablespoons / about 25g): This is what gives the gummies their structure. I recommend a high-quality brand like Great Lakes or Vital Proteins. Grass-fed gelatin is a nice bonus, but any unflavored gelatin will work. Do not substitute with flavored gelatin packets—they have added sugar and artificial flavors that will throw off the recipe. For a vegan version, you can use agar agar powder, but the texture will be different (more jelly-like than chewy) and the ratio is different (use about 2 teaspoons of agar agar, but note that the texture is never quite the same).
- Optional: Lemon Juice (1 tablespoon / 15ml): A squeeze of fresh lemon juice brightens the flavor and helps preserve the gummies slightly. It also adds a little vitamin C boost. I almost always include it unless I’m out of lemons.
- Optional: Vitamin C Powder (¼ teaspoon): This is totally optional, but I sometimes add a pinch of vitamin C powder (ascorbic acid) for an extra immune kick. It adds a slight tartness, which I love. Don’t overdo it, or the gummies will be too sour.
Ingredient Selection Tips: When buying elderberries, look for ones that are plump and dark. Avoid berries that look dusty or have a lot of stem pieces mixed in. I’ve found that the quality of your gelatin really matters—cheap gelatin can result in a grainy texture or gummies that don’t set properly. Spend the extra dollar for a good brand. Trust me on this one.
Equipment Needed
You don’t need a lot of fancy equipment for this recipe, which is part of its charm. Here’s what you’ll actually use:
- Small Saucepan: A 1- or 2-quart saucepan is perfect for simmering the elderberries. I use my trusty All-Clad, but any non-reactive pan (stainless steel or enameled) will work fine.
- Fine-Mesh Strainer or Cheesecloth: You need something to strain the berries out of the syrup. A fine-mesh strainer works great, but if you want a super clear syrup, line it with a double layer of cheesecloth. I usually just use the strainer—a few tiny berry bits never hurt anyone.
- Small Bowl: For blooming the gelatin. A cereal bowl works perfectly.
- Silicone Gummy Molds: These are not strictly necessary, but they make the gummies look so professional and fun. You can find them in all shapes—bears, stars, hearts, even little dinosaurs. If you don’t have molds, you can pour the mixture into a small glass dish and cut it into squares once it’s set. I’ve done both, and the molds are more fun, but the dish method is perfectly fine.
- Whisk or Fork: For stirring the gelatin into the syrup. A small whisk is ideal, but a fork works in a pinch.
- Dropper or Small Pitcher: For filling the molds. A small glass measuring cup with a spout works great. A turkey baster also works surprisingly well. I’ve used a clean dropper before, and it’s precise but slow.
- Baking Sheet or Plate: To hold the filled molds while they set in the fridge. This just makes them easier to move around.
If you’re new to making gummies, I recommend starting with a simple silicone mold in a basic shape. They’re inexpensive (I got a set of four on Amazon for under ten bucks) and they last forever. Just wash them by hand with warm, soapy water and they’ll be good for years.
Preparation Method
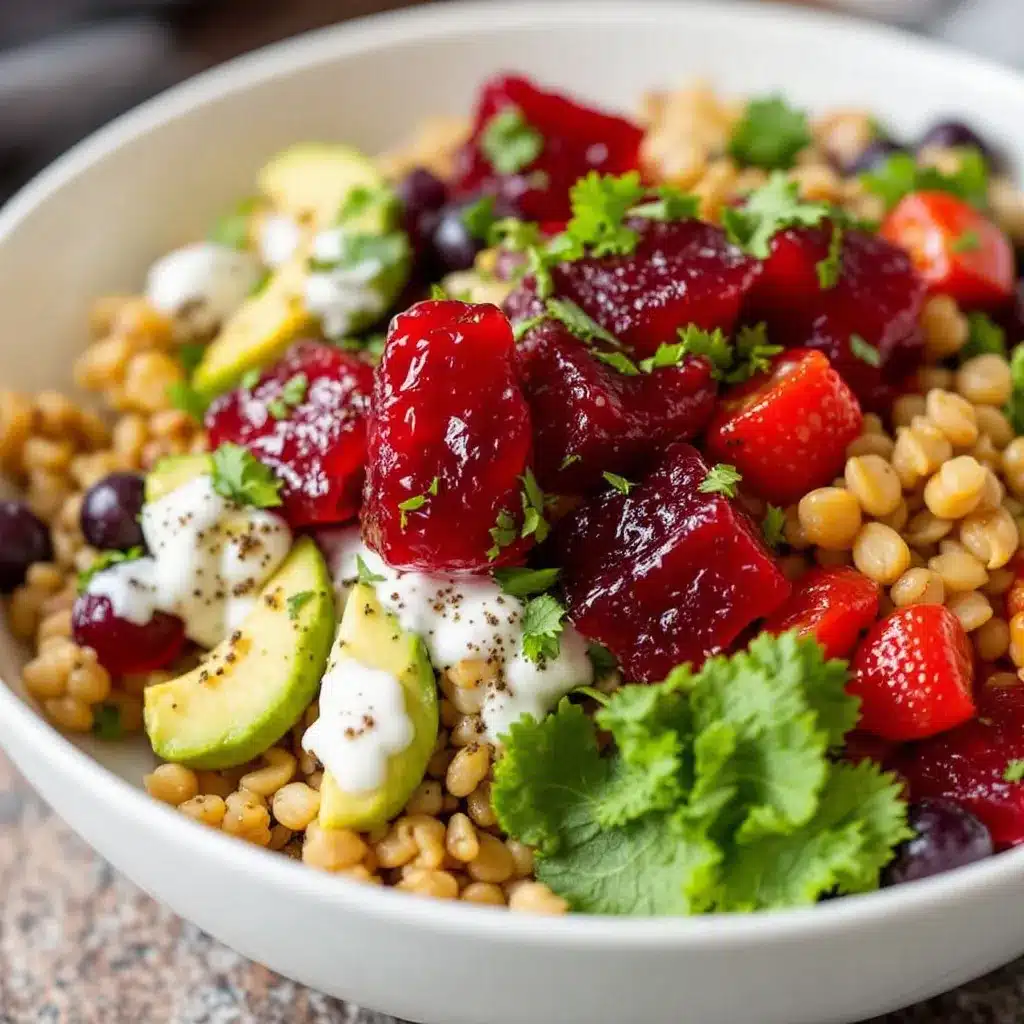
Making these gummies is surprisingly straightforward. Once you’ve done it once, you’ll be able to whip up a batch in your sleep. Here’s the step-by-step breakdown:
- Make the Elderberry Syrup (15 minutes): Place the dried elderberries and 1 cup of water in your small saucepan. Bring to a boil over medium-high heat, then reduce the heat to low and let it simmer gently for about 15 minutes. You’ll see the water turn a deep, beautiful purple as the berries release their goodness. The berries will plump up and the liquid will reduce slightly. Don’t boil it too hard, or you’ll lose too much water and the syrup will be too concentrated. You want it to be gently bubbling, not raging.
- Strain the Berries: Place your fine-mesh strainer over a small bowl or a glass measuring cup. Carefully pour the hot liquid through the strainer, pressing on the berries with the back of a spoon to extract every last drop of that gorgeous syrup. Discard the spent berries (or compost them!). You should have about ¾ cup of concentrated elderberry syrup. Let it cool for about 5 minutes until it’s warm but not hot. If it’s too hot, it can damage the gelatin’s ability to set.
- Bloom the Gelatin (5 minutes): While the syrup is cooling slightly, pour ¼ cup of the warm elderberry syrup into a small bowl. Sprinkle the gelatin powder evenly over the surface. Don’t dump it all in one spot! Sprinkle it in a thin, even layer to prevent clumps. Let it sit undisturbed for about 5 minutes. This is called “blooming,” and it allows the gelatin to absorb the liquid and hydrate. The mixture will look like a thick, jiggly paste. That’s exactly what you want.
- Combine and Warm (2 minutes): Pour the remaining warm elderberry syrup back into the saucepan. Add the honey (or maple syrup) and the lemon juice. Warm it over low heat, stirring gently, just until the honey dissolves. Do not let it boil. Now, add the bloomed gelatin mixture to the saucepan. Whisk constantly over low heat until the gelatin is completely dissolved and the mixture is smooth and glossy. This takes about 1-2 minutes. You should see no lumps or streaks of undissolved gelatin. If you’re adding vitamin C powder, whisk it in now.
- Fill the Molds (5-10 minutes): Remove the saucepan from the heat. Let the mixture cool for another 2-3 minutes—it should be warm but not hot to the touch. If it’s too hot, it can make the molds cloudy. Using your dropper or small pitcher, carefully fill the gummy molds. Work quickly but steadily, as the mixture will start to thicken as it cools. If it thickens too much, just warm it gently over low heat for a few seconds. Tap the molds gently on the counter to release any air bubbles. I always get a few bubbles, and they don’t affect the final product at all.
- Set the Gummies (2-4 hours): Place the filled molds on a baking sheet or plate and carefully transfer them to the refrigerator. Let them set for at least 2 hours, but 4 hours is better for a firmer texture. Don’t rush this step! I once tried to pop them out after an hour, and they were still too soft and squishy. Patience is key here.
- Unmold and Enjoy: Once the gummies are fully set, gently push them out of the molds. They should release easily. If they stick, you can pop them in the freezer for 5 minutes to firm them up even more. Store them in an airtight container in the refrigerator.
Sensory Cues: When your syrup is done simmering, it should look like a dark, almost opaque purple. The aroma is earthy and slightly sweet, like a forest after a rain. When you whisk in the gelatin, the mixture should become smooth and glossy, almost like a thin jelly. The final gummies should be firm but have a slight give when you press them—like a high-quality fruit snack, not a rubber band.
Cooking Tips & Techniques
I’ve made this recipe enough times to have learned a few things the hard way. Let me save you some trouble.
Don’t Over-Boil the Berries: The first time I made elderberry syrup, I let it boil for way too long, thinking I was extracting more goodness. What I actually did was make a bitter, concentrated syrup that tasted like medicine. Elderberries don’t need a long simmer—15 minutes is plenty. Any longer, and you start breaking down the compounds that make them taste good. Trust the time.
The Temperature Sweet Spot: Gelatin is sensitive to temperature. Too hot, and it loses its setting power. Too cold, and it won’t dissolve properly. The ideal temperature for adding gelatin to your syrup is around 120-130°F (49-54°C)—warm to the touch but not hot. I use an instant-read thermometer when I’m being precise, but honestly, I’ve learned to judge it by feel. If it’s too hot to comfortably touch, let it cool.
Prevent Sticky Molds: If your gummies are sticking to the molds, you might not have let them set long enough. Or, your mixture might have been too hot when you poured it. I’ve also found that giving the molds a very light spray with a neutral oil (like coconut oil) before filling them helps them release perfectly. Just a tiny spritz—you don’t want oily gummies.
Work in Batches: If you’re using multiple small molds, fill them one at a time and keep the remaining mixture warm on the stove (on the lowest heat, stirring occasionally). This prevents it from thickening before you’re done. I learned this after my third batch turned into a semi-solid blob halfway through filling the second mold.
Deal with Foam: Sometimes, especially if you whisk vigorously, you’ll get a layer of foam on top of your gummy mixture. This is just air bubbles. You can skim it off with a spoon before pouring, or you can just accept it—the foam will set into a slightly lighter, airier layer on top of your gummies. It’s not a problem, just a texture thing. I usually skim it because I’m a little particular, but it’s totally optional.
Variations & Adaptations
One of the best things about this recipe is how easy it is to adapt. Here are a few of my favorite variations:
- Spiced Elderberry Gummies: Add a cinnamon stick, a few cloves, and a thin slice of fresh ginger to the pot while you simmer the elderberries. Strain them out with the berries. The spices add a lovely warmth that’s perfect for winter. I made a batch with these for a Christmas gift exchange, and they were gone in minutes.
- Berry Blend Gummies: Replace half of the dried elderberries with dried hibiscus flowers or dried rose hips. Hibiscus adds a tart, cranberry-like flavor and a beautiful bright red color. Rose hips are packed with vitamin C and add a subtle floral note. This is my go-to variation in the spring.
- Citrus Burst Gummies: Increase the lemon juice to 2 tablespoons and add 1 teaspoon of finely grated orange zest to the syrup after straining. The citrus cuts through the earthiness of the elderberries and makes them taste almost like a fancy candy. My kids (okay, and my husband) love this version.
- Vegan Agar Agar Version: To make these vegan, substitute the gelatin with 2 teaspoons of agar agar powder. The method is slightly different: you need to bring the syrup to a full boil after adding the agar agar and boil for 2 minutes, whisking constantly, to activate it. The texture will be more like a firm jelly than a chewy gummy, and they need to set at room temperature, not in the fridge. They also don’t melt in warm weather, which is a nice bonus for summer.
- Low-Sugar Version: Use a sugar-free sweetener like monk fruit or stevia glycerite instead of honey or maple syrup. Start with a small amount and taste as you go, because these sweeteners are much more concentrated. The texture will be the same, but the flavor might be slightly different. I’ve done this for a friend who’s diabetic, and she loved them.
Serving & Storage Suggestions
These gummies are best enjoyed straight from the fridge—the cold temperature gives them a nice, firm texture that’s really satisfying to chew. I usually pop one or two in the morning with my breakfast, or take a few with me when I’m heading out for the day. They’re a great little snack for kids’ lunchboxes, too, though I’d warn you that they can be a little sticky if they warm up too much.
Storage: Keep your gummies in an airtight container in the refrigerator. A glass jar with a tight-fitting lid works perfectly, or you can use a small plastic container. They’ll stay fresh for up to 2 weeks, though honestly, they never last that long in my house. Do not leave them at room temperature for more than a few hours—they’ll get soft and sticky, and they can even start to mold if it’s humid.
Freezing: These gummies freeze beautifully! Spread them out on a baking sheet lined with parchment paper and freeze until solid (about an hour), then transfer them to a freezer-safe bag or container. They’ll keep for up to 3 months. You can eat them straight from the freezer—they’re like little frozen fruit chews—or let them thaw in the fridge for about 15 minutes before eating.
Flavor Development: Here’s something interesting: the flavor of these gummies actually gets better after a day or two in the fridge. The tartness and sweetness meld together, and the elderberry flavor becomes more rounded. So don’t be discouraged if they taste a little sharp on day one. Give them a day to settle, and you’ll be rewarded.
Presentation Idea: If you’re giving these as gifts, layer them in a small glass jar with a pretty ribbon tied around the neck. I’ve also put them in little cellophane bags tied with twine for party favors. Everyone loves them, and they’re always impressed when you say you made them yourself.
Nutritional Information & Benefits
Here’s the thing about elderberries: they’re not just tasty—they’re genuinely good for you. Elderberries are packed with antioxidants, particularly anthocyanins, which give them that deep purple color. They’ve been studied for their ability to support the immune system and reduce the duration of cold symptoms. Combined with honey (which has its own antimicrobial properties) and gelatin (which is great for gut health and joints), these little gummies are a powerhouse of wellness.
Estimated Nutritional Values (per serving of 4 gummies):
- Calories: 45-55
- Total Fat: 0g
- Sodium: 5mg
- Total Carbohydrates: 10-12g
- Sugars: 8-10g (from honey and berries)
- Protein: 4g
- Vitamin C: 2-4% DV (more if you add the optional powder)
Dietary Considerations: This recipe is naturally gluten-free, dairy-free, and nut-free. For a vegan version, use maple syrup and agar agar. For a low-sugar version, use a monk fruit sweetener. The main allergen to be aware of is gelatin, which is derived from animal collagen, so it’s not suitable for vegetarians or vegans.
I personally love that I can give these to my family and feel good about it. They’re a treat that’s actually doing something beneficial. That’s a win-win in my book.
Conclusion
Look, I know making your own gummies might seem like a fussy, extra step in an already busy life. But honestly? It’s one of those kitchen projects that gives back way more than it asks. The process is simple, the ingredients are few, and the result is something genuinely useful and delicious. These easy homemade elderberry gummies have become a staple in my kitchen, and I think they’ll become one in yours too.
I love that this recipe is forgiving enough for a beginner but satisfying enough for someone who’s been cooking for years. It’s a small batch, so there’s no pressure—if you mess up, you’ve only wasted a few tablespoons of gelatin and some berries. But you won’t mess up. I promise. Just follow the steps, trust the process, and don’t skip the blooming step.
I’d love to hear how yours turn out! Did you try a variation? Did you use dinosaur molds or stars? Did your kids love them? Drop a comment below and let me know. And if you’re looking for another immune-supporting recipe to try, you might enjoy this nourishing homemade bone broth—it’s another one of my cold-weather favorites. Happy cooking, friends! Here’s to a healthy, happy season.
Frequently Asked Questions
Can I use fresh elderberries instead of dried?
It’s not recommended. Fresh elderberries need to be cooked thoroughly to be safe for consumption, and they have a much higher water content than dried berries, which will throw off the liquid ratios in this recipe. Dried elderberries are more concentrated and consistent, making them ideal for gummy making.
Why didn’t my gummies set?
This usually happens for one of three reasons: the mixture was too hot when you added the gelatin (heat can destroy gelatin’s setting power), you didn’t let the gelatin bloom long enough, or you didn’t use enough gelatin. Make sure your syrup is warm, not hot, and let the gelatin sit for a full 5 minutes before stirring it in.
Can I double this recipe?
Absolutely! Simply double all the ingredients. The simmering time for the berries stays the same, but the cooling and setting times might be slightly longer for a larger batch. Just make sure your saucepan is big enough to hold everything comfortably.
How many gummies does this recipe make?
It depends on the size of your molds, but generally, this small batch recipe makes about 30-40 standard-sized bear gummies (about 1 inch long). If you’re using a larger mold or cutting them into squares from a dish, you’ll get fewer, larger pieces.
Can I use flavored gelatin instead of unflavored?
I wouldn’t recommend it. Flavored gelatins contain added sugar, artificial flavors, and colors that will completely change the taste and texture of the gummies. Plus, they often have a different setting strength than unflavored gelatin. Stick with unflavored for the best results and control over the flavor.
Pin This Recipe!
Easy Homemade Elderberry Gummies: A Small Batch Recipe
These easy homemade elderberry gummies are a tart-sweet immune booster made with simple ingredients. Perfect for cold season, they’re a delicious and cost-effective alternative to store-bought supplements.
- Prep Time: 15 minutes
- Cook Time: 15 minutes
- Total Time: 2 hours 30 minutes (including setting time)
- Yield: 30-40 gummies 1x
- Category: Snack
- Cuisine: American
Ingredients
- ⅓ cup (about 40g) dried elderberries
- 1 cup (240ml) water
- 3–4 tablespoons (45-60ml) raw honey or maple syrup
- 3 tablespoons (about 25g) unflavored gelatin powder
- 1 tablespoon (15ml) lemon juice (optional)
- ¼ teaspoon vitamin C powder (optional)
Instructions
- Make the Elderberry Syrup: Place the dried elderberries and 1 cup of water in a small saucepan. Bring to a boil over medium-high heat, then reduce heat to low and simmer gently for about 15 minutes until the water turns deep purple and the berries plump up.
- Strain the Berries: Place a fine-mesh strainer over a small bowl or glass measuring cup. Pour the hot liquid through the strainer, pressing on the berries with the back of a spoon to extract all the syrup. Discard the berries. You should have about ¾ cup of syrup. Let cool for about 5 minutes until warm but not hot.
- Bloom the Gelatin: Pour ¼ cup of the warm elderberry syrup into a small bowl. Sprinkle the gelatin powder evenly over the surface in a thin layer. Let sit undisturbed for about 5 minutes until it forms a thick, jiggly paste.
- Combine and Warm: Pour the remaining warm elderberry syrup back into the saucepan. Add the honey (or maple syrup) and lemon juice. Warm over low heat, stirring gently, until the honey dissolves. Do not boil. Add the bloomed gelatin mixture and whisk constantly over low heat until completely dissolved and smooth, about 1-2 minutes. If using vitamin C powder, whisk it in now.
- Fill the Molds: Remove from heat and let cool for 2-3 minutes until warm but not hot. Using a dropper or small pitcher, carefully fill silicone gummy molds. Tap molds gently on the counter to release air bubbles.
- Set the Gummies: Place filled molds on a baking sheet or plate and refrigerate for at least 2 hours, preferably 4 hours, until firm.
- Unmold and Enjoy: Gently push the gummies out of the molds. Store in an airtight container in the refrigerator.
Notes
Don’t over-boil the berries; 15 minutes is enough. Gelatin is sensitive to temperature—add it when the syrup is warm (120-130°F) not hot. If gummies stick to molds, let them set longer or lightly spray molds with neutral oil. Work in batches if using multiple molds to prevent mixture from thickening. Skim off any foam if desired.
Nutrition
- Serving Size: 4 gummies
- Calories: 4555
- Sugar: 810
- Sodium: 5
- Carbohydrates: 1012
- Protein: 4
Keywords: elderberry gummies, homemade gummies, immune booster, small batch, healthy snack, elderberry recipe



