Love this? Save it for later!
Share the inspiration with your friends
Introduction
“You really don’t need a fancy grill or years of experience to make a steak that tastes like it’s straight from a steakhouse,” my neighbor Jake said one sunny Saturday afternoon while we were chatting over the fence. Honestly, I wasn’t expecting much from his backyard barbecue skills—Jake’s more of a weekend gardener than a grill master. But there I was, watching him carefully season a thick cut of steak, confidently flipping it on a modest charcoal grill that looked like it had seen better days.
Jake’s method was so simple that I almost didn’t believe it would work. No marinades, no complicated rubs, just salt, pepper, and a little patience. That day, I learned that making an easy juicy grilled steak is less about fuss and more about technique. Maybe you’ve been there—intimidated by the idea of grilling steak because you think it’s complicated or requires expensive equipment. Well, let me tell you, this recipe is perfect for beginners who want that tender, flavorful steak without the stress.
Since that day, I keep coming back to this straightforward approach—especially on busy weeknights when I want something satisfying but quick. I even tried it on a hectic Tuesday when I forgot to thaw anything in advance (don’t ask), and it still came out tender and juicy. This easy juicy grilled steak recipe isn’t just a fallback; it’s my go-to for impressing friends and family without breaking a sweat. You’re going to love how simple it is to get those grill marks and that mouthwatering flavor in four simple steps.
Why You’ll Love This Recipe
Let me share why this easy juicy grilled steak for beginners has earned a permanent spot in my recipe arsenal:
- Quick & Easy: You’ll have this steak ready in under 20 minutes, perfect for those spontaneous grill cravings or weeknight dinners.
- Simple Ingredients: Nothing fancy needed—just good quality steak, salt, pepper, and a touch of oil. You probably have everything in your pantry already.
- Perfect for Any Occasion: Whether it’s a casual backyard barbecue, a cozy dinner for two, or a family gathering, this steak impresses without stress.
- Crowd-Pleaser: Even steak skeptics have been converted after trying this juicy, tender cut.
- Unbelievably Delicious: The secret lies in the seasoning and cooking technique that locks in juices and creates that crave-worthy crust.
This recipe stands apart because it focuses on the basics done right—no marinades that mask the beef’s natural flavor, no complicated timing charts. The simple salt-and-pepper seasoning enhances rather than overwhelms. Plus, using a cast iron skillet or grill pan as an alternative makes it accessible even if you don’t have an outdoor grill. Honestly, this is comfort food at its finest—meaty, satisfying, and just a little indulgent. Once you try it, you’ll want to come back to this method every time you crave a perfect steak.
What Ingredients You Will Need
This easy juicy grilled steak recipe uses straightforward, pantry-friendly ingredients chosen to highlight the natural flavor of the meat. No need for fancy sauces or secret spices—just quality basics and a couple of tips to bring out the best.
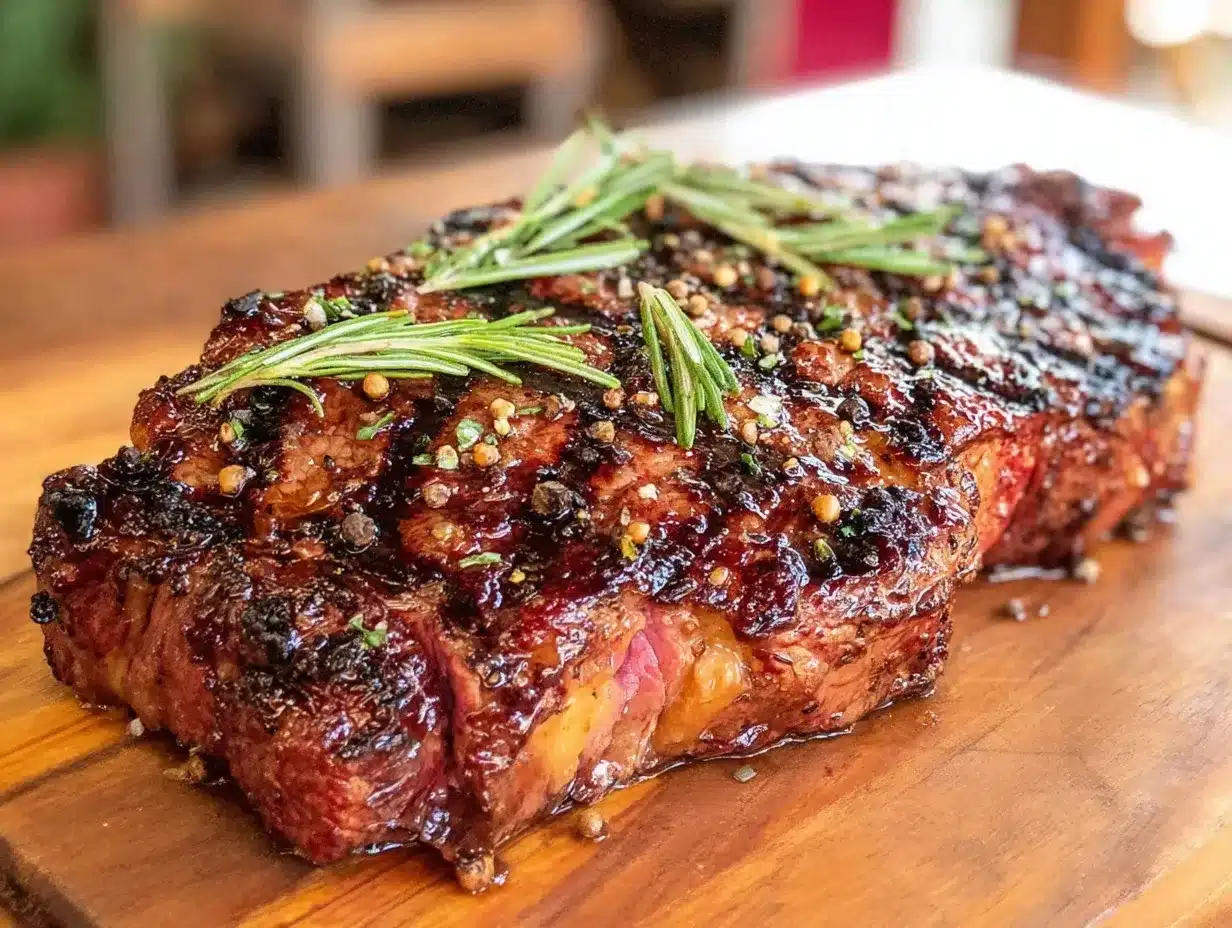
- Steak of your choice: Ribeye, sirloin, or New York strip (about 1-inch thick, 8-12 ounces / 225-340 grams). I prefer USDA Choice grade for balance of flavor and affordability.
- Coarse kosher salt: Essential for seasoning and creating that crusty sear.
- Freshly ground black pepper: Adds a subtle heat and depth—grind just before using for best aroma.
- Olive oil or avocado oil: Just a tablespoon to lightly coat the steak before seasoning (use neutral oil if preferred).
- Optional garlic powder or smoked paprika: For a gentle smoky twist, but keep it minimal to not overpower the steak’s flavor.
- Fresh herbs like rosemary or thyme (optional): Toss a sprig on the grill or pan at the end for aroma.
If you’re looking for a gluten-free or paleo-friendly steak, this recipe fits perfectly without any changes. For those who want a dairy-free approach, no worries—there’s no butter involved unless you decide to finish with a pat on top (which is delicious but optional). When picking your steak, look for marbling (those little white streaks of fat) for juiciness. And if you’re shopping at a local butcher, don’t hesitate to ask for a recommendation; they usually know the best cuts for grilling.
Equipment Needed
Grilling steak doesn’t require a long list of fancy tools. Here’s what you’ll need to get started:
- Grill or grill pan: A charcoal or gas grill works great, but a heavy cast iron grill pan on the stovetop is a perfect alternative for indoor cooking.
- Tongs: Essential for flipping the steak without piercing it (which can cause juice loss).
- Instant-read meat thermometer: Highly recommended for beginners to check doneness without cutting into the steak.
- Cutting board: Preferably wood or plastic for resting and slicing the steak after cooking.
- Sharp knife: For slicing the steak against the grain to keep it tender.
For budget-friendly grilling, a simple cast iron skillet can substitute for a grill pan. I’ve tried grilling on an old charcoal grill and a small electric grill with success—each brings a different flavor profile. Just remember to clean and season your cast iron regularly to keep it non-stick and rust-free. If you don’t have a thermometer, no worries; I’ll guide you on how to judge doneness by touch and timing later on.
Preparation Method
- Bring the steak to room temperature (about 20-30 minutes): This step is crucial for even cooking. Take your steak out of the fridge and let it sit on the counter while you prepare your grill or pan. It helps prevent that frustrating overcooked outside and raw inside effect.
- Preheat your grill or pan: Get your grill or cast iron pan smoking hot—around 450°F (232°C) or higher. You want that intense heat to quickly sear the meat and lock in juices. If using a grill, clean the grates well and lightly oil them to prevent sticking.
- Season the steak generously: Brush a thin layer of oil on both sides, then sprinkle coarse kosher salt and freshly ground pepper evenly. Don’t be shy—this is where the flavor begins. Optionally, add a pinch of garlic powder or smoked paprika for subtle extra flavor.
- Grill the steak: Place the steak on the hot grill or pan. For a 1-inch thick steak, cook about 4-5 minutes on the first side without moving it to get those classic grill marks. Flip it using tongs and cook another 3-4 minutes for medium-rare (adjust time up or down for your preferred doneness). Use the instant-read thermometer to check: 130°F (54°C) for medium-rare, 140°F (60°C) for medium.
- Rest the steak: Remove the steak from heat and let it rest on a cutting board, loosely covered with foil for about 5-10 minutes. Resting redistributes the juices, making every bite juicy and tender.
- Slice and serve: Slice against the grain—that means cutting perpendicular to the lines of muscle fibers. This shortens the fibers and makes the steak easier to chew. Serve immediately with your favorite sides or sauces.
Pro tip: If you’re grilling outdoors and want those beautiful crosshatch grill marks, rotate the steak 90 degrees halfway through cooking each side. Also, don’t press down on the steak while it’s cooking; it squeezes out the juices and dries it out.
Cooking Tips & Techniques
Cooking a juicy grilled steak can seem intimidating, but a few insider tips make all the difference:
- Pat your steak dry: Before seasoning, use paper towels to remove excess moisture. A dry surface sears better and forms a tasty crust.
- Don’t overcrowd the grill or pan: Give each steak room to breathe. Overcrowding traps steam and prevents that crispy sear.
- Use tongs, not forks: Piercing the meat lets precious juices escape, leading to a drier steak.
- Learn the finger test for doneness: Press the fleshy part of your hand below the thumb—soft means rare, firmer means medium, and firm means well-done. It’s a handy skill if you’re without a thermometer.
- Resting is non-negotiable: Skipping this step is a rookie mistake. Trust me, the juice pooling inside the steak magically redistributes during rest and keeps every bite luscious.
- Season generously: Salt is your friend. It enhances flavor and helps form that crust, but wait until just before cooking to salt to avoid drawing out moisture too early.
I once tried rushing this process and ended up with a dry, tough steak that no one wanted to eat (lesson learned). Now I always take the time for these simple techniques—they’re the secret behind consistently juicy results.
Variations & Adaptations
Once you master this easy juicy grilled steak recipe, feel free to experiment with these variations to suit your taste or dietary needs:
- Herb Butter Finish: Add a pat of garlic-herb butter on top of the steak right after grilling for an indulgent, melt-in-your-mouth finish.
- Spicy Kick: Mix smoked paprika with cayenne pepper and black pepper for a smoky, spicy rub that adds a bold flavor twist.
- Marinade Option: For a more tender and flavorful steak, marinate in a simple mixture of soy sauce, Worcestershire sauce, and a splash of balsamic vinegar for 30 minutes before grilling.
- Alternative Cooking Methods: If you don’t have a grill or grill pan, sear the steak in a cast iron skillet then finish in a 400°F (204°C) oven for 5-7 minutes.
- Allergen-Friendly: This recipe is naturally gluten-free and dairy-free unless you add butter. Swap in coconut oil or ghee if you want a buttery finish but avoid dairy.
I once tried the herb butter version during a summer cookout, and it completely stole the show. The fresh rosemary and thyme made the steak taste like it belonged in a fancy restaurant, yet it was effortless to make.
Serving & Storage Suggestions
Serving your easy juicy grilled steak at the right temperature makes all the difference. I recommend slicing just before serving so the steak stays warm and juicy.
- Serve immediately: Pair with grilled vegetables, a fresh salad, or classic sides like mashed potatoes or roasted sweet potatoes.
- Beverage pairing: A robust red wine like Cabernet Sauvignon or a crisp IPA complements the beef’s richness beautifully.
- Storage: Leftover steak keeps well in an airtight container in the refrigerator for up to 3 days.
- Reheating: Gently reheat in a skillet over medium-low heat or in the oven at 275°F (135°C) wrapped in foil to maintain juiciness.
- Flavor development: Some find steak tastes even better the next day as the flavors meld, perfect for steak salads or sandwiches.
Pro tip: Avoid microwaving leftovers if possible—it tends to dry out the meat. Instead, use gentle reheating methods that keep the steak tender.
Nutritional Information & Benefits
This easy juicy grilled steak is a protein powerhouse, providing approximately 600 calories, 45g of protein, and 45g of fat per 8-ounce (225g) serving, depending on the cut. It’s naturally low in carbohydrates and contains essential nutrients like iron, zinc, and B vitamins, which support energy and immune function.
Choosing leaner cuts like sirloin lowers fat content if desired. Grass-fed beef options often have a better fatty acid profile with more omega-3s. This recipe can fit well into low-carb, keto, paleo, and gluten-free diets with no adjustments needed.
Personally, I appreciate how satisfying a well-cooked steak can be after a long day—it fuels my body and feels like a rewarding treat. Plus, the simple ingredient list keeps it wholesome without unnecessary additives.
Conclusion
Making an easy juicy grilled steak for beginners really comes down to mastering a few simple steps and trusting your instincts. This recipe strips steak cooking back to basics, so you can enjoy that tender, flavorful bite without stress or fuss.
Feel free to adjust seasoning and doneness to your taste, and don’t hesitate to try the variations and sides that excite you. Cooking steak should be fun, satisfying, and accessible to everyone, and that’s exactly what this recipe delivers.
I keep coming back to this method because it works—every time. It’s the recipe I recommend to friends who want to impress without complicated prep. I hope it becomes one of your go-to meals too. If you try it, I’d love to hear how your easy juicy grilled steak turned out or any creative twists you added!
FAQs About Easy Juicy Grilled Steak
How do I know when my steak is done without a thermometer?
Use the finger test method by comparing the firmness of the steak to different parts of your hand. Soft and squishy is rare, medium is firmer, and well-done feels very firm. Also, time your cooking based on thickness and heat—practice makes perfect!
Can I use frozen steak for this recipe?
It’s best to use fresh or fully thawed steak for even cooking. Cooking from frozen may result in uneven doneness and a less juicy steak.
What’s the best way to get grill marks on my steak?
Preheat your grill or pan until very hot, place the steak without moving it for 4-5 minutes, then rotate 90 degrees halfway through that time before flipping. Repeat on the other side.
Can I make this recipe on an electric grill or stovetop?
Absolutely! A cast iron grill pan or regular skillet works well indoors. Just get it very hot and follow the same timing and seasoning steps.
How long should I let the steak rest after grilling?
Rest the steak for about 5-10 minutes loosely covered with foil. This helps redistribute juices for a tender bite.
For a similar easy-to-master protein dish, you might enjoy the crispy garlic chicken that pairs beautifully with simple sides.
Pin This Recipe!
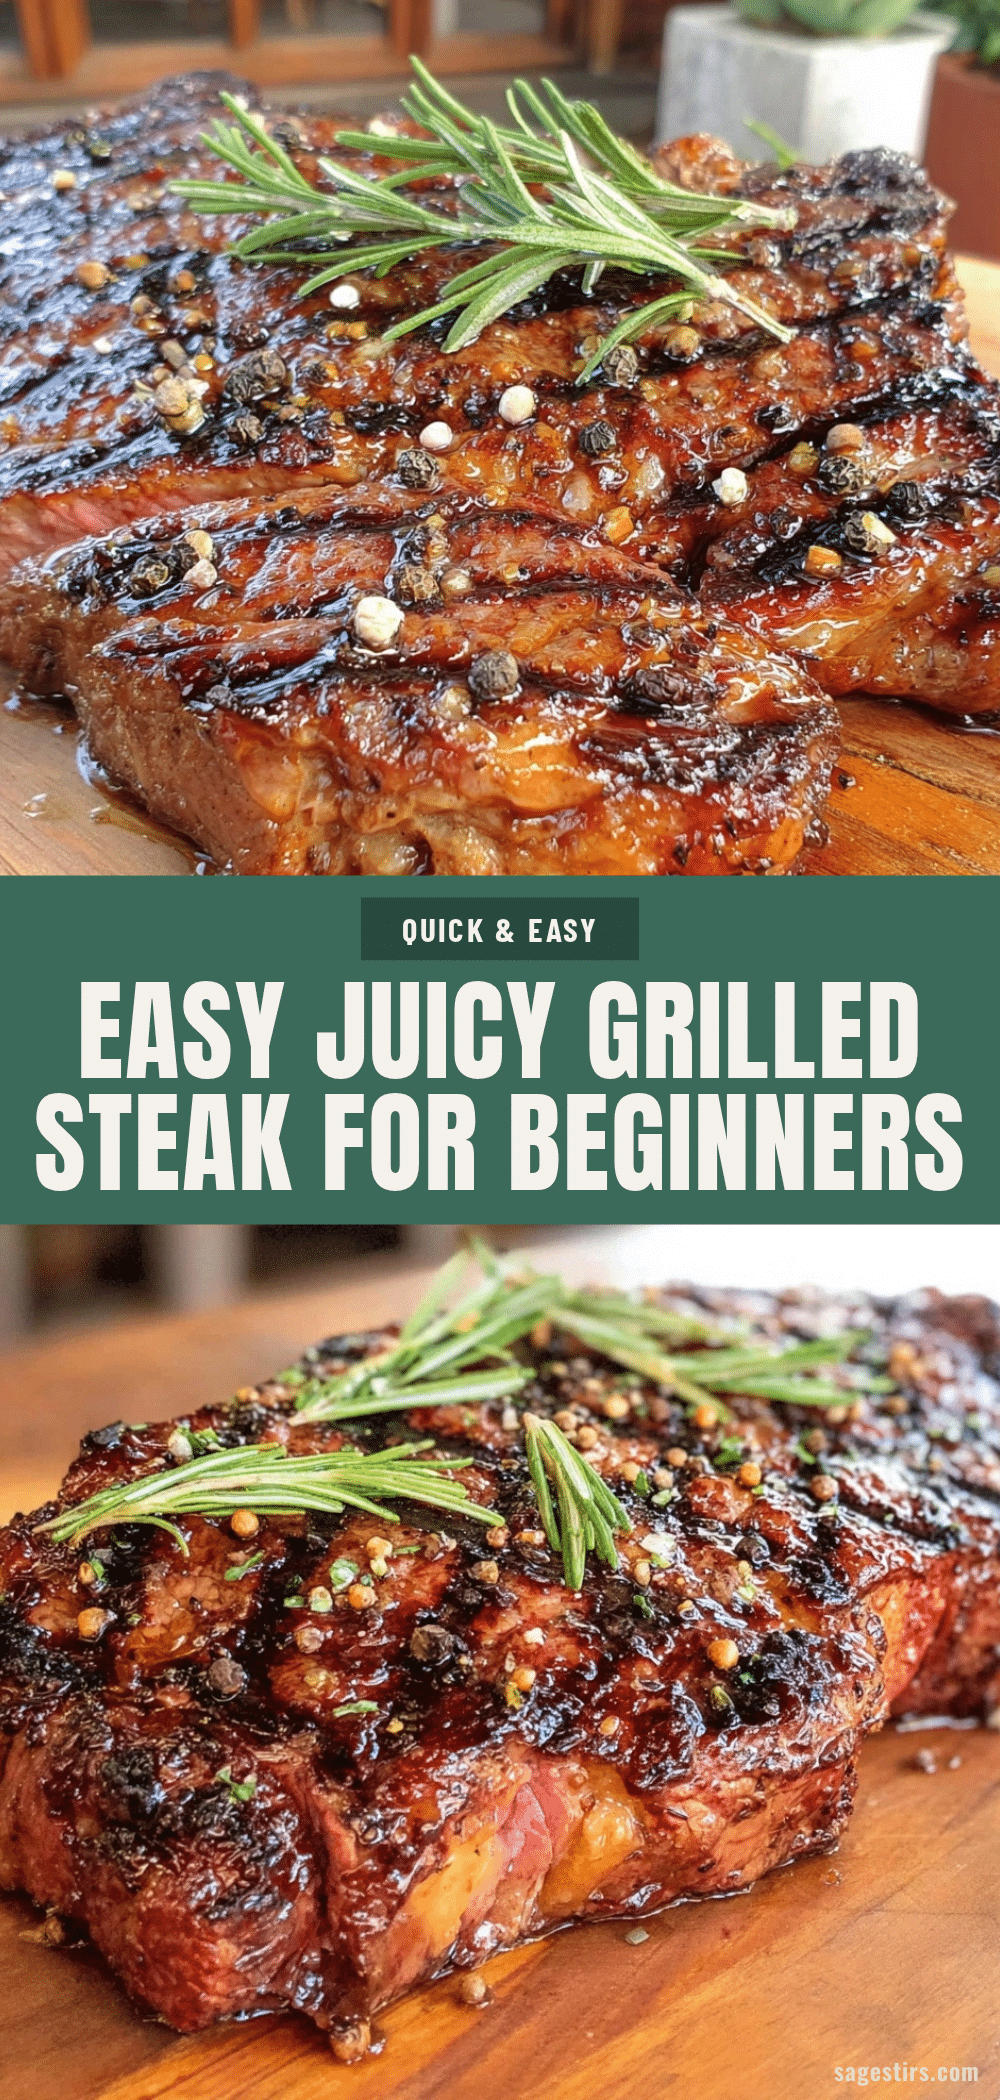
Easy Juicy Grilled Steak Recipe for Beginners in 4 Simple Steps
A simple and straightforward grilled steak recipe perfect for beginners, requiring minimal ingredients and equipment to achieve a juicy, flavorful steak with perfect grill marks.
- Prep Time: 25 minutes
- Cook Time: 8-10 minutes
- Total Time: 33-35 minutes
- Yield: 1 serving 1x
- Category: Main Course
- Cuisine: American
Ingredients
- 1 steak of your choice (ribeye, sirloin, or New York strip), about 8–12 ounces (225–340 grams), 1-inch thick
- Coarse kosher salt
- Freshly ground black pepper
- 1 tablespoon olive oil or avocado oil
- Optional: garlic powder or smoked paprika
- Optional: fresh herbs like rosemary or thyme
Instructions
- Bring the steak to room temperature for about 20-30 minutes.
- Preheat your grill or cast iron pan until very hot, around 450°F (232°C) or higher.
- Brush a thin layer of oil on both sides of the steak, then season generously with coarse kosher salt and freshly ground black pepper. Optionally add a pinch of garlic powder or smoked paprika.
- Place the steak on the hot grill or pan. Cook for 4-5 minutes on the first side without moving it to get grill marks. Rotate the steak 90 degrees halfway through cooking this side for crosshatch marks.
- Flip the steak using tongs and cook for another 3-4 minutes for medium-rare (adjust time for preferred doneness). Use an instant-read thermometer to check: 130°F (54°C) for medium-rare, 140°F (60°C) for medium.
- Remove the steak from heat and let it rest loosely covered with foil for 5-10 minutes.
- Slice the steak against the grain and serve immediately.
Notes
Bring steak to room temperature before cooking for even doneness. Use tongs to flip to avoid piercing the meat and losing juices. Rest steak after cooking to redistribute juices. For crosshatch grill marks, rotate steak 90 degrees halfway through cooking each side. Avoid pressing down on steak while cooking to keep it juicy. If no thermometer, use finger test for doneness.
Nutrition
- Serving Size: 1 steak (8-12 ounces
- Calories: 600
- Fat: 45
- Protein: 45
Keywords: grilled steak, easy steak recipe, juicy steak, beginner steak recipe, steak grilling, simple steak, backyard barbecue