Love this? Save it for later!
Share the inspiration with your friends
My nephew’s third birthday party was two weeks away, and my sister had one request: “Something fun, something the kids can help make, and absolutely no cake.” She was tired of smeared frosting and half-eaten slices. I had been looking for a dessert that actually felt like an activity, not just another sweet thing on the table. The kind of treat that makes kids gasp and adults chuckle. Dirt cups were the obvious answer, but I wanted them to be more than just chocolate pudding and crushed cookies. They needed to feel special—like a little garden of surprises.
I tested three versions before the party. The first was too runny. The second had the wrong cookie-to-pudding ratio (too much dirt, not enough cream). The third, though—that one worked. The layers stayed put, the gummy worms looked like they were actually crawling out of the soil, and the whole thing came together in under twenty minutes. No oven required. No complicated techniques. Just a bowl, a whisk, and a handful of ingredients you can grab at any grocery store.
The party was a hit. The kids spent more time arranging their worms than eating, which honestly made the whole thing worth it. And the adults? They kept sneaking cups from the back of the fridge when they thought no one was looking. That’s when I knew this recipe was a keeper. It is playful without being silly, indulgent without being heavy, and it’s the kind of dessert that makes people smile before they even take a bite.
These Easy Oreo Dirt Cup Pudding Cups with Gummy Worms have become my go-to for birthdays, backyard barbecues, and even lazy Sunday afternoons when the kids need a project. They are forgiving, customizable, and impossible to mess up. Honestly, if a three-year-old can help layer them, so can you.
Why You’ll Love This Recipe
I have made these dirt cups more times than I can count—for school parties, family reunions, and even a few grown-up gatherings where I swapped the gummy worms for fresh berries and mint leaves. Every single time, they disappear. That is not an exaggeration. People eat them, then ask for the recipe, then make them the next week. Here is why this version stands out from the endless Pinterest recipes you have seen:
- No baking required. You do not even need to turn on the stove. Just mix, layer, and chill. Perfect for hot summer days when the oven is off-limits.
- Kid-friendly from start to finish. My nephew crushed the Oreos himself (with a zip-top bag and a rolling pin). Kids love the assembly line process—it feels like a craft project they can eat.
- Simple ingredients, big payoff. Instant pudding, milk, Cool Whip, Oreos, and gummy worms. That is it. No fancy extracts, no specialty stores, no stress.
- Make-ahead magic. These actually get better after a few hours in the fridge. The cookies soften slightly, the pudding sets perfectly, and the flavors meld together. You can make them the night before and relax on party day.
- Endlessly customizable. I have made a peanut butter version, a gluten-free version (using gluten-free chocolate cookies), and even a dairy-free version with coconut milk pudding. The base recipe works with whatever you have on hand.
- Portion control (sort of). Because they are individual cups, everyone gets their own. No fighting over the last slice. Unless someone hides their cup in the back of the fridge—which I have definitely done.
What makes this recipe different from the rest is the texture. The pudding is silky, the crushed Oreos are sandy but not dusty, and the Cool Whip adds a lightness that keeps it from feeling like a brick of sugar. I tested the ratios until the dirt layer actually looked like soil—dark, crumbly, with little chunks of cookie. It is the small details that make people say, “Wait, these are homemade?”
This recipe is the one you pull out when you want to impress without stressing. It is comfort food reimagined—playful, nostalgic, and deeply satisfying. The first bite always brings a smile. That is the kind of dessert worth making.
What Ingredients You Will Need
This recipe uses simple, everyday ingredients to create something that looks like it took way more effort than it actually did. Here is what you need and why each one matters:
For the Pudding Base
- 1 (3.9 oz) package instant chocolate pudding mix – I recommend Jell-O brand for consistency, but store brands work fine. Do not use cook-and-serve pudding; it requires stovetop cooking and does not set as firmly in individual cups. The instant kind is key for that smooth, no-fuss texture.
- 2 cups cold whole milk – Whole milk gives the richest, creamiest pudding. You can use 2% or even oat milk in a pinch, but the pudding will be slightly less thick. If using non-dairy milk, look for barista blends or extra-creamy versions.
- 1 (8 oz) tub Cool Whip, thawed – This is what makes the pudding light and airy instead of dense. You can substitute homemade whipped cream (1 cup heavy cream + 2 tablespoons powdered sugar), but Cool Whip holds its shape better and keeps longer in the fridge. I have used both, and honestly, Cool Whip wins for texture here.
For the Dirt Layer

- 1 (14.3 oz) package Oreo cookies (about 36 cookies) – Regular Oreos work best. Double Stuf is fine, but the filling-to-cookie ratio changes the texture slightly. You want the dark, crumbly cookie part to mimic soil. I have tried chocolate wafers, and they are too uniform—the small chunks of Oreo cream add that realistic “dirt” look. Do not scrape the filling off; crush everything together.
For the Garnish
- 1 (4.5 oz) bag gummy worms – The classic choice. I like the sour variety for a tangy contrast to the sweet pudding. You can also use gummy bugs, gummy frogs, or even gummy leaves for a garden theme. Pick your favorite shape and color.
- Optional: 1-2 tablespoons chocolate shavings or cocoa powder – If you want an extra-dark dirt look, dust the top with a little cocoa powder or grate some dark chocolate over the finished cups. I do this for adult versions; kids usually prefer the pure Oreo dirt.
- Optional: 4-6 fresh mint leaves or edible flowers – For a garden-party presentation, stick a mint leaf or a small edible flower into the dirt. It looks adorable and adds a fresh note that balances the sweetness.
Substitution Notes
- Gluten-free: Use gluten-free chocolate sandwich cookies (like Glutino or Goodie Girl) and check your pudding mix label. Most instant pudding is gluten-free, but always verify.
- Dairy-free: Use unsweetened almond milk or oat milk for the pudding, and a dairy-free whipped topping like CocoWhip. The texture will be slightly softer but still delicious.
- Lower sugar: Use sugar-free instant pudding and reduced-fat Cool Whip. The cookies still have sugar, but it cuts the overall sweetness by a noticeable amount.
- Peanut butter version: Add 2 tablespoons creamy peanut butter to the pudding mixture before folding in the Cool Whip. It adds a rich, salty note that pairs beautifully with chocolate.
Equipment Needed
You do not need much to make these dirt cups, which is part of the appeal. Here is what you will need:
- Large mixing bowl – For whisking the pudding and milk together. Any medium-to-large bowl works.
- Whisk – Essential for getting the pudding smooth without lumps. A fork works in a pinch, but a whisk is faster.
- Rubber spatula – For folding the Cool Whip into the pudding. A spatula helps you scrape the sides and incorporate everything gently without deflating the mixture.
- Zip-top bag or food processor – For crushing the Oreos. A zip-top bag and a rolling pin is the classic method (and very satisfying). A food processor gives a finer, more uniform crumb. I prefer the bag method because you can control the chunkiness—leave a few bigger pieces for texture.
- Rolling pin or heavy-bottomed pan – For smashing the cookies if using the bag method. A wine bottle works too.
- Small cups or glasses – 6 to 8 individual serving cups, depending on size. I use 8-ounce plastic cups for parties (they are cheap and disposable), but small mason jars, juice glasses, or even ramekins work beautifully. Clear cups let you see the layers, which is half the fun.
- Measuring cups and spoons – For the milk and any optional add-ins.
- Refrigerator space – You need room for the cups to chill for at least 2 hours. Clear a shelf beforehand so you are not playing Tetris later.
Budget-friendly tip: Reuse yogurt cups or small takeout containers. Wash them well, and they work perfectly. I have even used shot glasses for mini dirt cups at cocktail parties—they are adorable and portion-controlled.
Preparation Method
This recipe comes together in about 15 minutes of active work, plus 2 hours of chilling. Here is the step-by-step process I have refined through many, many batches:
Step 1: Crush the Oreos
Place the entire package of Oreos (filling and all) into a large zip-top bag. Seal it, removing as much air as possible. Use a rolling pin to crush the cookies into fine crumbs with a few small chunks remaining. You want the texture of coarse sand with some pebble-sized pieces. If using a food processor, pulse 8-10 times—do not over-process or you will get Oreo dust. Set the crumbs aside in a bowl. You should have about 2 ½ to 3 cups of crumbs.
Step 2: Make the Pudding
In a large mixing bowl, whisk together the instant chocolate pudding mix and 2 cups cold whole milk. Whisk vigorously for about 2 minutes until the mixture thickens and becomes smooth. It will be quite thick at this point—that is normal. Let it sit for 5 minutes to fully set. The pudding should hold its shape when you lift the whisk.
Step 3: Fold in the Cool Whip
Add the entire container of thawed Cool Whip to the pudding. Use a rubber spatula to gently fold it together. Start from the bottom and work your way up, turning the bowl as you go. Do not stir vigorously or you will deflate the airiness. Fold until no white streaks remain. The mixture should be light, mousse-like, and uniform in color. Taste a spoonful—if it tastes like chocolate clouds, you have done it right.
Step 4: Layer the Cups
Set out your 6 to 8 serving cups. Start with a layer of crushed Oreos at the bottom of each cup—about 2 tablespoons per cup. Press it down gently with the back of a spoon to create a firm base. Next, spoon or pipe the pudding mixture over the Oreo layer. Fill each cup about halfway. Add another layer of crushed Oreos (about 1 ½ tablespoons), then another layer of pudding, filling almost to the top. Leave about ½ inch of space for the final dirt layer.
Step 5: Top with Dirt and Worms
Sprinkle a generous layer of crushed Oreos over the top of each cup. This is the “dirt” that will hide the worms. Use about 2 tablespoons per cup, or enough to completely cover the pudding. Gently press a few gummy worms into the dirt so they look like they are crawling out. Leave some worms half-buried and others fully visible. Arrange them however you like—this is the fun part.
Step 6: Chill
Place the finished cups in the refrigerator for at least 2 hours, preferably 4. Chilling allows the pudding to set firmly and the Oreo crumbs to soften slightly, creating that realistic dirt texture. Do not skip this step. If you serve them immediately, the layers will be loose and the worms will slide around. Patience pays off here.
Step 7: Serve
Remove the cups from the fridge just before serving. If you made them in advance, add a few fresh gummy worms on top right before serving for the best visual effect (the worms can get a bit sticky after sitting in the fridge overnight). Serve with spoons and watch the smiles appear.
Cooking Tips & Techniques
After making these dirt cups for every occasion imaginable, I have learned a few things the hard way. Here are my best tips for perfect results every time:
- Use cold milk. Instant pudding relies on cold liquid to activate the thickeners. If your milk is warm, the pudding will be thin and take much longer to set. I keep a carton of milk in the fridge specifically for baking and pudding-making.
- Do not overmix the pudding. Once the pudding mix is fully dissolved, stop whisking. Overmixing can break down the starches and result in a thinner, less stable pudding. Two minutes of whisking is plenty.
- Let the pudding rest before folding. Give the pudding 5 minutes to set before adding the Cool Whip. This ensures the pudding is thick enough to hold the whipped topping without deflating it.
- Crush the Oreos in batches. If you are making a double batch, crush the cookies in two separate bags. A single bag with 36 cookies is hard to crush evenly. Divide and conquer.
- Use a piping bag for the pudding layer. If you want perfectly clean, Instagram-worthy layers, transfer the pudding mixture to a piping bag (or a zip-top bag with the corner snipped off) and pipe it into the cups. It is neater and faster than spooning.
- Chill the cups uncovered for the first hour. This prevents condensation from forming on the lids or plastic wrap, which can drip onto the dirt layer and make it soggy. After an hour, cover loosely with plastic wrap or lids.
- Make the dirt layer extra dark. For a more realistic soil look, mix 1 tablespoon of unsweetened cocoa powder into the crushed Oreos before layering. It deepens the color and adds a subtle bitterness that balances the sweet pudding.
- Do not skip the rest time. I once served these after only 30 minutes of chilling because I was impatient. The pudding was runny, the layers mixed together, and the worms floated. Learn from my mistake: 2 hours minimum, 4 is better.
Variations & Adaptations
One of the best things about this recipe is how easily it adapts to different tastes, dietary needs, and occasions. Here are a few variations I have tried and loved:
Peanut Butter Dirt Cups
Add 3 tablespoons of creamy peanut butter to the pudding mixture before folding in the Cool Whip. Microwave the peanut butter for 15 seconds to soften it, then whisk it into the pudding until smooth. The peanut butter adds a salty, nutty depth that pairs perfectly with the chocolate. Use Reese’s Pieces instead of gummy worms for a candy-themed twist.
Mint Chocolate Dirt Cups
Use mint chocolate pudding mix instead of regular chocolate. Add ½ teaspoon of peppermint extract to the pudding for extra minty punch. Top with crushed chocolate mint cookies (like Mint Oreos) and use green gummy worms. The cool mint flavor is refreshing and unexpected.
Gluten-Free Dirt Cups
Substitute gluten-free chocolate sandwich cookies for the Oreos. Most major brands offer a gluten-free version that tastes nearly identical. Double-check that your pudding mix is certified gluten-free. Everything else in the recipe is naturally gluten-free, so this is an easy swap.
Dairy-Free / Vegan Dirt Cups
Use unsweetened oat milk or almond milk for the pudding, and a dairy-free whipped topping like CocoWhip or homemade coconut whipped cream. Check that your cookies are vegan (regular Oreos are accidentally vegan, but some specialty brands are not). The texture will be slightly softer, but the flavor is still spot-on.
Halloween Dirt Cups
Use orange and black gummy worms, or swap worms for gummy spiders and bugs. Add a few candy pumpkins on top. The dark dirt layer looks especially spooky against bright orange candy. I make these every October and they are always the first thing to disappear at costume parties.
Mini Dirt Cups for Parties
Use shot glasses or 2-ounce plastic cups for bite-sized versions. These are perfect for cocktail parties, baby showers, or any event where guests want a small sweet treat. Layer as directed, but use smaller amounts—about 1 tablespoon of each layer per cup. Top with mini gummy worms.
Serving & Storage Suggestions
These dirt cups are best served cold, straight from the fridge. The contrast between the cool, creamy pudding and the crumbly Oreo dirt is part of the magic. Here is how to serve and store them for the best results:
Serving Temperature: Serve chilled, not frozen. If you have made them ahead, let them sit at room temperature for 5 minutes before serving—this takes the edge off the cold without warming the pudding too much.
Presentation Ideas: For parties, arrange the cups on a tray with a few extra gummy worms scattered around for a playful look. You can also add a small plastic shovel or a mini gardening trowel as a serving utensil—it is a cute touch that fits the theme. If using clear cups, make sure the layers are visible. The stripes of brown and chocolate are half the visual appeal.
Complementary Dishes: These dirt cups pair well with easy buffalo chicken dip for a salty-sweet party spread. They also go beautifully with a warm beverage like cozy homemade pumpkin spice latte for a fall-themed dessert table.
Storage: Store leftover dirt cups covered in the refrigerator for up to 3 days. The Oreo crumbs will soften over time, which some people actually prefer. If you want to keep the dirt crunchy, store the crushed Oreos separately and add them just before serving. The pudding mixture alone will keep for 4-5 days in an airtight container.
Freezing: I do not recommend freezing assembled dirt cups. The pudding can become watery and the texture changes significantly upon thawing. If you must freeze, freeze the pudding mixture alone in a sealed container for up to 1 month. Thaw in the refrigerator overnight, then assemble with fresh Oreo crumbs and gummy worms.
Flavor Development: These cups taste best after 4-6 hours of chilling. The flavors meld together, the pudding firms up perfectly, and the Oreo crumbs soften just enough to mimic real soil. Overnight is even better. The gummy worms will soften slightly, so add fresh ones on top if you want them to stay chewy.
Nutritional Information & Benefits
Let us be honest: these are a treat, not a health food. But knowing what is in them helps you enjoy them mindfully. Here is the estimated nutritional breakdown per serving (based on 8 servings):
- Calories: Approximately 380-420 per cup
- Total Fat: 16-18g
- Saturated Fat: 8-10g
- Cholesterol: 10-15mg
- Sodium: 350-400mg
- Total Carbohydrates: 55-60g
- Dietary Fiber: 2-3g
- Sugars: 38-42g
- Protein: 5-7g
Health Considerations: The milk and Cool Whip provide some calcium and a small amount of protein, but this is primarily a carbohydrate-and-fat dessert. If you are watching your sugar intake, use sugar-free pudding and reduced-fat Cool Whip. The Oreos still contain sugar, but you can reduce the portion size to 1 cookie per serving instead of 4-5.
Dietary Notes: This recipe is vegetarian. It can be made gluten-free, dairy-free, and vegan with the substitutions listed above. It contains wheat (Oreos), milk, and soy (Cool Whip). Gummy worms often contain gelatin, so check labels if you are serving vegetarians who avoid gelatin.
Portion Perspective: One cup is a generous serving. For kids, consider making smaller cups (use 4-ounce cups instead of 8-ounce). The mini versions are perfect for lunchboxes or after-school snacks without overdoing it. I have also made these as a party dessert where each guest gets one cup—portion control is built in, which I appreciate.
Conclusion
These Easy Oreo Dirt Cup Pudding Cups with Gummy Worms are more than just a dessert. They are a project, a memory, and a guaranteed crowd-pleaser all rolled into one. Whether you are making them for a child’s birthday party, a game day gathering, or just a rainy afternoon when the kids need something fun to do, they deliver every single time.
What I love most about this recipe is how forgiving it is. You can swap ingredients, adjust the layers, change the toppings, and it still turns out delicious. It is the kind of recipe that builds confidence in the kitchen—especially for kids who are just learning to measure, mix, and layer. My nephew still talks about “his” dirt cups, and he is six now. That is the power of a simple, joyful dessert.
I encourage you to make these your own. Try the peanut butter version. Use mint pudding for a cool twist. Add candy pumpkins in the fall. The base recipe is a canvas, and you are the artist. And when you make them, I would love to hear how they turned out. Drop a comment below, share a photo, or tag me on social media. Seeing your creations is the best part of sharing this recipe.
Now go crush some cookies and make some memories. Your kitchen is about to get a little more fun.
Frequently Asked Questions
Can I make these dirt cups the night before?
Absolutely. In fact, they taste better after chilling overnight. The pudding sets firmly, the Oreo crumbs soften to a realistic dirt texture, and the flavors blend beautifully. Just wait to add the gummy worms until right before serving if you want them to stay chewy and vibrant. If you add them the night before, they will soften and may lose some color.
Can I use homemade whipped cream instead of Cool Whip?
Yes, you can substitute 1 ½ cups of homemade whipped cream (made from 1 cup heavy cream and 2 tablespoons powdered sugar). The texture will be slightly lighter and less stable than Cool Whip, so the cups may not hold their layers as firmly after a day in the fridge. For best results, use the homemade whipped cream within 24 hours of assembly.
How do I crush the Oreos without making a mess?
Use a large zip-top bag and press out all the air before sealing. Place the bag on a cutting board or countertop, then use a rolling pin or the bottom of a heavy pan to crush the cookies. The bag contains the crumbs, so cleanup is minimal. If you want finer crumbs, use a food processor with short pulses. Just be careful not to over-process into dust.
Can I use sugar-free pudding and cookies?
Yes, you can use sugar-free instant chocolate pudding and sugar-free Oreos (or similar cookies). The texture will be slightly different—sugar-free pudding can be a bit softer—but the flavor is still good. Reduce the milk by 2 tablespoons if using sugar-free pudding, as it sometimes needs less liquid to set properly.
How long do these stay fresh in the fridge?
Assembled dirt cups will keep for 3-4 days in the refrigerator when covered. The Oreo crumbs will continue to soften over time, becoming more like a cake-like texture than crunchy dirt. If you prefer the crunch, store the crushed Oreos separately and add them just before serving. The pudding mixture alone will last 5-6 days in an airtight container.
Pin This Recipe!
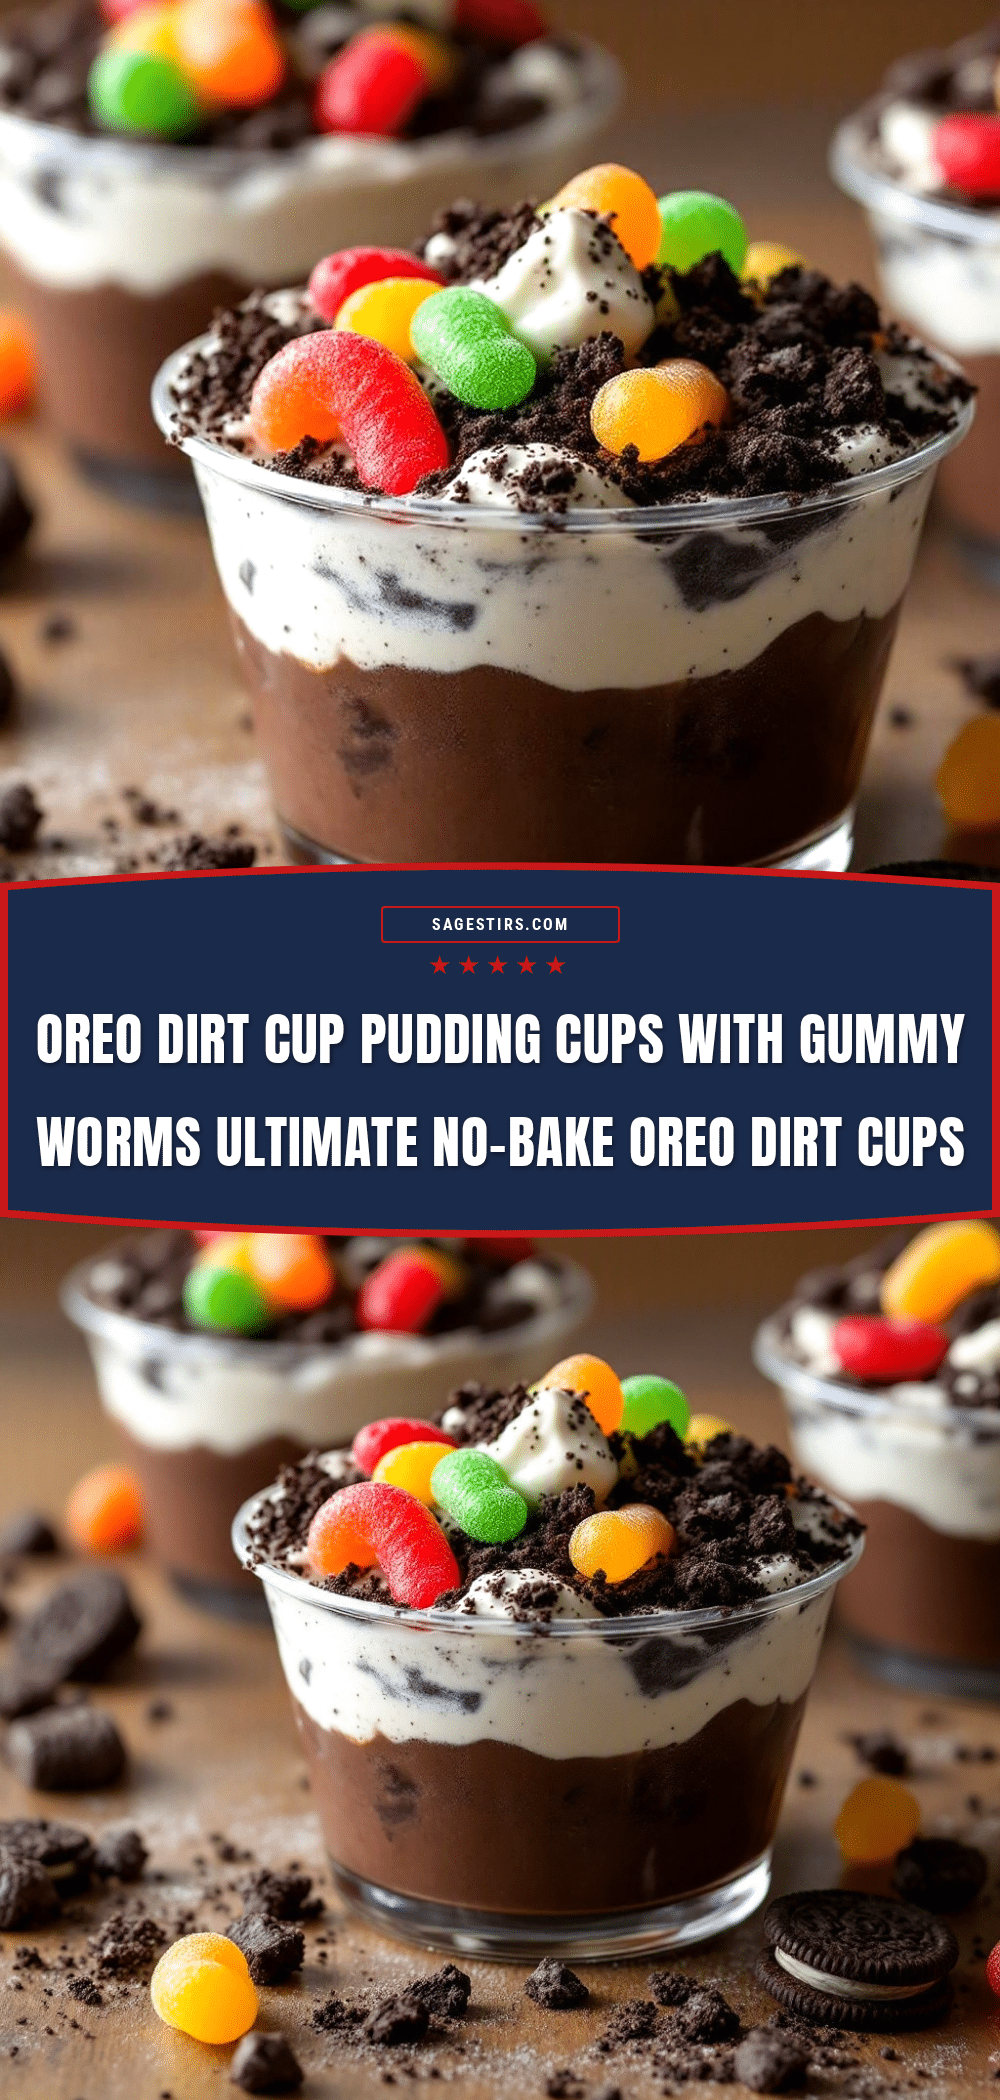
Easy Oreo Dirt Cup Pudding Cups with Gummy Worms

These no-bake Oreo dirt cups are a fun, kid-friendly dessert featuring layers of creamy chocolate pudding, crushed Oreo cookies, and gummy worms. Perfect for parties, they come together in under 20 minutes and are endlessly customizable.
- Prep Time: 15 minutes
- Cook Time: 0 minutes
- Total Time: 2 hours 15 minutes (includes chilling time)
- Yield: 8 servings 1x
- Category: Dessert
- Cuisine: American
Ingredients
- 1 (3.9 oz) package instant chocolate pudding mix
- 2 cups cold whole milk
- 1 (8 oz) tub Cool Whip, thawed
- 1 (14.3 oz) package Oreo cookies (about 36 cookies)
- 1 (4.5 oz) bag gummy worms
- Optional: 1-2 tablespoons chocolate shavings or cocoa powder
- Optional: 4-6 fresh mint leaves or edible flowers
Instructions
- Crush the Oreos: Place the entire package of Oreos (filling and all) into a large zip-top bag. Seal it, removing as much air as possible. Use a rolling pin to crush the cookies into fine crumbs with a few small chunks remaining. Set aside.
- Make the pudding: In a large mixing bowl, whisk together the instant chocolate pudding mix and 2 cups cold whole milk. Whisk vigorously for about 2 minutes until the mixture thickens and becomes smooth. Let it sit for 5 minutes to fully set.
- Fold in the Cool Whip: Add the entire container of thawed Cool Whip to the pudding. Use a rubber spatula to gently fold it together until no white streaks remain. The mixture should be light and mousse-like.
- Layer the cups: Set out 6 to 8 serving cups. Start with a layer of crushed Oreos at the bottom of each cup (about 2 tablespoons per cup). Press it down gently. Spoon or pipe the pudding mixture over the Oreo layer, filling each cup about halfway. Add another layer of crushed Oreos (about 1 ½ tablespoons), then another layer of pudding, filling almost to the top. Leave about ½ inch of space for the final dirt layer.
- Top with dirt and worms: Sprinkle a generous layer of crushed Oreos over the top of each cup (about 2 tablespoons per cup). Gently press a few gummy worms into the dirt so they look like they are crawling out.
- Chill: Place the finished cups in the refrigerator for at least 2 hours, preferably 4 hours. This allows the pudding to set firmly and the Oreo crumbs to soften slightly.
- Serve: Remove the cups from the fridge just before serving. Add a few fresh gummy worms on top right before serving for the best visual effect.
Notes
Use cold milk for the pudding to activate thickeners. Do not overmix the pudding. Let the pudding rest for 5 minutes before folding in Cool Whip. For cleaner layers, use a piping bag for the pudding. Chill cups uncovered for the first hour to prevent condensation. For a more realistic dirt look, mix 1 tablespoon cocoa powder into the crushed Oreos. These cups taste best after 4-6 hours of chilling or overnight.
Nutrition
- Serving Size: 1 cup
- Calories: 400
- Sugar: 40
- Sodium: 375
- Fat: 17
- Saturated Fat: 9
- Carbohydrates: 58
- Fiber: 2.5
- Protein: 6
Keywords: dirt cups, Oreo pudding, no-bake dessert, kid-friendly dessert, gummy worms, chocolate pudding, party dessert



