Love this? Save it for later!
Share the inspiration with your friends
My niece Clara asked why I couldn’t just skip the step of chilling the dough. I started to explain why that wouldn’t work—then stopped. I had no good answer. Honestly, I’d been chilling pumpkin cookie dough for years because that’s what the recipes always said to do. It felt like a rule. But Clara, who was maybe twelve at the time, just looked at me with that patient expression kids get when adults are being ridiculous. “Have you ever tried not chilling it?” she asked. I hadn’t. So I didn’t.
Let me tell you, I was prepared for flat, greasy pucks of cookie. I had my oven mitts ready for disappointment. But what came out of the oven that afternoon was something else entirely. They were fluffy. I mean, bakery-case, cloud-soft, almost-cake-like fluffy. The brown butter had this nutty warmth that wrapped around the pumpkin spice, and the chocolate chips melted into little pockets of gooey sweetness. I stood there in my slightly messy kitchen, holding a spatula, and just stared at these cookies. Clara had been right all along.
That moment stuck with me. Not just because I learned something about cookie science, but because it reminded me that sometimes the best recipes come from questioning the rules. These fluffy brown butter pumpkin chocolate chip cookies are now my absolute favorite fall bake. They come together fast, they don’t need fancy techniques, and they taste like autumn in the best possible way. Maybe you’ve been there too—following a step just because, when all along there was a simpler, better way waiting. These cookies are that better way.
Why You’ll Love This Recipe
I’ve tested this recipe more times than I care to admit. Some batches turned out too dense. Others were too flat. A few were just… sad. But this version? This one works every single time. And here’s the thing—it’s not just another pumpkin cookie recipe. It’s the one that solves the biggest problems people have with pumpkin baking.
- Unbelievably Fluffy: Most pumpkin cookies turn out dense and almost gummy. Not these. The combination of brown butter and a specific mixing method creates cookies that are light, tender, and pillowy. You’ll be shocked at the texture.
- No Chilling Required: I know, I know—I just told you the story. But seriously, no chilling means you can have warm cookies in under 25 minutes. That’s a game-changer for spontaneous baking cravings.
- Perfectly Balanced Flavor: Brown butter adds a deep, nutty richness that complements the pumpkin without overpowering it. The chocolate chips bring just enough sweetness to keep everything in harmony.
- Simple Pantry Ingredients: You don’t need anything weird. Butter, sugar, eggs, pumpkin puree, flour, chocolate chips—all standard stuff you probably already have.
- Crowd-Pleaser for Fall Gatherings: I’ve brought these to potlucks, Thanksgiving dinners, and casual get-togethers. They disappear fast. Kids love them, adults love them, and people always ask for the recipe.
What makes this recipe different from the dozens of pumpkin cookie recipes out there? It’s the brown butter technique combined with the no-chill method. The brown butter adds a toasty, almost caramel-like depth that regular melted butter just can’t match. And skipping the chill time means the cookies spread just enough to stay soft and puffy without turning into flat discs. This isn’t just another version—it’s the version I’ve perfected after many, many batches.
These cookies are the kind that make you close your eyes after the first bite. They’re comfort food reimagined—faster, fluffier, and packed with that cozy fall feeling we all crave. Perfect for impressing guests without stress, or turning a random Tuesday into something special.
What Ingredients You Will Need
This recipe uses simple, wholesome ingredients to deliver bold flavor and satisfying texture without the fuss. Most of these are pantry staples, especially during pumpkin season. Let me walk you through each one and share a few tips I’ve learned along the way.
- Unsalted Butter (1 cup / 2 sticks): This is the star of the show. Using unsalted butter lets you control the salt level. You’ll be browning this butter, which transforms it into something magical. I prefer using a good-quality butter like Kerrygold for the richest flavor, but any unsalted butter works fine. Cut it into pieces before browning for even melting.
- Pumpkin Puree (3/4 cup): Make sure you’re using 100% pumpkin puree, not pumpkin pie filling. The pie filling has added sugar and spices that will throw off the recipe. I like Libby’s brand for consistent results. If you’re using homemade pumpkin puree, make sure to drain any excess liquid by pressing it through a fine-mesh strainer or patting it dry with paper towels. Too much moisture will make the cookies dense.
- Light Brown Sugar (1 cup, packed): Brown sugar adds moisture and that subtle molasses flavor that pairs beautifully with pumpkin and brown butter. Pack it firmly into your measuring cup for accuracy. Dark brown sugar works too, but it will give the cookies a slightly deeper, more caramel-like flavor.
- Granulated Sugar (1/2 cup): This helps with spreading and adds sweetness. The combination of brown and granulated sugar gives the cookies the perfect texture—crispy edges with a soft, fluffy center.
- Large Egg (1): The egg provides structure and helps bind everything together. Make sure it’s at room temperature for the best incorporation. If you forgot to take it out of the fridge, place it in a bowl of warm water for 5 minutes.
- Vanilla Extract (2 teaspoons): Use pure vanilla extract if you can. It adds warmth and depth that artificial vanilla just can’t match. I’ve been using Nielsen-Massey for years and love it.
- All-Purpose Flour (2 cups): Regular all-purpose flour works perfectly here. Spoon it into your measuring cup and level it off with a knife—don’t scoop directly from the bag, or you’ll end up with too much flour and dry cookies. For a gluten-free option, use a 1:1 gluten-free baking flour blend.
- Pumpkin Pie Spice (2 teaspoons): You can use store-bought or make your own. If you’re making your own, mix 1 teaspoon cinnamon, 1/2 teaspoon ginger, 1/4 teaspoon nutmeg, 1/4 teaspoon allspice, and a pinch of cloves. This spice blend is what gives the cookies that classic fall flavor.
- Baking Soda (1 teaspoon): This helps the cookies rise and spread. Make sure your baking soda is fresh—if it’s been sitting in your pantry for over a year, it might not work as well.
- Salt (1/2 teaspoon): Salt balances the sweetness and enhances all the flavors. I use fine sea salt for baking. If you’re using kosher salt, you might need a bit more.
- Semi-Sweet Chocolate Chips (1 1/2 cups): Semi-sweet is my go-to because it’s not too sweet and not too bitter. It lets the pumpkin and brown butter shine. You can use dark chocolate chips if you prefer a richer flavor, or milk chocolate for a sweeter cookie. I’ve also used chopped chocolate bars for those melty puddles of chocolate—highly recommend.
One more thing about the pumpkin puree—don’t be tempted to add more than the recipe calls for. I know it seems like more pumpkin would mean more flavor, but it actually makes the cookies too wet and they’ll turn out more like muffin tops than cookies. Trust the measurements here.
Equipment Needed
You don’t need a fancy kitchen to make these cookies. Here’s what you’ll need:
- Large Skillet or Saucepan: For browning the butter. A light-colored pan is best because you can see the butter change color. I use a stainless steel skillet, but a non-stick pan works too.
- Mixing Bowls: You’ll need one large bowl for the wet ingredients and one medium bowl for the dry ingredients. I prefer glass or stainless steel bowls.
- Whisk: For mixing the dry ingredients and for combining the wet ingredients. A sturdy whisk makes the job easier.
- Rubber Spatula: This is essential for folding in the chocolate chips and scraping down the sides of the bowl. A silicone spatula is heat-resistant and easy to clean.
- Baking Sheets: Two standard baking sheets work well. I like using light-colored aluminum sheets for even browning. Dark sheets can cause the bottoms to brown too quickly.
- Parchment Paper or Silicone Baking Mat: This prevents sticking and makes cleanup a breeze. Parchment paper is my preference because it’s disposable.
- Cookie Scoop or Tablespoon: For portioning the dough evenly. A 1.5-tablespoon cookie scoop gives you perfectly uniform cookies. If you don’t have one, just use a regular tablespoon.
- Cooling Rack: Letting the cookies cool on a rack prevents the bottoms from getting soggy. If you don’t have one, you can transfer them to a plate after a few minutes.
If you don’t have a kitchen scale, don’t worry—I’ve provided all measurements in cups and spoons. But if you do have one, weighing your flour (240 grams) gives the most consistent results. Also, an oven thermometer is a good investment if your oven runs hot or cold. It’s saved many of my bakes.
Preparation Method
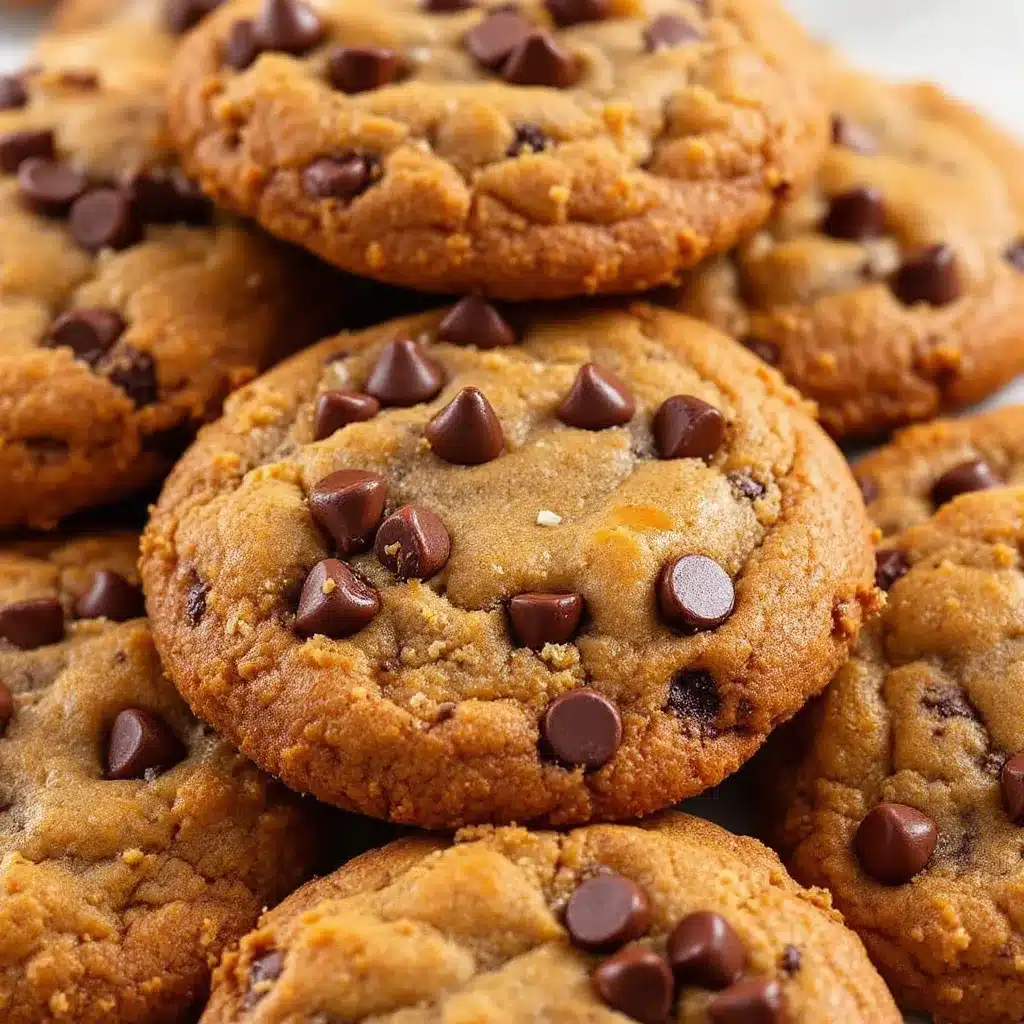
Let’s get baking. This recipe comes together quickly, so have all your ingredients measured and ready before you start. Here’s the step-by-step process.
- Brown the butter. Place the 1 cup of unsalted butter in a light-colored skillet or saucepan over medium heat. Stir occasionally with a rubber spatula or wooden spoon. After about 5-7 minutes, the butter will start to foam and you’ll see brown specks forming at the bottom. The butter will smell nutty and delicious. Once it reaches a golden-amber color, remove it from the heat immediately and pour it into a heatproof bowl to stop the cooking process. Let it cool for 10-15 minutes. Don’t skip this cooling step—if the butter is too hot, it will cook the egg when you mix it in.
- Preheat the oven. Set your oven to 350°F (175°C). Line two baking sheets with parchment paper or silicone mats.
- Mix the wet ingredients. In a large bowl, combine the cooled brown butter, 1 cup packed light brown sugar, and 1/2 cup granulated sugar. Whisk vigorously for about 1 minute until the mixture looks smooth and slightly thickened. Add 1 large egg (room temperature) and 2 teaspoons vanilla extract. Whisk again until fully combined. The mixture should look glossy and smell amazing.
- Add the pumpkin. Add 3/4 cup pumpkin puree to the bowl. Whisk gently until just combined. Don’t overmix here—you want the pumpkin incorporated but you don’t want to deflate the mixture. The batter will look a bit curdled at this point, but that’s totally normal. Don’t panic.
- Combine the dry ingredients. In a separate medium bowl, whisk together 2 cups all-purpose flour, 2 teaspoons pumpkin pie spice, 1 teaspoon baking soda, and 1/2 teaspoon salt. Make sure there are no lumps. This step ensures the leavening and spices are evenly distributed throughout the dough.
- Add the dry ingredients to the wet. Pour the dry ingredients into the wet mixture. Use a rubber spatula to fold everything together gently. Stir just until no streaks of flour remain. A few small lumps are fine. Overmixing will make the cookies tough, so be gentle here.
- Fold in the chocolate chips. Add 1 1/2 cups semi-sweet chocolate chips to the dough. Fold them in with the spatula until they’re evenly distributed. At this point, the dough will be soft and slightly sticky. That’s exactly what we want.
- Scoop the dough. Using a 1.5-tablespoon cookie scoop or a regular tablespoon, drop rounded scoops of dough onto the prepared baking sheets. Space them about 2 inches apart—they will spread a little but not too much. You should get about 24 cookies total.
- Bake. Place the baking sheets in the preheated oven. Bake for 10-12 minutes. The cookies should look puffed up and the edges should be set but the centers will still look slightly soft. For softer, fluffier cookies, bake for 10 minutes. For slightly crisper edges, go for 12 minutes. The tops might look a little cracked—that’s the pumpkin doing its thing.
- Cool. Let the cookies cool on the baking sheet for 5 minutes. This allows them to set up without breaking apart. Then transfer them to a cooling rack to cool completely. Or, you know, eat one warm. I won’t tell anyone.
A few things to watch for: If your cookies spread too much, your butter might have been too warm. If they’re too dense, you might have overmixed the dough or added too much pumpkin. If they’re dry, you might have overbaked them. Every oven is different, so start checking at the 9-minute mark the first time you make these.
Cooking Tips & Techniques
After making these cookies more times than I can count, I’ve picked up a few tricks that make a real difference. Let me share them with you.
Watch the butter carefully. Browning butter can go from perfect to burnt in about 30 seconds. Once you see those brown specks forming and smell that nutty aroma, pull it off the heat immediately. I’ve ruined a few batches by getting distracted—my phone rang once and I ended up with black butter. Not a good look.
Use room temperature ingredients. This is one of those baking rules that actually matters. A cold egg can seize up the brown butter and make the dough lumpy. If you forgot to take the egg out of the fridge, place it in a bowl of warm water for 5 minutes. The pumpkin puree should also be at room temperature.
Don’t skip the cooling step. I know it’s tempting to use the brown butter right away, but if it’s too hot, it will partially cook the egg and change the texture of the cookies. Let it cool for at least 10 minutes. It should feel warm to the touch but not hot.
Measure flour correctly. This is the most common mistake in cookie baking. Scooping flour directly from the bag packs it down and you end up with too much. Instead, spoon the flour into your measuring cup and level it off with a knife. Or better yet, use a kitchen scale—240 grams is the sweet spot.
Chill if you must, but you don’t have to. I’ve tested this recipe both ways. Chilling the dough for 30 minutes gives you slightly thicker cookies with a bit more chew. Not chilling gives you fluffier, softer cookies. Both are delicious. If you do chill the dough, let it sit at room temperature for 10 minutes before scooping—it’ll be easier to handle.
Bake one sheet at a time. If you put both baking sheets in the oven at once, the heat circulates unevenly and your cookies might not bake consistently. If you need to bake two batches, keep the second batch of dough at room temperature while the first batch bakes.
One mistake I made early on was using too much pumpkin puree. I thought more pumpkin would mean more flavor, but it just made the cookies dense and gummy. Stick to the 3/4 cup measurement and you’ll be fine.
Variations & Adaptations
One of the best things about this recipe is how flexible it is. Here are some variations I’ve tried and loved.
Gluten-Free Version: Substitute the all-purpose flour with a 1:1 gluten-free baking flour blend. I’ve used King Arthur’s Measure for Measure blend with great results. The cookies might be slightly more delicate, but they’re still fluffy and delicious. Add an extra tablespoon of flour if the dough seems too wet.
Dairy-Free Option: Use vegan butter for the brown butter step. I’ve done this with Miyoko’s European Style Cultured Vegan Butter and it works beautifully. The flavor is slightly different but still rich and nutty. Use dairy-free chocolate chips as well—Enjoy Life makes a good one.
White Chocolate & Cranberry: Swap the semi-sweet chocolate chips for 1 cup white chocolate chips and 1/2 cup dried cranberries. The tartness of the cranberries balances the sweetness of the white chocolate perfectly. This is my go-to version for Thanksgiving.
Pumpkin Spice Extra: If you’re a pumpkin spice fanatic (no judgment here), add an extra teaspoon of pumpkin pie spice and a pinch of ground cardamom. The cardamom adds a floral, slightly citrusy note that’s really lovely.
Nutty Addition: Fold in 1/2 cup toasted pecans or walnuts along with the chocolate chips. Toast the nuts in a dry skillet over medium heat for 3-4 minutes until fragrant. Let them cool before adding to the dough. The crunch is a nice contrast to the soft cookie.
Maple Glaze Drizzle: For an extra-special treat, whisk together 1 cup powdered sugar, 2 tablespoons maple syrup, and 1 tablespoon milk until smooth. Drizzle over cooled cookies. Let the glaze set for about 15 minutes before serving. This turns them into a dessert that feels fancy but is still easy.
I once made a batch with chopped crystallized ginger instead of chocolate chips. It was a little odd, honestly—the ginger was too intense. Stick with the chocolate chips or try one of the variations above. Some experiments work, some don’t. That’s part of the fun.
Serving & Storage Suggestions
These cookies are best served slightly warm, when the chocolate chips are still a little melty and the brown butter flavor is at its peak. Let them cool on the baking sheet for 5 minutes, then transfer to a plate and serve. A glass of cold milk is the classic pairing, but a warm cup of chai tea or a pumpkin spice latte works beautifully too.
For a dessert spread, arrange the cookies on a pretty platter with a few sprigs of fresh rosemary or cinnamon sticks for a seasonal touch. They also make great ice cream sandwiches—just sandwich a scoop of vanilla or caramel ice cream between two cookies and freeze for 30 minutes.
Storing at Room Temperature: Place the cookies in an airtight container with a piece of bread. Sounds weird, I know, but the bread absorbs excess moisture and keeps the cookies soft for up to 5 days. Change the bread every other day. Without the bread trick, they’ll stay fresh for about 3 days.
Freezing the Baked Cookies: Let the cookies cool completely, then place them in a single layer in a freezer-safe bag or container. Separate layers with parchment paper. They’ll keep for up to 3 months. To thaw, let them sit at room temperature for about 30 minutes. You can also microwave them for 10-15 seconds for that fresh-from-the-oven warmth.
Freezing the Dough: This is my favorite trick. Scoop the dough into balls and place them on a parchment-lined baking sheet. Freeze for 1 hour until solid, then transfer the dough balls to a freezer bag. They’ll keep for up to 3 months. When you’re ready to bake, place the frozen dough balls on a baking sheet and bake at 350°F for 12-14 minutes—no need to thaw. You might need to add a minute or two to the baking time.
The cookies actually taste even better the next day. The flavors have time to meld together, and the brown butter flavor becomes even more pronounced. If you can resist eating them all on day one, you’re stronger than I am.
Nutritional Information & Benefits
I’m not a nutritionist, but I’ve done my best to estimate the nutritional values for one cookie (based on 24 cookies total). Keep in mind these are rough estimates and can vary based on specific brands and ingredient substitutions.
| Nutrient | Amount per Cookie |
|---|---|
| Calories | 185 |
| Total Fat | 10g |
| Saturated Fat | 6g |
| Cholesterol | 25mg |
| Sodium | 95mg |
| Total Carbohydrates | 24g |
| Dietary Fiber | 1g |
| Sugars | 15g |
| Protein | 2g |
| Vitamin A | 15% DV |
Pumpkin is a great source of vitamin A, which supports eye health and immune function. It also provides fiber and antioxidants. The brown butter adds healthy fats, and the dark chocolate (if you use it) contains flavonoids that are good for heart health. Of course, these are still cookies—they’re a treat, not a health food. But they’re a treat that happens to have some nutritional perks.
If you’re watching your sugar intake, you can reduce the granulated sugar to 1/3 cup. The cookies will be slightly less sweet but still delicious. For a lower-fat version, you can replace half the butter with unsweetened applesauce, but the texture will be more cake-like and less fluffy.
These cookies contain gluten, dairy, and eggs. For allergen-friendly versions, see the variations section above.
Conclusion
These fluffy brown butter pumpkin chocolate chip cookies have become my fall baking staple. They’re everything I want in a seasonal treat—warm, cozy, and full of flavor. The brown butter adds a depth that regular cookies just can’t match, and the no-chill method means you can have a batch in the oven in under 15 minutes. That’s a win in my book.
I hope you give these a try and make them your own. Maybe you’ll add extra chocolate chips or a sprinkle of flaky sea salt on top. Maybe you’ll double the batch and freeze half for later. Whatever you do, I’d love to hear about it. Leave a comment below and let me know how they turned out, or share your own twist on the recipe. Your version might be even better than mine—just ask my niece Clara.
Happy baking, friends. May your kitchen smell like brown butter and pumpkin spice, and may your cookies always be fluffy.
Frequently Asked Questions
Can I use pumpkin pie filling instead of pumpkin puree?
No, please don’t. Pumpkin pie filling has added sugar, spices, and sometimes thickeners that will throw off the recipe completely. Stick with 100% pumpkin puree. Your cookies will thank you.
Why did my cookies turn out flat?
Flat cookies usually happen for one of three reasons: the butter was too warm when you mixed it, you used too much sugar, or your baking soda is old. Make sure your butter has cooled to room temperature after browning, measure your ingredients carefully, and check that your baking soda is fresh.
Can I make these cookies vegan?
Yes, with a few swaps. Use vegan butter for the brown butter step, a flax egg (1 tablespoon ground flaxseed mixed with 3 tablespoons water) instead of a regular egg, and dairy-free chocolate chips. The texture will be slightly different—a bit more delicate—but they’ll still be delicious.
How do I know when the cookies are done baking?
Look for puffed-up cookies with set edges and slightly soft centers. The tops might look a little cracked, which is normal. If you gently touch the center, it should feel soft but not raw. For perfectly fluffy cookies, err on the side of underbaking—they’ll continue to set on the hot baking sheet.
Can I use fresh pumpkin instead of canned?
You can, but you’ll need to drain it well. Fresh pumpkin puree has more water than canned. Place the puree in a fine-mesh strainer lined with paper towels and let it drain for 30 minutes. Pat it dry with more paper towels before using. If you skip this step, your cookies might turn out dense and gummy.
Pin This Recipe!
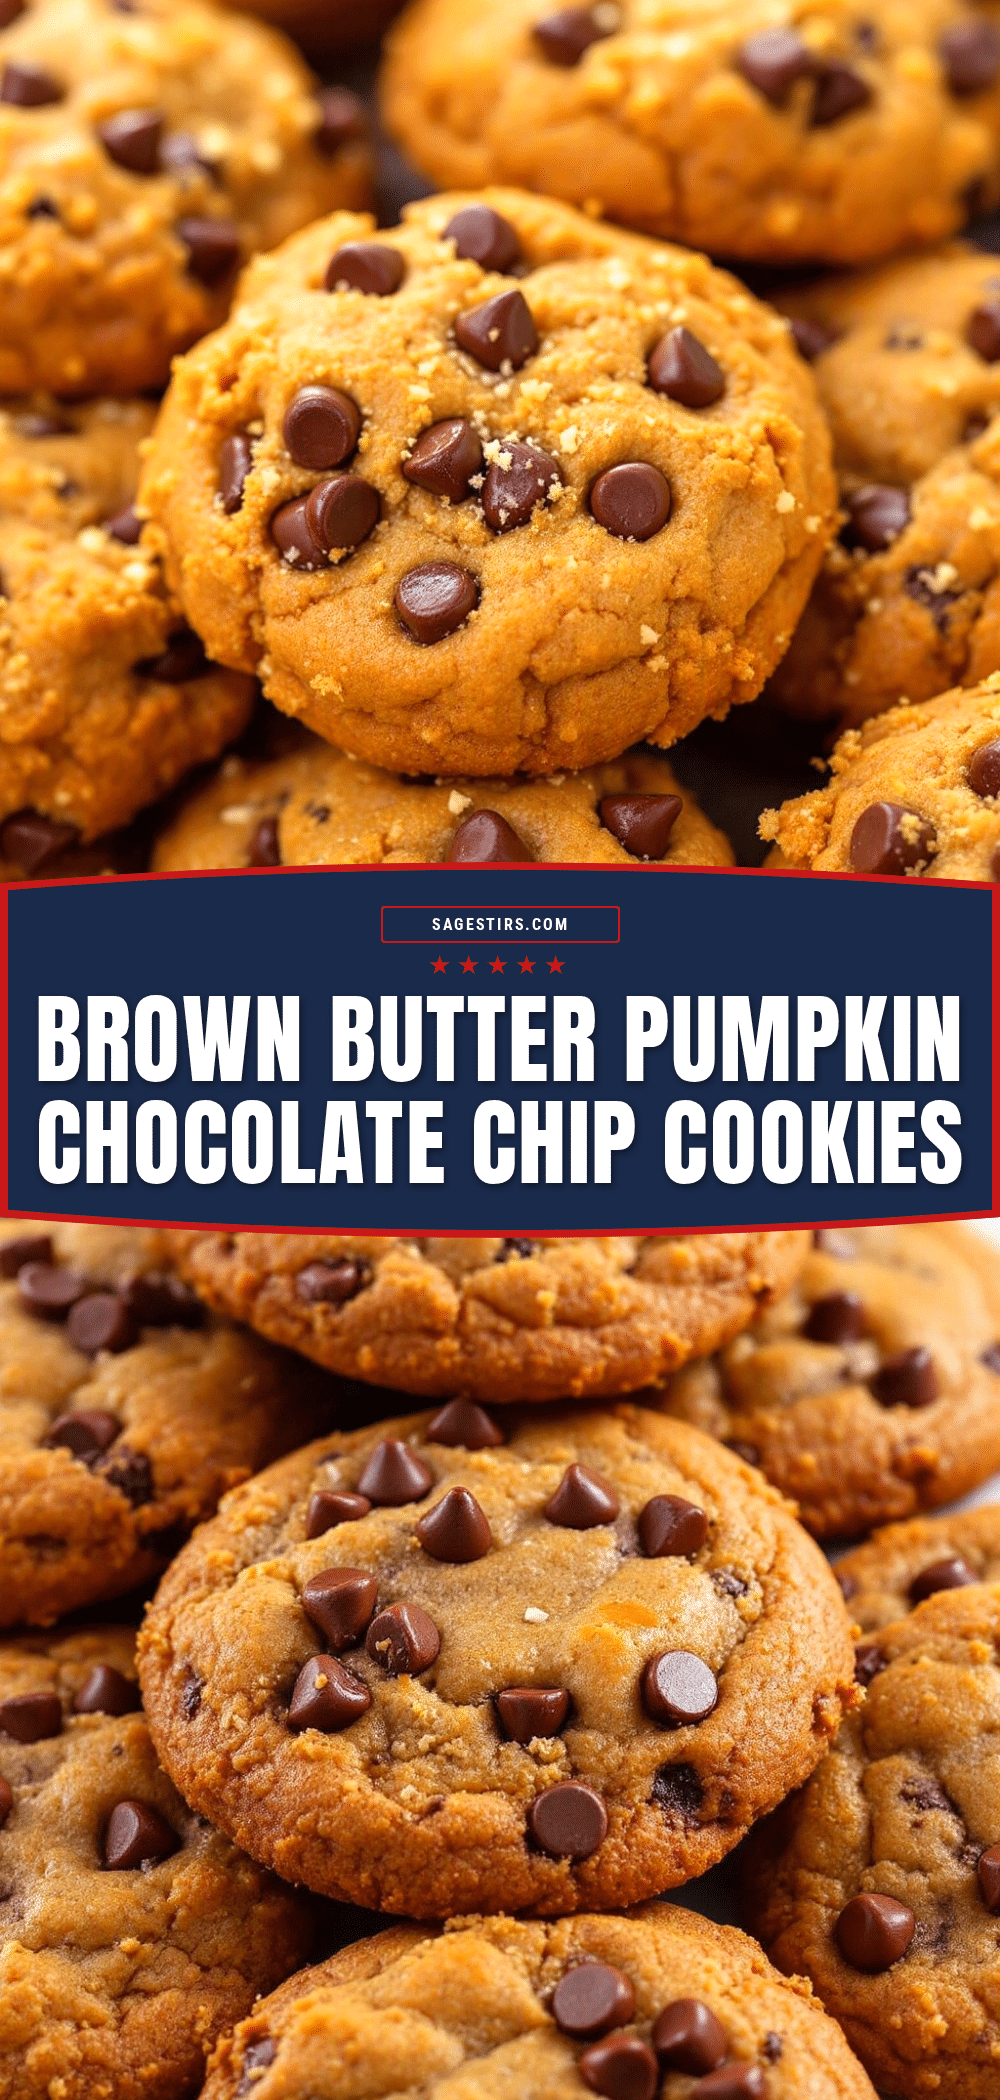
Fluffy Brown Butter Pumpkin Chocolate Chip Cookies

These fluffy brown butter pumpkin chocolate chip cookies are soft, cloud-like, and packed with warm fall flavors. No chilling required, so you can have warm cookies in under 25 minutes.
- Prep Time: 15 minutes
- Cook Time: 12 minutes
- Total Time: 27 minutes
- Yield: 24 cookies 1x
- Category: Dessert
- Cuisine: American
Ingredients
- 1 cup (2 sticks) unsalted butter
- 3/4 cup pumpkin puree (not pumpkin pie filling)
- 1 cup packed light brown sugar
- 1/2 cup granulated sugar
- 1 large egg, room temperature
- 2 teaspoons vanilla extract
- 2 cups all-purpose flour
- 2 teaspoons pumpkin pie spice
- 1 teaspoon baking soda
- 1/2 teaspoon salt
- 1 1/2 cups semi-sweet chocolate chips
Instructions
- Brown the butter: Place 1 cup unsalted butter in a light-colored skillet or saucepan over medium heat. Stir occasionally. After 5-7 minutes, the butter will foam and brown specks will form. Once golden-amber, remove from heat and pour into a heatproof bowl. Let cool for 10-15 minutes.
- Preheat oven to 350°F (175°C). Line two baking sheets with parchment paper or silicone mats.
- In a large bowl, combine cooled brown butter, 1 cup packed light brown sugar, and 1/2 cup granulated sugar. Whisk vigorously for 1 minute until smooth and slightly thickened.
- Add 1 large egg (room temperature) and 2 teaspoons vanilla extract. Whisk until fully combined and glossy.
- Add 3/4 cup pumpkin puree. Whisk gently until just combined. The mixture may look slightly curdled; that’s normal.
- In a separate medium bowl, whisk together 2 cups all-purpose flour, 2 teaspoons pumpkin pie spice, 1 teaspoon baking soda, and 1/2 teaspoon salt.
- Pour dry ingredients into wet mixture. Fold with a rubber spatula until just combined—no streaks of flour remain. Do not overmix.
- Fold in 1 1/2 cups semi-sweet chocolate chips until evenly distributed. Dough will be soft and slightly sticky.
- Using a 1.5-tablespoon cookie scoop or tablespoon, drop rounded scoops onto prepared baking sheets, spacing 2 inches apart. You should get about 24 cookies.
- Bake for 10-12 minutes. Cookies should be puffed with set edges and soft centers. For softer cookies, bake 10 minutes; for crisper edges, bake 12 minutes.
- Let cookies cool on baking sheet for 5 minutes, then transfer to a cooling rack to cool completely.
Notes
For best results, use room temperature ingredients. Brown butter can burn quickly—watch carefully. Measure flour by spooning into cup and leveling off. If chilling dough, let sit at room temperature 10 minutes before scooping. Bake one sheet at a time for even results.
Nutrition
- Serving Size: 1 cookie
- Calories: 185
- Sugar: 15
- Sodium: 95
- Fat: 10
- Saturated Fat: 6
- Carbohydrates: 24
- Fiber: 1
- Protein: 2
Keywords: pumpkin cookies, brown butter, chocolate chip, fall baking, no chill, fluffy cookies