Love this? Save it for later!
Share the inspiration with your friends
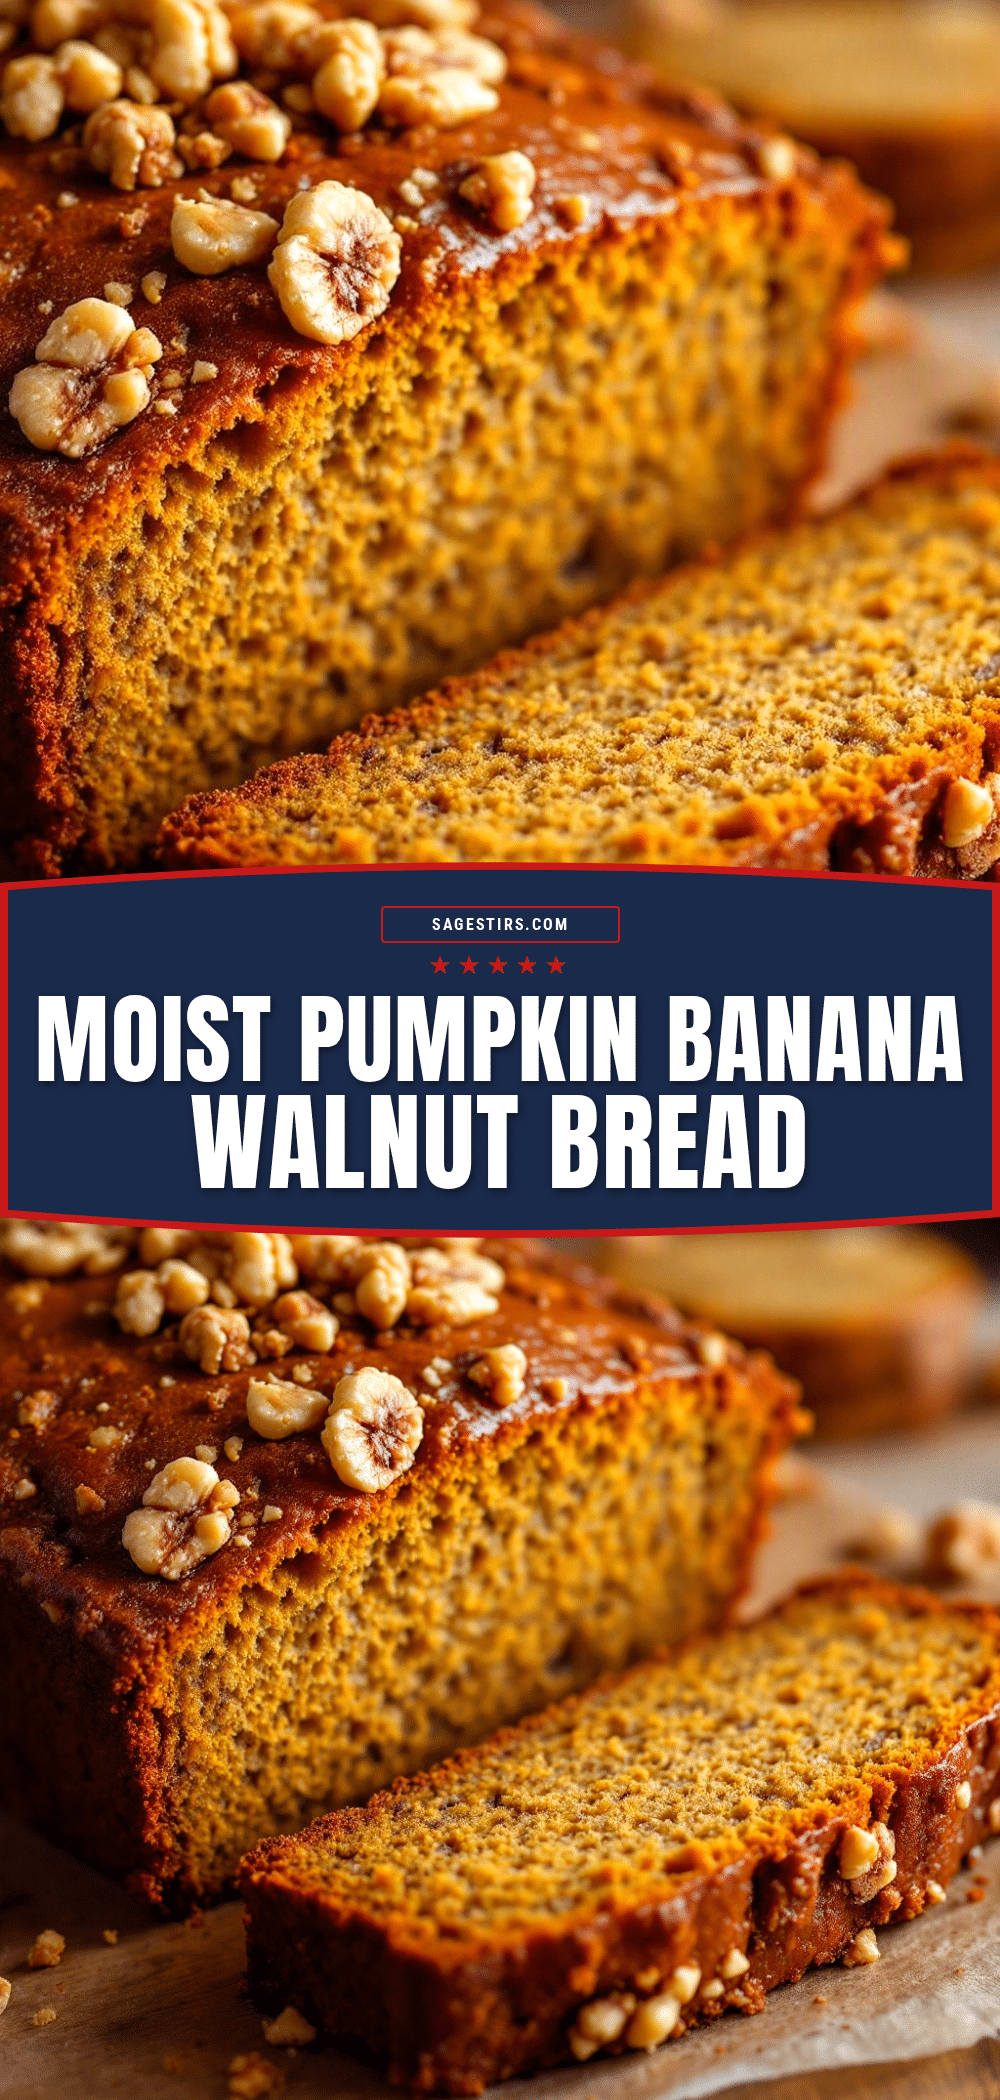
Third time this week I pulled this loaf from the oven, and this time I finally remembered to set a timer instead of guessing by smell. The kitchen smelled like a cross between a pumpkin patch and a banana stand — if that sounds weird, I promise it works. I had one overripe banana on the counter and half a can of pumpkin leftover from making my brown butter pumpkin chocolate chip cookies, and I just couldn’t let either go to waste.
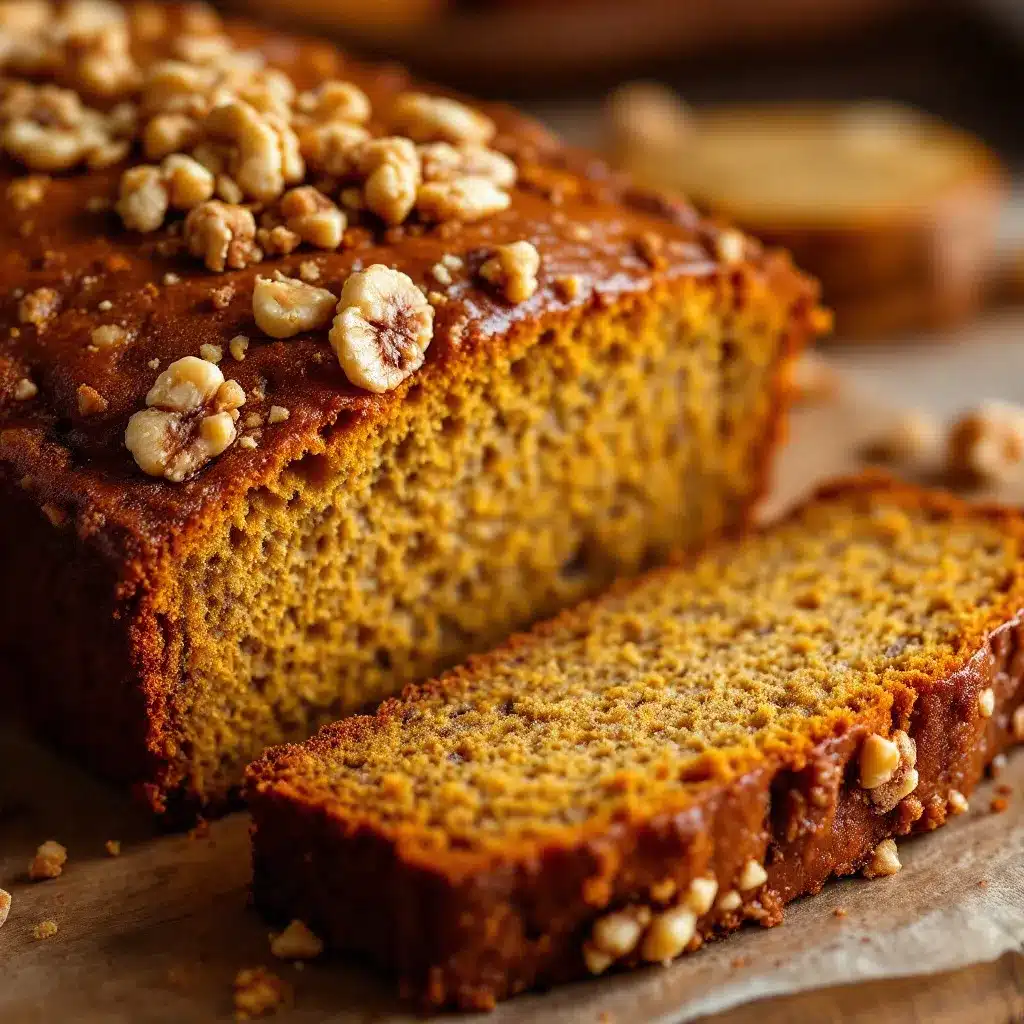
The first loaf was good but a little dense — you know, that heavy feeling that sits in your stomach. The second was better but the walnuts sank to the bottom like they were trying to escape. This third one? It came out exactly right. The crumb was tender, the pumpkin and banana flavors mingled without fighting each other, and the walnuts stayed suspended throughout like little buttery treasures.
Honestly, I think the trick was not overmixing and using room temperature eggs — two things I usually ignore when I’m impatient. But this time I paid attention, and the bread rewarded me. It’s the kind of loaf that makes you close your eyes after the first bite, even if you’re standing at the counter in sweatpants. And isn’t that the whole point of baking something like this?
Why You’ll Love This Recipe
This Moist Pumpkin Banana Walnut Bread hits that sweet spot between healthy-ish and indulgent. It tastes like you spent all morning baking, but it comes together in one bowl with zero fancy equipment. I’ve tested this recipe four times now (yes, four — the third one was the charm, but I made a fourth just to be sure) and it delivers consistent results every single time.
- One Bowl Wonder : Mix everything in a single bowl. Less dishes, more time to actually enjoy the bread.
- Perfectly Moist : The combination of pumpkin puree and ripe bananas creates a texture that stays soft for days. No dry crumb here.
- Pantry-Friendly Ingredients : You probably have most of these already. No weird specialty items required.
- Freezes Like a Dream : Make two loaves and freeze one for later. It thaws beautifully and tastes just as fresh.
- Customizable : Swap the walnuts for pecans, add chocolate chips, or leave out the nuts entirely. The base recipe is forgiving.
- Fall Vibes All Year : Sure, it screams autumn, but I’ve made this in July and it still felt right. Pumpkin doesn’t need a season.
What makes this recipe different from other pumpkin banana breads is the balance. Most recipes lean too heavy on the pumpkin or let the banana overpower everything. Here, they work together like a duet. The pumpkin adds moisture and a subtle earthiness, while the banana brings sweetness and structure. The walnuts add crunch and a little bitterness that cuts through the sweetness perfectly.
This isn’t just another quick bread recipe. It’s the one you’ll bookmark, screenshot, and text to your mom. The one that makes you look like a baking pro even if you’re just following directions. Trust me on this.
What Ingredients You Will Need
This recipe uses simple, wholesome ingredients that come together to create something genuinely special. Most of these are pantry staples, which makes this bread perfect for those mornings when you need to use up what you have.
- All-purpose flour, 1 ¾ cups (220g) — Standard all-purpose works best here. Spoon and level it into your measuring cup for accuracy. If you scoop directly from the bag, you’ll end up with too much flour and a dry loaf.
- Baking soda, 1 teaspoon — This is our main leavening agent. Make sure it’s fresh — test it by dropping a little into vinegar. If it fizzes aggressively, you’re good.
- Baking powder, ½ teaspoon — Adds a little extra lift. I use aluminum-free for cleaner flavor.
- Salt, ½ teaspoon — Don’t skip this. Salt enhances all the other flavors and balances the sweetness.
- Ground cinnamon, 1 ½ teaspoons — The backbone of the spice profile. I prefer Ceylon cinnamon for its subtle sweetness, but regular cassia works fine too.
- Pumpkin pie spice, 1 teaspoon — You can make your own with cinnamon, nutmeg, ginger, and cloves, but store-bought works perfectly here.
- Ground nutmeg, ¼ teaspoon — Freshly grated if you have it. The difference is subtle but noticeable.
- Unsalted butter, ½ cup (1 stick, 113g), melted and slightly cooled — Melting the butter gives the bread a tender crumb. Let it cool for a few minutes so it doesn’t cook the eggs when you mix.
- Granulated sugar, ¾ cup (150g) — Just enough sweetness without being cloying. You can reduce this to ½ cup if your bananas are very ripe.
- Brown sugar, ¼ cup (50g), packed — Adds moisture and a hint of molasses flavor. Light or dark both work — dark gives a deeper flavor.
- Large eggs, 2, at room temperature — Room temperature eggs emulsify better into the batter. If you forgot to take them out early, place them in a bowl of warm water for 5 minutes.
- Pumpkin puree, 1 cup (240g) — Not pumpkin pie filling. Make sure you grab 100% pure pumpkin puree. Libby’s is my go-to brand for consistent texture and flavor.
- Ripe bananas, 2 medium, mashed (about 1 cup or 240g) — The riper the better. Brown spots are your friend here. They should be soft and smell sweet.
- Vanilla extract, 1 teaspoon — Pure vanilla extract makes a difference. Imitation works in a pinch but the flavor is noticeably less complex.
- Walnuts, 1 cup (120g), roughly chopped — Toast them first for extra flavor. Spread on a baking sheet at 350°F for 5-7 minutes until fragrant. Let them cool before adding to the batter.
Optional add-ins: Chocolate chips (½ cup), dried cranberries (¼ cup), or a streusel topping (flour, butter, brown sugar, cinnamon mixed until crumbly).
Equipment Needed
You don’t need a fancy kitchen to make this bread. Here’s what you’ll need:
- 9×5-inch loaf pan — Standard size. If you use an 8×4 pan, increase baking time by 5-10 minutes. Glass or metal both work, but metal gives a nicer crust.
- Large mixing bowl — Big enough to mix everything without splashing. I use a ceramic bowl that’s seen better days but still gets the job done.
- Whisk — For combining dry ingredients and smoothing out the wet mixture.
- Rubber spatula — For folding everything together without overmixing. A wooden spoon works too.
- Parchment paper — Lining the pan makes removal effortless. Leave an overhang on two sides for easy lifting.
- Cooling rack — Lets air circulate so the bottom doesn’t get soggy. If you don’t have one, invert the loaf onto a cutting board after 10 minutes.
- Measuring cups and spoons — For accuracy. I cannot stress this enough — baking is science, not art.
- Kitchen scale (optional but recommended) — Weighing ingredients is more precise than measuring by volume. I use mine every time.
Preparation Method
Preheat your oven to 350°F (175°C). Line your loaf pan with parchment paper, letting it hang over the long sides. Lightly grease the exposed ends with butter or non-stick spray.
Step 1: Combine dry ingredients. In your large mixing bowl, whisk together the flour, baking soda, baking powder, salt, cinnamon, pumpkin pie spice, and nutmeg. Set aside. This ensures the leavening agents and spices are evenly distributed — no biting into a pocket of baking soda.
Step 2: Mix wet ingredients. In a separate bowl (or the same one if you’re lazy like me — just wipe it out first), whisk together the melted butter, granulated sugar, and brown sugar until smooth. Add the eggs one at a time, whisking well after each. The mixture should look glossy and slightly thickened.
Step 3: Add pumpkin and banana. Whisk in the pumpkin puree, mashed bananas, and vanilla extract until fully combined. The batter will look a little lumpy from the bananas — that’s fine. Don’t try to make it perfectly smooth.
Step 4: Combine wet and dry. Pour the wet mixture into the dry ingredients. Use your rubber spatula to fold everything together gently. Stir just until you no longer see streaks of flour — about 10 to 12 strokes. A few lumps are okay. Overmixing will develop gluten and make the bread tough.
Step 5: Fold in walnuts. Add the chopped walnuts and fold them in with 3 to 4 more strokes. If you’re adding chocolate chips or dried fruit, fold them in now too. The batter will be thick and slightly stiff — that’s exactly what you want.
Step 6: Transfer to pan. Scrape the batter into your prepared loaf pan and spread it evenly. Tap the pan on the counter a few times to release any air bubbles. For a bakery-style look, sprinkle a few extra chopped walnuts on top before baking.
Step 7: Bake. Place the pan in the center of the oven and bake for 55 to 65 minutes. Start checking at 50 minutes. The bread is done when a toothpick inserted into the center comes out clean or with just a few moist crumbs. The top should be deep golden brown and cracked beautifully.
Step 8: Cool. Let the bread cool in the pan for 15 minutes. Then lift it out using the parchment overhang and transfer to a wire rack. Cool completely before slicing — about 1 hour. I know it’s tempting to cut into it warm, but it will crumble apart if you do. Trust the process.
Pro tip for even baking: If the top is browning too quickly but the center isn’t done, tent the pan loosely with aluminum foil for the last 15 minutes of baking.
Cooking Tips & Techniques
I’ve made enough mistakes with quick breads to fill a cookbook. Here are the lessons I learned so you don’t have to repeat them.
Don’t overmix the batter. This is the number one mistake people make. Stir until the flour just disappears. Overmixing develops gluten, which gives you a tough, rubbery bread instead of a tender, moist one. Think of it like folding a letter — gentle and purposeful.
Toast your walnuts. Raw walnuts are fine, but toasting them brings out their natural oils and deepens their flavor. Spread them on a baking sheet at 350°F for 5-7 minutes. You’ll smell them when they’re ready. Let them cool completely before adding to the batter, or they’ll melt the butter in the mixture.
Use the right banana ripeness. Your bananas should be heavily spotted — almost black. Green or yellow bananas won’t mash properly and won’t provide enough sweetness or moisture. If your bananas aren’t ripe enough, place them on a baking sheet in a 300°F oven for 15-20 minutes until the skins darken. Let them cool before mashing.
Check your oven temperature. Ovens run hot or cold more often than you’d think. An oven thermometer costs about $10 and will save you from underbaked or burnt loaves. I keep mine hanging on the center rack at all times.
Room temperature ingredients matter. Cold eggs won’t emulsify properly into the butter mixture, leaving you with a greasy batter. Leave your eggs on the counter for 30 minutes before starting, or place them in a bowl of warm water for 5 minutes.
Let it cool completely. I know I said this already, but it bears repeating. Slicing warm bread is like trying to cut through a cloud — it just collapses. Give it a full hour on the cooling rack. Your patience will be rewarded with clean, beautiful slices.
Use a kitchen scale. If you bake often, invest in one. Measuring flour by volume is notoriously inconsistent. One cup can range from 120g to 150g depending on how you scoop. Weighing eliminates the guesswork.
If you enjoyed this recipe, you might also love my one bowl banana bread with browned butter — it uses a similar technique but with a completely different flavor profile.
Variations & Adaptations
This recipe is incredibly versatile. Here are some ways to make it your own:
Chocolate Chip Pumpkin Banana Bread — Swap the walnuts for ½ cup of semi-sweet or dark chocolate chips. The chocolate adds richness that pairs beautifully with the pumpkin and banana. I’ve made this version for my nephew’s birthday and it disappeared in minutes.
Gluten-Free Version — Substitute the all-purpose flour with a 1:1 gluten-free baking flour blend that contains xanthan gum. I’ve tested this with Bob’s Red Mill 1:1 and King Arthur Measure for Measure, and both work well. Add an extra tablespoon of milk or water if the batter seems too stiff.
Vegan Adaptation — Replace the eggs with two flax eggs (2 tablespoons ground flaxseed mixed with 6 tablespoons water, let sit for 5 minutes). Use melted coconut oil or vegan butter instead of dairy butter. The texture will be slightly denser but still delicious.
Lower Sugar Option — Reduce the granulated sugar to ½ cup and the brown sugar to 2 tablespoons. The bananas and pumpkin provide natural sweetness, so you won’t miss the extra sugar much. This version is great for breakfast or as a snack for kids.
Spiced Cranberry Walnut — Fold in ½ cup dried cranberries along with the walnuts. The tartness of the cranberries cuts through the sweetness and adds a festive touch. This is my go-to version for Thanksgiving morning.
Streusel Topping — Mix ¼ cup flour, ¼ cup brown sugar, 2 tablespoons cold butter, and ½ teaspoon cinnamon until crumbly. Sprinkle over the batter before baking. The streusel adds a crunchy, buttery topping that makes the bread feel extra special.
Mini Loaves or Muffins — Divide the batter among 3 mini loaf pans (bake for 30-35 minutes) or a 12-cup muffin tin (bake for 18-22 minutes). Mini loaves make great gifts, and muffins are perfect for grab-and-go breakfasts.
For another fall-inspired treat, try my easy cinnamon apple fritter bread — it uses a similar one-bowl method but with apples instead of pumpkin.
Serving & Storage Suggestions
This bread is delicious at any temperature, but here’s how to serve and store it for the best experience:
Serving temperature: Room temperature is ideal. The flavors are more pronounced and the texture is at its peak. If you’re impatient (like me), a slightly warm slice with a pat of butter melting into it is pure comfort.
Presentation ideas: Slice the bread into 1-inch thick pieces and arrange on a wooden board. Dust with powdered sugar for a pretty finish. Serve alongside coffee, tea, or a glass of cold milk. For brunch, pair it with scrambled eggs and fresh fruit for a balanced meal.
Complementary dishes: This bread goes beautifully with a warm cup of chai or a pumpkin spice latte. For a savory contrast, serve it alongside a cozy slow cooker fall harvest beef stew — the sweetness of the bread balances the richness of the stew perfectly.
Storage instructions: Wrap the cooled loaf tightly in plastic wrap or aluminum foil and store at room temperature for up to 4 days. Do not refrigerate — the cold will dry out the bread. If your kitchen is very warm, you can store it in an airtight container instead.
Freezing instructions: This bread freezes beautifully. Wrap the fully cooled loaf (or individual slices) in plastic wrap, then in aluminum foil, and place in a freezer-safe bag. Freeze for up to 3 months. To thaw, leave at room temperature for 2-3 hours or overnight in the refrigerator. Individual slices thaw in about 30 minutes.
Reheating tips: For that fresh-from-the-oven experience, warm individual slices in a 300°F oven for 5-7 minutes, or microwave for 15-20 seconds. If you’re reheating a whole frozen loaf, unwrap it and place it in a 300°F oven for 15-20 minutes until warmed through.
Flavor development: Interestingly, this bread tastes even better on day two. The flavors meld together and the moisture distributes more evenly. So if you can resist eating it all on day one, you’re in for a treat.
Nutritional Information & Benefits
Here’s the estimated nutritional breakdown per slice (based on 12 slices):
| Nutrient | Amount per Slice |
|---|---|
| Calories | 285 |
| Total Fat | 14g |
| Saturated Fat | 5g |
| Cholesterol | 45mg |
| Sodium | 220mg |
| Total Carbohydrates | 37g |
| Dietary Fiber | 3g |
| Sugars | 18g |
| Protein | 5g |
Health benefits of key ingredients: Pumpkin is packed with vitamin A, fiber, and antioxidants that support eye health and immunity. Bananas provide potassium, which helps regulate blood pressure and muscle function. Walnuts are rich in omega-3 fatty acids, which are great for brain health and reducing inflammation. Cinnamon may help stabilize blood sugar levels.
Dietary considerations: This recipe can be made gluten-free (see variations), and with substitutions it can be vegan. It contains dairy (butter), eggs, and nuts (walnuts). For a nut-free version, simply omit the walnuts or replace with sunflower seeds or pumpkin seeds.
Personal wellness perspective: I like to think of this bread as a “sometimes food” that’s still better for you than most store-bought options. It has real ingredients, no preservatives, and you control the sugar. Plus, the fiber from the pumpkin and bananas helps keep you full. One slice with your morning coffee is a perfectly reasonable way to start the day.
Conclusion
This Moist Pumpkin Banana Walnut Bread is everything I want in a quick bread — tender, flavorful, and forgiving enough for beginner bakers. The combination of pumpkin and banana creates a depth of flavor that surprises people every time. And the walnuts? They add that little crunch that makes each bite interesting.
I love this recipe because it’s not fussy. You don’t need a stand mixer or special techniques. Just a bowl, a whisk, and a little patience while it bakes. It’s the kind of bread that makes your house smell amazing and makes you feel like you’ve accomplished something before 10 AM.
I’d love to hear how yours turns out. Did you add chocolate chips? Swap the walnuts for pecans? Make it gluten-free? Drop a comment below and share your version — I read every single one and I love seeing how you make this recipe your own. And if you snap a photo, tag me so I can see that beautiful golden crust and those perfectly suspended walnuts.
Happy baking, friends. Your kitchen is about to smell incredible.
Frequently Asked Questions
Can I use frozen bananas for this recipe?
Yes, absolutely! Thaw them completely at room temperature or in the microwave. They’ll release a lot of liquid — don’t drain it. Mash them with the liquid and use as directed. Frozen bananas are actually sweeter than fresh ones because the freezing process breaks down starches into sugar.
Why did my bread sink in the middle?
This usually happens for one of three reasons: the batter was overmixed, the oven temperature was too low, or you opened the oven door too often during baking. Make sure your oven is fully preheated, mix just until combined, and resist the urge to peek until the 50-minute mark.
Can I make this without walnuts?
Of course! Simply omit the walnuts or replace them with an equal amount of pecans, chocolate chips, dried cranberries, or even pumpkin seeds. The bread will still be delicious — just a little less crunchy.
How do I know when the bread is fully baked?
Insert a toothpick or wooden skewer into the center of the loaf. If it comes out clean or with just a few moist crumbs, it’s done. If there’s wet batter on it, bake for another 5 minutes and check again. The internal temperature should reach 200-205°F on an instant-read thermometer.
Can I double this recipe?
Yes! This recipe doubles beautifully. Use two 9×5-inch loaf pans and bake them on the same rack, rotating halfway through. The baking time may increase by 5-10 minutes. You can also bake one loaf and freeze the other for later — just wrap it tightly and freeze for up to 3 months.
Pin This Recipe!
Moist Pumpkin Banana Walnut Bread
This Moist Pumpkin Banana Walnut Bread combines pumpkin puree and ripe bananas for a tender, flavorful loaf with crunchy walnuts. It’s a one-bowl wonder that’s perfect for fall or any time of year.
- Prep Time: 15 minutes
- Cook Time: 55 minutes
- Total Time: 1 hour 10 minutes
- Yield: 12 servings 1x
- Category: Bread
- Cuisine: American
Ingredients
- 1 ¾ cups (220g) all-purpose flour
- 1 teaspoon baking soda
- ½ teaspoon baking powder
- ½ teaspoon salt
- 1 ½ teaspoons ground cinnamon
- 1 teaspoon pumpkin pie spice
- ¼ teaspoon ground nutmeg
- ½ cup (1 stick, 113g) unsalted butter, melted and slightly cooled
- ¾ cup (150g) granulated sugar
- ¼ cup (50g) brown sugar, packed
- 2 large eggs, at room temperature
- 1 cup (240g) pumpkin puree (not pumpkin pie filling)
- 2 medium ripe bananas, mashed (about 1 cup or 240g)
- 1 teaspoon vanilla extract
- 1 cup (120g) walnuts, roughly chopped
Instructions
- Preheat oven to 350°F (175°C). Line a 9×5-inch loaf pan with parchment paper, letting it overhang on the long sides. Lightly grease exposed ends with butter or non-stick spray.
- In a large mixing bowl, whisk together flour, baking soda, baking powder, salt, cinnamon, pumpkin pie spice, and nutmeg. Set aside.
- In a separate bowl, whisk together melted butter, granulated sugar, and brown sugar until smooth. Add eggs one at a time, whisking well after each until glossy and slightly thickened.
- Whisk in pumpkin puree, mashed bananas, and vanilla extract until fully combined. Batter will be slightly lumpy from bananas.
- Pour wet mixture into dry ingredients. Fold gently with a rubber spatula just until no streaks of flour remain (about 10-12 strokes). Do not overmix.
- Fold in chopped walnuts with 3-4 more strokes. Batter will be thick and slightly stiff.
- Scrape batter into prepared loaf pan and spread evenly. Tap pan on counter a few times to release air bubbles. Optionally, sprinkle extra chopped walnuts on top.
- Bake for 55-65 minutes, starting to check at 50 minutes. Bread is done when a toothpick inserted in center comes out clean or with a few moist crumbs. Top should be deep golden brown and cracked.
- Cool in pan for 15 minutes, then lift out using parchment overhang and transfer to a wire rack. Cool completely before slicing (about 1 hour).
Notes
For best results, use room temperature eggs and do not overmix the batter. Toast walnuts before adding for extra flavor. Bread tastes even better on day two. Store wrapped at room temperature for up to 4 days or freeze for up to 3 months.
Nutrition
- Serving Size: 1 slice
- Calories: 285
- Sugar: 18
- Sodium: 220
- Fat: 14
- Saturated Fat: 5
- Carbohydrates: 37
- Fiber: 3
- Protein: 5
Keywords: pumpkin banana bread, walnut bread, moist bread, fall baking, quick bread, one bowl recipe