Love this? Save it for later!
Share the inspiration with your friends
The fall bake sale was in six hours and I’d completely forgotten. Everyone else would be bringing those picture-perfect pies with lattice crusts and homemade caramel drizzles. I had a can of pumpkin puree, some cream cheese that was about to expire, and a stick of butter I’d accidentally left out overnight. Honestly, I almost gave up and grabbed a box of cookies from the gas station. But then I remembered a trick my old roommate used to do — browning butter. It felt like a gamble, you know? I mean, I was already running late, and now I was going to add an extra step?
Let me tell you, the smell alone was worth the risk. That nutty, toasty aroma filled my tiny apartment and suddenly, the panic subsided. I threw together a simple crust, whipped up a creamy pumpkin filling with a swirl of cheesecake, and poured the liquid gold — that glorious brown butter — right on top. I pulled them out of the oven, slightly lopsided and definitely not Instagram-worthy. But when I cut into them later at the bake sale, that first bite had this unexpected depth. The brown butter wasn’t just a topping; it had seeped into every layer, making the pumpkin taste richer and the cheesecake almost caramel-like.
I sold out in twenty minutes. A woman actually asked me for the recipe, and I had to scribble it on a napkin. That’s when I knew I had stumbled onto something special. These Perfect Brown Butter Pumpkin Cheesecake Bars aren’t just another fall dessert — they’re the one that makes people close their eyes after the first bite. Maybe you’ve been there, staring at a half-empty pantry, wondering how to pull off a miracle. Well, this is that miracle recipe. It’s been my secret weapon for every potluck, holiday dinner, and last-minute gathering ever since.
Why You’ll Love This Recipe
I’ve tested this recipe more times than I can count, tweaking the ratios and playing with the baking time until it was just right. What I ended up with is a dessert that hits every single note — it’s indulgent but not overly sweet, creamy but with a satisfying crunch from the crust. Here is why these bars have become my most-requested recipe:
- Quick & Easy: While it looks like a fancy bakery creation, it comes together in about 30 minutes of active prep time. The oven does the rest of the work.
- Simple Ingredients: You probably have most of these in your pantry right now. No obscure spices or hard-to-find extracts.
- Perfect for Fall Gatherings: Whether it’s Thanksgiving, a Friendsgiving potluck, or just a cozy Sunday afternoon, these bars fit right in.
- Crowd-Pleaser: I’ve served these to pumpkin lovers and pumpkin skeptics alike. The cheesecake layer wins over the doubters every single time.
- Unbelievably Delicious: The brown butter adds a nutty, toasty flavor that transforms ordinary pumpkin bars into something extraordinary. It’s the kind of detail that makes people think you spent hours in the kitchen.
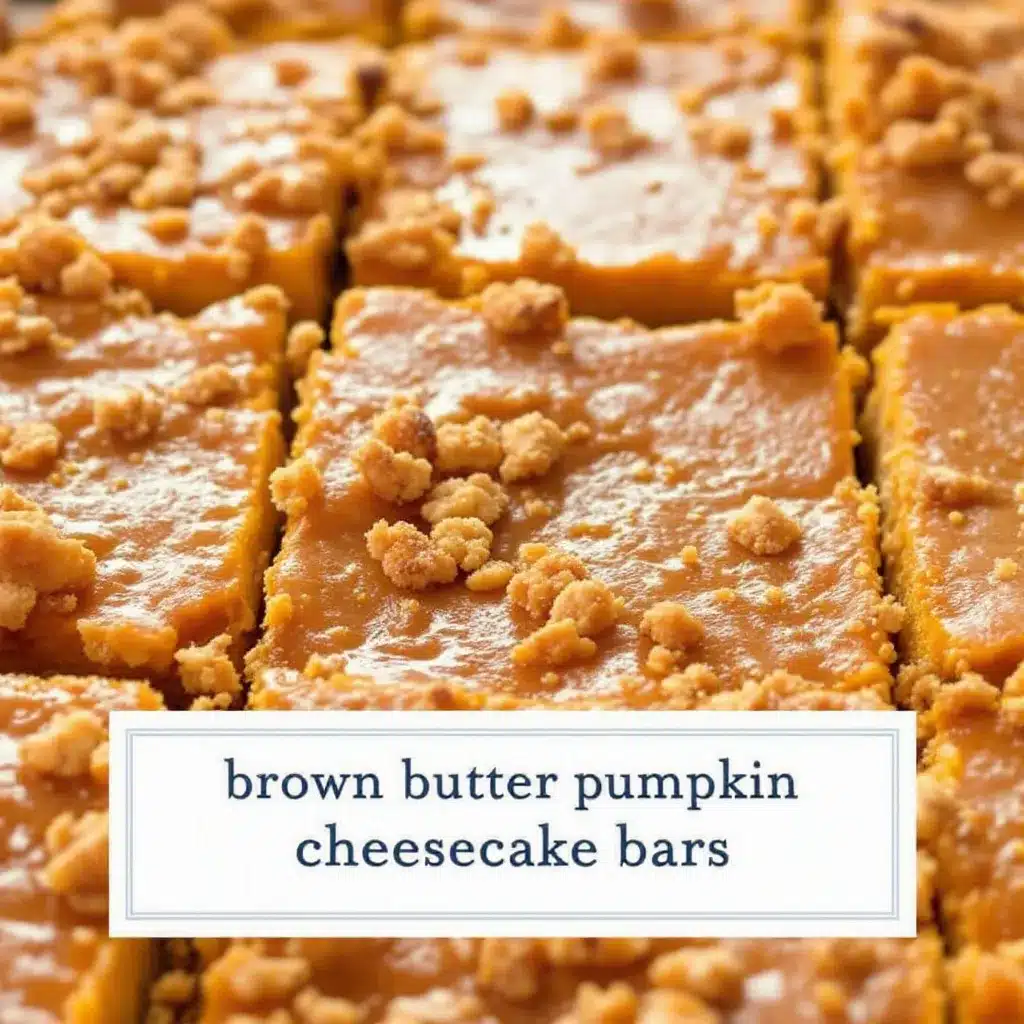
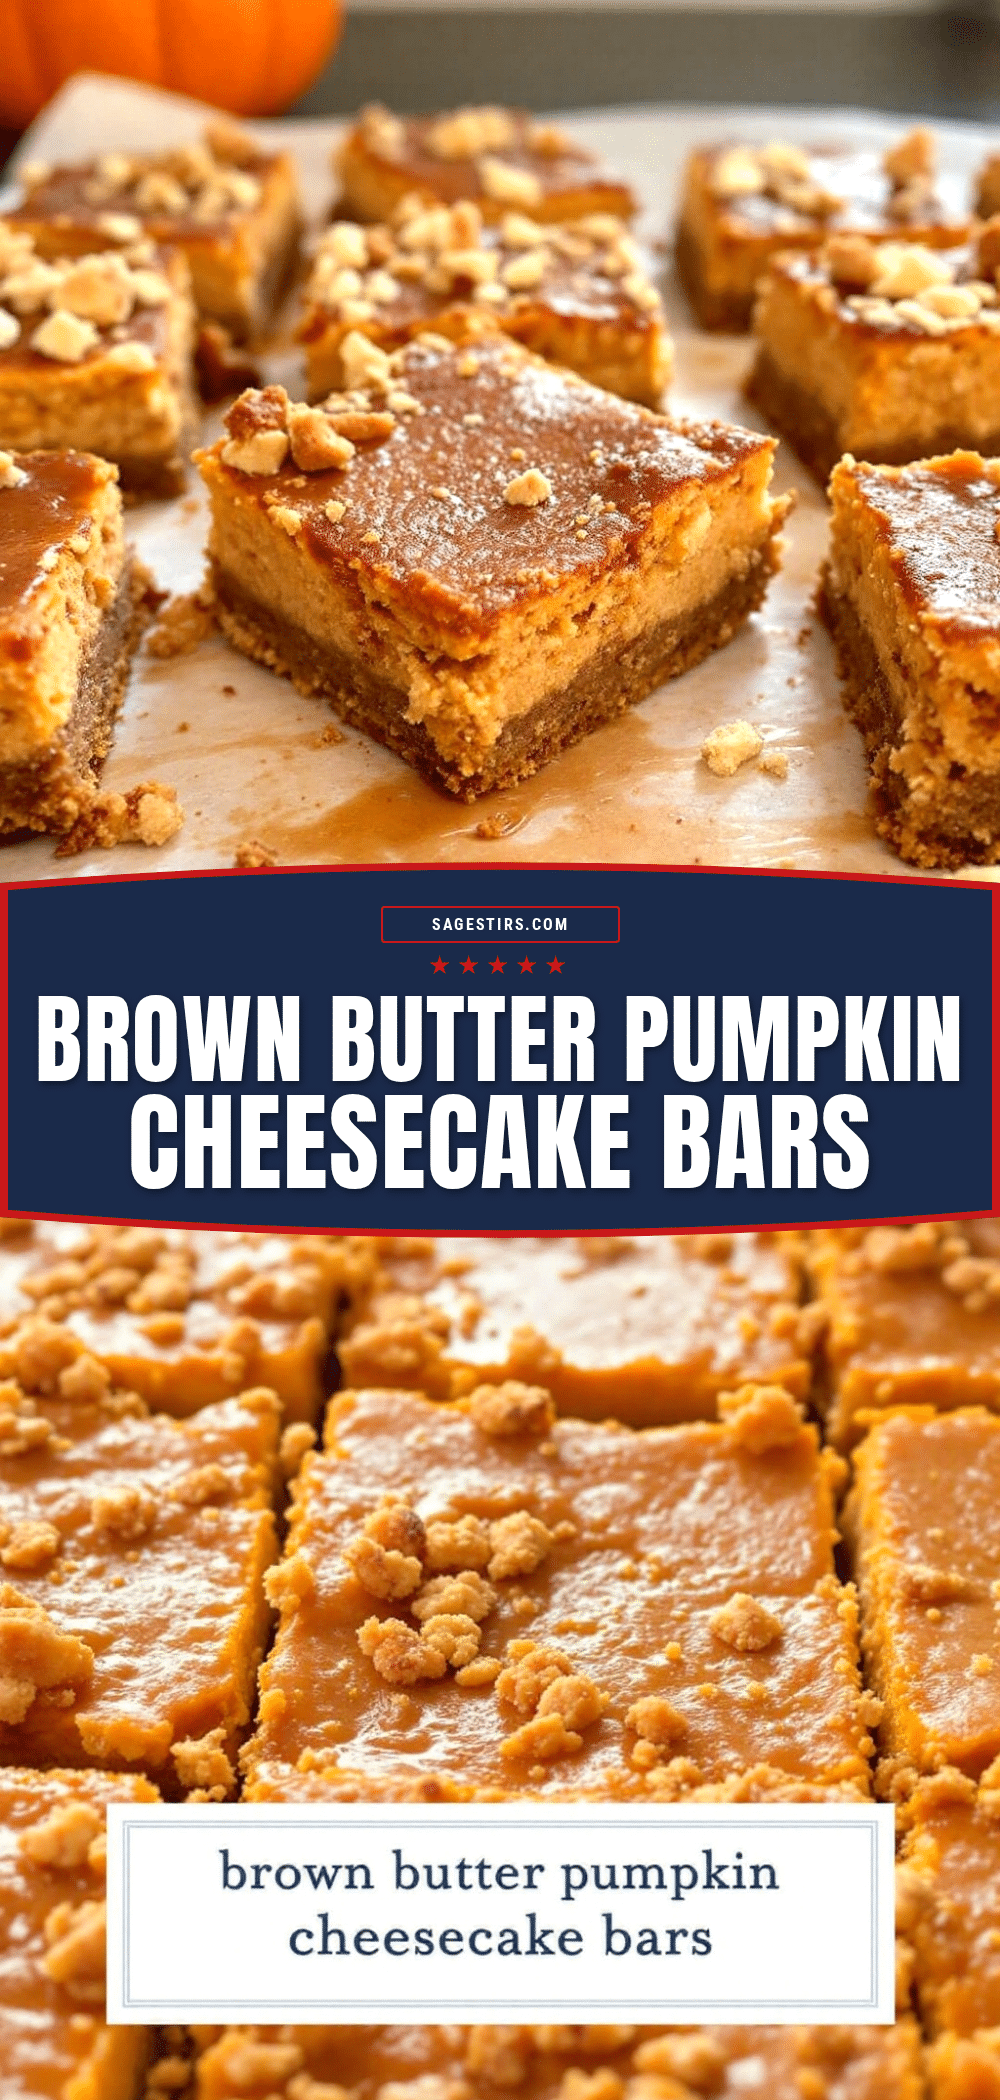
What sets this recipe apart from the dozens of other pumpkin cheesecake bars out there is that brown butter technique. It’s not just a fancy buzzword — it genuinely changes the flavor profile. The butter develops these deep, caramelized notes that complement the pumpkin spice without overpowering it. Plus, the texture is spot on: a buttery shortbread crust, a velvety pumpkin cheesecake filling, and that gorgeous brown butter swirl on top. It’s comfort food reimagined — familiar enough to be nostalgic, but unique enough to feel special. Perfect for impressing guests without the stress, or turning a simple Tuesday night into something memorable.
What Ingredients You Will Need
This recipe uses simple, wholesome ingredients to deliver bold flavor and satisfying texture without the fuss. Most of these are pantry staples, especially during the fall season. Here is everything you will need, broken down by component.
For the Crust
- 1 ½ cups graham cracker crumbs (about 12 full sheets, crushed finely)
- ¼ cup granulated sugar
- 6 tablespoons unsalted butter, melted
- ¼ teaspoon salt (a pinch of fine sea salt balances the sweetness)
For the Pumpkin Cheesecake Filling
- 16 ounces cream cheese, softened (full-fat is best for that creamy texture)
- ¾ cup granulated sugar
- 1 cup pumpkin puree (not pumpkin pie filling — make sure it’s 100% pure pumpkin)
- 2 large eggs, room temperature
- 1 teaspoon vanilla extract
- 1 ½ teaspoons pumpkin pie spice (or 1 teaspoon cinnamon + ½ teaspoon ginger + ¼ teaspoon nutmeg + ¼ teaspoon cloves)
- 1 tablespoon all-purpose flour (helps stabilize the cheesecake and prevents cracking)
For the Brown Butter Swirl
- ½ cup unsalted butter (use a light-colored pan to see the browning process clearly)
- 2 tablespoons brown sugar, packed
- ½ teaspoon vanilla extract
- Pinch of salt
I recommend using a good quality cream cheese like Philadelphia for the smoothest results. For the pumpkin puree, Libby’s is my go-to — it’s consistently thick and not too watery. If you can find fresh pumpkin and roast it yourself, go for it, but canned is perfectly fine and saves time. For the brown butter, use unsalted butter so you can control the salt level. Trust me, that pinch of salt in the swirl makes a difference — it cuts through the richness and makes the flavors pop.
Equipment Needed
You don’t need a fancy kitchen to make these bars. Here is what you will need:
- 9×9-inch baking pan (an 8×8 works too, but the bars will be slightly thicker and may need a few extra minutes of baking)
- Parchment paper (for easy lifting — cut two strips to create a sling)
- Mixing bowls (one medium, one large)
- Hand mixer or stand mixer (a whisk and some elbow grease will work too, but a mixer makes the filling silky smooth)
- Small saucepan (for browning the butter — light-colored is best so you can see the color change)
- Rubber spatula
- Measuring cups and spoons
- Knife or offset spatula (for swirling the brown butter into the filling)
If you don’t have a hand mixer, no worries. Just make sure your cream cheese is really soft — let it sit out for at least an hour — and whisk vigorously. I’ve done it that way when my mixer was on the fritz, and it worked out fine. For the brown butter, a light-colored saucepan is key. I learned this the hard way when I used my dark nonstick pan and ended up with burnt butter because I couldn’t see the color change. A cheap stainless steel pan from the dollar store works perfectly.
Preparation Method
Let’s get baking! I’ve broken this down into clear steps with all the little details I wish someone had told me the first time.
Step 1: Prep Your Pan and Preheat
Preheat your oven to 350°F (175°C). Line your 9×9-inch pan with two strips of parchment paper, crossing them like a plus sign. Leave some overhang on the sides — this will be your handles to lift the bars out later. Lightly grease the parchment with a bit of butter or nonstick spray.
Step 2: Make the Crust
In a medium bowl, combine the graham cracker crumbs, sugar, and salt. Pour in the melted butter and stir with a fork until the mixture looks like wet sand. It should clump together when you squeeze it. Press this mixture firmly into the bottom of your prepared pan. I use the bottom of a measuring cup to get it nice and even. Bake for 10 minutes, then set aside to cool slightly. The crust should be lightly golden and fragrant.
Step 3: Brown the Butter
While the crust is baking, make the brown butter. Place the ½ cup of butter in a small saucepan over medium heat. Stir constantly with a rubber spatula or whisk. The butter will melt, then foam, then start to sizzle. Keep stirring — you’ll see little brown specks forming at the bottom of the pan. This is the milk solids toasting, and it’s where all the flavor comes from. Once the butter turns a golden amber color and smells nutty (about 5-7 minutes), remove it from the heat immediately. Pour it into a small heatproof bowl to stop the cooking. Stir in the brown sugar, vanilla, and a pinch of salt. Set aside to cool while you make the filling.
Step 4: Make the Pumpkin Cheesecake Filling
In a large bowl, beat the softened cream cheese with the granulated sugar until smooth and creamy — about 2 minutes. Scrape down the sides of the bowl. Add the pumpkin puree and mix until combined. Add the eggs one at a time, mixing on low speed after each addition. You don’t want to incorporate too much air, which can cause cracks. Add the vanilla, pumpkin pie spice, and flour, and mix just until everything is smooth. The batter should be thick, creamy, and a beautiful orange color.
Step 5: Assemble the Bars
Pour the pumpkin cheesecake filling over the pre-baked crust. Spread it evenly with a spatula. Now, take your cooled brown butter mixture — it should be slightly thickened but still pourable. Drizzle it over the top of the filling in a zigzag pattern. Use a knife or toothpick to swirl it gently into the cheesecake. Don’t over-swirl, or you’ll lose the distinct layers. Just a few figure-eight motions will create a beautiful marbled effect.
Step 6: Bake to Perfection
Place the pan in the preheated oven and bake for 35-40 minutes. The edges should look set and slightly puffed, but the center should still have a slight jiggle when you gently shake the pan. This is the sweet spot — overbaking will make the cheesecake dry and cracked. Turn off the oven, crack the door open, and let the bars sit inside for 10 minutes. This gradual cooling helps prevent cracking. Then, remove the pan from the oven and let it cool completely on a wire rack.
Step 7: Chill and Slice
Once the bars are at room temperature, transfer the pan to the refrigerator. Chill for at least 4 hours, but overnight is best. I know it’s hard to wait, but this step is non-negotiable. The bars need time to set fully so you get clean, beautiful slices. When you’re ready to serve, lift the bars out using the parchment sling. Use a sharp knife, wiping it clean between cuts, to slice into 16 squares. For extra clean cuts, run the knife under hot water and dry it before each slice.
Cooking Tips & Techniques
After making these bars more times than I can count, I’ve collected a few tips that make a real difference.
Don’t rush the brown butter. This is the most important part. If you take it off the heat too early, you’ll just have melted butter. If you leave it too long, it will burn and turn bitter. Watch for that amber color and nutty smell — your nose knows. I burned my first batch because I walked away to answer my phone. Never again. Stand there and stir.
Room temperature ingredients matter. Cold cream cheese will give you a lumpy batter. Cold eggs can cause the mixture to curdle. Let everything sit out for at least an hour before you start. I usually take my cream cheese and eggs out of the fridge, then make the crust and brown the butter. By the time I’m ready for the filling, everything is perfect.
The jiggle test is your friend. When you check the bars at 35 minutes, give the pan a gentle shake. If the center wobbles like Jell-O, they’re done. If it’s liquidy, give them 5 more minutes. Ovens vary, so start checking early. I’ve had bars that were perfect at 32 minutes in one oven and needed 42 in another.
Let them cool gradually. That step where you leave them in the turned-off oven with the door cracked? It’s a game-changer. It prevents the sudden temperature shock that causes cracks. I learned this trick from a pastry chef friend, and I’ve never had a cracked cheesecake since.
Patience with chilling. I know you want to eat them immediately. I’ve been there. But cutting into warm cheesecake bars is a disaster — they’ll be a gooey mess. Four hours minimum. Overnight is ideal. The flavors meld together, the texture becomes velvety, and you get those perfect, photogenic slices.
Variations & Adaptations
One of the best things about this recipe is how adaptable it is. Here are some variations I’ve tried and loved.
Gluten-Free Version: Use gluten-free graham crackers or crushed gluten-free cookies for the crust. The filling is naturally gluten-free (just skip the tablespoon of flour or use a gluten-free all-purpose blend). I’ve made this for my gluten-intolerant sister-in-law, and she couldn’t tell the difference.
Vegan Adaptation: Use vegan cream cheese (like Kite Hill or Violife), a flax egg (1 tablespoon ground flaxseed + 3 tablespoons water per egg), and vegan butter for both the crust and the brown butter swirl. The texture will be slightly less creamy, but it’s still delicious. I tested this version last Thanksgiving for a vegan friend, and it was a hit.
Spice It Up: If you love a warm, spicy kick, add ¼ teaspoon of cayenne pepper or black pepper to the pumpkin filling. It sounds strange, but the heat plays beautifully with the sweet pumpkin and nutty brown butter. I tried this on a whim after reading about Mexican hot chocolate, and it worked surprisingly well.
Chocolate Swirl: Melt ¼ cup of dark chocolate chips and swirl it into the filling along with the brown butter. The chocolate and pumpkin combo is underrated — think pumpkin chocolate chip cookies, but in bar form. I did this for a Halloween party, and they disappeared in minutes.
Nutty Crust: Replace half of the graham cracker crumbs with crushed pecans or walnuts for an extra layer of flavor. Toast the nuts first to bring out their oils. This adds a lovely crunch and pairs perfectly with the brown butter.
Serving & Storage Suggestions
These bars are incredibly versatile when it comes to serving. Here is how I like to enjoy them.
Serving Temperature: I prefer them chilled straight from the fridge — the texture is firm and almost like a cheesecake truffle. But they’re also wonderful at room temperature, where the filling becomes softer and more luscious. For a truly decadent experience, warm a slice in the microwave for 10-15 seconds and top with a scoop of vanilla ice cream. The warm brown butter flavor really shines.
Presentation Ideas: Dust the tops with a little cinnamon or pumpkin pie spice before serving. A dollop of whipped cream and a drizzle of caramel sauce takes them to the next level. For Thanksgiving, I arrange them on a platter with fresh rosemary sprigs and a few candied pecans — it looks gorgeous with minimal effort.
Complementary Pairings: These bars pair beautifully with a hot cup of chai, spiced apple cider, or a dark roast coffee. For a boozy option, a glass of bourbon or a spiced rum cocktail is a fantastic match. The nutty notes in the brown butter echo the flavors in the spirits.
Storage Instructions: Store leftover bars in an airtight container in the refrigerator for up to 5 days. Place a piece of parchment paper between layers to prevent sticking. The flavors actually deepen after a day or two, so they might taste even better on day three.
Freezing Tips: These bars freeze beautifully. Once they are fully chilled and set, wrap each individual bar tightly in plastic wrap, then place them in a freezer-safe bag or container. They will keep for up to 3 months. To thaw, transfer a bar to the refrigerator overnight or let it sit at room temperature for about 30 minutes. I always keep a stash in my freezer for unexpected guests or late-night cravings.
Nutritional Information & Benefits
While these bars are definitely a treat, they do offer some surprising nutritional benefits thanks to the key ingredients.
Estimated Nutritional Values (per bar, based on 16 servings):
- Calories: 285
- Fat: 19g
- Carbohydrates: 26g
- Protein: 4g
- Fiber: 1g
- Sugar: 18g
Health Highlights: Pumpkin is packed with vitamin A, which is great for eye health and immune function. It’s also high in fiber and antioxidants. The cream cheese provides calcium and protein, while the brown butter (in moderation) offers healthy fats and fat-soluble vitamins. The pumpkin pie spice blend — cinnamon, ginger, nutmeg, and cloves — is rich in anti-inflammatory compounds.
Dietary Considerations: This recipe is vegetarian. For a lower-sugar option, you can reduce the sugar in the filling to ½ cup and use a sugar substitute in the crust. For a lower-fat version, use reduced-fat cream cheese, but note that the texture will be less creamy. The bars are not gluten-free unless you make the crust substitution mentioned above.
Potential Allergens: This recipe contains dairy (butter, cream cheese) and gluten (graham crackers). It also contains eggs. If you have allergies, please refer to the variations section for suitable substitutions.
I believe in balance — enjoying a delicious dessert like this is part of a happy, healthy life. These bars are made with real, recognizable ingredients, and that counts for something. So go ahead, have that second slice. You deserve it.
Conclusion
These Perfect Brown Butter Pumpkin Cheesecake Bars are more than just a recipe — they are a little piece of fall magic. They are the dessert that makes people stop mid-conversation and ask, “Wait, what is in this?” They are the reason I get texts every October asking, “Are you making those bars again this year?”
I hope you give them a try, whether it’s for a big holiday gathering or just a quiet evening at home. Don’t be afraid to make them your own — add a little extra spice, swap in your favorite nuts, or drizzle them with chocolate. The beauty of this recipe is that it’s forgiving and adaptable, just like the best comfort food should be.
When you make them — and I know you will — come back and let me know how they turned out. Did you try any variations? Did your family fight over the last piece? I want to hear all about it. Drop a comment below or tag me in your photos on social media. There is nothing that makes me happier than seeing these bars bring joy to someone else’s kitchen.
Happy baking, my friend. And remember — a little brown butter makes everything better.
Frequently Asked Questions
Can I use pumpkin pie filling instead of pumpkin puree?
I wouldn’t recommend it. Pumpkin pie filling is already sweetened and spiced, which will throw off the balance of the recipe. Stick with 100% pure pumpkin puree so you can control the sweetness and spice levels yourself.
Why did my cheesecake crack on top?
This usually happens from overbaking or sudden temperature changes. Make sure you take the bars out when the center still has a slight jiggle. Also, don’t skip the step where you let them cool in the turned-off oven with the door cracked. Gradual cooling is key.
Can I make these bars ahead of time?
Absolutely! In fact, they taste better the next day. You can make them up to 3 days in advance and keep them in the refrigerator. They also freeze well for up to 3 months. Just wrap them tightly and thaw overnight in the fridge before serving.
Can I use a different pan size?
Yes, but you’ll need to adjust the baking time. An 8×8-inch pan will give you thicker bars that need about 5-10 extra minutes of baking. A 9×13-inch pan will make thinner bars that bake faster — check them at 25 minutes. Keep an eye on the jiggle test.
My brown butter turned into a solid lump. What went wrong?
That’s totally normal! Brown butter solidifies as it cools, especially when you add the brown sugar. If this happens, simply warm it gently on the stovetop or in the microwave for 10-15 seconds until it’s pourable again. It will still swirl beautifully into the cheesecake filling.
Pin This Recipe!
Perfect Brown Butter Pumpkin Cheesecake Bars
These Perfect Brown Butter Pumpkin Cheesecake Bars are a fall dessert that combines a buttery graham cracker crust, a creamy pumpkin cheesecake filling, and a nutty brown butter swirl. They are quick to prepare, use simple ingredients, and are perfect for gatherings.
- Prep Time: 30 minutes
- Cook Time: 40 minutes
- Total Time: 4 hours 10 minutes (includes chilling)
- Yield: 16 servings 1x
- Category: Dessert
- Cuisine: American
Ingredients
- 1 ½ cups graham cracker crumbs (about 12 full sheets, crushed finely)
- ¼ cup granulated sugar
- 6 tablespoons unsalted butter, melted
- ¼ teaspoon salt
- 16 ounces cream cheese, softened
- ¾ cup granulated sugar
- 1 cup pumpkin puree (not pumpkin pie filling)
- 2 large eggs, room temperature
- 1 teaspoon vanilla extract
- 1 ½ teaspoons pumpkin pie spice (or 1 teaspoon cinnamon + ½ teaspoon ginger + ¼ teaspoon nutmeg + ¼ teaspoon cloves)
- 1 tablespoon all-purpose flour
- ½ cup unsalted butter
- 2 tablespoons brown sugar, packed
- ½ teaspoon vanilla extract
- Pinch of salt
Instructions
- Preheat your oven to 350°F (175°C). Line a 9×9-inch baking pan with two strips of parchment paper, crossing them like a plus sign, leaving overhang on the sides. Lightly grease the parchment with butter or nonstick spray.
- In a medium bowl, combine graham cracker crumbs, ¼ cup granulated sugar, and ¼ teaspoon salt. Pour in 6 tablespoons melted butter and stir with a fork until the mixture looks like wet sand. Press firmly into the bottom of the prepared pan. Bake for 10 minutes, then set aside to cool slightly.
- While the crust is baking, make the brown butter. Place ½ cup unsalted butter in a small saucepan over medium heat. Stir constantly until the butter melts, foams, and turns a golden amber color with brown specks, about 5-7 minutes. Remove from heat immediately and pour into a small heatproof bowl. Stir in 2 tablespoons brown sugar, ½ teaspoon vanilla extract, and a pinch of salt. Set aside to cool.
- In a large bowl, beat the softened cream cheese with ¾ cup granulated sugar until smooth and creamy, about 2 minutes. Scrape down the sides. Add pumpkin puree and mix until combined. Add eggs one at a time, mixing on low speed after each addition. Add 1 teaspoon vanilla extract, 1 ½ teaspoons pumpkin pie spice, and 1 tablespoon flour, and mix just until smooth.
- Pour the pumpkin cheesecake filling over the pre-baked crust and spread evenly. Drizzle the cooled brown butter mixture over the top in a zigzag pattern. Use a knife or toothpick to swirl gently into the filling, creating a marbled effect.
- Bake for 35-40 minutes. The edges should look set and slightly puffed, but the center should still have a slight jiggle when shaken. Turn off the oven, crack the door open, and let the bars sit inside for 10 minutes. Then remove and cool completely on a wire rack.
- Once at room temperature, transfer the pan to the refrigerator and chill for at least 4 hours, preferably overnight. Lift the bars out using the parchment sling, slice into 16 squares with a sharp knife (wiping clean between cuts), and serve.
Notes
Don’t rush the brown butter; watch for amber color and nutty smell. Use room temperature ingredients for a smooth batter. The jiggle test is key for doneness. Let bars cool gradually in the oven to prevent cracking. Chill for at least 4 hours before slicing for clean cuts.
Nutrition
- Serving Size: 1 bar
- Calories: 285
- Sugar: 18
- Sodium: 220
- Fat: 19
- Saturated Fat: 11
- Carbohydrates: 26
- Fiber: 1
- Protein: 4
Keywords: pumpkin cheesecake bars, brown butter, fall dessert, pumpkin bars, cheesecake bars, Thanksgiving dessert



