Love this? Save it for later!
Share the inspiration with your friends
For years, I just accepted that pumpkin cheesecake was a holiday-only affair—too much fuss, too many dishes, and a crust that always seemed to turn soggy before the filling set. I’d scroll through recipes promising the perfect slice, but they all required springform pans and water baths and a level of patience I simply didn’t have on a Tuesday night. The gap was real: I wanted that creamy, spiced, tangy-sweet combination, but I needed it in a form that didn’t demand a clean kitchen and three hours of uninterrupted time. Honestly, I stopped looking for a while and just made do with plain pumpkin pie. It was fine. But it wasn’t what I was craving.
Then I started playing around with bar recipes—things that could bake in a standard 9×13 pan and get sliced without ceremony. The gingersnap crust happened by accident, actually. I had a box of cookies leftover from a fall baking spree, and smashing them up felt way more satisfying than making traditional graham cracker crust. The first batch came out of the oven and I stood there eating a warm, slightly messy square straight from the pan. That’s when I knew I had something worth holding onto. These bars became the thing I brought to every potluck, every Friendsgiving, every random Thursday when I just wanted a little taste of autumn without the production.
There’s something about the way the spicy snap of the crust meets that velvety pumpkin filling—it just works. No water bath. No cracks. No stress. This is the recipe that finally closed the gap for me.
Why You’ll Love This Recipe
Let’s be real—there are a million pumpkin cheesecake recipes out there. But these bars are different, and I say that as someone who tested six versions before landing on this one. Here’s why they’re worth your time:
- No Water Bath Required — Traditional cheesecake can be a drama queen. These bars bake low and slow in a regular pan, no steam bath needed. I’ve made them a dozen times and never once had a crack.
- Simple Ingredients — You probably have most of this in your pantry right now. No obscure extracts or specialty flours. Just good, honest baking staples.
- Perfect for Fall Gatherings — Whether it’s a cozy dinner or a Halloween party, these bars travel well and slice cleanly. They’re the kind of dessert that disappears before the pumpkin pie even gets touched.
- Crowd-Pleaser — I’ve served these to kids who swear they don’t like cheesecake and adults who claim they’re “not dessert people.” Empty pan, every single time.
- That Gingersnap Crust — This isn’t just a crust, it’s a flavor anchor. The molasses and ginger in the cookies stand up to the creamy filling in a way that graham crackers just can’t match.
I remember the first time I brought these to a family gathering. My aunt, who is notoriously picky about desserts, took one bite and asked for the recipe before she even finished chewing. That’s the kind of reaction these bars get. They’re not trying to be fancy—they’re just genuinely, unapologetically delicious.
And honestly? They’re easier than a batch of cookies. If you can stir cream cheese and sugar together, you can make these. No mixer required for the filling, no chilling the dough, no rolling or cutting. Just mix, pour, bake, and wait—that’s the hard part, honestly.
What Ingredients You Will Need
This recipe uses simple, wholesome ingredients to deliver that rich, spiced flavor and silky texture. Most of these are pantry staples, especially if you’ve done any fall baking this season.
For the Gingersnap Crust
- 2 cups (240g) gingersnap cookie crumbs — I use store-bought cookies for convenience. Nabisco or Mi-Del both work great. You’ll need about 8 ounces of cookies.
- 5 tablespoons (70g) unsalted butter, melted — Salted butter works too, just reduce any added salt in the crust.
- 2 tablespoons (25g) granulated sugar — This is optional, but it helps the crust hold together and adds a touch of sweetness.
- Pinch of salt — Only if your cookies aren’t salted. Most are, so taste first.
For the Pumpkin Cheesecake Filling
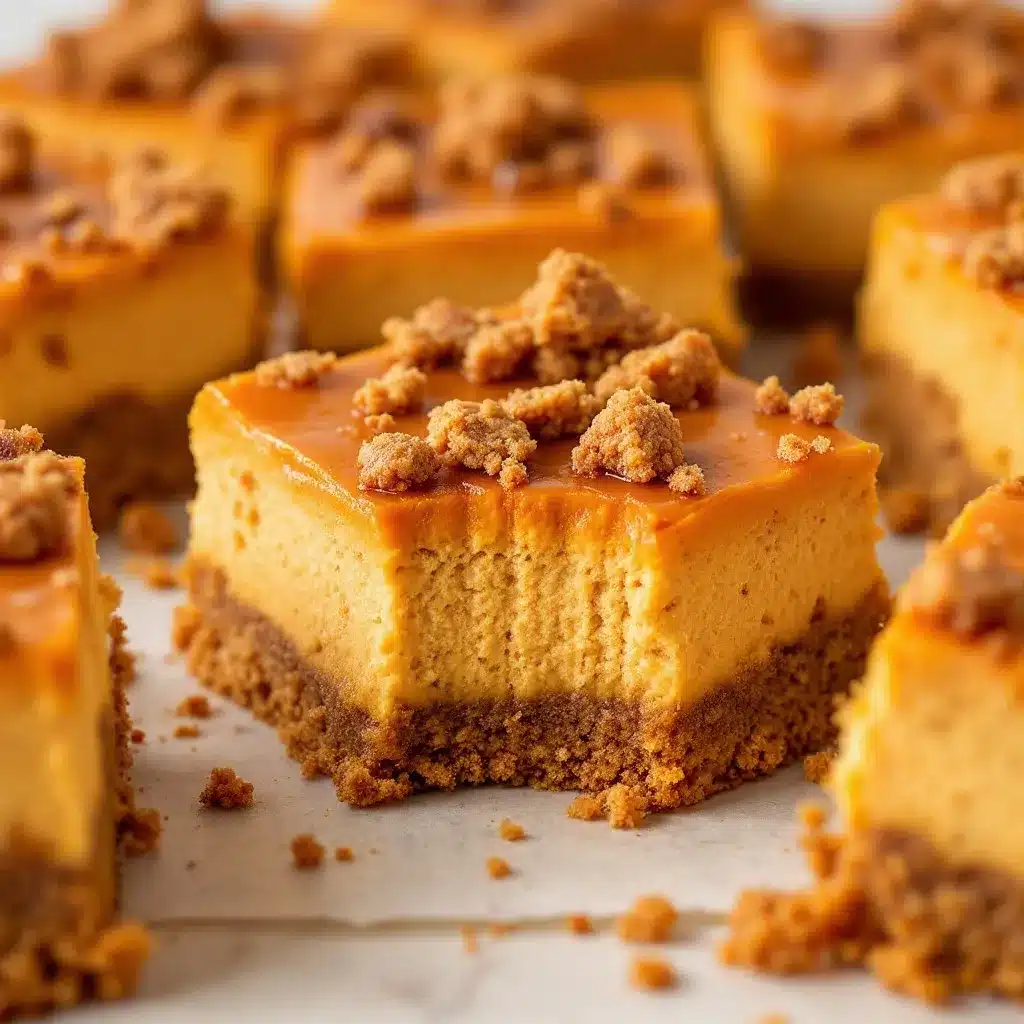
- 16 ounces (450g) cream cheese, softened — Full-fat is best here for texture. Let it sit out for at least an hour before starting.
- ¾ cup (150g) granulated sugar — Just enough to sweeten without overpowering the pumpkin.
- ¼ cup (50g) light brown sugar, packed — Adds a subtle molasses note that plays nicely with the crust.
- 3 large eggs, room temperature — Cold eggs can seize the batter. Let them sit in warm water for 5 minutes if you’re in a hurry.
- 1 teaspoon vanilla extract — Pure vanilla makes a difference here.
- 1 cup (245g) pumpkin puree — Not pumpkin pie filling. Make sure it’s 100% pure pumpkin. Libby’s is my go-to.
- 1 teaspoon pumpkin pie spice — Or make your own with cinnamon, nutmeg, ginger, and cloves.
- ½ teaspoon ground cinnamon — Because you can never have too much cinnamon.
- ¼ teaspoon salt — Balances the sweetness and brightens the flavors.
- 2 tablespoons (16g) all-purpose flour — Helps stabilize the filling and prevent cracking.
I’ve made this with dairy-free cream cheese before, and it works—just make sure it’s the block style, not the spreadable kind in a tub. The texture will be slightly less dense, but still delicious. If you’re looking for a gluten-free option, most gingersnap cookies are actually gluten-free, but double-check the label. I’ve also used gluten-free graham crackers in a pinch, and while the flavor changes, it’s still good.
One thing I’ve learned the hard way: don’t skip letting the cream cheese come to room temperature. I tried rushing it once and ended up with lumpy filling. It still baked up okay, but the texture wasn’t as smooth. Patience pays off here.
Equipment Needed
- 9×13-inch baking pan — Metal or glass both work. I prefer metal for more even browning.
- Parchment paper — For easy lifting and clean slicing. Don’t skip this.
- Food processor or zip-top bag and rolling pin — For crushing the gingersnaps. I use a food processor because I’m lazy.
- Medium mixing bowl — For the crust.
- Large mixing bowl — For the filling.
- Hand mixer or stand mixer — A hand mixer is totally fine. You can even whisk by hand if you’re patient.
- Spatula — For scraping every last bit of filling.
- Measuring cups and spoons — Standard baking tools.
- Sharp knife — For clean slices. Run it under hot water between cuts.
If you don’t have a food processor, just put the cookies in a zip-top bag and go at them with a rolling pin. It’s oddly satisfying and takes about two minutes. I’ve done it both ways, and honestly, the bag method feels more therapeutic.
Preparation Method
Step 1: Prep Your Pan and Preheat
Preheat your oven to 325°F (160°C). Line your 9×13 pan with parchment paper, leaving a couple inches of overhang on the long sides. This will be your lifting handles later. Lightly spray the parchment with nonstick spray, just to be safe.
Step 2: Make the Crust
Pulse the gingersnap cookies in a food processor until you have fine crumbs. You should have about 2 cups. Pour them into a medium bowl, add the melted butter, sugar, and salt if using. Stir with a fork until every crumb is moistened. It should look like wet sand.
Press the mixture firmly into the bottom of your prepared pan. I use the bottom of a measuring cup to really pack it down. You want an even, compact layer. Bake for 10 minutes, then set aside to cool slightly while you make the filling.
Tip from personal experience: Don’t overbake the crust. It will continue to firm up as it cools, and it will bake again with the filling. You just want it set and fragrant.
Step 3: Make the Cheesecake Filling
In a large bowl, beat the softened cream cheese with a hand mixer on medium speed until smooth and creamy—about 2 minutes. Scrape down the sides and the beaters. Add both sugars and beat for another minute until fluffy.
Add the eggs one at a time, beating on low after each just until combined. Overmixing at this stage can incorporate too much air, which leads to cracks. Trust me, I’ve learned this the hard way.
Add the vanilla, pumpkin puree, pumpkin pie spice, cinnamon, and salt. Mix on low until everything is uniform. It should be a beautiful, warm orange color. Finally, sprinkle in the flour and mix until just combined. Don’t overmix.
Step 4: Assemble and Bake
Pour the filling over the pre-baked crust. Use a spatula to spread it evenly to the edges. Give the pan a gentle tap on the counter to release any air bubbles.
Bake at 325°F (160°C) for 35-40 minutes. The edges should look set and slightly puffed, but the center will still jiggle slightly when you shake the pan. That’s exactly what you want. Overbaking will make the cheesecake dry and prone to cracking.
Turn off the oven, crack the door open, and let the bars sit in the cooling oven for 10 minutes. This gentle cooling helps prevent the dreaded crack.
Step 5: Cool and Chill
Remove the pan from the oven and let it cool completely on a wire rack—about an hour. Then cover with plastic wrap and refrigerate for at least 4 hours, preferably overnight. This is the hardest step because the kitchen smells incredible, but it’s non-negotiable for clean slices and the best texture.
When you’re ready to serve, use the parchment sling to lift the entire block out of the pan. Place it on a cutting board and slice with a sharp knife, wiping the blade clean between cuts. I like to cut them into 12 even bars, but you can go smaller for a crowd.
Cooking Tips & Techniques
I’ve made these bars more times than I can count, and I’ve definitely made my share of mistakes. Here’s what I’ve learned so you don’t have to repeat my errors.
Room Temperature Ingredients Matter — I cannot stress this enough. Cold cream cheese creates lumps that won’t smooth out no matter how long you beat it. Cold eggs can cause the batter to separate. Set everything out on the counter an hour before you start. Set a timer if you’re forgetful like me.
Don’t Overmix the Filling — This is the number one cause of cracks. Once you add the eggs, mix on low speed and stop as soon as everything is combined. You’re not trying to incorporate air; you’re just blending ingredients.
The Jiggle Test — The center of the cheesecake should wobble like Jell-O when you shake the pan. If it’s completely still, it’s overbaked. If it ripples like liquid, it needs more time. That gentle jiggle is your sweet spot.
Patience with Chilling — I know it’s tempting to cut into these while they’re still warm, but you’ll end up with a messy, gooey situation. The filling needs time to set up properly. Overnight chilling gives you those clean, Instagram-worthy slices.
Use a Hot Knife — Run your knife under hot water and dry it between each cut. This gives you those beautiful, clean edges without dragging the filling. It’s a small step that makes a big difference.
One time I forgot to line the pan with parchment and spent twenty minutes trying to pry the bars out with a spatula. They came out in chunks. Still tasted amazing, but not exactly presentation-worthy. Learn from my laziness.
Variations & Adaptations
This recipe is forgiving and flexible. Here are some ways to make it your own.
Gluten-Free Version
Use gluten-free gingersnap cookies and substitute the all-purpose flour with a 1:1 gluten-free baking flour blend. I’ve tested this with King Arthur’s measure-for-measure blend and it worked perfectly.
Dairy-Free Version
Use dairy-free cream cheese and a plant-based butter alternative. Miyoko’s and Kite Hill both make excellent cream cheese alternatives. The texture will be slightly softer, so chill thoroughly before slicing.
Spice It Up
Add a pinch of cayenne pepper or black pepper to the filling for a subtle heat that plays beautifully with the pumpkin and ginger. I tried this on a whim last fall and it was a hit at a Halloween party.
Chocolate Swirl
Melt 4 ounces of semi-sweet chocolate and drizzle it over the filling before baking. Use a knife to swirl it gently into the top. The chocolate and pumpkin combination is surprisingly good.
Pecan Topping
After the bars have chilled, top them with a sprinkle of candied pecans and a drizzle of caramel sauce. It turns these into an extra-special dessert for holidays.
I once made a version with a maple cinnamon glaze drizzled on top, and honestly, it was incredible. The maple adds a cozy sweetness that feels like autumn in a bite. If you’re feeling adventurous, give it a try.
Serving & Storage Suggestions
These bars are best served cold, straight from the fridge. The texture is firm and creamy, and the flavors are more pronounced when they’re chilled. I like to let them sit at room temperature for about 10 minutes before serving—just enough to take the chill off without losing structure.
For presentation, I love adding a dollop of whipped cream and a light dusting of cinnamon on top. It makes them look fancy with almost zero effort. If you’re serving a crowd, arrange them on a platter with fresh cranberries and rosemary sprigs for a festive fall look.
Storage: Keep leftovers in an airtight container in the refrigerator for up to 5 days. I’ve never had them last that long, but theoretically they’ll stay fresh. The crust stays crisp and the filling stays creamy.
Freezing: These freeze beautifully. Wrap individual bars in plastic wrap, then place them in a freezer-safe bag. They’ll keep for up to 3 months. Thaw in the refrigerator overnight before serving. I always keep a stash in the freezer for unexpected guests or late-night cravings.
Reheating: Honestly, I don’t recommend reheating these. They’re meant to be enjoyed cold. But if you absolutely must, a few seconds in the microwave will take the chill off. Just don’t overdo it or the crust will get soggy.
One thing I’ve noticed: the flavors actually get better after a day or two in the fridge. The spices meld together and the texture becomes even creamier. So don’t be afraid to make these a day ahead—they’ll taste even better.
Nutritional Information & Benefits
These bars are a treat, no doubt about it. But they do have some redeeming qualities. Here’s a rough estimate per bar (based on 12 servings):
- Calories: Approximately 380
- Protein: 7g
- Fat: 24g
- Carbohydrates: 36g
- Sugar: 26g
- Fiber: 2g
Pumpkin is packed with vitamin A and fiber, which is a nice bonus. The cream cheese provides calcium and protein, and the gingersnaps bring a little iron from the molasses. Is this health food? No. But it’s a dessert made with real ingredients, and that counts for something.
If you’re watching your sugar intake, you can reduce the sugar in the filling by a quarter cup without affecting the texture too much. The crust is harder to adjust, but you can use a sugar-free gingersnap if you can find one.
I personally love that these bars feel indulgent without being overly heavy. One bar is satisfying enough that you don’t need a second slice. Usually.
Conclusion
These Perfect Pumpkin Cheesecake Bars with Gingersnap Crust are everything I wanted from a fall dessert—easy, impressive, and deeply satisfying. They solve that craving for something creamy and spiced without the stress of a traditional cheesecake. No water bath, no fuss, no drama. Just a beautiful pan of bars that make any occasion feel special.
I hope you give these a try and make them your own. Maybe you’ll add a chocolate swirl, or a pecan topping, or just enjoy them exactly as written. That’s the beauty of a good recipe—it’s a starting point, not a rulebook.
If you make these, I’d love to hear about it. Drop a comment below and let me know how they turned out, what variations you tried, or just say hi. And if you’re looking for more cozy fall recipes, you might enjoy these pumpkin spice snickerdoodle cookies or this cozy slow cooker fall harvest beef stew for a savory option.
Happy baking, and may your kitchen smell like autumn all year round.
Frequently Asked Questions
Can I use fresh pumpkin instead of canned?
Yes, but you’ll need to roast and puree it first, then drain off any excess liquid. Fresh pumpkin tends to be more watery than canned, which can make the filling too soft. I recommend using canned for consistency, but fresh works if that’s what you have.
Why did my cheesecake crack?
Cracks usually happen from overbaking, overmixing, or sudden temperature changes. Make sure you don’t overbeat the eggs, bake just until the center jiggles, and let the bars cool gradually in the oven with the door cracked. Also, room temperature ingredients help prevent cracks.
Can I make these in an 8×8 pan?
You can, but the bars will be much thicker and will need longer baking time—about 50-55 minutes. You’ll also need to adjust the crust amount slightly. I prefer the 9×13 pan for the perfect ratio of crust to filling.
How do I get clean slices?
Chill the bars thoroughly—at least 4 hours, overnight is best. Use a sharp knife and run it under hot water, drying it between each cut. Wipe the blade clean after every slice. This gives you those beautiful, bakery-style edges.
Can I use a different cookie for the crust?
Absolutely. Graham crackers, vanilla wafers, or shortbread cookies all work. The flavor will change, but the texture will be similar. I love the spicy kick of gingersnaps, but a buttery shortbread crust is also delicious with the pumpkin filling.
Pin This Recipe!
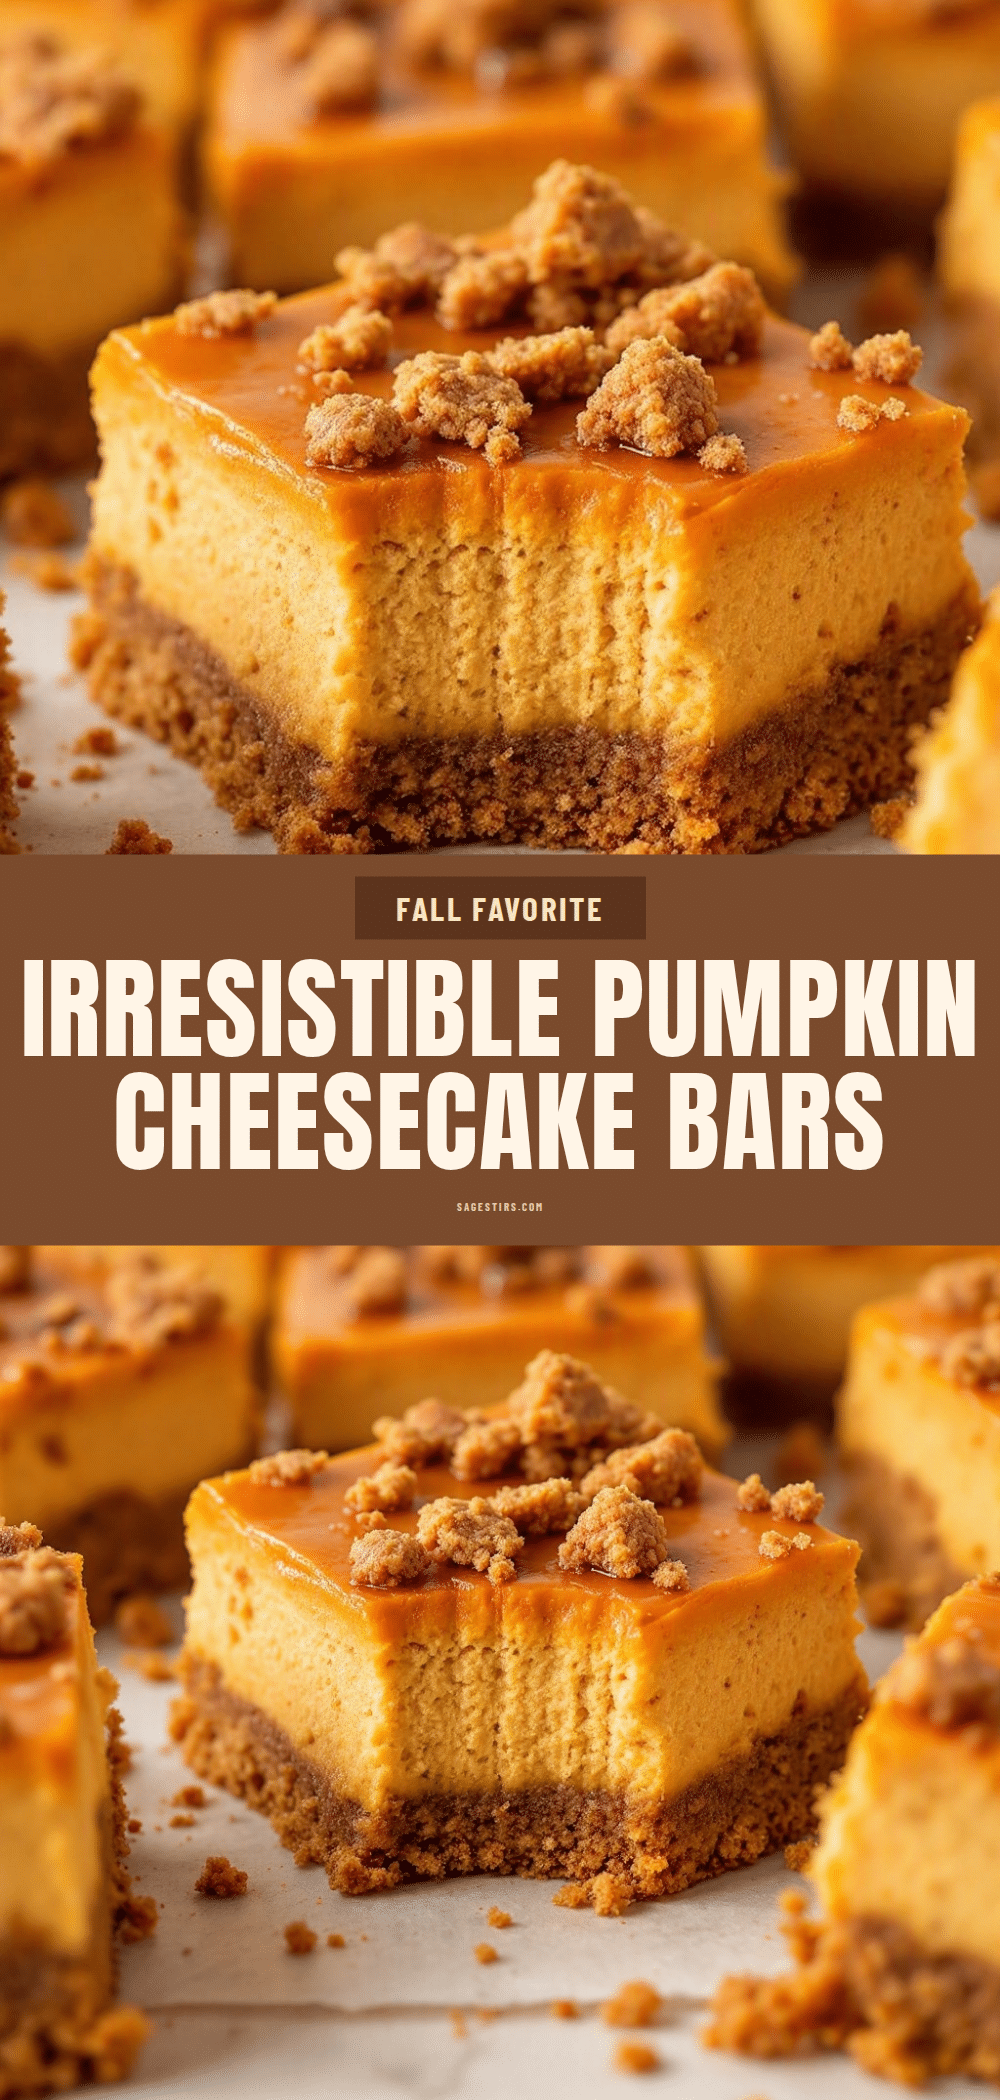
Perfect Pumpkin Cheesecake Bars with Gingersnap Crust
These easy pumpkin cheesecake bars feature a spicy gingersnap crust and a creamy, no-water-bath filling. Perfect for fall gatherings, they slice cleanly and disappear fast.
- Prep Time: 20 minutes
- Cook Time: 40 minutes
- Total Time: 5 hours (includes chilling)
- Yield: 12 servings 1x
- Category: Dessert
- Cuisine: American
Ingredients
- 2 cups (240g) gingersnap cookie crumbs
- 5 tablespoons (70g) unsalted butter, melted
- 2 tablespoons (25g) granulated sugar
- Pinch of salt
- 16 ounces (450g) cream cheese, softened
- ¾ cup (150g) granulated sugar
- ¼ cup (50g) light brown sugar, packed
- 3 large eggs, room temperature
- 1 teaspoon vanilla extract
- 1 cup (245g) pumpkin puree
- 1 teaspoon pumpkin pie spice
- ½ teaspoon ground cinnamon
- ¼ teaspoon salt
- 2 tablespoons (16g) all-purpose flour
Instructions
- Preheat oven to 325°F (160°C). Line a 9×13-inch baking pan with parchment paper, leaving overhang on the long sides. Lightly spray with nonstick spray.
- Pulse gingersnap cookies in a food processor until fine crumbs. In a medium bowl, combine crumbs, melted butter, sugar, and salt. Stir until moistened like wet sand. Press firmly into the bottom of the prepared pan. Bake for 10 minutes, then set aside to cool slightly.
- In a large bowl, beat softened cream cheese with a hand mixer on medium speed until smooth, about 2 minutes. Add both sugars and beat for 1 minute until fluffy.
- Add eggs one at a time, beating on low after each just until combined. Add vanilla, pumpkin puree, pumpkin pie spice, cinnamon, and salt. Mix on low until uniform. Sprinkle in flour and mix until just combined.
- Pour filling over pre-baked crust. Spread evenly. Tap pan gently on counter to release air bubbles. Bake at 325°F (160°C) for 35-40 minutes, until edges are set and center jiggles slightly.
- Turn off oven, crack door open, and let bars sit in cooling oven for 10 minutes. Remove and cool completely on a wire rack (about 1 hour). Cover with plastic wrap and refrigerate for at least 4 hours, preferably overnight.
- Use parchment sling to lift bars out of pan. Slice with a sharp knife, wiping blade clean between cuts. Serve cold.
Notes
Room temperature ingredients are crucial for a smooth filling. Don’t overmix after adding eggs to prevent cracks. The center should jiggle when done. Chill overnight for best texture and clean slices. Run knife under hot water between cuts for neat edges.
Nutrition
- Serving Size: 1 bar
- Calories: 380
- Sugar: 26
- Sodium: 320
- Fat: 24
- Saturated Fat: 14
- Carbohydrates: 36
- Fiber: 2
- Protein: 7
Keywords: pumpkin cheesecake bars, gingersnap crust, fall dessert, easy cheesecake bars, no water bath cheesecake



