Love this? Save it for later!
Share the inspiration with your friends
I did not trust black food in cupcakes. Honestly, I thought mixing activated charcoal into a batter sounded like a mistake until the first bite. I grew up thinking that if my dessert looked like a chimney sweep’s soot, it probably tasted like one too. My friend Sarah brought a box to our office Halloween party last year. She promised them were “ghosts” that would float away in your mouth. I rolled my eyes so hard I almost got a crick in my neck.
The box was plain white. Inside sat these matte black circles with tiny white faces. They looked less like treats and more like evidence from a crime scene. I took one because it would be rude not to. I expected a chalky, bitter dust bomb. I braced myself for the worst.
The texture was different though. It was dense but moist, like a brownie that learned to bake like a sponge cake. The cocoa flavor was deep, almost savory in its richness. Then the cream cheese frosting hit. That tangy sweetness cut through the dark cocoa perfectly. I closed my eyes and forgot about the spooky aesthetic for a second.
I went back for a second one immediately. I needed to prove it wasn’t a fluke. It wasn’t. The flavor profile was complex enough to stand on its own without the visual gimmick. That was the moment I realized I had been wrong about black velvet cake. It’s not just a party trick. It’s a legitimate flavor experience.
Now I make these every October. I know I sound like a convert who found religion, but the proof is in the piping bag. You will love how easy these are to make. The batter comes together faster than you can find your spooky sprinkles. Trust me, your guests will be too busy trying to figure out how to eat a ghost to judge your baking skills.
Why You’ll Love This Recipe
There is a specific kind of magic in baking that combines technical precision with playful presentation. These Creamy Black Velvet Ghost Cupcakes are the perfect example. I have tested dozens of chocolate cake recipes over the years. Some are too dry. Others are too sweet. This recipe strikes a balance that feels professional, yet totally approachable for home bakers. The secret lies in the buttermilk and the careful handling of the cocoa powder.
Here is why this recipe earns its spot in your Halloween rotation:
* **Quick & Easy**: The batter comes together in under 20 minutes. You can have these in the oven before your trick-or-treaters even knock on the door. It is perfect for busy weeknights or last-minute party planning.
* **Simple Ingredients**: You likely already have most of these items in your pantry. Flour, sugar, cocoa, and buttermilk are staples. The activated charcoal is the only specialty item, and you can find it in the baking aisle or online. No fancy grocery trips needed.
* **Perfect for Parties**: These are great for Halloween gatherings, school parties, or even a spooky date night. The ghost shape is universally loved by kids and adults alike.
* **Crowd-Pleaser**: Even people who claim they “don’t like black food” usually love these once they taste the rich cocoa. They get rave reviews from kids and adults alike.
* **Unbelievably Delicious**: The texture and flavor combo is next-level comfort food. The cream cheese frosting adds a tangy contrast that keeps the sweetness from being cloying.
What makes this recipe different from the rest is the “black velvet” technique. Most black cakes use soot or excessive food coloring. This version uses high-quality cocoa powder combined with a touch of activated charcoal for a true matte finish. It isn’t just another version—it’s your best version. The cake stays moist for days, which is a huge win for meal preppers.
This recipe isn’t just good—it is the kind that makes you close your eyes after the first bite. It’s comfort food reimagined with a spooky twist. It’s healthier in the sense that it feels indulgent but balanced. Perfect for impressing guests without stress, or turning a simple meal into something memorable.
What Ingredients You Will Need
This recipe uses simple, wholesome ingredients to deliver bold flavor and satisfying texture without the fuss. The key to a successful black velvet cake is balancing the bitterness of the cocoa with the tang of buttermilk and the sweetness of the frosting. You want a cake that is dark, rich, and tender.
Here is what you will need to gather:
**For the Black Velvet Cake Batter:**
* **All-purpose flour** (1 ½ cups): The base structure. Do not skip measuring correctly.
* **Granulated sugar** (1 cup): Provides sweetness and helps with browning.
* **Unsweetened cocoa powder** (½ cup): Use a high-quality brand like Ghirardelli or Hershey’s for best depth of flavor.
* **Baking powder** (1 tsp) and **baking soda** (½ tsp): These leavening agents help the cake rise.
* **Salt** (½ tsp): Enhances the chocolate flavor.
* **Buttermilk** (1 cup): Adds tang and tenderness. If you don’t have it, mix milk with lemon juice.
* **Vegetable oil** (½ cup): Keeps the cake moist longer than butter would.
* **Large eggs** (2, room temperature): Essential for structure.
* **Vanilla extract** (1 tsp): Adds warmth and aroma.
* **Activated charcoal powder** (1-2 tsp): This is what gives the cake its true black color. Food-grade is a must. Start with 1 tsp to avoid bitterness.
**For the Cream Cheese Frosting:**
* **Cream cheese** (8 oz, softened): Use full-fat brick cream cheese, not the spreadable kind in a tub.
* **Unsalted butter** (½ cup, softened): Adds richness and stability.
* **Powdered sugar** (3-4 cups): Sweetens and thickens the frosting.
* **Vanilla extract** (1 tsp): For flavor.
* **White food coloring gel** (optional): For a pure white frosting.
I recommend using **Kerrygold** butter for the frosting if you can find it. It has a higher butterfat content which makes the frosting smoother. For the charcoal, I trust **Charcoalmills** for their fine texture. Avoid charcoal that feels gritty, or your cake will have a sandy mouthfeel.
If you need substitutions, you can swap the vegetable oil for melted coconut oil for a slight coconut hint. For a gluten-free option, use a 1:1 gluten-free flour blend.
Equipment Needed
You do not need a lot of fancy gear to make these ghosts. A few basic tools will get you to the finish line.
* **Muffin Tin**: Standard 12-cup muffin tins work best. I use non-stick ones for easy release.
* **Cupcake Liners**: White liners look best because they blend with the ghost face.
* **Electric Mixer**: A hand mixer or stand mixer is crucial for whipping the frosting. Doing this by hand is a workout you don’t need.
* **Mixing Bowls**: Two medium bowls for dry and wet ingredients.
* **Measuring Cups and Spoons**: Precision matters in baking.
* **Piping Bag and Tips**: A star tip (like Wilton 1M) makes the frosting look fluffy. A small round tip is good for the eyes and mouth.
* **Cooling Rack**: Let the cakes cool completely before frosting. Warm cake melts frosting.
If you don’t have a piping bag, you can use a Ziploc bag with the corner cut off. It works fine in a pinch. For the charcoal, a small sieve helps sift it into the flour so you don’t get clumps.
Preparation Method
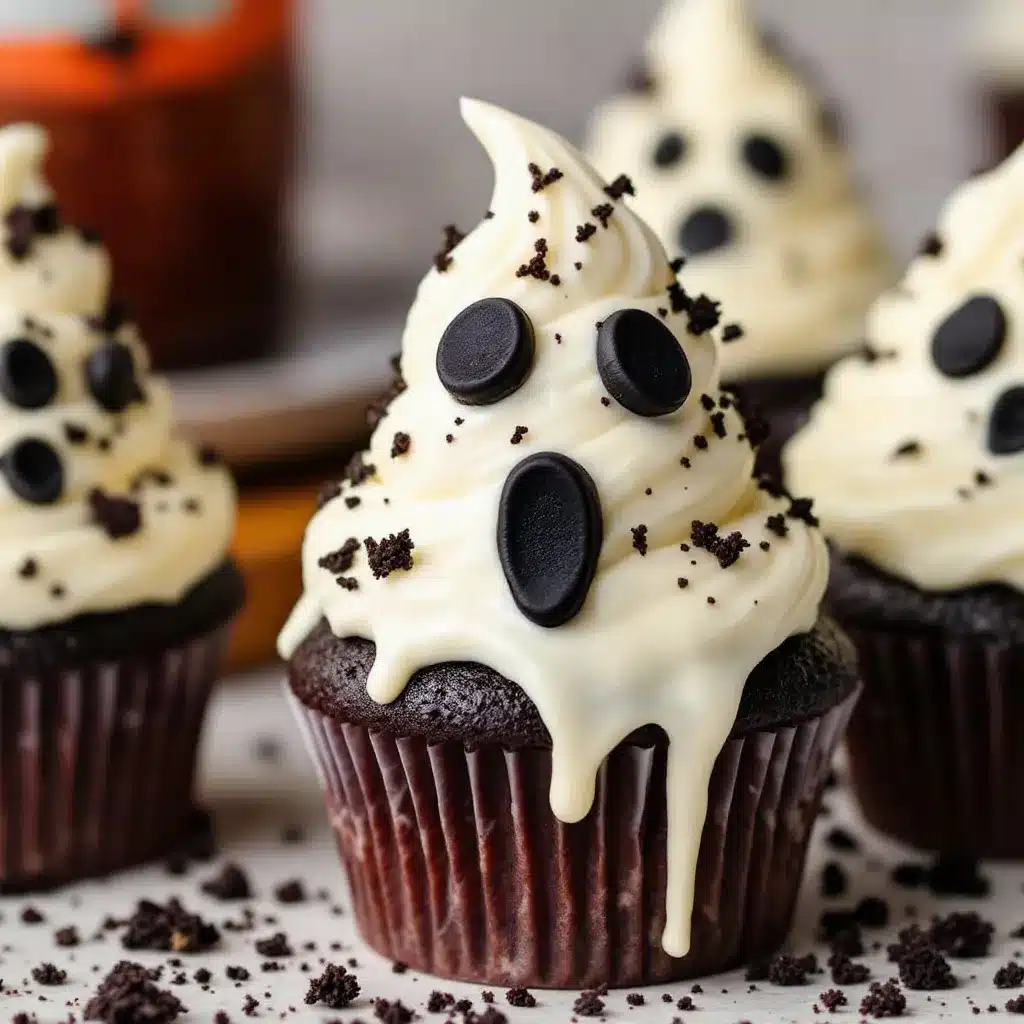
Making these cupcakes is straightforward if you follow the steps in order. Here is how to build your batch of spooky treats.
1. **Preheat and Prep**: Preheat your oven to 350°F (175°C). Line your muffin tin with white cupcake liners. This takes about 5 minutes.
2. **Mix Dry Ingredients**: In a medium bowl, whisk together the flour, sugar, cocoa powder, baking powder, baking soda, and salt. Sift in the activated charcoal powder. Whisk until the mixture is a uniform dark gray-black. This prevents speckles in your cake.
3. **Mix Wet Ingredients**: In a separate large bowl, whisk the buttermilk, vegetable oil, eggs, and vanilla extract until smooth. The eggs should be room temperature to emulsify better with the oil.
4. **Combine**: Pour the wet ingredients into the dry ingredients. Use a spatula or mixer on low speed. Mix until just combined. Do not overmix or the cake will be tough. The batter will be thin. This is normal.
5. **Fill Liners**: Divide the batter evenly among the 12 liners. Fill each about 2/3 full. This takes about 10 minutes.
6. **Bake**: Bake for 18-20 minutes. A toothpick inserted into the center should come out clean or with a few moist crumbs. Do not overbake.
7. **Cool**: Let the cupcakes cool in the pan for 5 minutes. Then transfer them to a wire rack to cool completely. This step is critical. If you frost warm cake, the frosting will slide off.
8. **Make Frosting**: While cakes cool, beat the softened cream cheese and butter until smooth. Add vanilla. Gradually add powdered sugar, one cup at a time, until stiff peaks form. This takes about 5 minutes of mixing.
9. **Pipe Ghosts**: Fill a piping bag with the frosting. Pipe a dollop on top of each cooled cupcake. Then pipe a second, slightly smaller dollop on top of the first. Shape it into a teardrop or ghost shape with your finger or a knife.
10. **Add Faces**: Use black icing gel or edible markers to draw two eyes and a small mouth. Let the frosting set for 30 minutes before serving.
Cooking Tips & Techniques
There are a few tricks to ensure your black velvet cupcakes turn out perfectly every time. I have learned these the hard way through trial and error.
* **Room Temperature Ingredients**: Make sure your eggs, butter, and cream cheese are at room temperature. Cold ingredients create lumps in the batter and frosting.
* **Don’t Overmix**: Once you add the flour, mix only until you no longer see dry streaks. Overmixing develops gluten, which makes cake dense and chewy instead of tender.
* **Charcoal Dosage**: Start with 1 teaspoon of activated charcoal. If you add too much, the cake can taste metallic or bitter. You want the color, not the flavor of a chemistry set.
* **Frosting Consistency**: If your frosting is too thick, add a teaspoon of milk. If it is too thin, add more powdered sugar. You want it to hold its shape when piped.
* **Cooling is Key**: Never rush the cooling process. I once tried to frost warm cupcakes and ended up with a melted mess. Patience pays off.
I also recommend using gel food coloring if you want the frosting to be a stark white. Liquid coloring can make the frosting runny and tint it gray. Gel keeps the texture stable.
Variations & Adaptations
You can tweak this recipe to suit different dietary needs or flavor preferences. Here are some ideas I have tried.
* **Gluten-Free Option**: Substitute the all-purpose flour with a high-quality 1:1 gluten-free flour blend. Add a teaspoon of xanthan gum if your blend doesn’t include it.
* **Dairy-Free Version**: Use dairy-free butter and cream cheese alternatives. Coconut oil works well instead of vegetable oil. Note that the texture might be slightly denser.
* **Vegan Option**: Use flax eggs (1 tbsp ground flaxseed mixed with 3 tbsp water per egg) and vegan cream cheese. The flavor will be slightly different but still delicious.
* **Red Velvet Twist**: Swap the activated charcoal for red food coloring and add a tablespoon of vinegar to the batter for a true red velvet ghost.
* **Spicy Kick**: Add a pinch of cayenne pepper to the batter for a subtle heat that contrasts with the sweet frosting.
I once tried adding crushed Oreos to the batter for a “dirt” effect. It was fun but made the cake too heavy. Stick to the simple batter for the best texture.
Serving & Storage Suggestions
These ghosts look best when served at room temperature. The frosting softens slightly, making it easier to eat.
* **Presentation**: Arrange them on a white platter for maximum contrast. Add some black sprinkles or edible gold dust for extra flair.
* **Pairing**: Serve with a cold glass of milk or a cup of black coffee. The bitterness of the coffee complements the cocoa.
* **Storage**: Store leftovers in an airtight container in the refrigerator for up to 5 days. The buttermilk keeps them moist.
* **Freezing**: You can freeze the unfrosted cupcakes for up to 3 months. Thaw them in the fridge before frosting.
* **Reheating**: Do not microwave these. They will become soggy. Eat them cold or at room temp for the best experience.
The flavors develop over time. The cocoa and charcoal meld together after a day in the fridge, making the cake taste even richer.
Nutritional Information & Benefits
Each cupcake contains approximately 350-400 calories. The main sources of calories are the sugar, flour, and cream cheese frosting.
* **Cocoa Benefits**: Cocoa powder contains antioxidants called flavonoids, which are good for heart health.
* **Buttermilk**: Adds calcium and protein to the cake.
* **Cream Cheese**: Provides calcium and vitamin A, though it is high in saturated fat.
These treats are not a health food, but they are made with real ingredients. They are naturally gluten-free if you use GF flour. They contain dairy and eggs. Enjoy in moderation as a special treat.
Conclusion
These Creamy Black Velvet Ghost Cupcakes are a Halloween staple for a reason. They are easy to make, delicious to eat, and visually stunning. I hope you try this recipe and enjoy the process as much as I do. Feel free to customize the faces or add your own spooky touches.
Let me know how they turn out in the comments below. Did you use white or black liners? Do you prefer a tall ghost or a short one? Share your photos and adaptations.
Happy baking, and happy Halloween!
Frequently Asked Questions
Can I use regular food coloring instead of activated charcoal?
You can, but the color will be a dark brown or black with a sheen. Activated charcoal gives a true matte black finish that looks more realistic for a ghost.
Why did my cupcakes sink in the middle?
This usually happens if you overmix the batter or open the oven door too early. Make sure your leavening agents are fresh and not expired.
Can I make the frosting ahead of time?
Yes, you can make the frosting up to 3 days in advance. Store it in the fridge and let it come to room temperature before whipping it again.
How do I draw the ghost faces?
Use edible black icing pens or gel food coloring. If you don’t have those, you can use a toothpick dipped in black food coloring to draw the features.
Are these cupcakes safe for kids?
Yes, they are safe. Just ensure you use food-grade activated charcoal. Avoid using charcoal meant for grills or aquariums, as those are not safe for consumption.
Pin This Recipe!
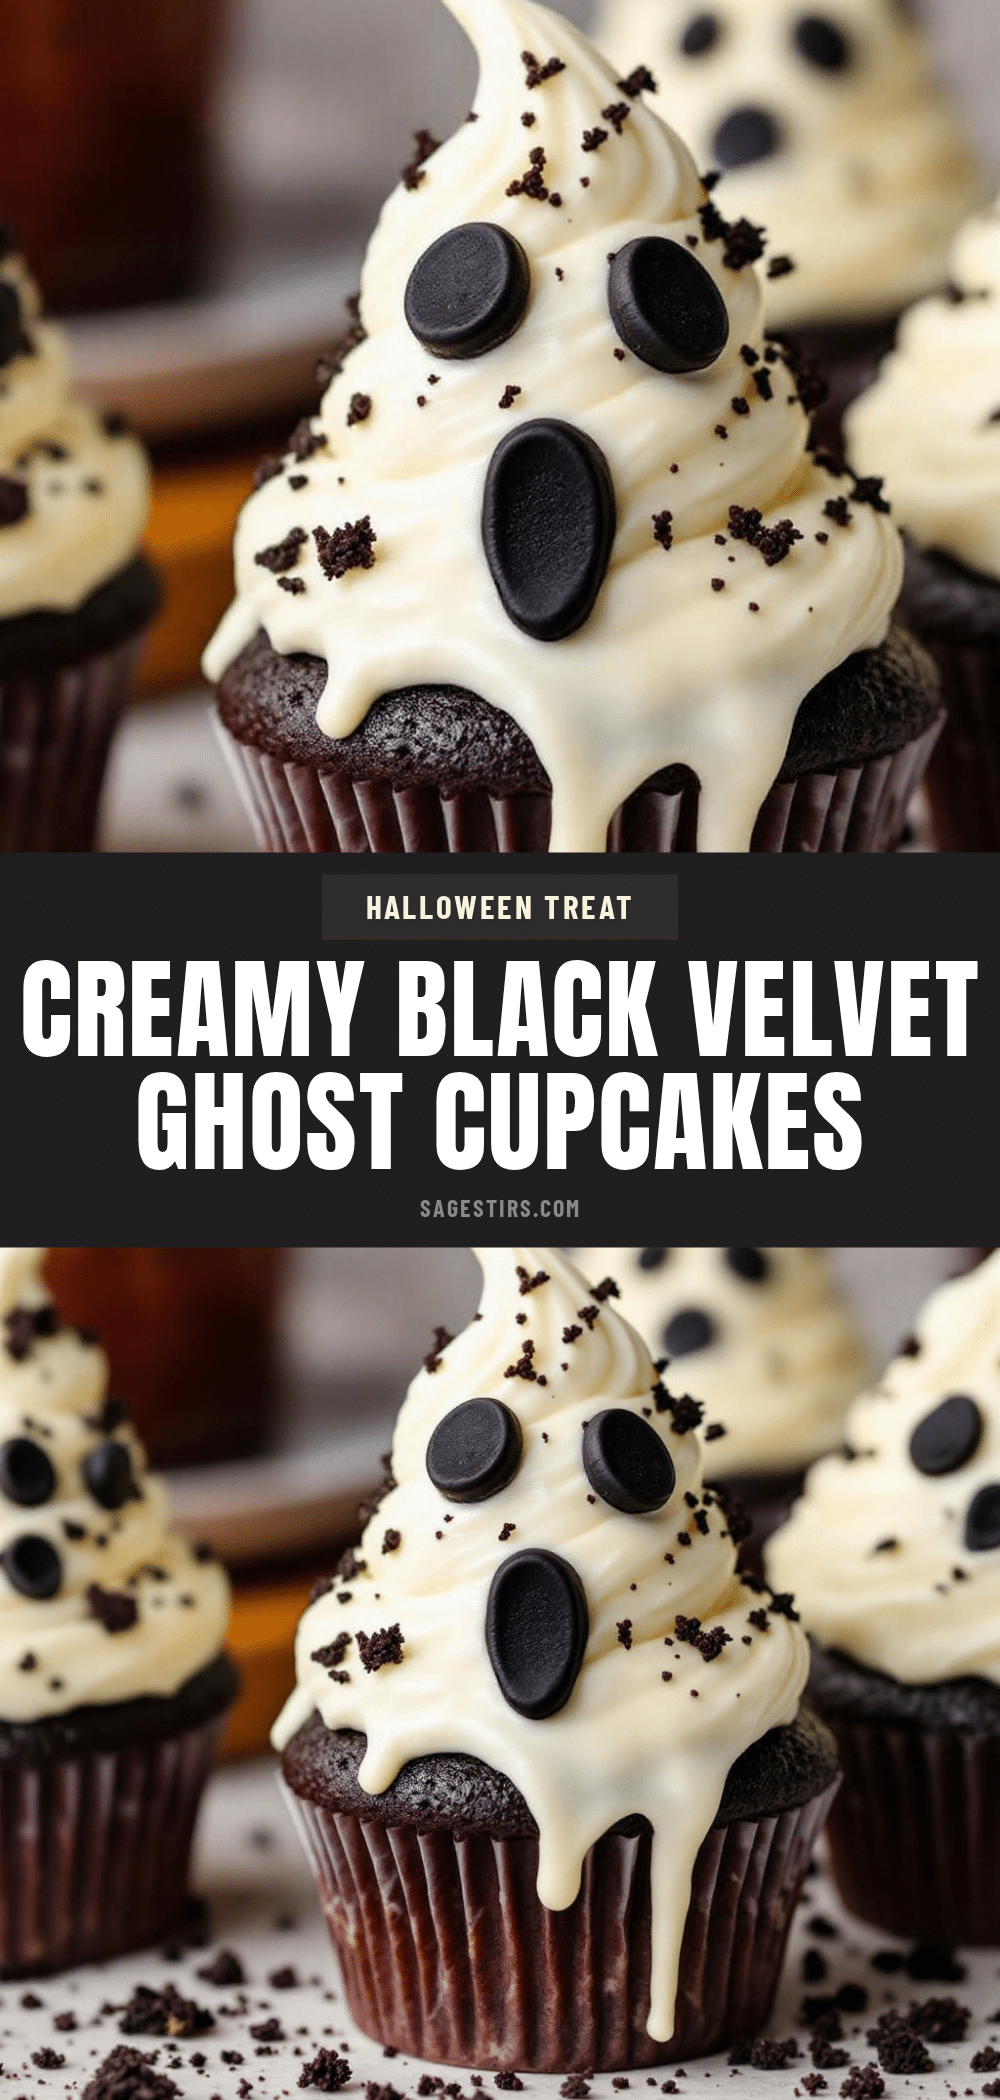
Creamy Black Velvet Ghost Cupcakes: 3-Step Easy Halloween Recipe
These matte black velvet cupcakes feature a rich cocoa flavor balanced by tangy cream cheese frosting, shaped into adorable ghosts for a spooky yet delicious Halloween treat.
- Prep Time: 20 minutes
- Cook Time: 20 minutes
- Total Time: 40 minutes
- Yield: 12 servings 1x
- Category: Dessert
- Cuisine: American
Ingredients
- 1 ½ cups all-purpose flour
- 1 cup granulated sugar
- ½ cup unsweetened cocoa powder
- 1 tsp baking powder
- ½ tsp baking soda
- ½ tsp salt
- 1 cup buttermilk
- ½ cup vegetable oil
- 2 large eggs, room temperature
- 1 tsp vanilla extract
- 1–2 tsp activated charcoal powder
- 8 oz cream cheese, softened
- ½ cup unsalted butter, softened
- 3–4 cups powdered sugar
- 1 tsp vanilla extract (for frosting)
- White food coloring gel (optional)
Instructions
- Preheat oven to 350°F (175°C) and line a 12-cup muffin tin with white cupcake liners.
- In a medium bowl, whisk together flour, sugar, cocoa powder, baking powder, baking soda, and salt. Sift in the activated charcoal powder and whisk until uniform.
- In a separate large bowl, whisk buttermilk, vegetable oil, eggs, and vanilla extract until smooth.
- Pour wet ingredients into dry ingredients and mix on low speed until just combined. Do not overmix.
- Divide batter evenly among liners, filling each about 2/3 full.
- Bake for 18-20 minutes or until a toothpick inserted comes out clean.
- Cool cupcakes in the pan for 5 minutes, then transfer to a wire rack to cool completely.
- While cakes cool, beat cream cheese and butter until smooth. Add vanilla and gradually beat in powdered sugar until stiff peaks form.
- Pipe frosting onto cooled cupcakes to create a ghost shape (teardrop).
- Use black icing gel or edible markers to draw eyes and a mouth. Let set for 30 minutes before serving.
Notes
Ensure ingredients are at room temperature for best texture. Do not overmix the batter to avoid toughness. Start with 1 tsp of activated charcoal to prevent bitterness. Store leftovers in an airtight container in the refrigerator for up to 5 days. Do not microwave as they will become soggy.
Nutrition
- Serving Size: 1 cupcake
- Calories: 375
- Sugar: 42
- Sodium: 250
- Fat: 18
- Saturated Fat: 8
- Carbohydrates: 52
- Fiber: 2
- Protein: 4
Keywords: Halloween, cupcakes, black velvet cake, ghost cupcakes, cream cheese frosting, activated charcoal, easy baking, party dessert



