Love this? Save it for later!
Share the inspiration with your friends
The third time I made this schnitzel sandwich in a single week, I was standing over the stove at 10 p.m. in sweatpants, pressing chicken into breadcrumbs with the kind of focus that probably looked unhinged. The first batch had been good. The second had been better. But that third one—the one where I finally let the chicken rest in the buttermilk for an extra twenty minutes and cranked the oil heat just a notch higher—that one made me actually laugh out loud. Not because it was funny, but because the crust shattered in that perfect way, and I thought, okay, I can stop now.
This is not a recipe that came from my grandmother’s kitchen or a trip to Munich. It came from a very specific craving I had last September when the weather turned crisp and I wanted something crunchy, salty, and completely satisfying without turning on the oven for an hour. I wanted a Crispy Oktoberfest Chicken Schnitzel Sandwich that felt like a celebration but came together on a Tuesday night. So I made one. And then I made it again. And again.
What kept me coming back wasn’t just the crunch—though let’s be honest, that’s a big part of it. It was how the whole thing came together in under thirty minutes without any fancy equipment or hard-to-find ingredients. The chicken stays juicy on the inside while the outside turns that deep golden brown you usually only get from a restaurant fryer. And the sandwich? It’s messy in the best way, with tangy slaw and a smear of mustard that cuts through all that richness. After that third batch, I finally wrote down exactly what I did so I wouldn’t lose it. This is that version.
Why You’ll Love This Recipe
I’ve tested this recipe more times than I care to admit, and every single iteration taught me something about getting that perfect crunch. Here’s what makes this version stand out from every other chicken sandwich you’ve tried.
- Quick & Easy: From start to finish, this sandwich comes together in about 30 minutes. The active cooking time is even less, which makes it perfect for those weeknights when you want something special but don’t have hours to spend in the kitchen.
- Simple Ingredients: You probably already have most of these items in your pantry and fridge. No trips to specialty stores or obscure spice blends required. The magic comes from technique, not a long ingredient list.
- Perfect for Game Day or Oktoberfest: Whether you’re hosting a football party or just craving something hearty, this sandwich fits the bill. It’s sturdy enough to hold up on a buffet table but elegant enough to serve for a casual dinner with friends.
- Crowd-Pleaser: I’ve served these to kids, picky eaters, and serious food lovers. Everyone goes quiet for the first few bites, and then the requests for seconds start rolling in. The combination of crispy chicken, tangy slaw, and soft bun is basically irresistible.
- Unbelievably Delicious: The crust on this chicken stays crispy even after it sits for a few minutes—something I struggled with for years. The secret is in the double-dredge technique and getting the oil temperature just right. When you bite into this sandwich, you get that audible crunch followed by tender, juicy chicken. It’s the kind of meal that makes you close your eyes after the first bite.
This isn’t just another chicken sandwich recipe. It’s the one I turn to when I need a guaranteed win—whether that’s for a big game, a casual Oktoberfest gathering, or just a Tuesday that deserves something better than takeout.
What Ingredients You Will Need
This recipe relies on simple, pantry-friendly ingredients that work together to create something truly special. The magic is in how you use them, not in chasing down obscure items.
For the Chicken Schnitzel
- Boneless, skinless chicken breasts (about 1.5 pounds or 680g) – Look for breasts that are evenly thick so they cook uniformly. If they’re on the thicker side, that’s fine—we’ll pound them out.
- All-purpose flour (1 cup or 120g) – This forms the first layer of our breading. Regular all-purpose works perfectly here.
- Large eggs (3, beaten) – The eggs help the breadcrumbs stick and create that golden crust.
- Panko breadcrumbs (2 cups or 100g) – Panko is non-negotiable for the crispiest results. Regular breadcrumbs won’t give you the same shatter. I prefer the unseasoned kind so I can control the flavor.
- Smoked paprika (1 teaspoon) – Adds color and a subtle smokiness that pairs beautifully with the mustard.
- Garlic powder (1 teaspoon) – Don’t skip this. It adds depth without being overpowering.
- Salt and black pepper – To taste, but be generous. Season each layer of the breading.
- Neutral oil for frying (about 2 cups or 480ml) – I use canola or vegetable oil. Peanut oil works great too. You need enough to come about halfway up the sides of your pan.
For the Quick Slaw
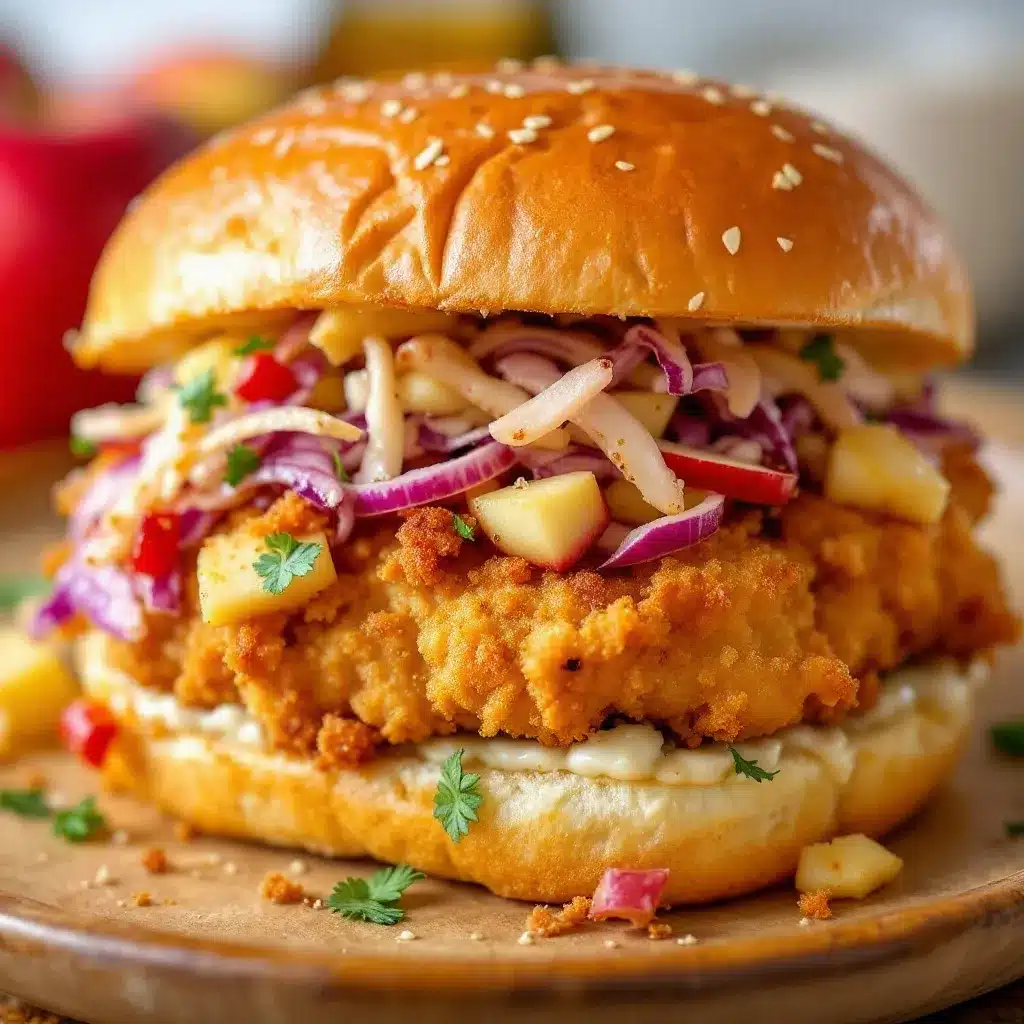
- Green cabbage (2 cups, thinly shredded) – You can use pre-shredded coleslaw mix in a pinch, but shredding your own gives better texture.
- Apple cider vinegar (2 tablespoons) – Provides that necessary tang that cuts through the richness of the fried chicken.
- Olive oil (1 tablespoon) – Helps the dressing cling to the cabbage.
- Honey (1 teaspoon) – Just a touch to balance the acidity.
- Salt and pepper – To taste.
For Assembly
- 4 soft hoagie rolls or brioche buns – The bun needs to be sturdy enough to hold everything but soft enough to not fight back. Brioche buns add a touch of sweetness that works beautifully.
- German-style mustard (about 4 tablespoons) – This is where the Oktoberfest flavor really comes through. I like a spicy brown mustard or a stone-ground variety. Feel free to use whole grain mustard for extra texture.
- Pickles (optional, but highly recommended) – Dill pickle slices or cornichons add another layer of tang and crunch.
Substitution Notes
If you’re gluten-free, you can substitute the all-purpose flour with a gluten-free blend and use gluten-free panko. The texture will be slightly different, but it still works well. For a dairy-free version, this recipe is already dairy-free as written—just double-check your mustard and breadcrumbs. If you want to lighten things up, you can bake the chicken on a wire rack at 425°F for about 15 minutes, flipping halfway through. It won’t be quite as crispy, but it’s still delicious.
Equipment Needed
You don’t need much to make this sandwich, and most of these items are probably already in your kitchen.
- Large skillet or cast-iron pan (12-inch or larger) – Cast iron holds heat beautifully and gives you that perfect golden crust. A heavy-bottomed stainless steel pan works too. I’ve used both, and I slightly prefer cast iron for even browning.
- Meat mallet or rolling pin – For pounding the chicken to even thickness. If you don’t have a mallet, a rolling pin or even a heavy-bottomed skillet works in a pinch. Just place the chicken between two sheets of plastic wrap first.
- Three shallow bowls – For the flour, eggs, and breadcrumbs. Pie plates work great for this.
- Tongs – For handling the chicken during breading and frying. They give you better control than forks.
- Wire rack set over a baking sheet – This is crucial for keeping the chicken crispy after frying. If you set it directly on paper towels, the steam will soften the crust. Trust me on this one—I learned the hard way.
- Instant-read thermometer – Not strictly necessary, but it takes the guesswork out of knowing when the chicken is done. The internal temperature should reach 165°F.
- Sharp knife and cutting board – For shredding the cabbage and prepping the chicken.
If you don’t have a wire rack, you can use a clean cooling rack or even a broiler pan. The goal is to let air circulate around the chicken so it stays crispy. Budget-friendly tip: check your local dollar store for basic kitchen thermometers and inexpensive tongs. They work just as well as the fancy versions.
Preparation Method
Let me walk you through this step by step. I’ve included all the little details that make the difference between a good schnitzel sandwich and a great one.
Step 1: Prepare the Chicken
Place your chicken breasts on a cutting board and cover them with a piece of plastic wrap. Using a meat mallet or rolling pin, gently pound each breast to an even thickness of about 1/4 inch (6mm). Start from the center and work outward. You want them thin enough to cook quickly but thick enough to stay juicy. If the chicken starts to tear at the edges, you’re pounding too hard. Ease up. Season both sides generously with salt and pepper.
Step 2: Set Up Your Breading Station
Get three shallow bowls ready. In the first bowl, combine the flour with half a teaspoon of salt and half a teaspoon of pepper. In the second bowl, beat the eggs with a tablespoon of water until smooth. In the third bowl, mix the panko breadcrumbs with the smoked paprika and garlic powder. Add another half teaspoon of salt and a good pinch of pepper. Line them up in order: flour, eggs, breadcrumbs.
Step 3: Bread the Chicken
Working with one piece at a time, dredge the chicken in the flour mixture, shaking off any excess. You want a thin, even coating—not clumpy. Dip it into the beaten eggs, letting any excess drip off. Finally, press it firmly into the panko mixture, making sure both sides are fully coated. Don’t be shy here. Really press those breadcrumbs into the chicken. Place the breaded chicken on a plate or tray and repeat with the remaining pieces.
Step 4: Make the Quick Slaw
While the breaded chicken rests for a few minutes, make the slaw. In a medium bowl, combine the shredded cabbage, apple cider vinegar, olive oil, honey, and a pinch of salt and pepper. Toss everything together with your hands or tongs. Taste it and adjust the seasoning. You want it tangy but balanced. Set it aside to let the flavors meld while you fry the chicken.
Step 5: Heat the Oil
Pour about 1/2 inch (1.25 cm) of oil into your skillet and heat it over medium-high heat. You’ll know it’s ready when a pinch of panko sizzles immediately when dropped in. If you’re using a thermometer, aim for 350°F (175°C). Getting the oil temperature right is probably the most important step. Too cold, and the chicken will absorb oil and get greasy. Too hot, and the outside will burn before the inside cooks through.
Step 6: Fry the Chicken
Carefully place the breaded chicken into the hot oil, working in batches if needed. Don’t overcrowd the pan—the chicken needs room to cook evenly. Fry for 3-4 minutes per side, until deep golden brown and cooked through. The crust should look shattery and gorgeous. Use your tongs to flip gently. When the chicken is done, transfer it to the wire rack and sprinkle with a little flaky salt while it’s still hot. This is a small step that makes a big difference.
Step 7: Toast the Buns
Once all the chicken is fried, pour out most of the oil from the pan, leaving just a thin coating. Place your buns cut-side down in the warm pan and toast for about 30 seconds, until golden. This adds flavor and helps prevent the buns from getting soggy.
Step 8: Assemble the Sandwiches
Spread a generous layer of mustard on the bottom half of each toasted bun. Place a piece of crispy chicken on top. Add a handful of the quick slaw, then top with pickle slices if you’re using them. Close the sandwich with the top bun and press down gently. Serve immediately while everything is still warm and crunchy.
Cooking Tips & Techniques
I’ve made every mistake you can imagine with this recipe, so you don’t have to. Here are the things I wish someone had told me.
Don’t skip the resting step after breading. Letting the breaded chicken sit for 5-10 minutes before frying helps the coating adhere better. I learned this after watching my first batch lose half its crust in the oil. The flour absorbs moisture from the egg, which creates a stronger bond. It’s a small pause that pays off big.
Keep an eye on your oil temperature. This is the number one issue I see home cooks struggle with. If your oil isn’t hot enough, the chicken will absorb it like a sponge. If it’s too hot, you’ll get a burnt exterior and raw interior. I keep a thermometer clipped to my pan, but if you don’t have one, use the panko test. And remember that the temperature will drop when you add the chicken, so let the oil come back up between batches.
Work in batches. I know it’s tempting to throw all the chicken in at once, but overcrowding drops the oil temperature and leads to uneven cooking. Two pieces at a time is usually the sweet spot for a 12-inch skillet. The extra few minutes are worth it for that perfect crust.
Use your hands for breading. One hand for wet ingredients, one for dry. This keeps the mess contained and prevents clumpy breading. It sounds basic, but it’s the kind of tip that makes the whole process smoother. I keep one hand designated for the flour and panko, and the other for the egg. No sticky fingers, no clumps.
Season every layer. Don’t just season the chicken. Season the flour, season the breadcrumbs, and add a pinch of salt right after frying. Each layer contributes to the final flavor, and skipping any one of them leaves the sandwich tasting flat.
Variations & Adaptations
One of the best things about this recipe is how adaptable it is. Here are some variations I’ve tried and loved.
Make it spicy: Add a teaspoon of cayenne pepper or chili powder to the flour mixture. You can also mix some hot sauce into the egg wash for extra heat. I made this version for a football party last fall, and it disappeared in minutes alongside a batch of crispy baked chicken wings. The slight kick pairs beautifully with the tangy slaw.
Try a different protein: This breading works beautifully on pork cutlets or even thin turkey cutlets. For pork, reduce the cooking time slightly since it cooks faster than chicken. I’ve also made it with thinly sliced tofu for a vegetarian version—just press the tofu well first and adjust the seasoning.
Switch up the slaw: In the summer, I swap the cabbage for thinly sliced fennel and add some fresh dill. In the fall, I add shredded apple or pear to the slaw for sweetness. You can also use a store-bought coleslaw mix and just toss it with the vinegar dressing—no shame in shortcuts.
Change the mustard: If German-style mustard isn’t your thing, try honey mustard, Dijon, or even a spicy brown mustard. Each one gives the sandwich a completely different personality. For a truly Oktoberfest experience, use a sweet-hot mustard or one with beer in it.
Bake instead of fry: Place the breaded chicken on a wire rack set over a baking sheet, spray with cooking oil, and bake at 425°F for 12-15 minutes, flipping halfway through. It won’t be quite as crispy as the fried version, but it’s still really good and much lighter.
Serving & Storage Suggestions
These sandwiches are best served immediately while the chicken is still hot and the crust is shattery. But I have some tips for making them work for different situations.
Serving temperature: Serve the sandwiches hot, with the chicken fresh from the pan. The contrast between the warm chicken, cool slaw, and soft bun is part of what makes this sandwich so satisfying. If you’re serving a crowd, keep the fried chicken warm on a wire rack in a 200°F oven while you finish all the batches.
What to serve alongside: These sandwiches are hearty enough to stand alone, but they pair beautifully with a simple green salad, German potato salad, or a bowl of game day slow cooker chili. For drinks, a crisp lager or a dark wheat beer is perfect. If you’re going non-alcoholic, try an apple cider spritzer.
Storage: If you have leftover fried chicken (unlikely, but possible), store it in an airtight container in the refrigerator for up to 3 days. The slaw will keep separately for about 2 days. Do not assemble the sandwiches ahead of time, or the bread will get soggy.
Reheating: The best way to reheat the chicken is in a 375°F oven on a wire rack for about 8-10 minutes. This helps restore some of the crunch. Avoid the microwave—it will turn the crust into a sad, soggy mess. If you’re in a hurry, an air fryer at 375°F for 3-4 minutes works beautifully.
Make-ahead tips: You can bread the chicken up to 4 hours ahead and keep it in the refrigerator on a tray. Just let it come to room temperature for about 15 minutes before frying. The slaw can be made a day ahead—the flavors actually get better as it sits.
Nutritional Information & Benefits
While this sandwich is definitely a treat, it’s not without its redeeming qualities. Here’s a rough estimate per sandwich (based on one piece of chicken and a bun with slaw):
- Calories: Approximately 550-650
- Protein: 35-40g
- Carbohydrates: 45-50g
- Fat: 22-28g
- Fiber: 3-4g
- Sugar: 8-10g
These values will vary depending on the exact ingredients and portion sizes you use. The chicken provides a solid amount of lean protein, which helps keep you full and satisfied. The cabbage in the slaw is a good source of vitamin C and fiber. If you’re watching your sodium, you can reduce the salt in the breading and use a low-sodium mustard.
For those with dietary restrictions, this recipe can be adapted to be gluten-free (using gluten-free flour and panko) and is naturally dairy-free. It’s also relatively low in added sugars, with just a touch of honey in the slaw.
I’m not one to pretend that fried chicken is health food, but I do believe in balance. This sandwich is the kind of meal that feeds more than just your stomach—it satisfies a craving and brings people together. And honestly, that has its own kind of nutritional value.
Conclusion
This Crispy Oktoberfest Chicken Schnitzel Sandwich has become one of those recipes I turn to again and again, and I think it will for you too. It’s the perfect combination of crunchy, tangy, and hearty—all wrapped up in a sandwich that comes together in about half an hour. Whether you’re making it for a game day spread, a casual Oktoberfest celebration, or just a weeknight dinner that feels special, it delivers every single time.
What I love most about this recipe is how forgiving it is. You can tweak the slaw, swap the mustard, change up the protein, and it still works. It’s a framework for a great sandwich, not a rigid formula. So play with it. Make it your own. And when you do, I’d love to hear about it.
Drop a comment below and let me know how your schnitzel sandwich turned out. Did you try a fun variation? Serve it at a party? Figure out a shortcut I haven’t thought of? I read every comment, and your ideas often end up in my own kitchen. Until next time, happy cooking—and don’t forget the extra pickles.
Frequently Asked Questions
Can I use chicken thighs instead of breasts?
Absolutely. Chicken thighs work great for this recipe. They’re a bit more forgiving since they have more fat and stay juicy even if you cook them a minute too long. Just pound them to the same 1/4-inch thickness and adjust the cooking time slightly if needed.
Why did my breading fall off in the pan?
This usually happens for one of two reasons: either the oil wasn’t hot enough when you added the chicken, or you didn’t press the breadcrumbs firmly enough during breading. Make sure your oil is at 350°F before adding the chicken, and really press those panko crumbs into the egg-coated surface. Letting the breaded chicken rest for 5-10 minutes before frying also helps.
Can I make this recipe ahead of time for a party?
You can bread the chicken up to 4 hours ahead and keep it in the fridge. Fry it just before serving for the best texture. The slaw can be made a day ahead. If you need to fry everything in advance, reheat the chicken in a 375°F oven on a wire rack for about 8 minutes to restore some crunch.
What’s the best oil for frying schnitzel?
Use a neutral oil with a high smoke point. Canola, vegetable, peanut, or avocado oil all work well. Avoid olive oil or butter—they have lower smoke points and can burn at the temperatures needed for frying. The oil should be about 1/2 inch deep in the pan.
How do I keep the sandwich from getting soggy?
Toast your buns before assembling, and don’t add the slaw until right before serving. If you’re making multiple sandwiches, keep the components separate and let everyone build their own. The quick slaw releases moisture as it sits, so assembling too far in advance will soften the bun.
Pin This Recipe!
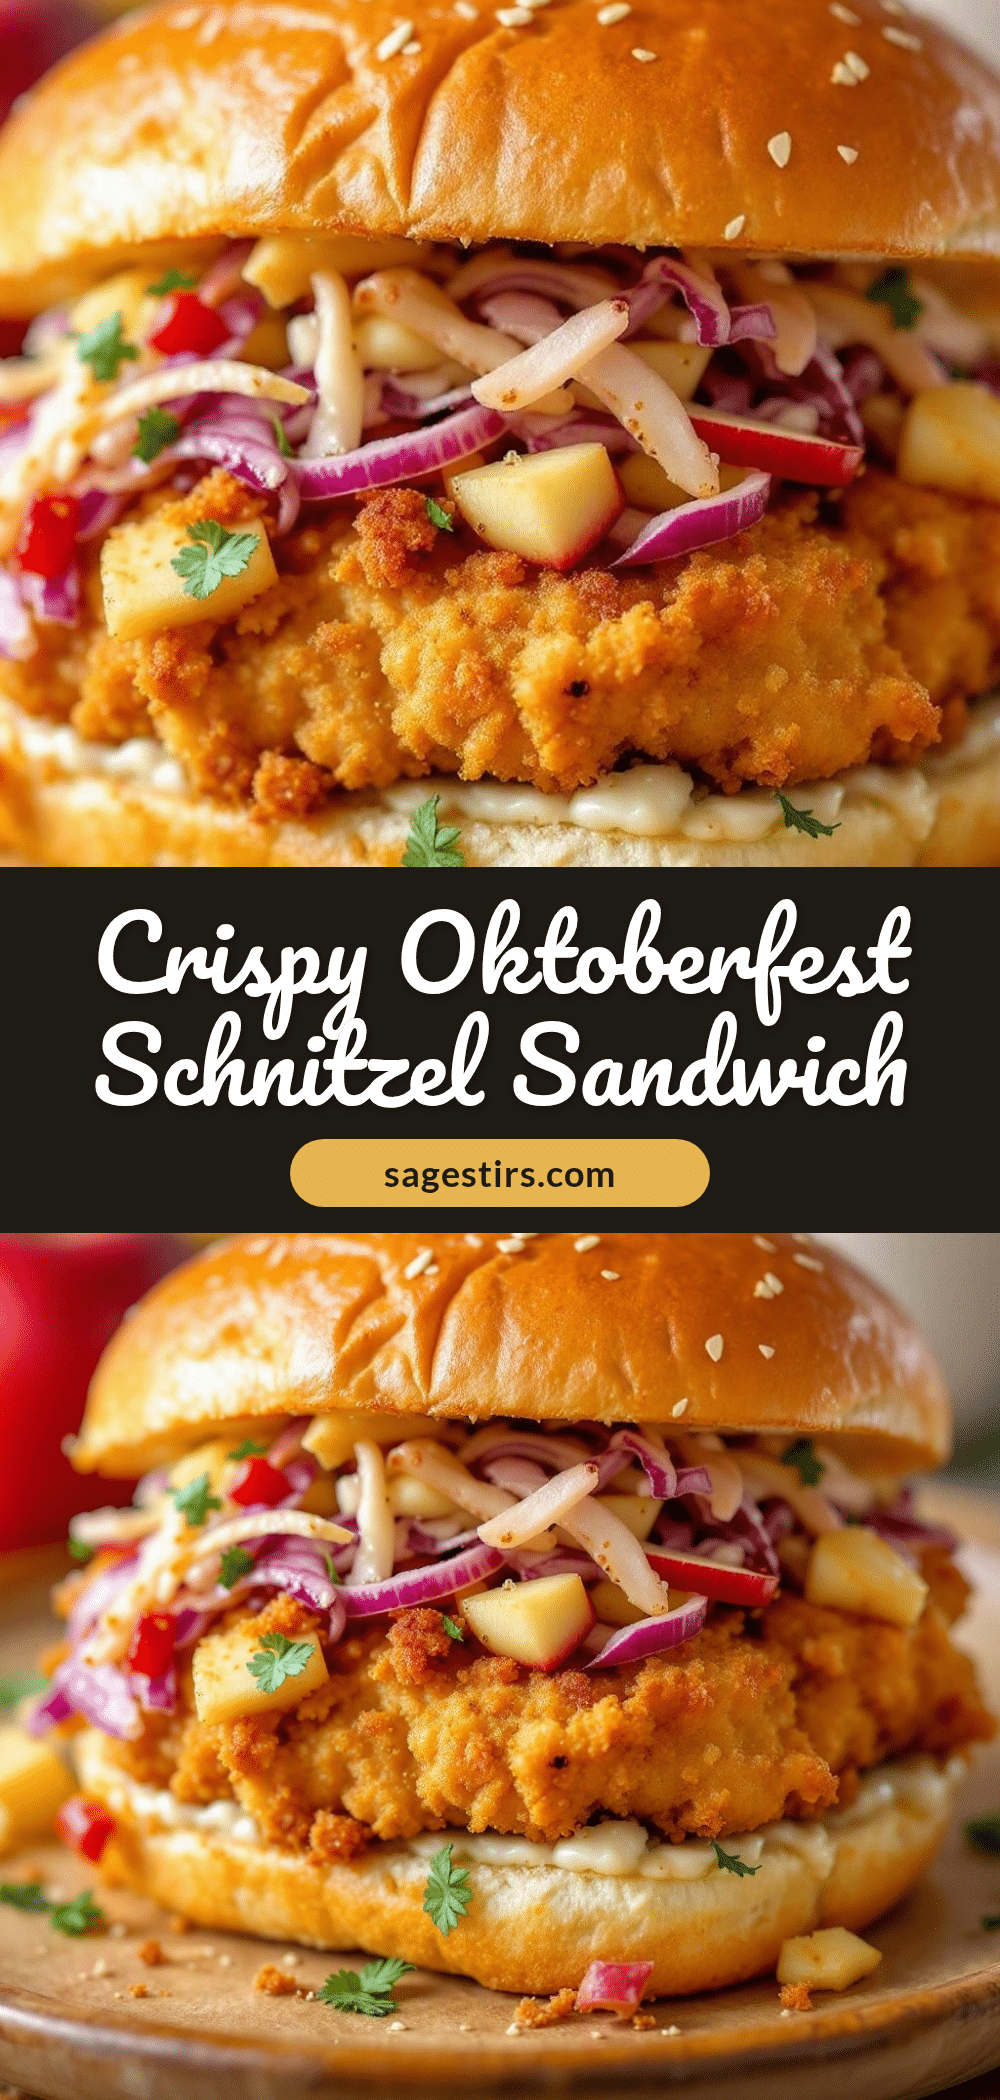
Crispy Oktoberfest Chicken Schnitzel Sandwich: Easy 30-Min Recipe

This crispy chicken schnitzel sandwich comes together in about 30 minutes with simple ingredients. It features a shatteringly crunchy panko crust, tangy quick slaw, and German-style mustard on a soft bun—perfect for weeknights, game day, or Oktoberfest.
- Prep Time: 15 minutes
- Cook Time: 15 minutes
- Total Time: 30 minutes
- Yield: 4 servings 1x
- Category: Main Course
- Cuisine: German
Ingredients
- 1.5 pounds (680g) boneless, skinless chicken breasts
- 1 cup (120g) all-purpose flour
- 3 large eggs, beaten
- 2 cups (100g) panko breadcrumbs
- 1 teaspoon smoked paprika
- 1 teaspoon garlic powder
- Salt and black pepper to taste
- 2 cups (480ml) neutral oil for frying (canola, vegetable, or peanut)
- 2 cups green cabbage, thinly shredded
- 2 tablespoons apple cider vinegar
- 1 tablespoon olive oil
- 1 teaspoon honey
- Salt and pepper to taste
- 4 soft hoagie rolls or brioche buns
- 4 tablespoons German-style mustard (spicy brown or stone-ground)
- Pickle slices (optional)
Instructions
- Place chicken breasts on a cutting board, cover with plastic wrap, and pound to an even thickness of about 1/4 inch (6mm). Season both sides generously with salt and pepper.
- Set up a breading station with three shallow bowls: first bowl with flour, 1/2 teaspoon salt, and 1/2 teaspoon pepper; second bowl with beaten eggs and 1 tablespoon water; third bowl with panko, smoked paprika, garlic powder, 1/2 teaspoon salt, and a pinch of pepper.
- Dredge each chicken piece in flour, shaking off excess. Dip into egg, letting excess drip off. Press firmly into panko mixture, coating both sides. Place breaded chicken on a plate and let rest for 5-10 minutes.
- In a medium bowl, combine shredded cabbage, apple cider vinegar, olive oil, honey, and a pinch of salt and pepper. Toss well and set aside.
- Pour about 1/2 inch (1.25 cm) of oil into a large skillet and heat over medium-high heat to 350°F (175°C). Test with a pinch of panko—it should sizzle immediately.
- Fry breaded chicken in batches (2 pieces at a time) for 3-4 minutes per side, until deep golden brown and cooked through (internal temperature 165°F). Transfer to a wire rack set over a baking sheet and sprinkle with flaky salt.
- Pour out most of the oil, leaving a thin coating. Toast buns cut-side down in the warm pan for about 30 seconds until golden.
- Spread mustard on bottom half of each toasted bun. Place a piece of crispy chicken on top, add a handful of slaw, and top with pickle slices if using. Close with top bun and serve immediately.
Notes
For best results, let breaded chicken rest 5-10 minutes before frying to help coating adhere. Keep oil temperature at 350°F (175°C) to avoid greasy or burnt crust. Work in batches to maintain oil temperature. Season each layer of breading for maximum flavor. To reheat leftovers, use a 375°F oven on a wire rack for 8-10 minutes or an air fryer at 375°F for 3-4 minutes.
Nutrition
- Serving Size: 1 sandwich
- Calories: 600
- Sugar: 9
- Sodium: 800
- Fat: 25
- Saturated Fat: 3
- Carbohydrates: 48
- Fiber: 4
- Protein: 38
Keywords: chicken schnitzel sandwich, Oktoberfest recipe, crispy chicken sandwich, easy weeknight dinner, game day food



