Love this? Save it for later!
Share the inspiration with your friends
My niece didn’t even say hello. She just held up her phone, screen first, with a photo of these little black cat truffles staring back at me. “Can we make these for my Halloween party?” she asked, already pulling open my pantry door. I hadn’t even taken my coat off yet. That’s the thing about these Easy Black Cat Oreo Truffles — they have this magnetic pull. One look at those cute little faces with their candy corn ears and chocolate eyes, and suddenly you’re elbow-deep in crushed cookies and cream cheese before you even realize what’s happening.
I’ll be honest — I wasn’t sure they’d turn out the first time. Oreo truffles can be finicky. Too much cream cheese and they’re a sticky mess. Not enough chilling time and they slide right off the fork. But something clicked with this batch. Maybe it was the extra time I let them firm up in the fridge, or maybe it was my niece standing there, narrating every step like a tiny cooking show host. Either way, these little guys came out looking like they belonged in a bakery window.
There’s something quietly satisfying about a no-bake dessert that looks like you spent hours on it. No oven required, no complicated piping skills, and absolutely zero chance of burning anything. These truffles are the kind of recipe that makes you look like a Halloween hero without the stress. And honestly? That’s my favorite kind of recipe to share.
Why You’ll Love This Recipe
Let me tell you why these Easy Black Cat Oreo Truffles have earned a permanent spot in my Halloween rotation. After testing them at three different gatherings — a kid’s party, a grown-up costume night, and a last-minute work potluck — I’ve got the data to back this up.
- No-Bake Magic: No oven, no stove, no problem. These come together with just a food processor and a fridge. Perfect for those days when you’re already juggling costumes and decorations.
- Simple Ingredients: A standard package of Oreos, some cream cheese, and melting chocolate. You probably have most of this in your kitchen right now. No specialty baking aisle scavenger hunts.
- Kid-Friendly Fun: My niece assembled half of these herself. The hands-on shaping and decorating make this a perfect activity for little helpers who want to feel like real pastry chefs.
- Make-Ahead Friendly: These truffles actually taste better after a day in the fridge. The flavors meld together, and the texture gets this perfect fudgy consistency that’s impossible to resist.
- Customizable Cuteness: You can make them spooky, silly, or somewhere in between. Change up the candy decorations to match your party theme or just go with whatever candy you have leftover from Halloween.
What really sets this recipe apart is the texture. I’ve had Oreo balls that were either too crumbly or too dense. These hit that sweet spot — creamy and rich on the inside with a satisfying snap when you bite through the chocolate shell. The black cat design isn’t just for show either. Those candy corn ears and mini chocolate chip eyes add little bursts of sweetness and crunch that make each bite interesting.
This is the kind of treat that makes people stop mid-conversation and say, “Wait, you made these?” And when you tell them they’re no-bake and take about 30 minutes of active work, they’ll never believe you. That’s the secret you get to keep.
What Ingredients You Will Need
This recipe keeps things refreshingly simple. You’ll find most of these items in your regular grocery run, and the few specialty decorations are easy to find during the Halloween season. Let me walk you through each ingredient and why it matters.
For the Truffle Base
- 1 (14.3 oz) package regular Oreo cookies — Go with the classic version, not Double Stuf. The regular filling-to-cookie ratio gives you the perfect texture. I’ve tried this with generic chocolate sandwich cookies, and they work fine, but the real Oreos give a creamier result. You’ll need the whole package — cookies and filling.
- 8 oz cream cheese, softened to room temperature — Full-fat cream cheese is non-negotiable here. The low-fat versions add too much moisture and make the truffles sticky. Let it sit on the counter for about 30 minutes before you start. Cold cream cheese doesn’t blend smoothly and leaves annoying white streaks throughout your black truffle mixture.
- Pinch of salt — Just a tiny pinch balances the sweetness and brings out the chocolate flavor. Trust me on this one.
For the Coating
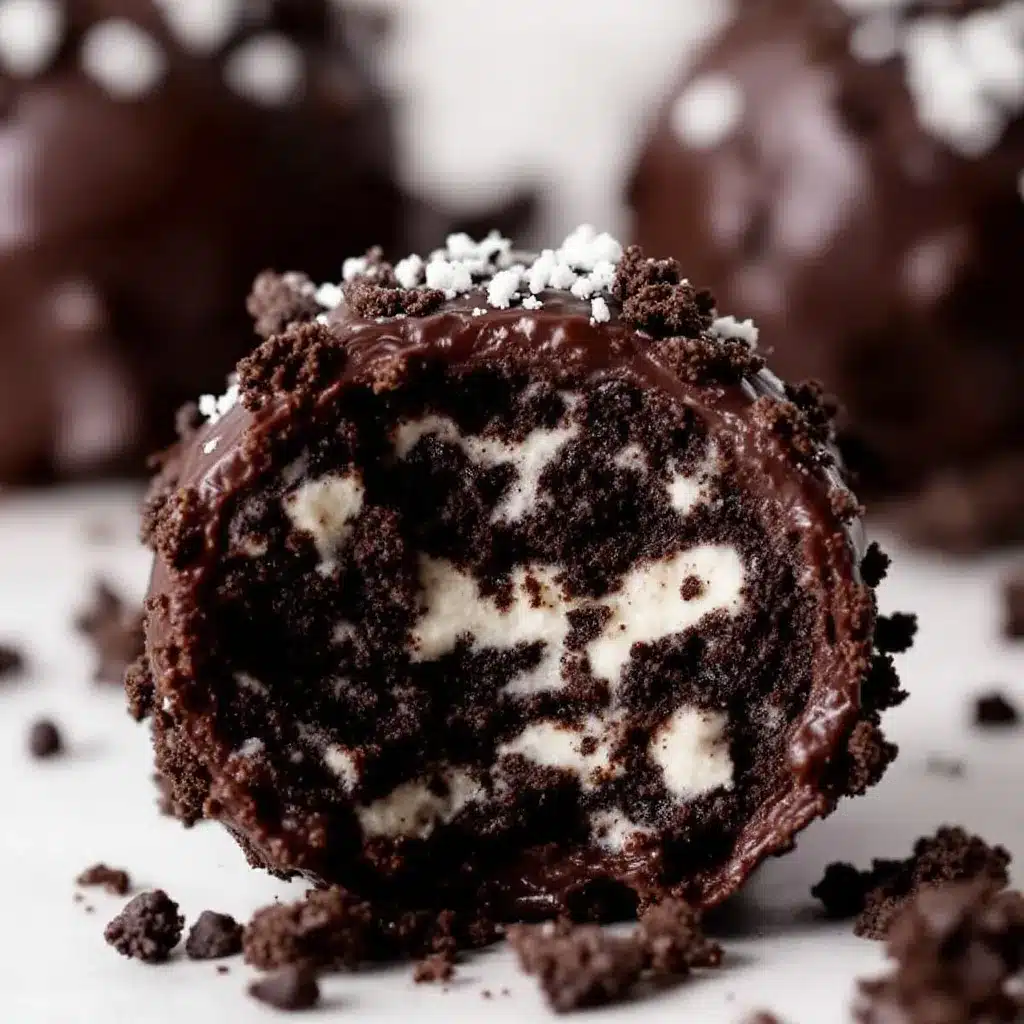
- 12 oz black candy melts or dark chocolate melting wafers — I prefer Wilton black candy melts for the most vibrant color. If you’re using dark chocolate, add a teaspoon of coconut oil to thin it out for easier dipping. The black color is what makes these cats pop, so don’t substitute with regular chocolate unless you’re going for a more subtle look.
- 1 teaspoon coconut oil or shortening — This helps thin the melted chocolate for smoother dipping. Skip the butter — it contains water and can seize your chocolate.
For the Decorations
- Candy corn (about 24 pieces) — These become the cat ears. Look for the classic tri-color candy corn. I’ve tried using orange melting chocolate piped into ear shapes, but candy corn is easier and gives that signature Halloween look.
- Mini chocolate chips (about 48 chips) — These are for the eyes. Regular mini chips work perfectly. If you can find white mini chips, those make cute eyes too, but I prefer the dark chocolate ones for a more cohesive look.
- Black licorice strings or black decorating gel — For the whiskers. I use black decorating gel because it’s easier to control. If you’re using licorice strings, cut them into 1-inch pieces and press them in gently while the chocolate is still wet.
- Orange or pink candy melts (optional) — A tiny dot for the nose adds extra personality. I’ve skipped this step before and the cats still looked adorable, but the nose really brings the face to life.
One note about substitutions — I’ve made these with gluten-free chocolate sandwich cookies for a friend with celiac disease, and they worked beautifully. Just check that your candy melts are also gluten-free if that’s a concern. The texture was slightly crumblier but still delicious.
Equipment Needed
You don’t need a fancy kitchen to pull these off. Here’s what you’ll actually use:
- Food processor — This is your best friend for turning Oreos into fine crumbs. A blender works in a pinch, but you’ll need to work in batches and shake it frequently. I’ve also used a rolling pin and a ziplock bag when my food processor was in the dishwasher — it’s doable, just more arm work.
- Large mixing bowl — For combining the cookie crumbs with cream cheese. Any bowl works, but wider bowls make mixing easier.
- Baking sheet lined with parchment paper — This is where your truffles will chill. The parchment prevents sticking and makes cleanup a breeze.
- Small cookie scoop or tablespoon — For portioning equal-sized truffle balls. A 1-tablespoon scoop gives you about 24 truffles. Eyeballing it works too, but you’ll end up with some tiny cats and some very chunky ones.
- Microwave-safe bowl — For melting the chocolate. Glass or ceramic works best. Avoid plastic bowls — they can hold onto residue that affects your chocolate.
- Fork or dipping tool — For coating the truffles in chocolate. A regular dinner fork works perfectly. I keep a dedicated dipping fork in my baking drawer for jobs like this.
- Toothpick — For adding the eyes and noses. Also helpful for popping any air bubbles in the chocolate coating.
That’s it. No stand mixer, no double boiler, no fancy piping bags. If you’ve got these basics, you’re ready to make the cutest Halloween treat on the block.
Preparation Method
Alright, let’s make some cats. This process has a few waiting periods, so I’ll walk you through how to use that time wisely.
Step 1: Crush the Oreos
Place the entire package of Oreos — cookies and filling — into your food processor. Pulse about 10-12 times until you have fine, uniform crumbs. You’re looking for a texture similar to wet sand. No big chunks remaining. If you’re using the ziplock bag method, seal the bag tight and go to town with a rolling pin. It takes about 5 minutes of solid effort, but it works.
Step 2: Mix the Truffle Base
Transfer the Oreo crumbs to a large mixing bowl. Add the softened cream cheese and a tiny pinch of salt. Use a spatula or your hands — honestly, hands work better here — to mix until everything is fully combined. The mixture should hold together when pressed. If it feels too dry, let it sit for 5 minutes. Sometimes the moisture from the cream cheese needs a minute to absorb. If it’s too sticky, pop it in the fridge for 10 minutes before shaping.
Step 3: Shape the Truffles
Using your cookie scoop or a tablespoon, portion out the mixture and roll into smooth balls. Place them on the parchment-lined baking sheet. You should get about 24 truffles. Now here’s the important part — gently pinch the top of each ball to create two small peaks where the ears will go. Don’t worry if they look a little lumpy. The chocolate coating will smooth everything out.
Pop the tray in the refrigerator for at least 30 minutes. This is crucial. Chilled truffles hold their shape when you dip them in warm chocolate. Skip this step and you’ll end up with chocolate soup and sad cat blobs.
Step 4: Melt the Chocolate
While the truffles chill, place your black candy melts and coconut oil in a microwave-safe bowl. Microwave in 30-second intervals, stirring thoroughly after each. It usually takes about 90 seconds total. Stir until completely smooth. If the chocolate seems too thick, add another ½ teaspoon of coconut oil. Too thin means you added too much — you can let it sit for a few minutes to thicken back up.
Step 5: Dip the Truffles
Remove the chilled truffles from the fridge. Working one at a time, drop a truffle into the melted chocolate. Use your fork to gently roll it around until fully coated. Lift it out with the fork, tap the fork handle on the bowl edge to let excess chocolate drip off, then slide the truffle onto the parchment paper using a toothpick. Repeat with all truffles.
Work quickly but carefully. If the chocolate starts thickening as it cools, reheat it for 15 seconds in the microwave.
Step 6: Decorate Immediately
This part requires speed. While the chocolate is still wet, press two candy corn pieces into the top for ears — pointy side up. Add two mini chocolate chips for eyes. Use the decorating gel or licorice pieces to add whiskers — three on each side. If you’re adding a nose, use a tiny dot of orange candy melt or a small piece of orange candy corn.
Don’t try to decorate after the chocolate sets. The decorations won’t stick, and you’ll end up with a pile of detached cat parts. Ask me how I know this.
Step 7: Set and Serve
Place the decorated truffles back in the refrigerator for another 15-20 minutes until the chocolate is completely firm. Once set, transfer them to a serving platter or store in an airtight container in the fridge. They’ll keep for up to a week — if they last that long.
Cooking Tips & Techniques
After making these Easy Black Cat Oreo Truffles about a dozen times, I’ve collected some hard-won wisdom. Let me save you from my mistakes.
Temperature is everything. Your cream cheese needs to be room temperature. I cannot stress this enough. Cold cream cheese creates lumps that won’t smooth out, no matter how long you mix. Set it out 30-45 minutes before starting. Your truffle mixture should be chilled before dipping, but your melted chocolate should be warm but not hot. If the chocolate is too hot, it’ll melt the truffle and you’ll get cracks. Test the temperature by touching a drop to your wrist — it should feel warm, not hot.
Don’t over-melt your chocolate. Candy melts are sensitive. Overheating turns them into a thick, clumpy mess. Stick to 30-second intervals and stir between each. If your chocolate seizes — gets thick and grainy — add a teaspoon of coconut oil and stir vigorously. Sometimes you can save it.
Work in small batches. Only take 4-5 truffles out of the fridge at a time. The rest stay cold while you work. If your truffles warm up, they’ll fall apart in the chocolate. I learned this the hard way when I dumped an entire tray of room-temp truffles into melted chocolate and ended up with a muddy disaster.
Use the fork-tap method for clean coating. After dipping, tap the fork handle against the bowl edge. This shakes off excess chocolate and prevents pooling around the base of the truffle. Nobody wants a truffle with a chocolate skirt.
Plan your decorating strategy. Set up all your decorations in little bowls before you start dipping. Once that chocolate hits the truffle, you have about 30 seconds to decorate before it starts setting. Having everything within reach makes the process smooth and stress-free.
Variations & Adaptations
One of the best things about this recipe is how adaptable it is. Here are some variations I’ve tried and loved:
White Cat Truffles: Use white candy melts instead of black, and swap the dark Oreos for Golden Oreos. Decorate with pink candy corn ears and dark chocolate chip eyes. These look adorable for a non-Halloween party or a winter-themed event.
Pumpkin Spice Cats: Add 1 teaspoon of pumpkin pie spice to the Oreo mixture before rolling. The warm spices pair beautifully with the chocolate. This version is perfect for pairing with a slice of moist pumpkin banana walnut bread for a full fall dessert spread.
Vegan Version: Use dairy-free cream cheese and vegan chocolate sandwich cookies. Most candy melts are naturally dairy-free, but check the label. The texture is slightly softer but still delicious. I made these for a vegan friend’s Halloween party, and they disappeared just as fast as the regular ones.
Spider Variation: Skip the cat decorations and turn these into spiders. After dipping, add eight pretzel stick legs (four on each side) while the chocolate is wet. Use two candy eyes on top. These are less cute and more creepy — perfect for older kids and adults.
Mini Version: Use a teaspoon instead of a tablespoon to make bite-sized truffles. These are great for parties where people want to sample multiple desserts. They’re also perfect for packing in lunchboxes alongside easy mini turkey meatball lunchbox cups for a fun Halloween-themed lunch.
Serving & Storage Suggestions
These truffles are best served cold, straight from the refrigerator. The chocolate shell has a satisfying snap, and the filling stays firm and creamy. Let them sit at room temperature for more than 15 minutes, and they’ll start to soften. Still delicious, but messier to eat.
For presentation, I like to arrange them on a black platter or a white cake stand. The contrast makes the cats pop. Sprinkle some orange and black sprinkles around the base for extra Halloween flair. If you’re serving them at a party, place them on a bed of shredded coconut that you’ve dyed green to look like grass — it’s a fun touch that kids love.
These pair beautifully with warm drinks. Serve them alongside a cozy homemade pumpkin spice latte with real pumpkin for a cozy Halloween afternoon treat. The rich chocolate balances perfectly with the spiced coffee.
Storage: Keep these in an airtight container in the refrigerator for up to one week. Layer them between sheets of parchment paper to prevent sticking. If you’re stacking them, make sure the chocolate is fully set before layering.
Freezer Instructions: These freeze beautifully. Place the fully decorated truffles on a baking sheet and freeze for 1 hour until solid. Transfer to a freezer-safe container with parchment between layers. They’ll keep for up to 3 months. Thaw in the refrigerator overnight before serving. I always keep a batch in my freezer for unexpected Halloween visitors or last-minute party invites.
One note on texture — these actually improve after a day in the fridge. The flavors meld together, and the filling becomes even more fudgy. So don’t stress about making them the day before. In fact, I recommend it.
Nutritional Information & Benefits
Let’s be real — these are a treat, not a health food. But here’s the breakdown so you know what you’re working with. Per truffle (based on 24 servings): approximately 160 calories, 9g fat, 19g carbohydrates, 2g protein, and 12g sugar.
The Oreo base provides a quick energy boost from carbohydrates, while the cream cheese adds a small amount of protein and calcium. The dark chocolate coating, if you choose that option, contains antioxidants called flavonoids that support heart health. The candy corn and mini chocolate chips are mostly decorative, so their nutritional impact is minimal per truffle.
For those with dietary concerns: these contain dairy, wheat, and soy. They are not vegan, gluten-free, or nut-free in their standard form. However, as I mentioned in the variations section, you can easily adapt them for vegan or gluten-free diets with simple substitutions.
My personal philosophy? Desserts like this are about joy, celebration, and connection. One batch makes 24 truffles, and if you’re sharing them at a party, that’s about one truffle per person. In the context of a balanced diet, that’s perfectly fine. Enjoy the treat, savor the moment, and don’t overthink the numbers.
Conclusion
These Easy Black Cat Oreo Truffles have become my go-to Halloween dessert for good reason. They’re simple enough to make with kids, impressive enough to serve at adult parties, and customizable enough to fit any fall celebration. The no-bake aspect means you can whip them up even on your busiest days, and the make-ahead convenience takes the stress out of party prep.
I love how this recipe brings people together. Whether it’s my niece excitedly pressing candy corn ears into truffles or friends at a party doing a double-take when they realize these little cats are homemade, there’s something special about sharing food that looks like it took way more effort than it actually did. That’s my favorite kind of cooking — the kind that makes you look like a rockstar without actually having to work like one.
I’d love to hear how your black cat truffles turn out. Did your kids help with the decorating? Did you try a fun variation? Drop a comment below and let me know. And if you’re looking for more easy Halloween treats, check out our perfect brown butter pumpkin snickerdoodle cookies recipe for another crowd-pleasing option. Happy Halloween, and happy snacking!
Frequently Asked Questions
Can I make these Oreo truffles ahead of time?
Absolutely. These actually taste better after a day in the fridge. Make them up to 3 days in advance and store in an airtight container in the refrigerator. You can also freeze them for up to 3 months.
Why did my truffle mixture turn out too sticky?
This usually happens when the cream cheese is too soft or warm. If your mixture is sticky, pop it in the refrigerator for 15-20 minutes before rolling. If it’s still too sticky, add a few more crushed Oreos to absorb the excess moisture.
Can I use Double Stuf Oreos instead of regular?
I don’t recommend it. The extra filling changes the texture and makes the truffles too soft. Stick with regular Oreos for the best results. If Double Stuf is all you have, scrape off some of the filling before crushing.
How do I get the chocolate coating smooth and even?
The key is proper chilling. Make sure your truffles are well-chilled before dipping. Also, add a teaspoon of coconut oil to your melted chocolate — it helps the coating flow smoothly and prevents streaks. Tap off excess chocolate with your fork for a clean finish.
My candy melts seized and turned clumpy. Can I fix this?
Sometimes you can save seized chocolate. Add 1 teaspoon of coconut oil or vegetable shortening and stir vigorously. If it smooths out, you’re good to go. If it stays clumpy, unfortunately you’ll need to start over with fresh chocolate. This is why I always buy an extra bag of candy melts — just in case.
Pin This Recipe!

Easy Black Cat Oreo Truffles: Best Halloween Treat
These no-bake Oreo truffles are shaped like adorable black cats with candy corn ears and chocolate chip eyes. Perfect for Halloween parties, they come together quickly with simple ingredients and are a hit with kids and adults alike.
- Prep Time: 30 minutes
- Cook Time: 0 minutes
- Total Time: 1 hour 15 minutes
- Yield: 24 servings 1x
- Category: Dessert
- Cuisine: American
Ingredients
- 1 (14.3 oz) package regular Oreo cookies
- 8 oz cream cheese, softened to room temperature
- Pinch of salt
- 12 oz black candy melts or dark chocolate melting wafers
- 1 teaspoon coconut oil or shortening
- Candy corn (about 24 pieces)
- Mini chocolate chips (about 48 chips)
- Black licorice strings or black decorating gel
- Orange or pink candy melts (optional)
Instructions
- Crush the Oreos: Place the entire package of Oreos into a food processor. Pulse 10-12 times until you have fine, uniform crumbs.
- Mix the truffle base: Transfer the Oreo crumbs to a large mixing bowl. Add the softened cream cheese and a pinch of salt. Mix with a spatula or your hands until fully combined. The mixture should hold together when pressed.
- Shape the truffles: Using a cookie scoop or tablespoon, portion out the mixture and roll into smooth balls. Place on a parchment-lined baking sheet. Gently pinch the top of each ball to create two small peaks for ears. Refrigerate for at least 30 minutes.
- Melt the chocolate: Place black candy melts and coconut oil in a microwave-safe bowl. Microwave in 30-second intervals, stirring after each, until smooth (about 90 seconds total).
- Dip the truffles: Remove chilled truffles from the fridge. Working one at a time, drop a truffle into the melted chocolate. Use a fork to roll it around until fully coated. Lift out, tap the fork on the bowl edge to remove excess chocolate, and slide onto parchment paper using a toothpick.
- Decorate immediately: While the chocolate is still wet, press two candy corn pieces into the top for ears (pointy side up). Add two mini chocolate chips for eyes. Use decorating gel or licorice pieces to add whiskers (three on each side). Optionally, add a tiny dot of orange candy melt for a nose.
- Set and serve: Place decorated truffles back in the refrigerator for 15-20 minutes until the chocolate is firm. Transfer to a serving platter or store in an airtight container in the fridge.
Notes
Temperature is key: cream cheese must be room temperature, truffles must be well-chilled before dipping, and melted chocolate should be warm but not hot. Work in small batches, taking only 4-5 truffles out of the fridge at a time. Set up decorations in small bowls before dipping. These truffles taste even better after a day in the fridge.
Nutrition
- Serving Size: 1 truffle
- Calories: 160
- Sugar: 12
- Sodium: 120
- Fat: 9
- Saturated Fat: 5
- Carbohydrates: 19
- Fiber: 1
- Protein: 2
Keywords: Halloween, Oreo truffles, black cat, no-bake, easy dessert, kid-friendly, Halloween treats



